Whether you need a homemade gift idea or you’re looking for more natural skincare products, this exfoliating body scrub is the perfect thing to whip up. The recipe comes from Lily Diamond, of the popular L.A.-based food and lifestyle blog Kale & Caramel. While the scrub is completely edible, we don’t recommend actually eating it.
By: Lily Diamond
Ingredients 1 serving
⅓ cup sea salt
⅔ cup fresh cranberries, very finely chopped
1 tablespoon finely shredded unsweetened coconut
1 tablespoon raw virgin coconut oil, softened
¼ teaspoon ground cloves or allspice
Preparation
Prep10 m
Ready In10 m
Combine salt, cranberries, coconut, coconut oil and cloves (or allspice) in a small bowl; mix thoroughly.
To make ahead: Store at room temperature for up to 1 week or refrigerate for up to 2 weeks.
Next time you’re enjoying a hot cuppa joe from your favorite coffee spot, instead of tossing the paper container, take it home to repurpose into a homemade candle. Use leftover wax candle ends, along with a sprinkling of used coffee grounds, and you’ve got a fun and eye-opening candle to scent your home or give as a gift.
What You’ll Need:
Small paper coffee cup
1 to 2 tablespoons used coffee grounds
Paper towel
1 cup wax candle remnants
Candle wick
Scissors
Small saucepan
Small metal or glass mixing bowl
Directions:
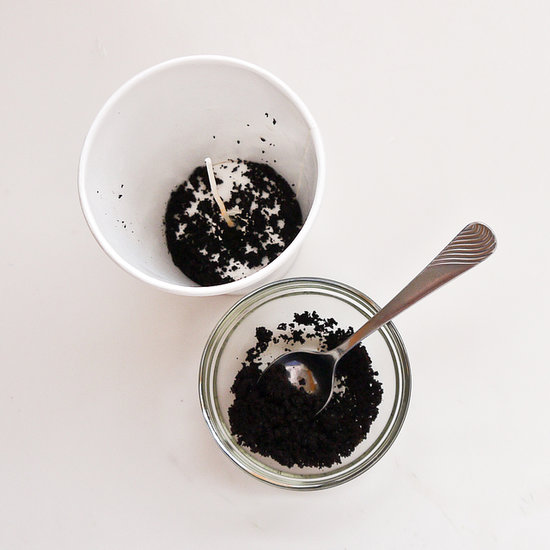
To create the base of the candle, add 1 cup of wax candle remnants to a small metal or heat-safe glass bowl, and place over the top of a small saucepan filled halfway with water, creating a double boiler. Bring the water to a simmer and watch closely until the wax has melted, which takes about 5 minutes.
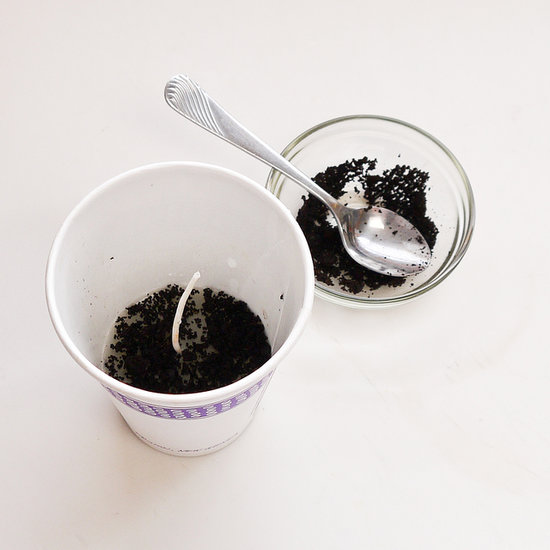
Give the paper coffee cup a good cleaning, and wipe to make sure it’s dry. Place the coffee grounds in a paper towel, and squeeze to release any extra liquid. Position the wick in the center of the cup, and sprinkle a layer of the coffee grounds at the base. You can find candle wicks at your local craft store.
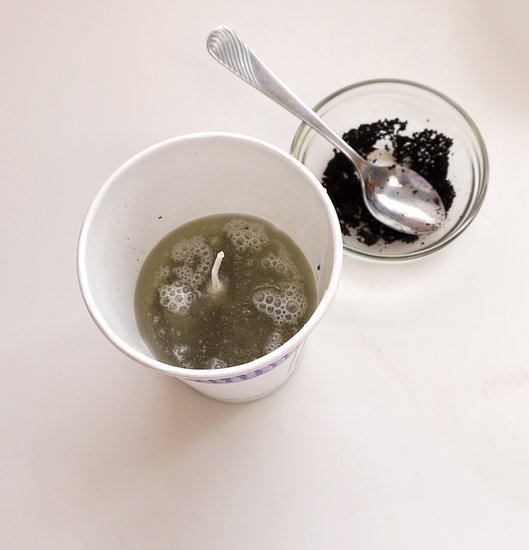
Carefully pour half of the melted wax over the coffee grounds, reserving the rest of the wax for the top of the candle. Let the wax harden for 20 minutes.
To create the second layer of the candle, sprinkle the cooled wax with another spoonful of coffee grounds. Rewarm the wax in the double boiler, and top off the candle.
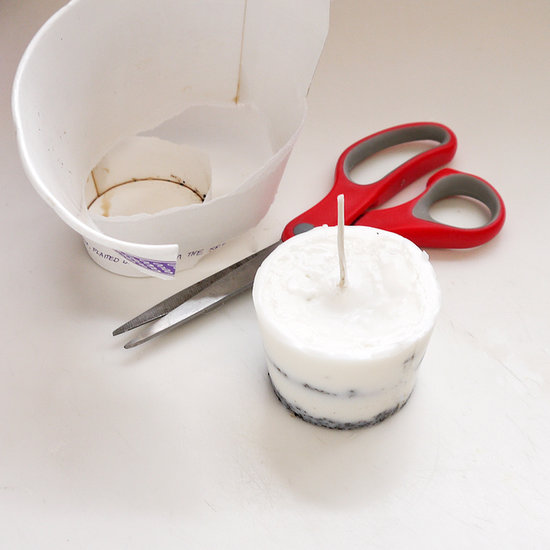
Let the candle cool for at least an hour, and then cut away the coffee cup to reveal the finished candle. If needed, smooth the edges with a paper towel, and trim the end of the wick to fit the candle. Find the perfect spot to display your candle, and enjoy the subtle coffee scent.
A list of kitchen organization ideas would not be complete without a spice rack solution. This spice rack could not be easier. Vintage Coca-Cola crates already have the perfect compartments. Simply hang it up and add your spice jars. Source: BROhaha
Don’t let those plastic straws end up in a landfill! When you’re done slurping up your iced coffee, save your straws to make a few of these gorgeous faux copper air planters.
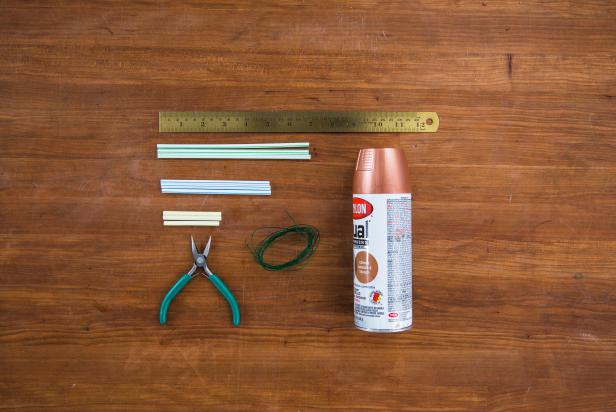
What You’ll Need
6 plastic straws
thin, flexible floral wire
copper spray paint
air plants
needle nose pliers
DIY Faux Copper Air Planter
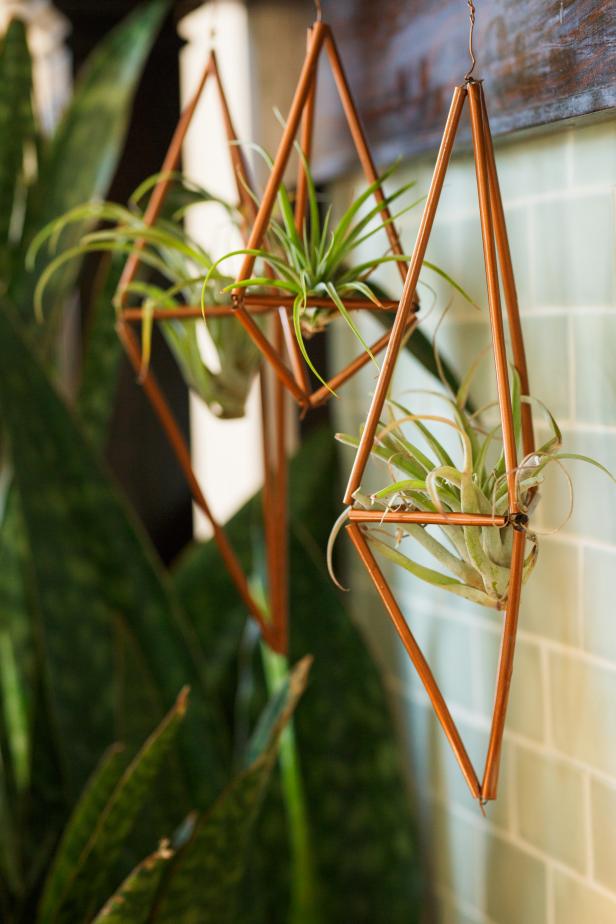
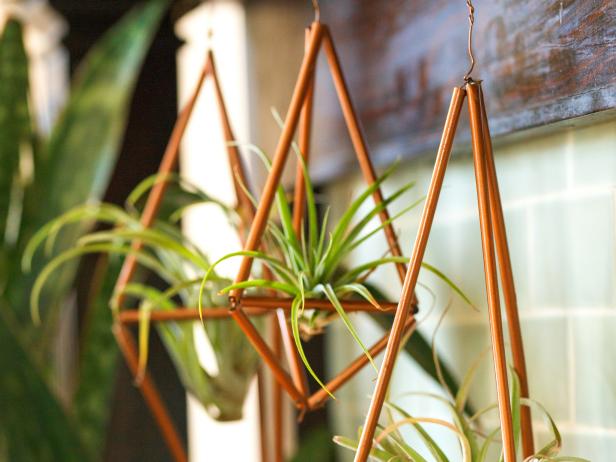
Don’t let those plastic straws end up in a landfill! When you’re done slurping up your iced coffee, save your straws to make a few of these gorgeous faux copper air planters. P.S. – they make great gifts.
Photo by: Jalynn Baker
Jalynn Baker
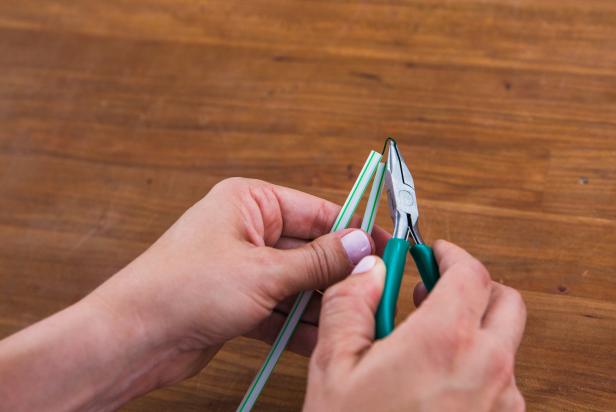
Cut Straws
DIY Faux Copper Air Planter
Don’t let those plastic straws end up in a landfill! When you’re done slurping up your iced coffee, save your straws to make a few of these gorgeous faux copper air planters. P.S. – they make great gifts.
Photo by: Jalynn Baker
Jalynn Baker
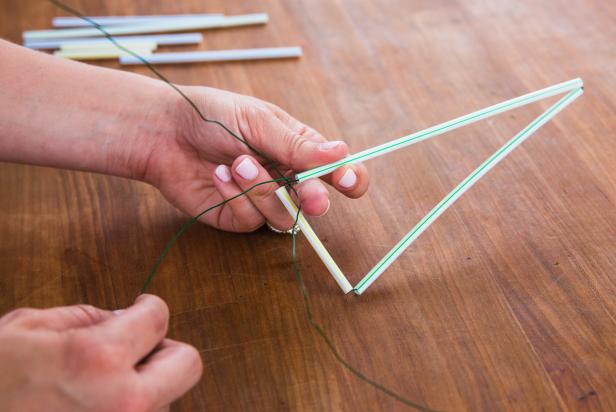
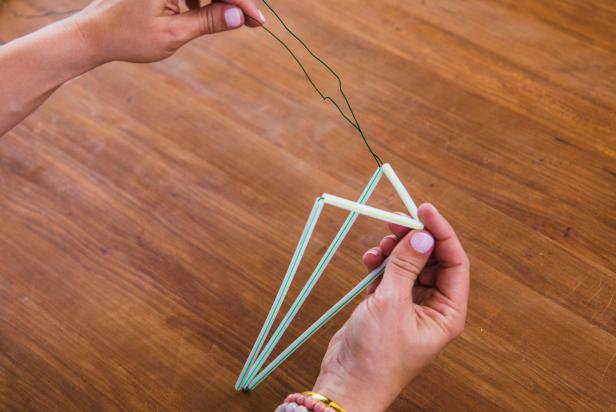
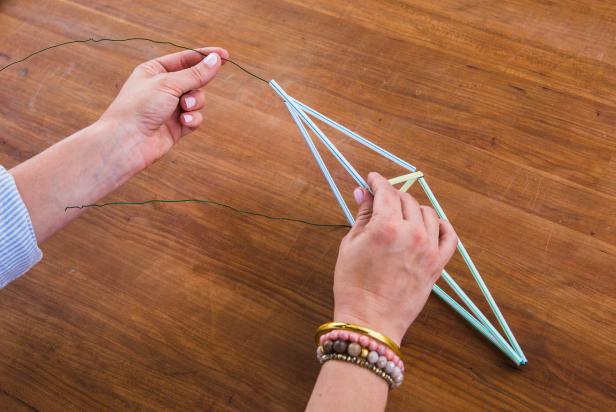
Cut three 7-inch straws, three 5-inch straws and three 2.5-inch straws.
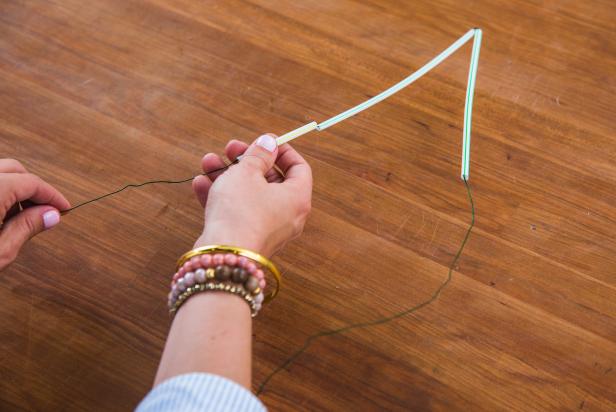
Create First Triangle
Jalynn Baker
Image 1
Jalynn Baker
Image 2
Jalynn Baker
Image 3
Jalynn Baker
Image 4
DIY Faux Copper Air Planter
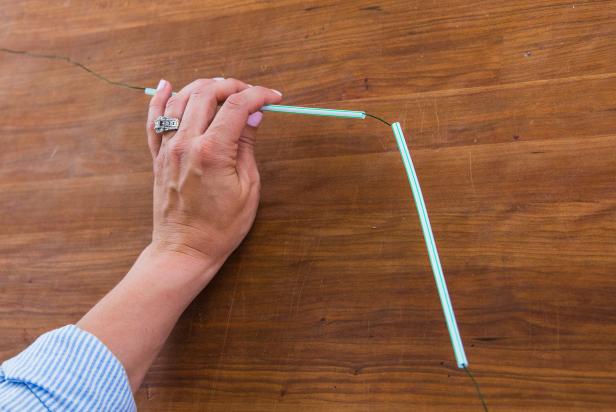
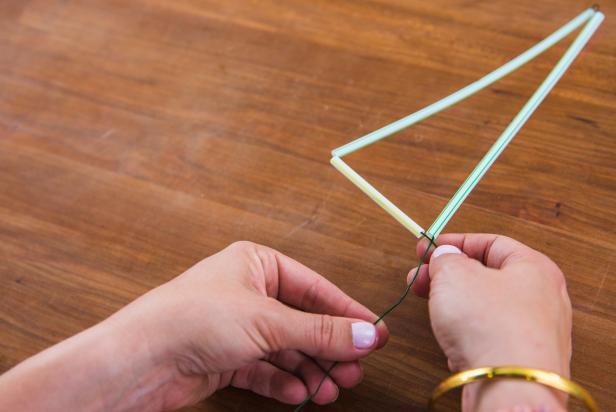
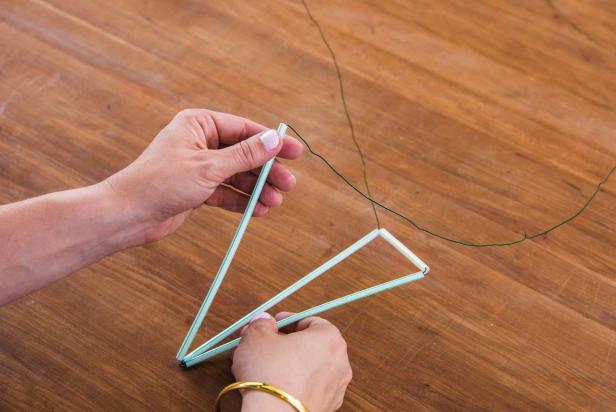
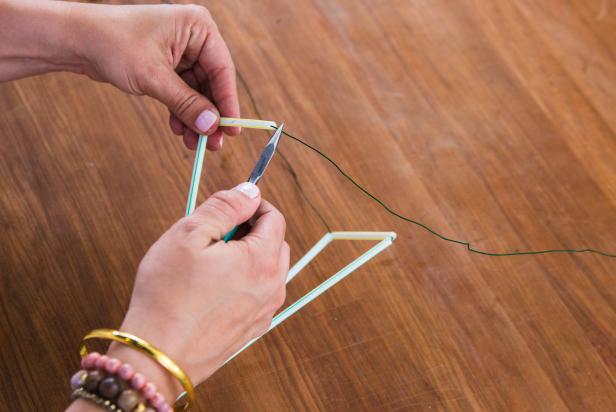
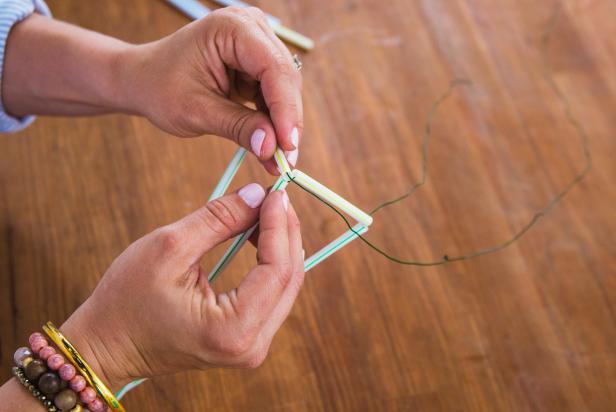
Thread a long piece of wire through two 7-inch straws, leaving about 30 inches of excess wire on one end (image 1). Use needle nose pliers to create a bend in the wire between the two straws (image 2). Thread a 2.5-inch straw onto the short side of the wire, bending the wire between it and the 7-inch straw to form a triangle (image 3). Twist the open ends of wire together to close the isosceles triangle (image 5).
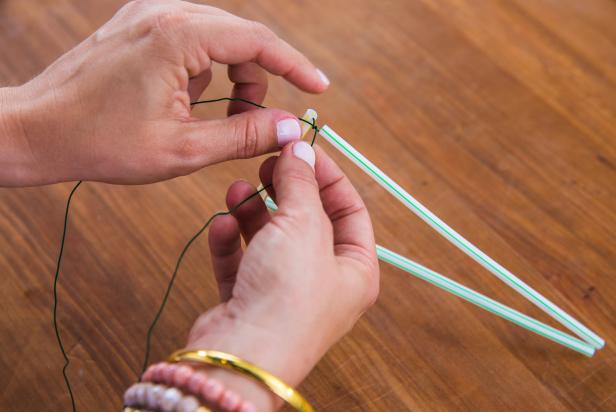
Make the Top Pyramid
Jalynn Baker
Image 1
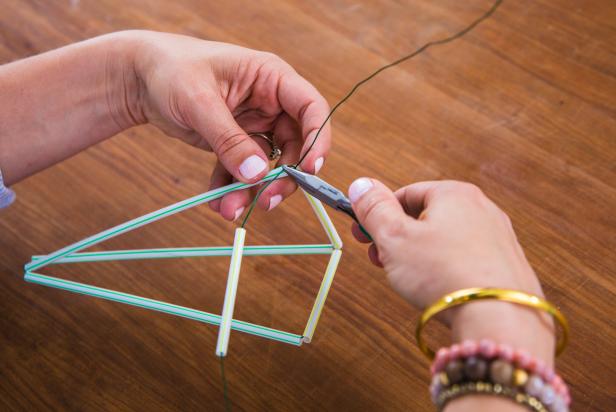
Slide the long end of the wire back up through the first 7-inch straw (image 1) and thread another 7-inch straw onto the same wire, bending the wire between the two straws (image 2). Then, bend the excess wire at the end of the straw to hold it in place.
Jalynn Baker
Image 1
Jalynn Baker
Image 2
Jalynn Baker
Image 3
Jalynn Baker
Image 4
Image 1
Thread a 2.5-inch straw onto the same wire, to the bend (image 1). Bend the wire, then thread it back through the first 2.5-inch piece, connecting the two 2.5-inch straws and creating half of the pyramid base (images 2 & 3). The two wires should now meet. Bend the long wire at the corner, then thread another 2.5-inch piece onto it, creating a triangular base (image 4). Wrap the long wire around one corner of the base to secure (image 5).
Make the Bottom Pyramid
JalynnBaker
JalynnBaker
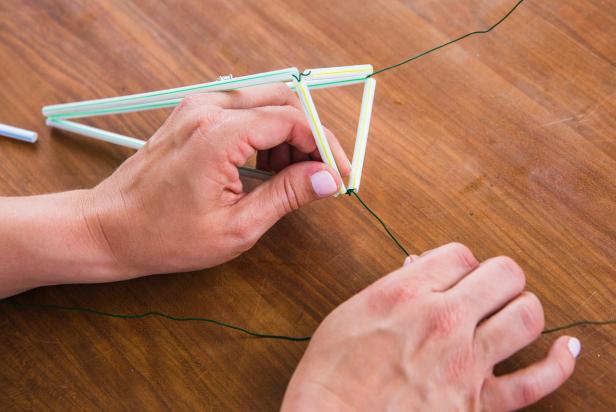
Thread two 5-inch straws onto the long wire, bending the wire in-between each straw to create a triangle (image 1). Connect the triangle to the base by threading the wire back through one of the 2.5-inch pieces (image 2).
JalynnBaker
Image 1
Thread the final 5-inch piece onto the wire (image 1), bending the wire to hold it in place. Thread the wire back up through one of the other 5-inch straws and secure wire to the base by twisting the excess wire together (image 2).
Finish It Up
DIY Faux Copper Air Planter
Don’t let those plastic straws end up in a landfill! When you’re done slurping up your iced coffee, save your straws to make a few of these gorgeous faux copper air planters. P.S. – they make great gifts.
Photo by: Jalynn Baker
Jalynn Baker
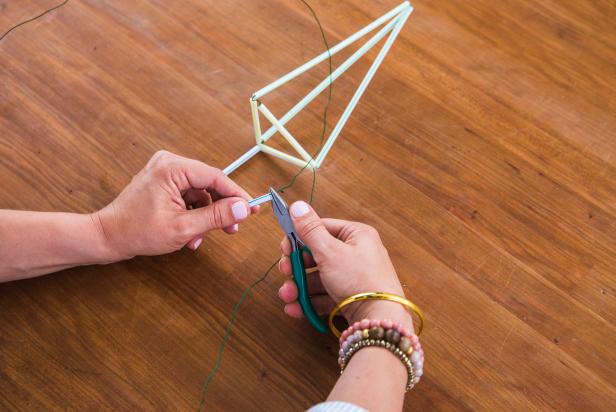
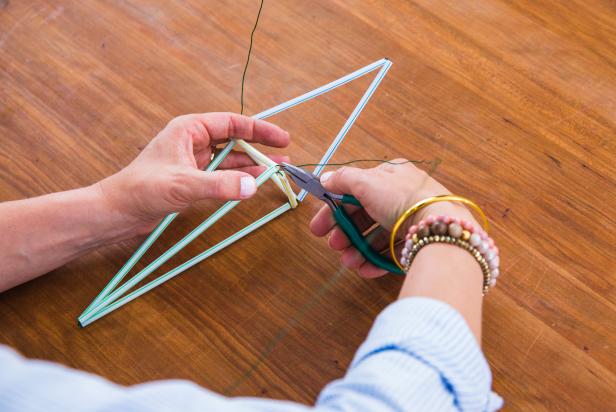
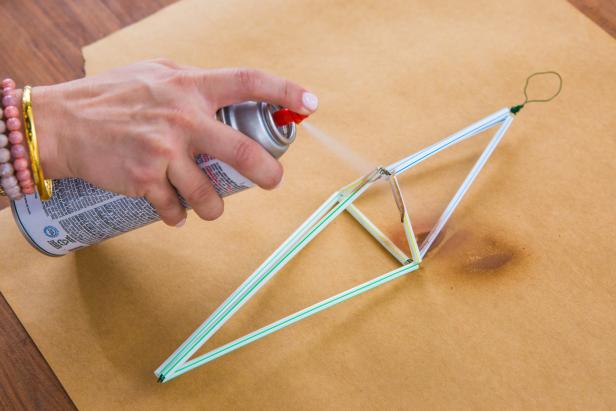
Cut off excess wire, clamping the raw edges with pliers to avoid snagging. Attach another piece of wire to the top of the planter for hanging, then paint with copper spray paint.
DIY Faux Copper Air Planter
Don’t let those plastic straws end up in a landfill! When you’re done slurping up your iced coffee, save your straws to make a few of these gorgeous faux copper air planters. P.S. – they make great gifts.
Photo by: Jalynn Baker
Jalynn Baker
Place an air plant (Tillandsia) in the middle base of the planter, hang and enjoy! When your plant’s ready for water, take it out of the base, soak thoroughly in a bowl of lukewarm water and sit it upside down on a paper towel to dry.
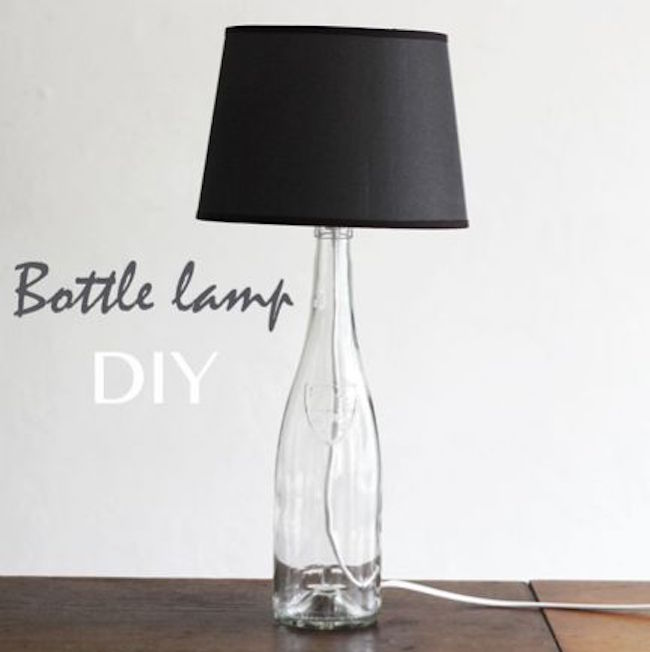
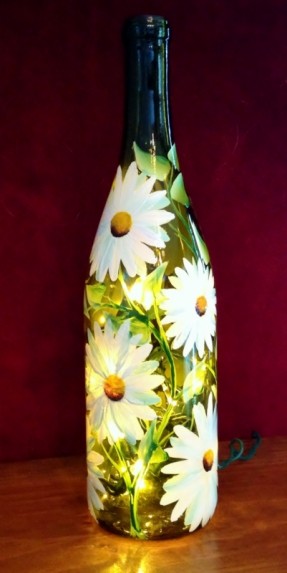
Hi my coolest people! Are you looking for a new cool idea? For all fans of DIY ideas, today we prepared an exquisite collection of 25+ DIY Bottle Lamps Decor Ideas That Will Add Uniqueness to Your Home.If you are looking for a new lamp to add to your home interior, think twice before you spend money on that. We tend to spend more than we can afford, so be cool and make the things that you need on your own. The results are priceless! Why buying a new lamp when you can do it yourself? There are so many ways of how to incorporate this idea to your home interior. Today, we suggest to use empty bottles in order to make amazing lamps.
Enjoy in this collection and try to copy some of them for your home.
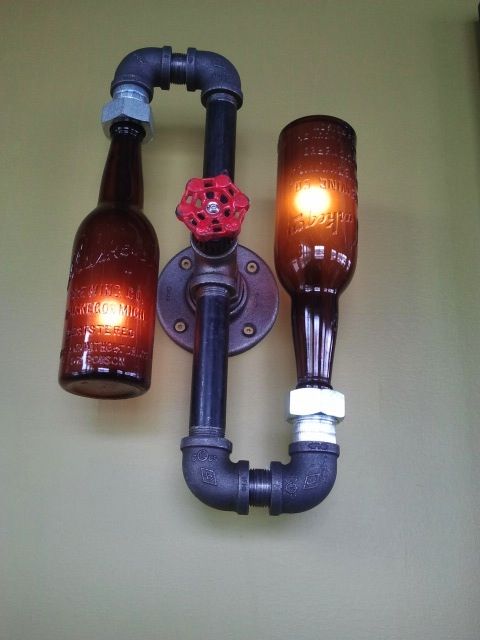
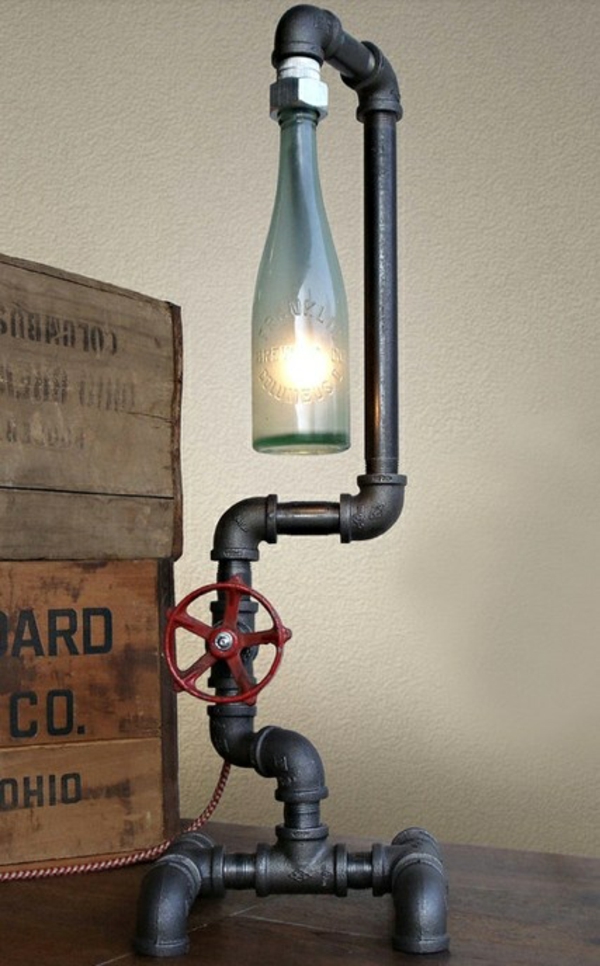
Unique Bottle Lamp Decor Ideas
There is a sign of elegance and uniqueness in every glass bottle. Some of them will catch your eye with their shape, color, or size. You can make them a part of your home decor as lighting solutions. Take a look at the following crafts and choose which one is your favorite.
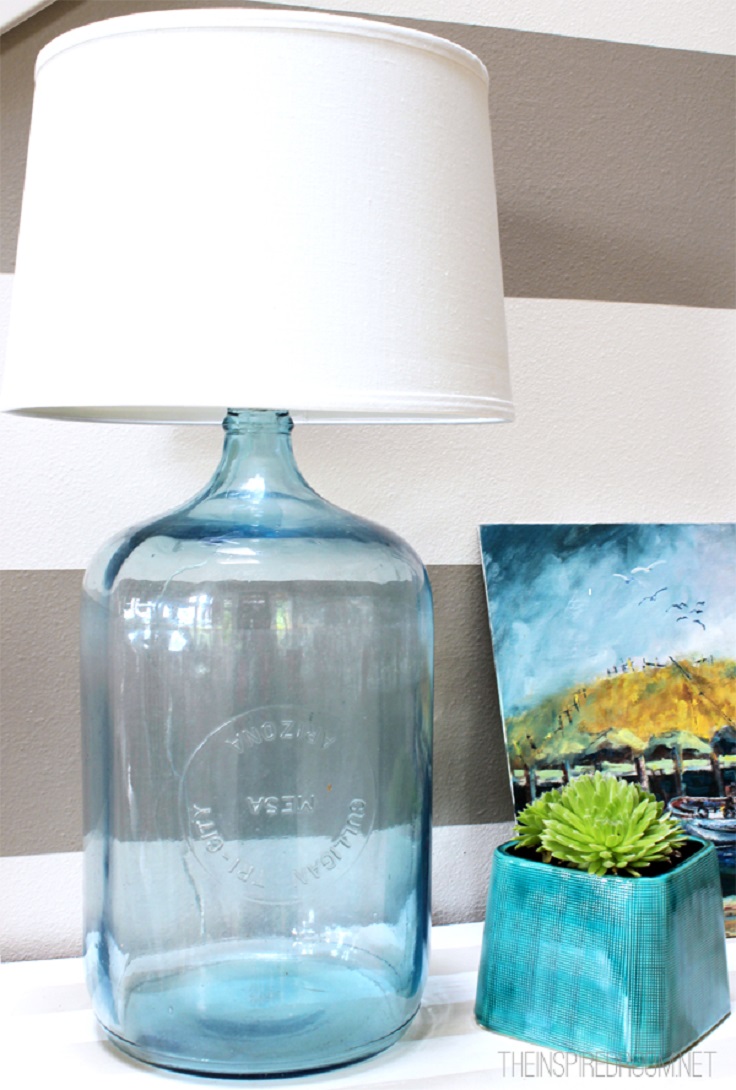
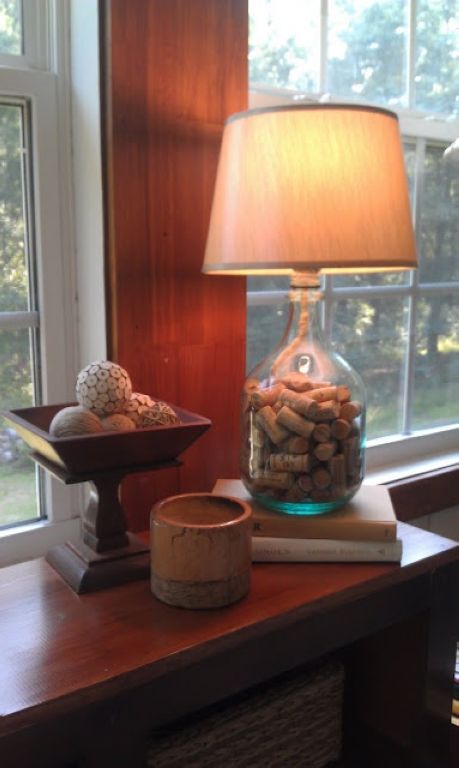
01. Jar Lamp
02.
03.
04. Cork Filled Bottle Lamp Decor Idea
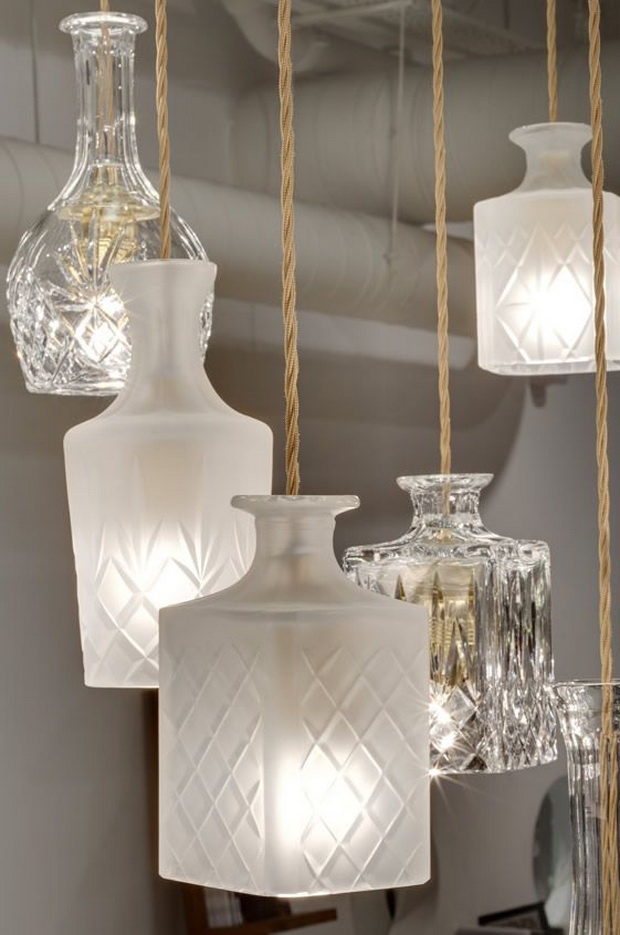
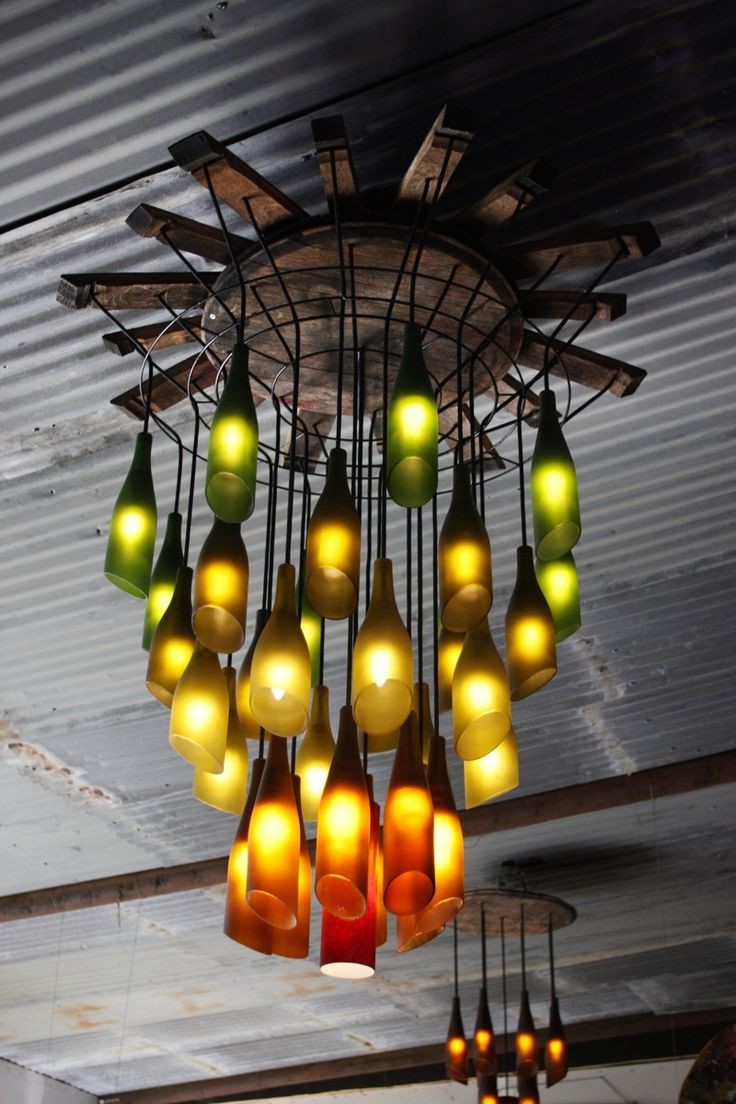
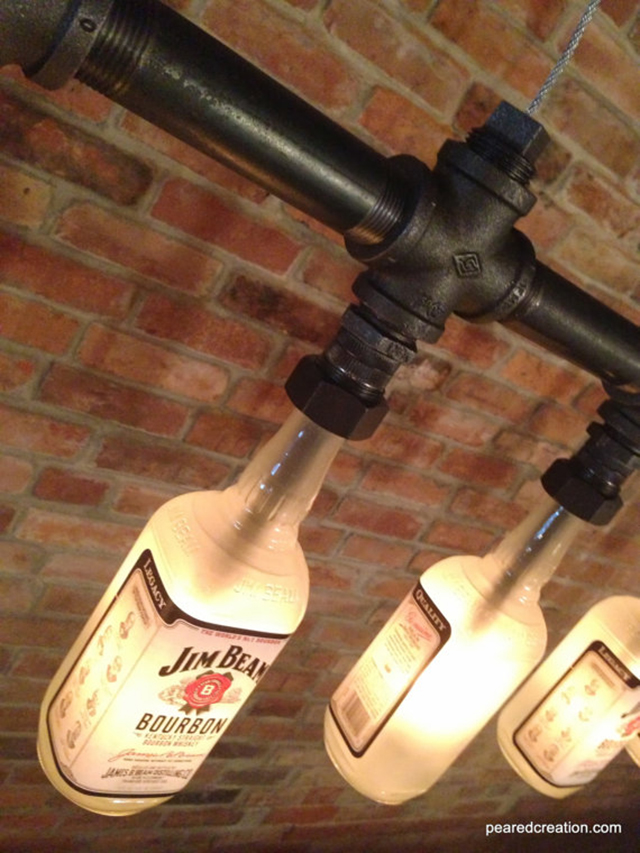
Hanging Bottle Chandeliers
Chandeliers are fascinating on their own, but usually they catch your eye with their uniqueness. So we are sure that the following unique hanging bottles chandeliers will be noticed by everyone that enters your place.
05. Creative Hanging Bottle Lamps
06.
07.
08.
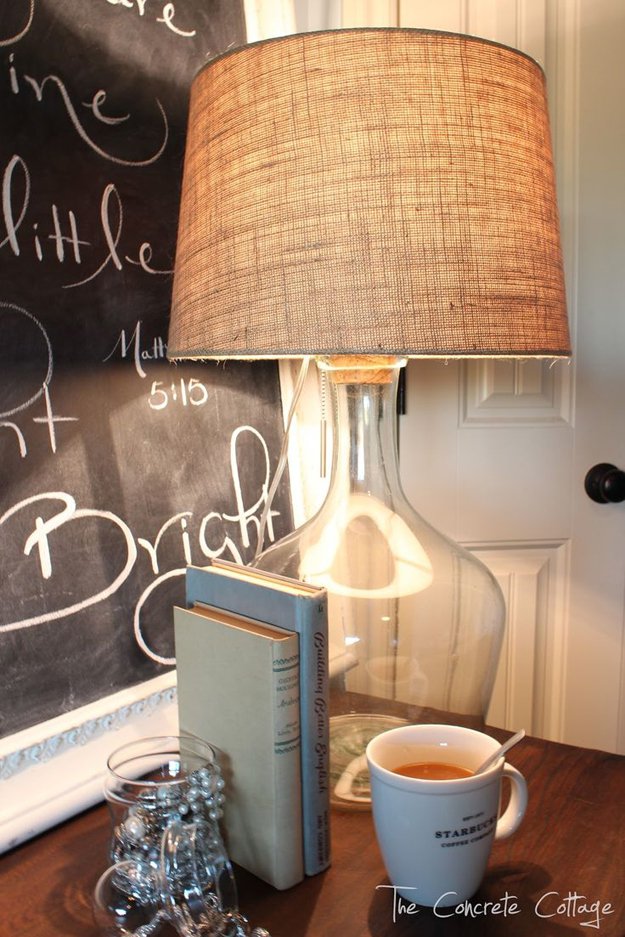
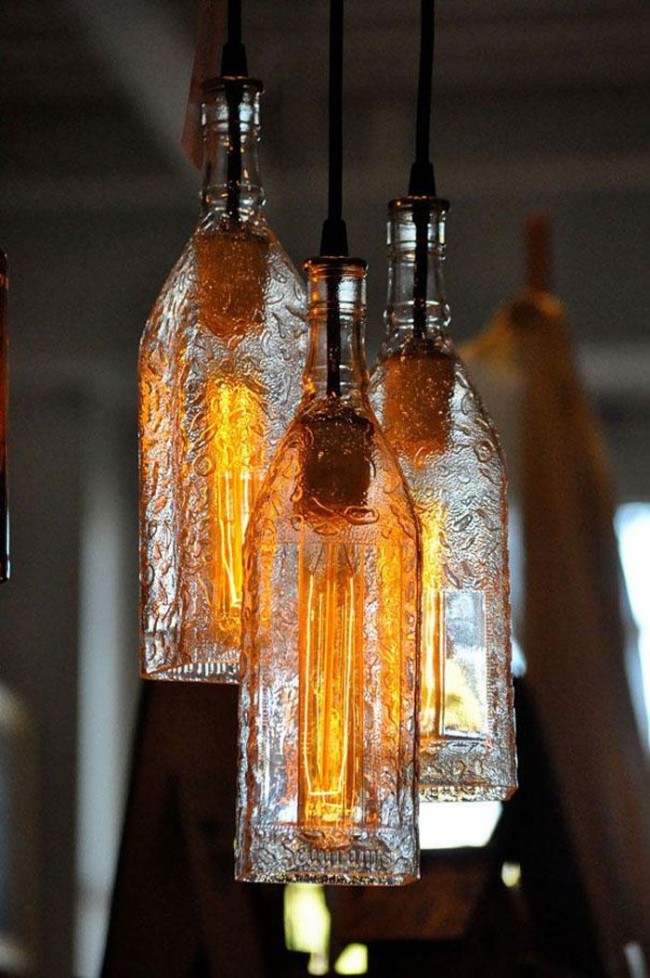
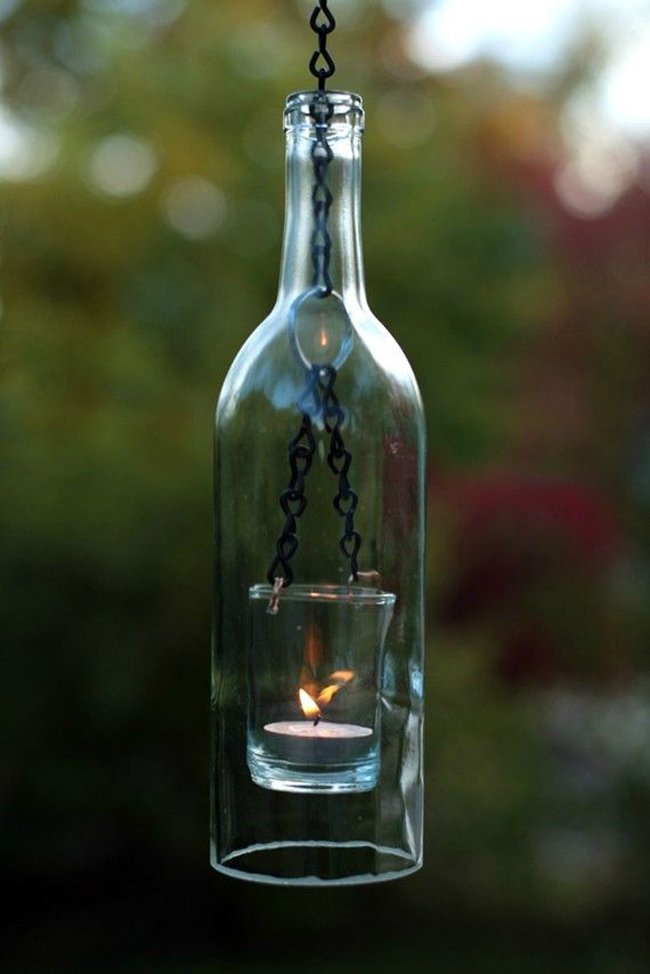
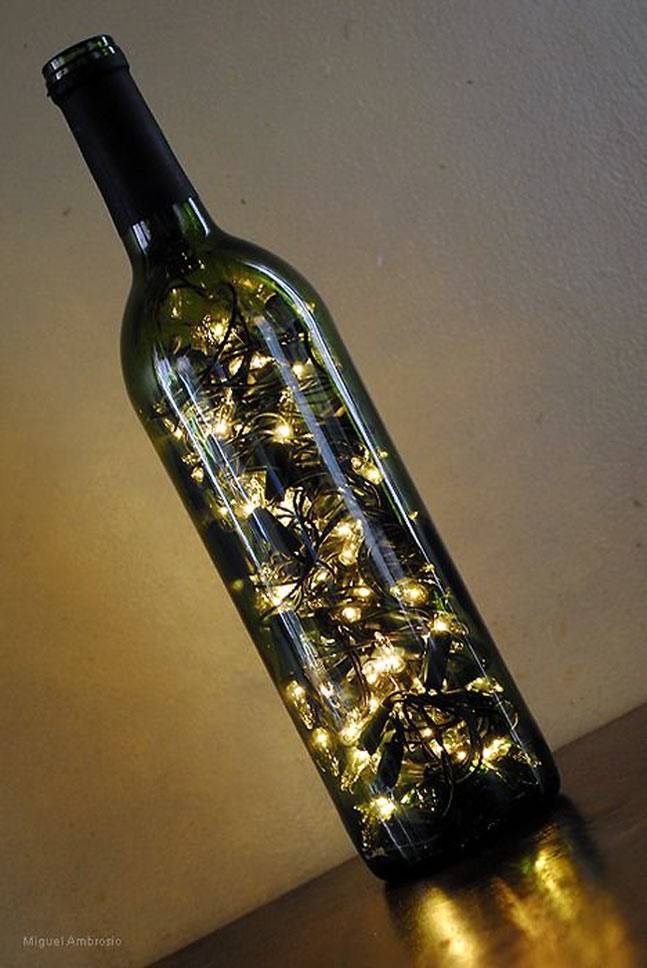
09. Wine Bottle Lantern
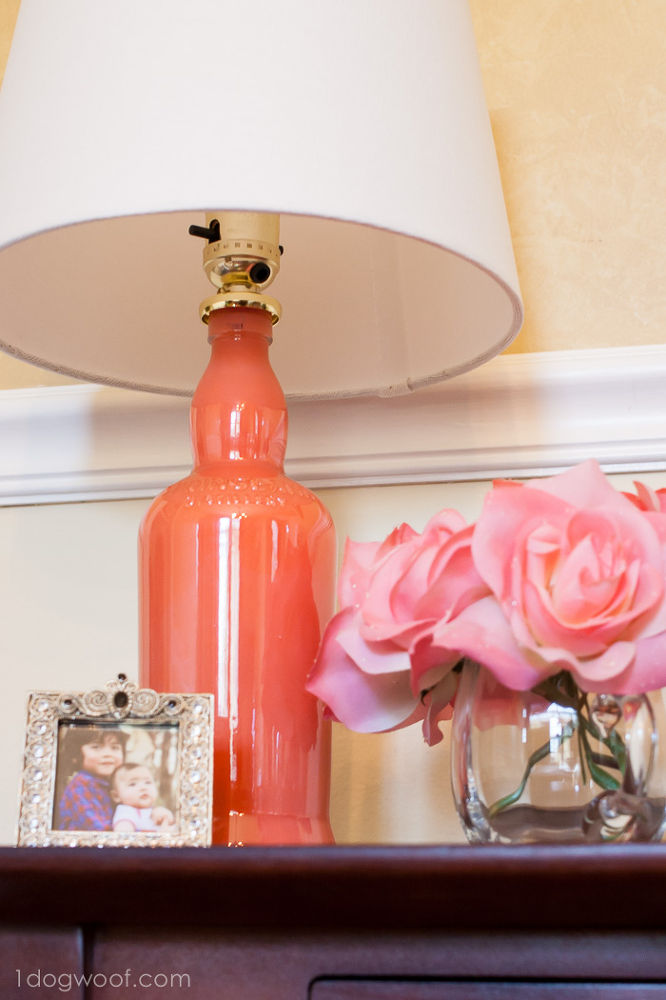
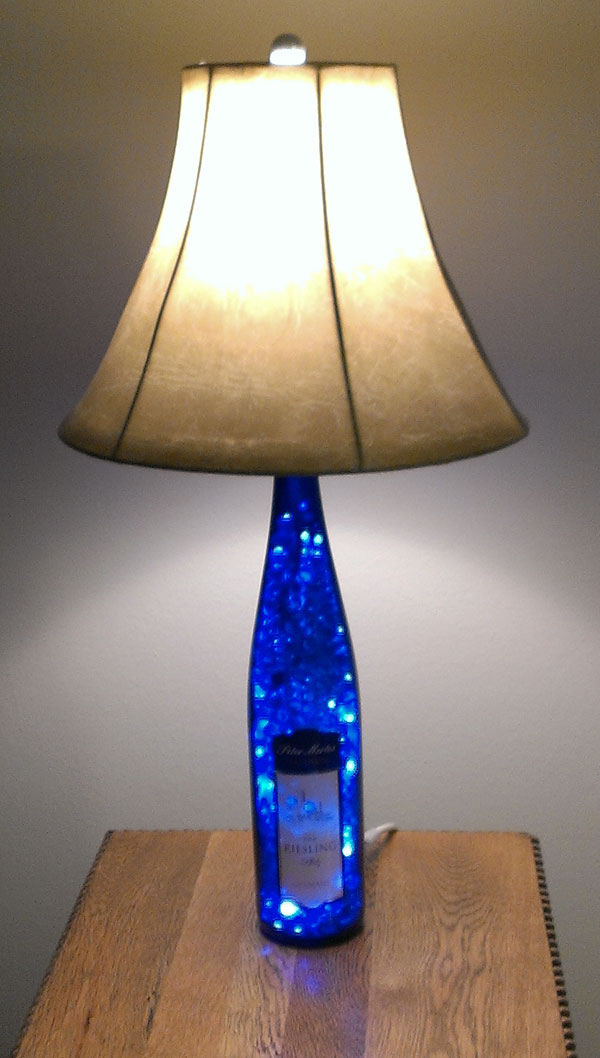
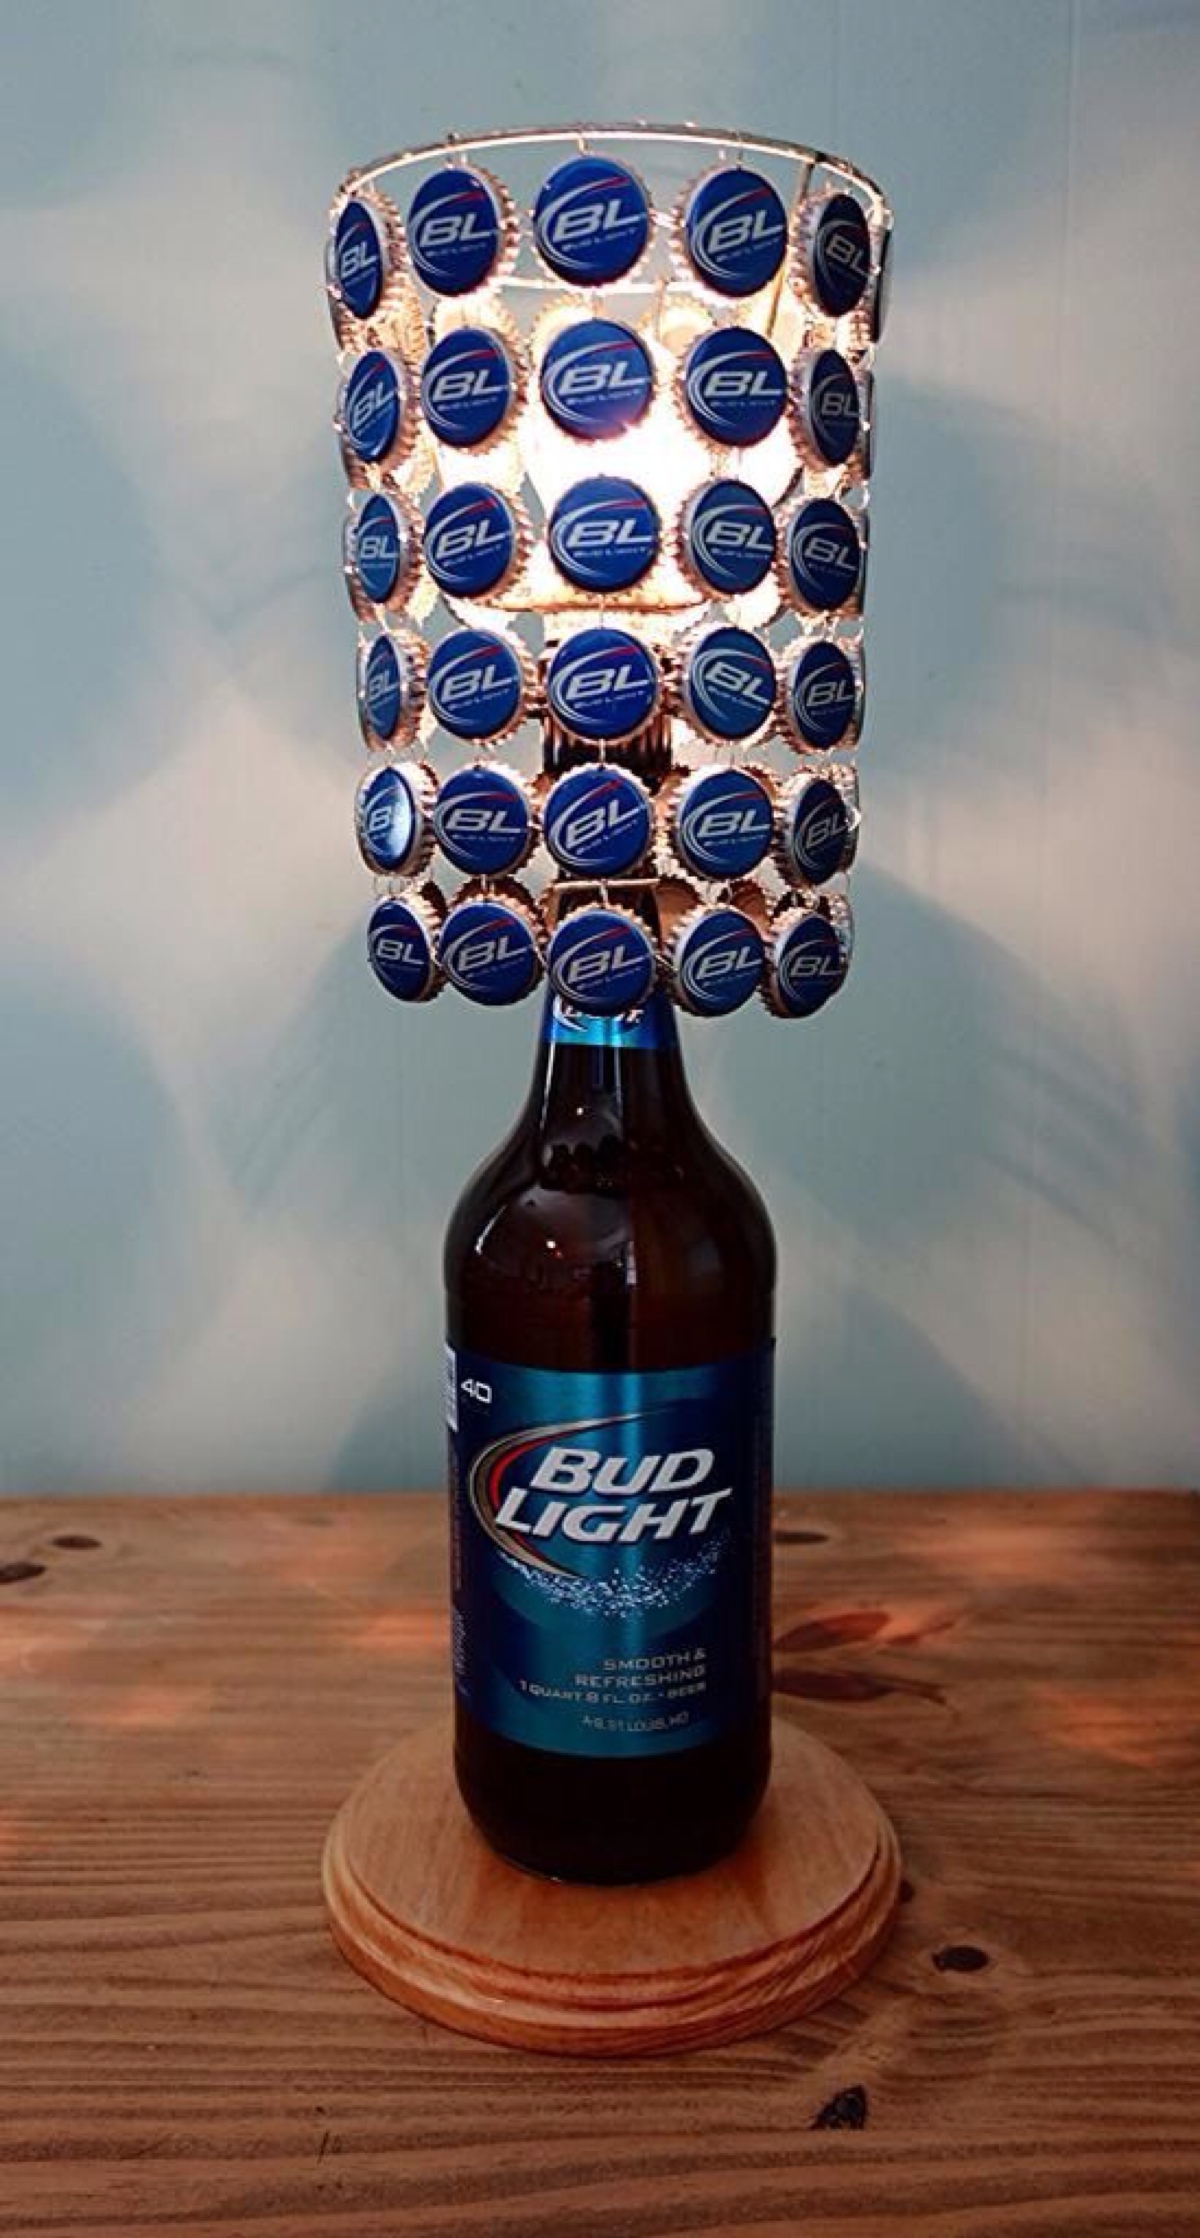
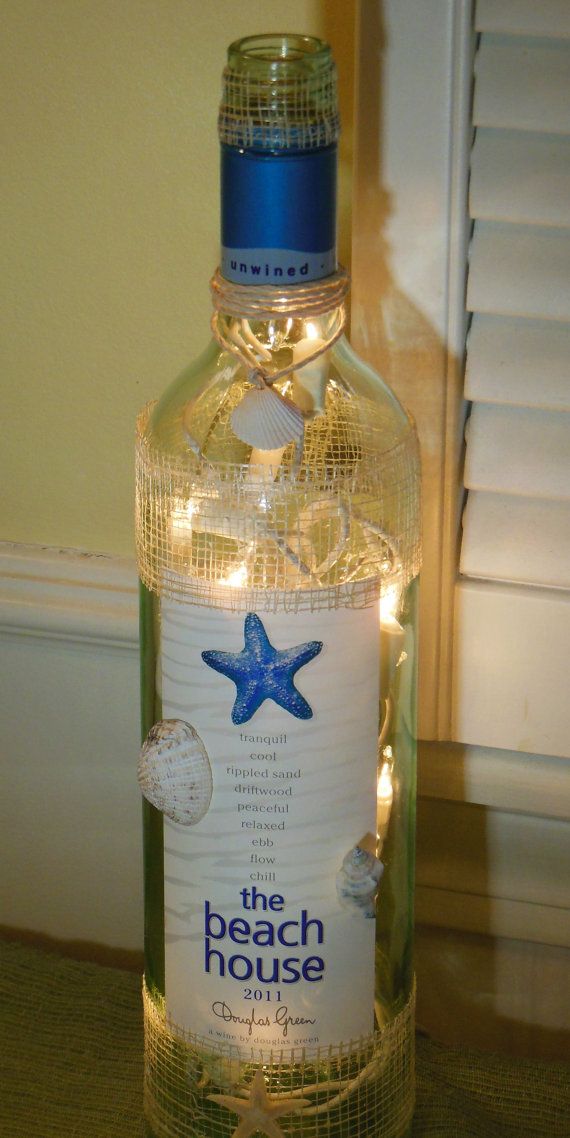
10. Wine Bottles Lamp Decor Ideas
11.
12.
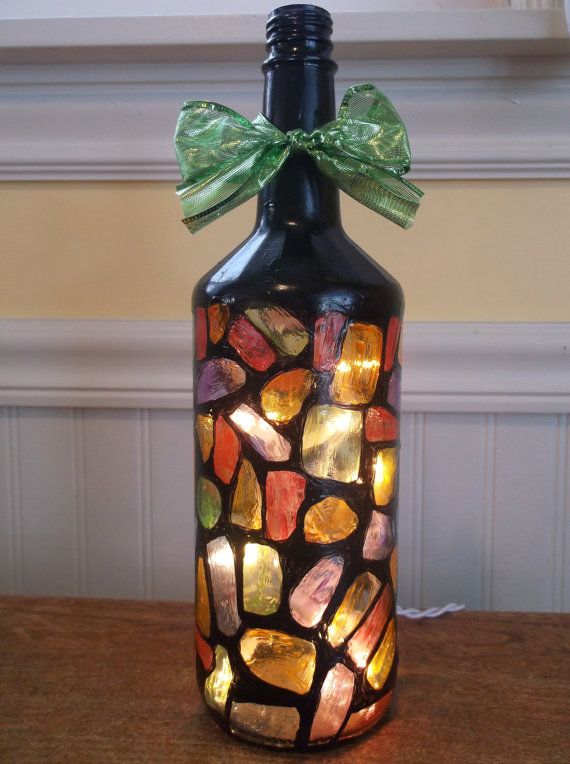
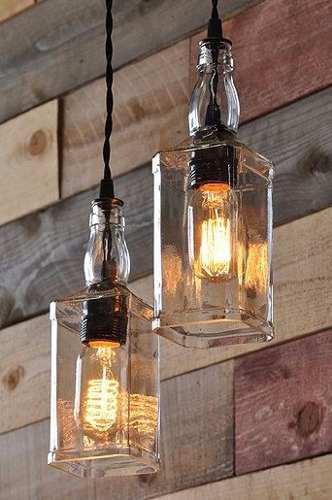
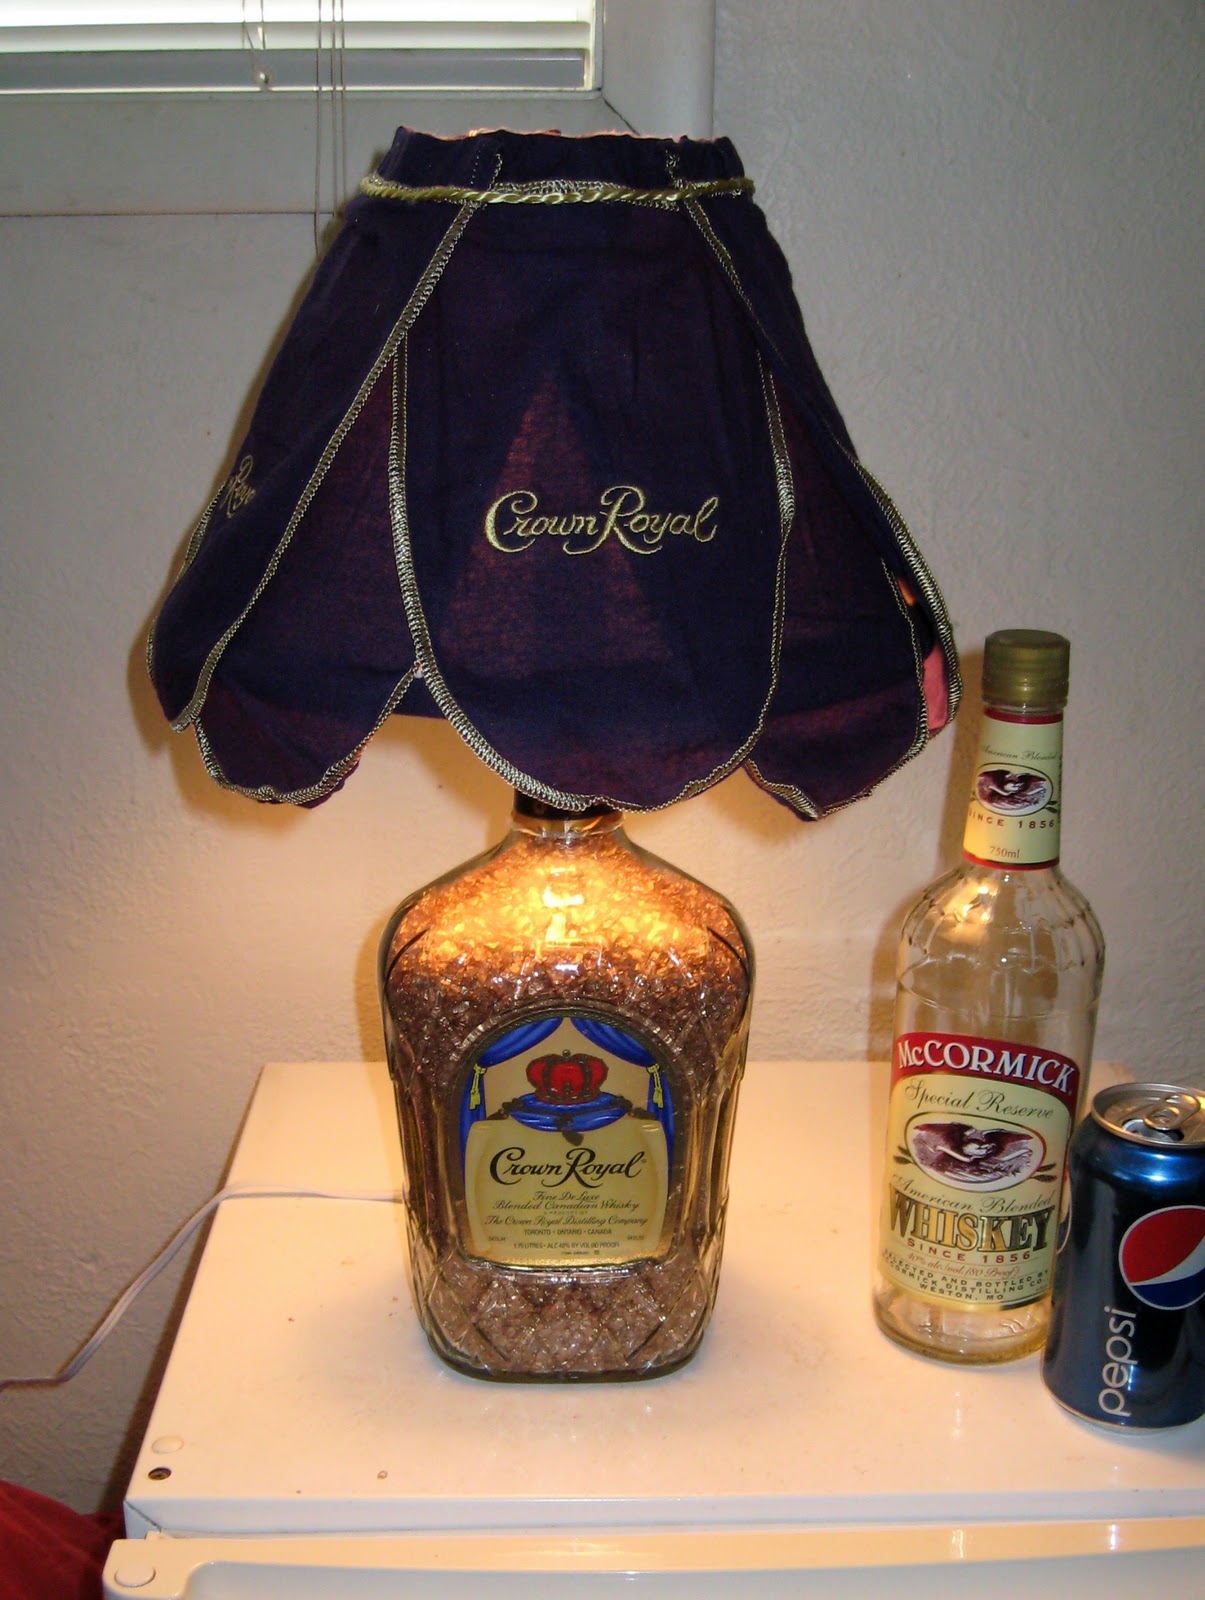
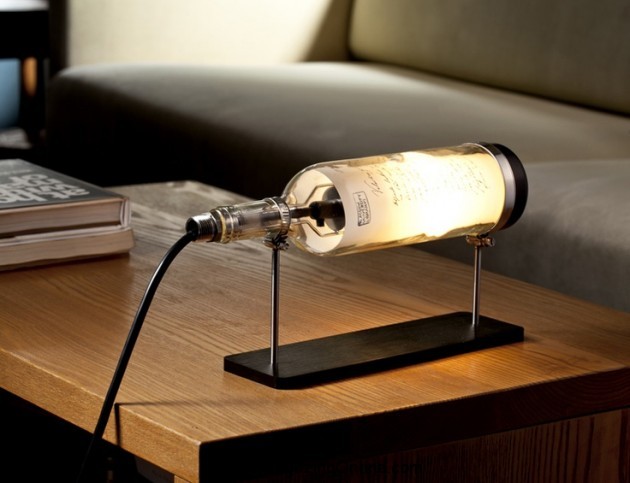
13. Rum Bottle Lamp Decor Idea
Whiskey Bottle Lamp Decor Ideas
For all whiskey lovers, here is something cool and catchy. Especially boys will be amazed by this creative whiskey lamp.
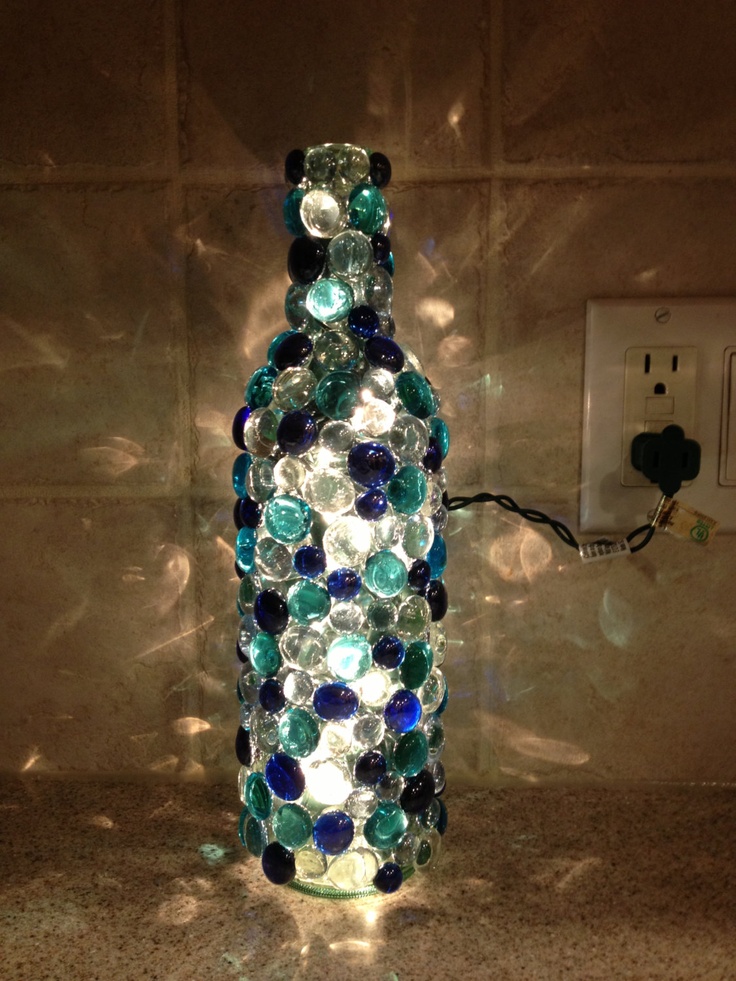
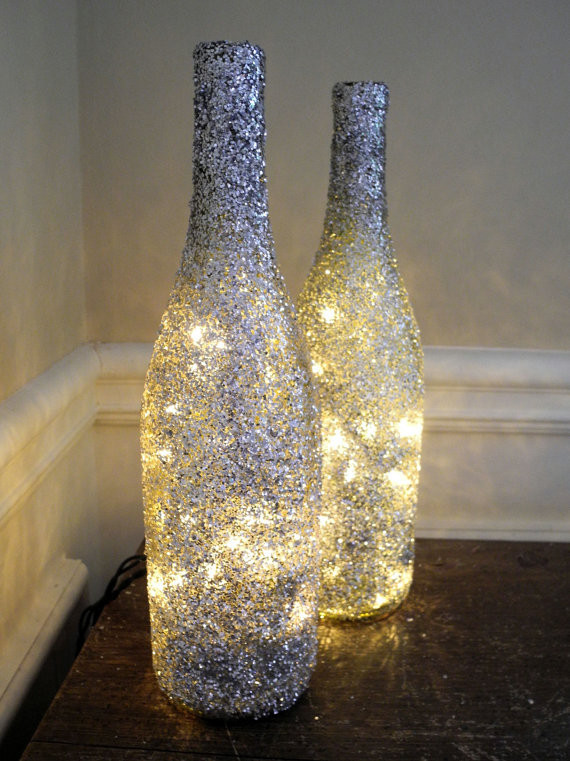
Bottle lamps can look even more adorable if you put some art in the look of the bottle. Just decorate it with a nice bow, colored paper, or paint it as you wish and you’ll get a piece of masterpiece!
So, how did you find our bottle lamp decor ideas for your home? Isn’t they lovely? Which one is your favorite? We want to hear from you. Feel free to share your comments with us and don’t forget to subscribe to our newsletter that you will easily find on our Feel It Cool website. Also, we made this collection to give you great ideas how to redecorate your dream home with something creative and unique. Thank you for reading and don’t forget to stay up to date with the content of Architecture & Design and find many other great home interior ideas.