Make Your Own Face Mask

Here’s what you’ll need:

You will use a cotton woven fabric that should be prewashed, thread and elastic for this. If you have the string type of elastic that will be better.

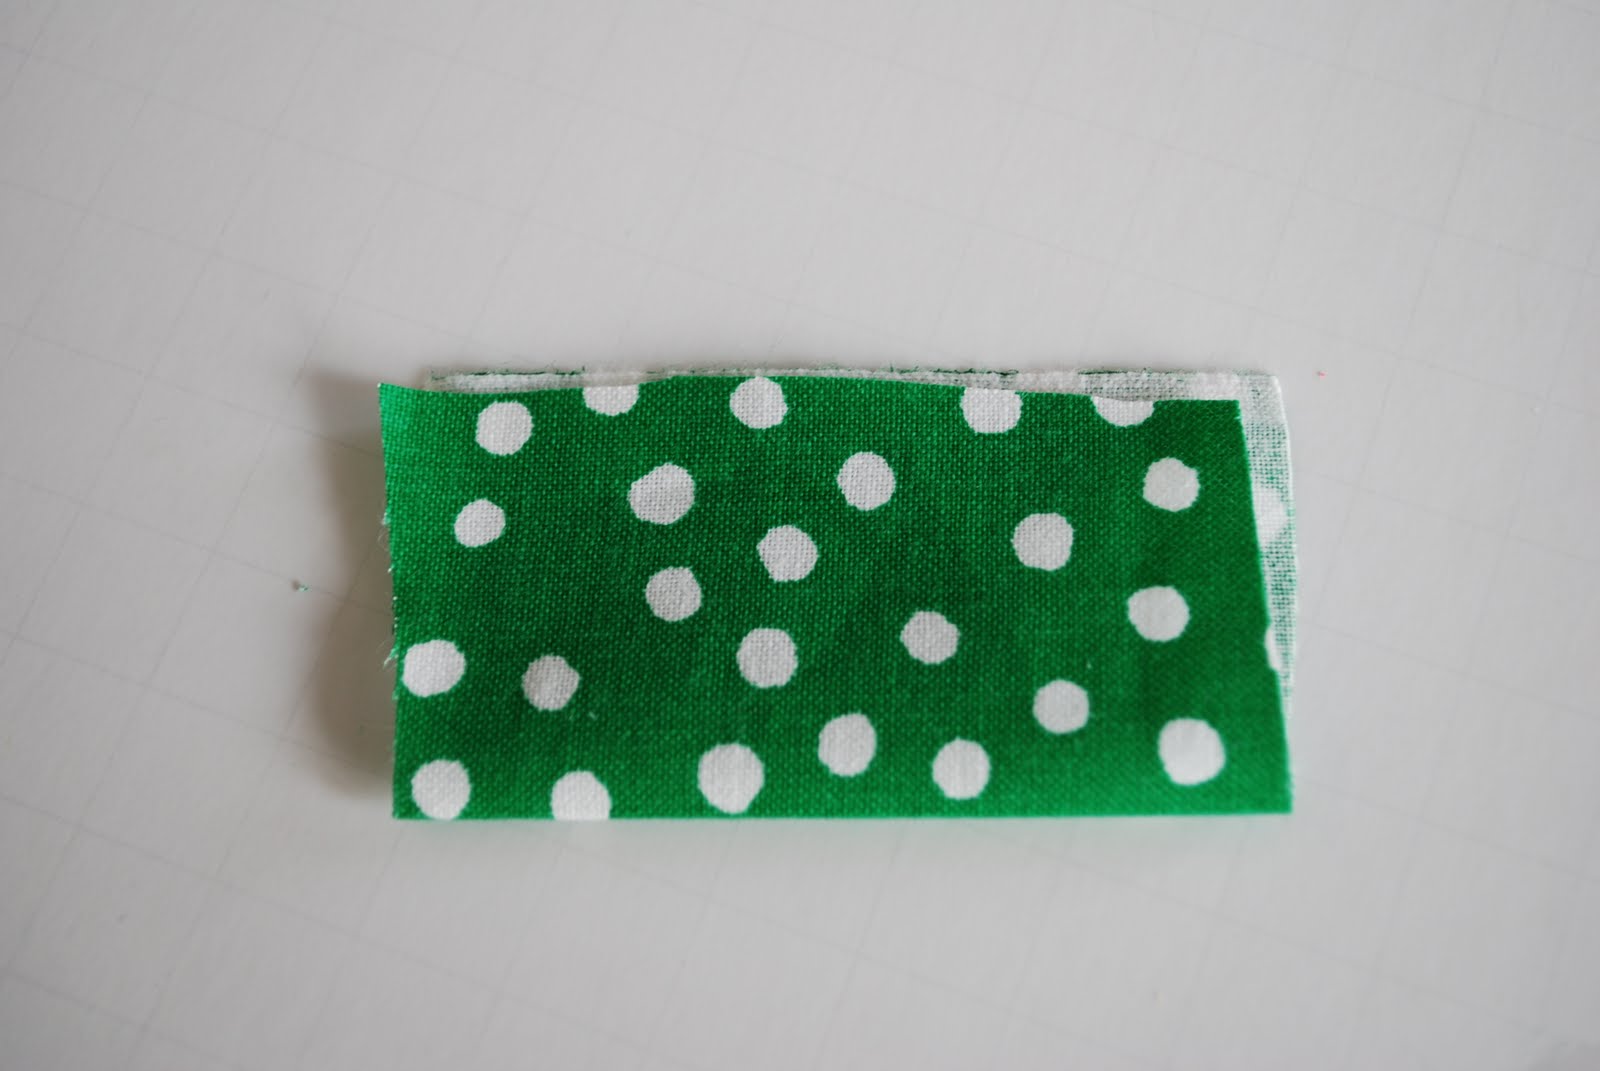
  • Cut 2 pcs 6″ X 8″ fabric in the fold
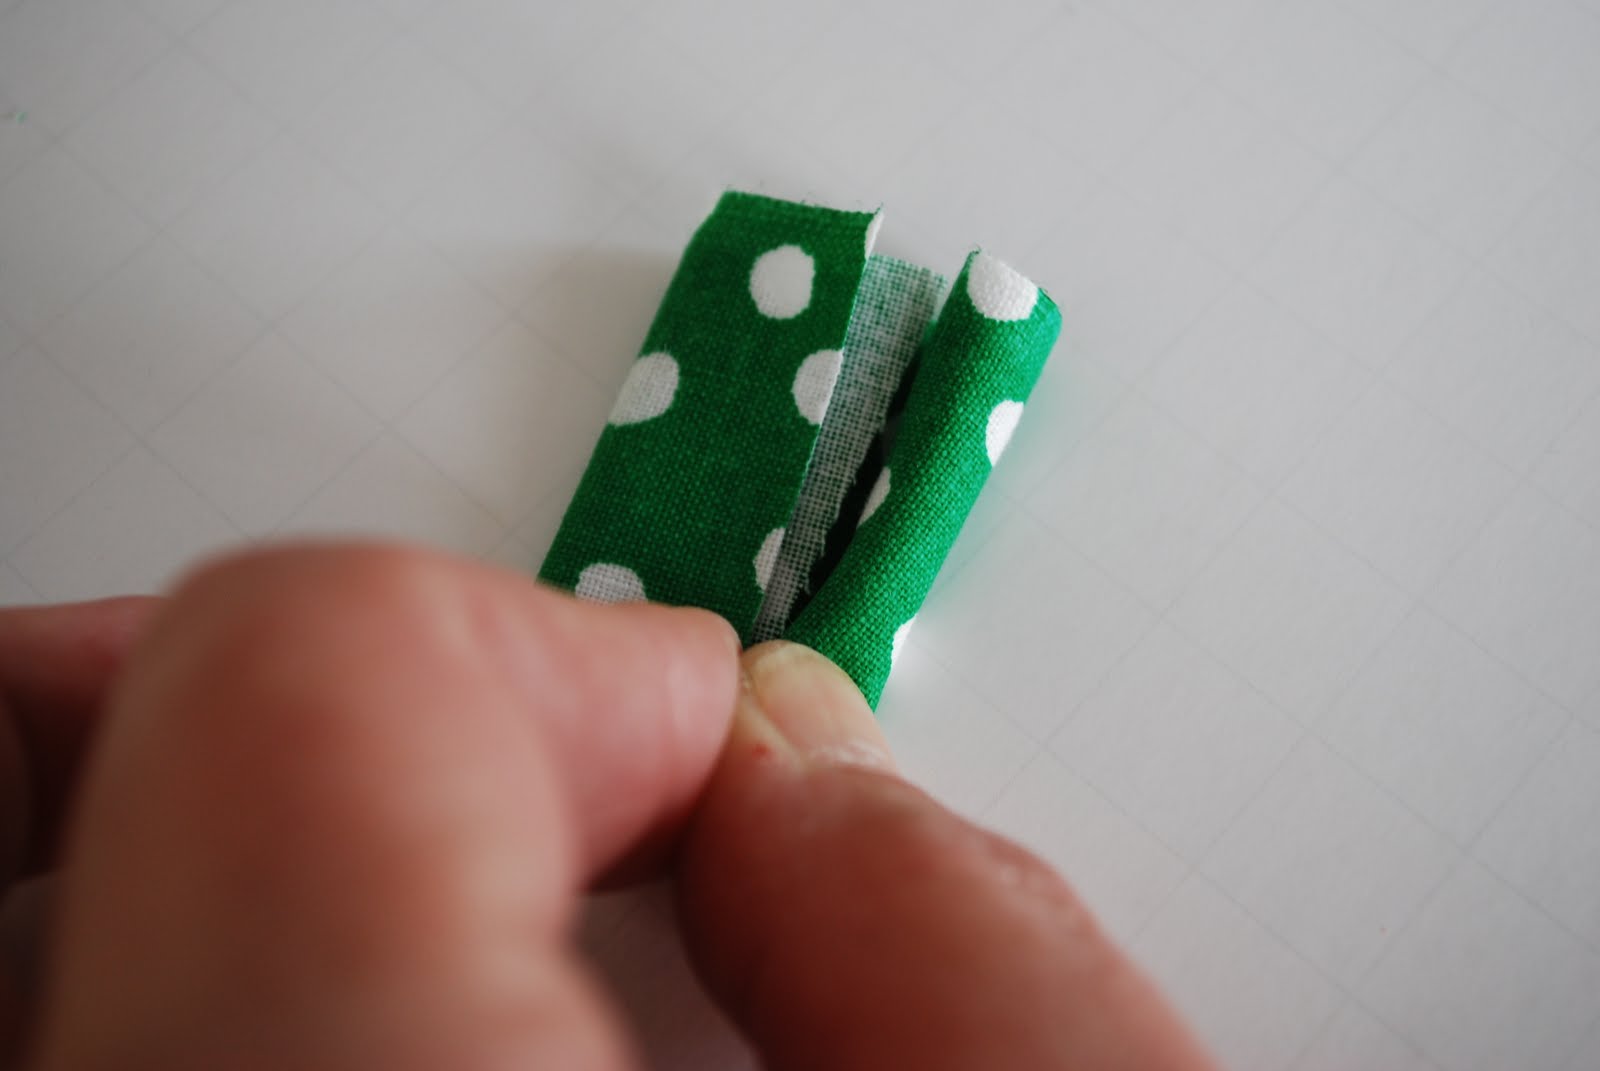
  • 2 pcs of 2″ X 5.5″ strips of fabric
  • Fold the fabric wrong side out. Stitch the sides.
  • Fold  ¼” on both sides from the center then stitch over the folded sides.

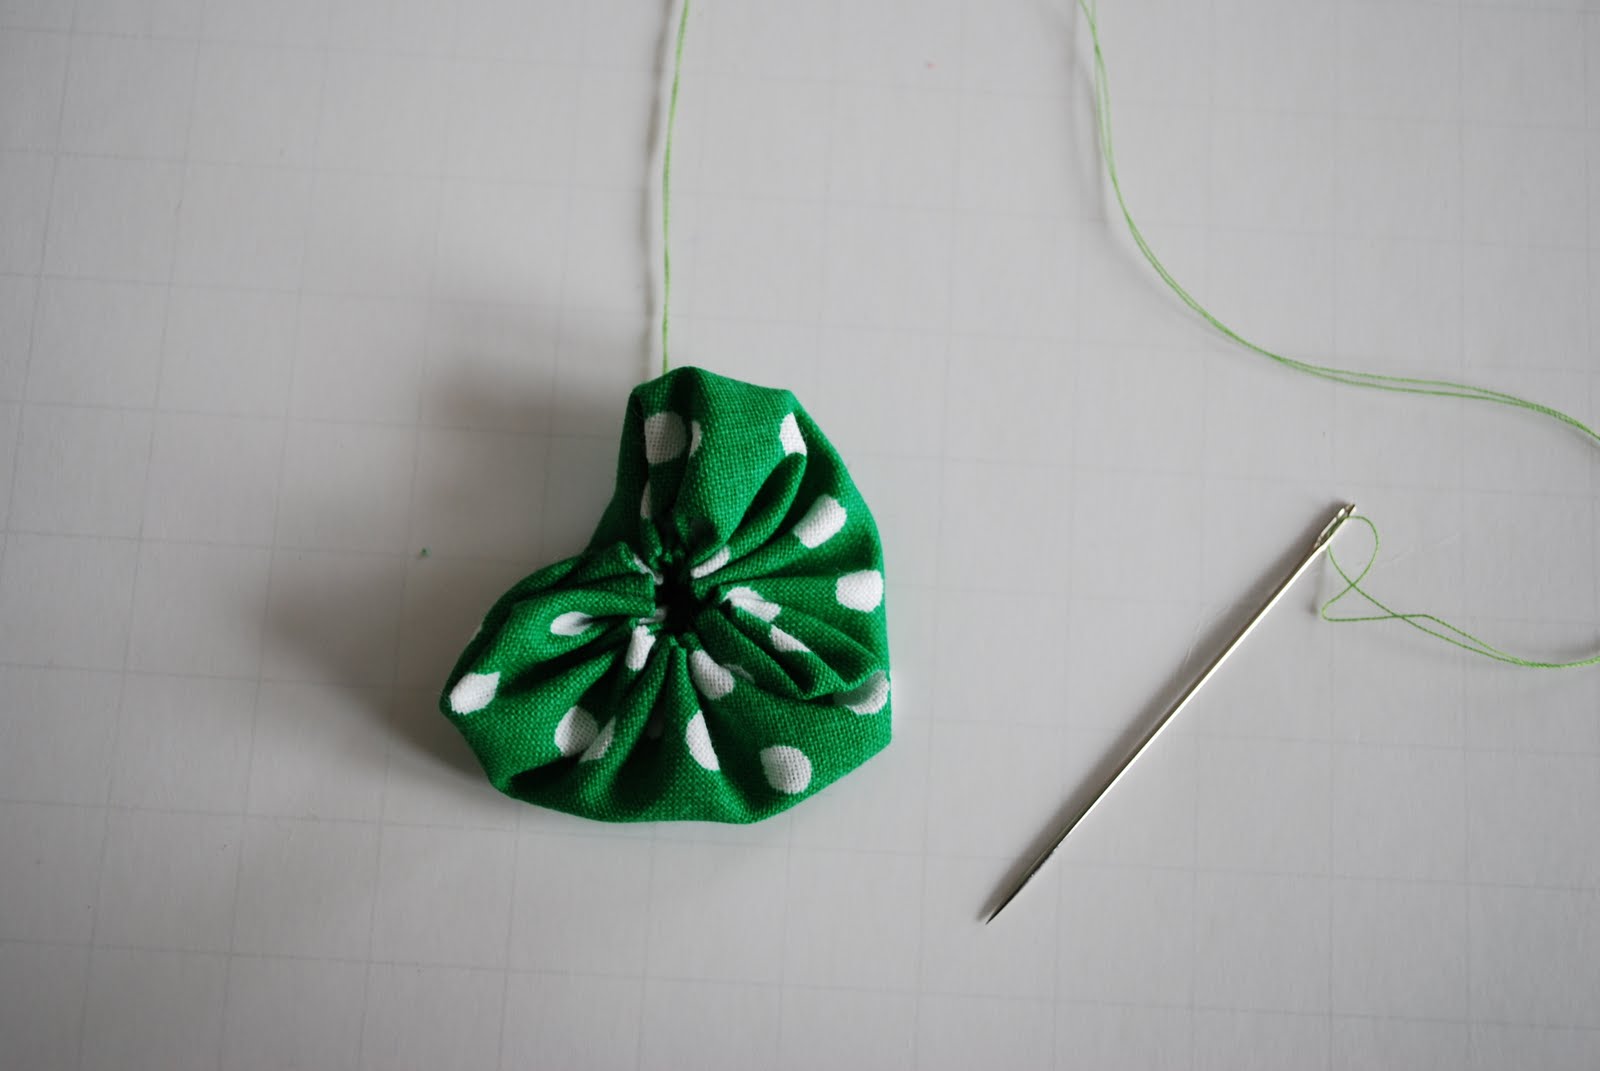
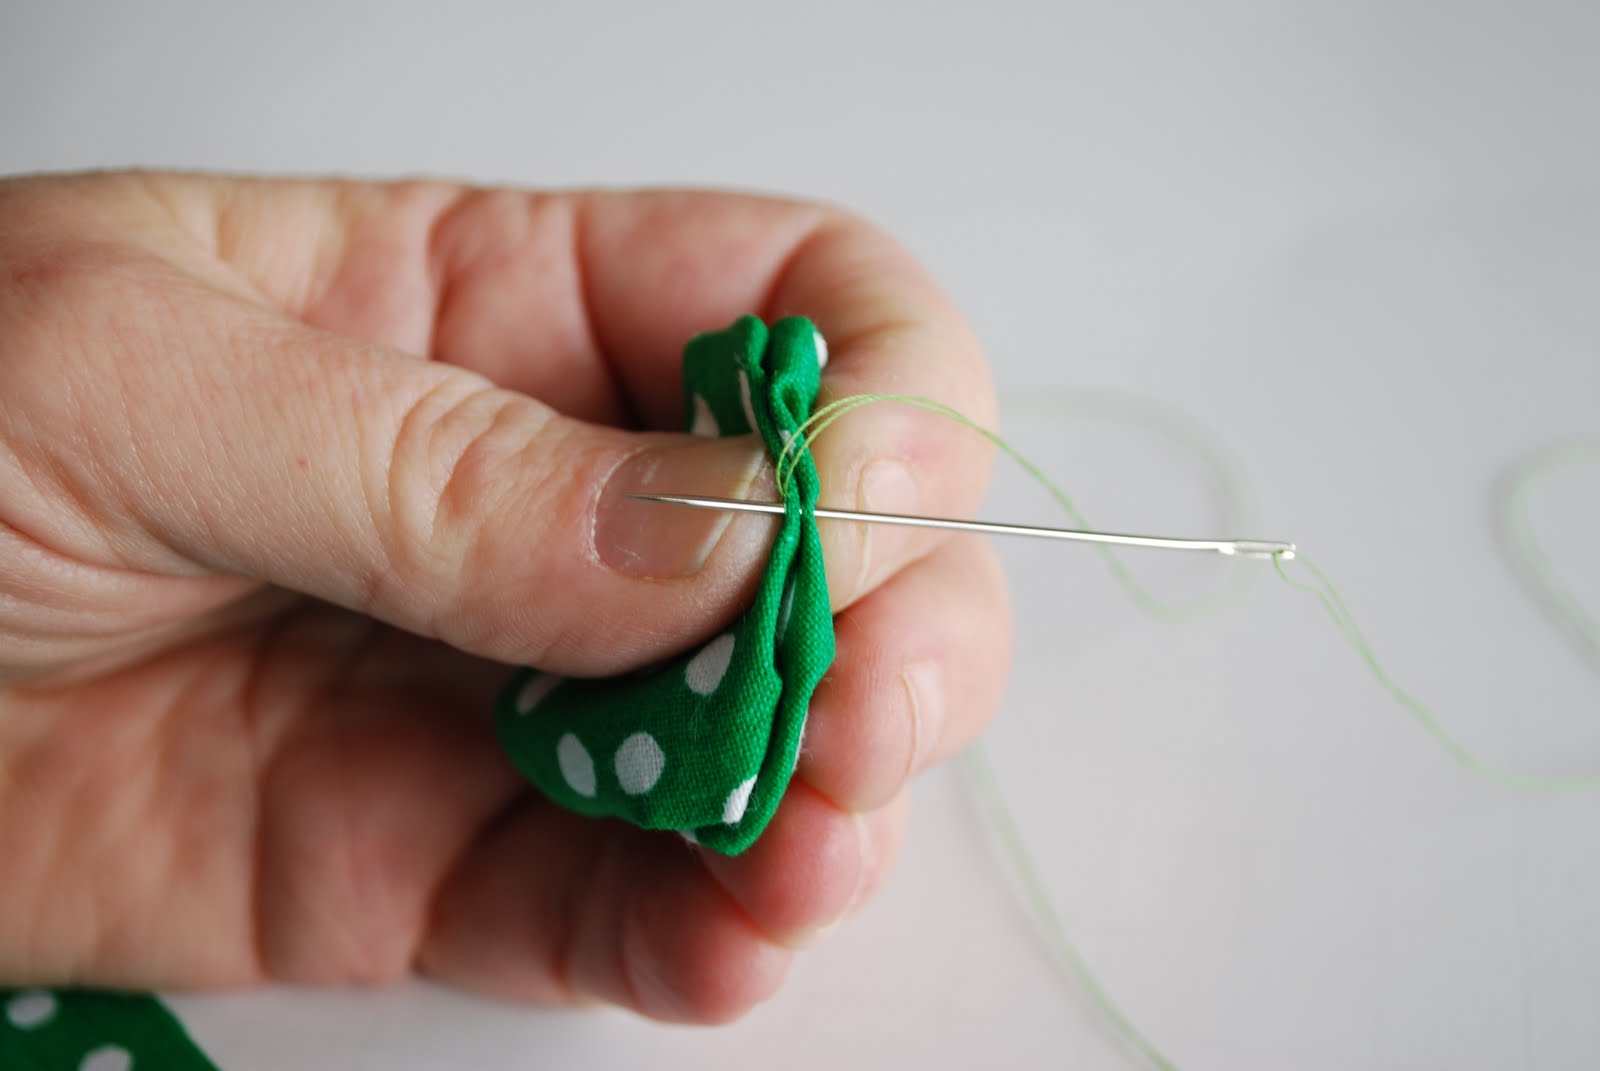
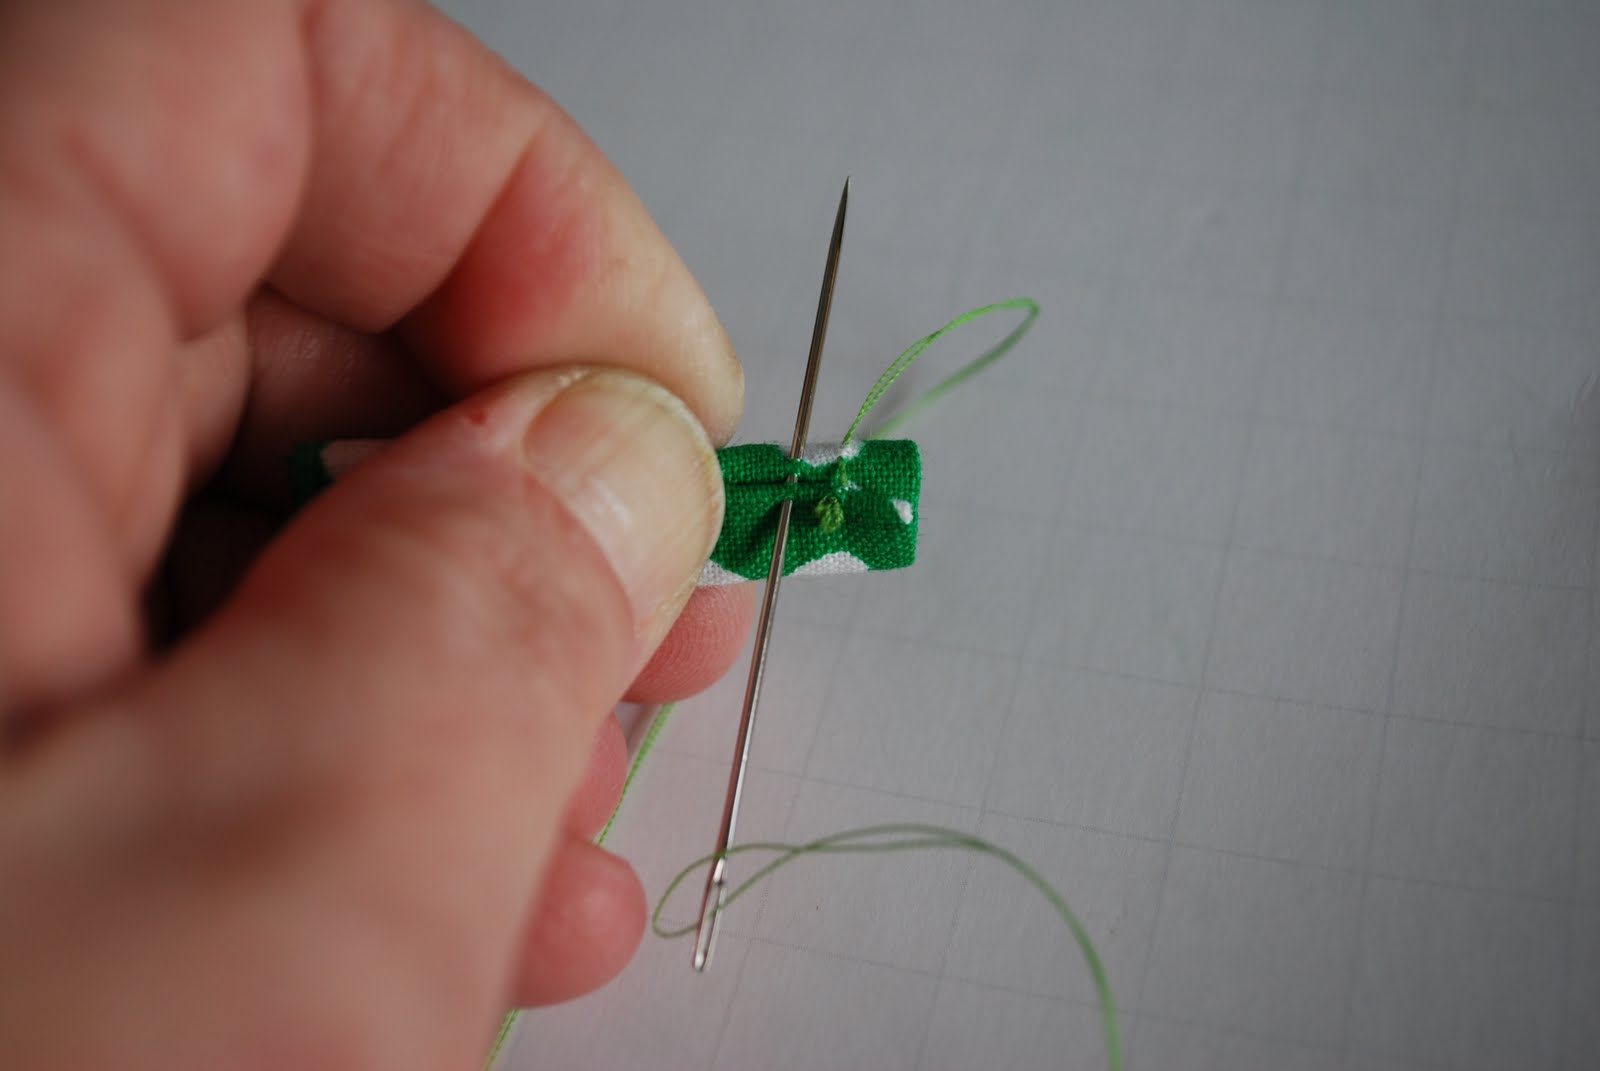
Not let’s make the seam: place the 2 pcs of 2″ X 5.5″ strip of fabric underneath the mask, roll them so both ends come in front of the mask, up and down, and then stitch them to the mask. Roll the edges from left and right to come to the center of the mask and stitch them in order to create a casing.

Cut 2 pcs of 8″ elastic. Insert each piece of elastic on the casing using a small safety pin and stitch both ends of the elastic together. If you are using elastic thread you can just tie it up. You can pull the stitch ends of the elastic to hide them inside the casing.

Other Types of Masks

A gas mask is that thing that has the potential to save your life by filtering toxins from the air when SHTF in one of the following situations:

  • In a natural/man-made disaster, when airborne pollutants fill the air. In the aftermath of volcanic eruption for example, the dust and ash in the air can kill you by obliterating your respiratory system. The same principle applies in an office building fire.
  • In a riot eliciting a chemical attack, a gas mask will make the difference if you have one when confronted with CS gas, tear gas or whatever.

You get the picture: basically, a gas mask will help you keep your lungs clear and your nose, mouth, eyes and mucous membranes protected from harmful substances. Having a gas mask ready or knowing how to improvise an effective DIY one on the fly is crucial both for your long term survival and your physical comfort in an emergency SHTF situation.

There are lots of disaster scenarios where a gas mask will help you mitigate the contamination in the air regardless of whether it’s smoke, particulates, infectious agents, airborne diseases, chemicals or whatnot. Fortunately, in this day and time, decent gas masks and respirators are commercially available everywhere, both online and offline.

You can buy a military-grade gas mask from the internet, in hardware stores, in Army surplus outlets etc, but there’s a flip side to that coin too: the coin itself, meaning that they are pretty expensive to buy and to maintain.

While they perform excellently, standard gas masks/respirators require regular maintenance, as infrequent changing of the filter cartridges, proper storage and so on and so forth. All these come with a hefty price tag, especially when times are tight.

Also, and, most importantly, you can’t carry a gas mask around with you 24/7/365. That would be pretty weird and uncomfortable because gas masks are bulky and heavy. It would be very peculiar to carry around a gas mask with you at work, don’t you think? People will label you as a terrorist or a nutcase.

Also, keep in mind that standard gas masks don’t function well if you have facial hair; any type/length of facial hair will negatively affect the crucial tight seal a gas mask has against your face.

However, you should know that there are alternatives to buying a regular gas mask. Yes, you can build yourself one using readily available materials (stuff you already have in your house) which are also dirt cheap even if you don’t already have them.

There’s a downside to a DIY respirator though: you can’t trust it with your life, especially in cases of a biological or chemical attack, because it’s not anywhere near as effective as the real thing so using one in a life-threatening situation is a desperate measure, the last resort..

Fair warning: A DIY gas mask/respirator is primitive when compared to a standard/military-grade one and offers very limited protection especially in a chemical/biological attack; you should be aware of the fact that tear gas (for example) is no joke; it can seriously injure your respiratory system and lead to death in certain situations especially if you suffer from chronic lung disease or asthma. To put it bluntly, a homemade gas mask should be Plan B because it can never compete (efficiency-wise) with a military-grade mask that features special filters, fibers, vents and valves and whatnot.

Imagini pentru coronavirus

The idea of a DIY gas mask is nothing new. It started back in the ’40s during WW2. The citizenry was instructed on the how to’s regarding DIY gas masks and the concept continued with Occupy Wall Street protesters along with many others Arab spring: Syrian, Egyptian, Maidan in Ukraine, Occupy in Hong Kong, etc.) as people were trying to protect themselves against the chemical weapons used by the regime police and military forces.

How to DIY Your Own Mask

Now, let’s take a look at the most popular DIY methods for masks, shall we?

2. The most basic DIY gas mask that can save your respiratory system (and implicitly your life) in the case of an event such as a volcanic eruption or a fire where ash and smoke fill the air. If these don’t sound probable to you, think about Pompeii and Mount St. Helens and 9/11.

In these cases, a fairly effective gas mask can be improvised under exigent circumstances from a simple cotton T-Shirt. Yes, it’s that “your T-Shirt can save your life” kind of a deal, when your ripped T-shirt will work as an efficient anti-dust/ash mask.

All you have to do is tear the T-shirt apart and use strips of fabric to cover your nostrils and your mouth (tied at the back of your neck) and voila, this is the simplest DIY gas mask project. For best results, you should get the cloth damp before using it, if possible.

3. One of the most dangerous things that can happen to you in an SHTF situation when you get gassed/trapped in a fire is the loss of vision. Swim goggles will save your life if you’re caught in a stampeding mob “sprayed” with tear gas and running for their lives, soaked in panic. To stay alive in such a situation, you’ll be required to see properly if you want to make it to safety. A quality pair of swim goggles is a must-have item to keep around in your “tactical” bag.

Cider vinegar can be used to protect you from the inhalation of tear gas, remember that folks. You can use a bandana soaked in cider vinegar put around your nose and mouth until you get to safety.

4. The soda bottle gas mask is my favorite DIY project because it offers a reasonable amount of protection from various contaminants, it’s very simple to manufacture and it doesn’t require huge skills or exotic materials to build it. It’s also pretty effective for a home-made gas mask and it can be built in 15 minutes tops if you have the necessary materials and a little bit of (prior) training.

For your soda bottle gas mask project, you’ll require a sharp cutting tool (razor blade, Exacto knife, sharp scissors), a permanent marker, glue, a 2-liter soda bottle, rubberized foam insulation strip (at least 1” wide) and an N95 particulate mask. Total cost: maybe $5.

You’ll have to clean the 2-liter plastic bottle and remove the labels. After that, draw a U-shaped area using the marker, big enough to fit your face and yet not too big. You should start with a smaller cut and work your way up from there because you can always trim more but you can’t put it back. You’ll need a fit snug against your face for an efficient seal.

The bottom of the bottle must be cut away, along with the U-shaped section (using the template lines drawn with the marker to fit your face).

You’ll end up with a basic shape that can be further adjusted for an optimal fit until you get it right. Keep in mind that the mask should fit your face tight yet not be uncomfortable.

Next, you’ll use the rubberized foam insulation as a seal for the edges of the bottle until you end up with a secure, complete seal and you’ll also make a circle of foam insulation inside the bottle that will serve as a resting place for the filtering element (the N95 mask) 2 inches up from the spout.

The elastic bands from the N95 mask will be removed for later use, along with the metal bridge. The N95 mask’s edging must be carefully cut. Just leave enough to keep the edges sealed. After that, the N95 mask must be placed inside the neck of the bottle, with the filter pointing out and down towards the spout. The elastic bands from the N95 mask will be used to secure the gas mask firmly on your face.

That’s about it, just remember to keep the soda bottle gas mask stored in a well-sealed plastic bag, removing as much air as possible from it, thus preventing the N95 mask (the filtering element) from getting contaminated

Recycle, Build Your Own Bee House

Make Your Own Little Bee Houses

Materials: (suggested)

  • a few scrap boards/planks
  • a log or two
  • Nails and Hammer
  • Drill or Drill Press
  • Some kind of Chop, Miter, Slide, or Circulating Saw to cut the boards. A good hand saw, if that’s all you have, will do. 
  • Sandpaper, if you want it to look nice

Step 1: Materials

Materials

     For this project, you can pretty much use any chunk of wood you have lying around. Other than than that, you need a few flat boards, such as shingles, and some board to attach it to. I’m pretty sure the shingles don’t actually make the bees want to move in any more than without them, but they make the finished project look kind of cute. 

     I figure the best way to do this is to have your bee house attached to something solid such as a post or tree, although I have seen ones that are meant to hang from something, but that seems like it wouldn’t be so good in the wind. You can choose either way, but I go with attaching them to something solid with a backboard. 

Step 2: Cutting Your Blocks to Size

Cutting Your Blocks to Size

2 More Images

    Since you can really get any deeper than what you drill bit can reach, that’s about how long the logs should be. Just eyeballing the first  one, it pretty much just needs to be cut in half, same as the one to the right, the block to the left being pretty good size already.

Remember, safety first! Ear protection is a must when operating loud saws! Feel free to use eye protection as well. 

I went ahead and cut the split log on the slide saw that I usually use, but the round log was too large a diameter, so I used my chop saw on it. 

Now I have 5 pieces to choose from to start my bee house. 

Step 3: Drilling the Holes

Drilling the Holes
Drilling the Holes
Drilling the Holes
https://www.instructables.com/id/Make-your-own-little-Bee-Houses/
Drilling the Holes

Now it’s time to drill the holes, which is half of the project in itself. An electric hand drill would work as well, but I found my drill press to be much more suitable. I drilled down as far as I could with the bit and my press, which was around 3-4 inches. The split log took a bit longer since it’s some kind of semi-hardwood, but I eventually got it done. For something this size, a minimum of 16 holes seems good. 

Now, there are a few things I chose not to do here. The first, I did not make any kind of markings as to where I wanted the holes, I just drilled in a more or less organized fashion. The spacing is important, so I kept them far enough apart, but the overall layout doesn’t really matter to the bees nor to me. The second, I did not use any other size bit, only a 3/8 bit, so there might be some bees that might not be able to live here. I might use other bits in the future, but not this time. 

I encourage everyone to do their own research on this, as I am only covering the simplest way possible to make a bee home. 

Step 4: Fitting the Shingles

Fitting the Shingles

3 More Images

Since this is supposed to resemble a small house, the shingles will be used for the ‘roof’.

First, I just stood them up about how they needed to be, and marked about how long I wanted them. After that, I went and cut them both on the slide saw, which I didn’t get a picture of. Next, you just nail them on real quick. I just used these little nails, four of them for each side.
The shingles were a bit to wide for the split log piece, so I had to chop them up a bit; I’m sure you can compensate for whatever for you use. 
After you get the shingles marked, cut, and nailed on, you should have a block of would that hopefully now resembles a small house. Very enticing to those Mason bees that need homes. 

Do your best not to put the nails into the holes you drilled. 

Step 5: Attaching the Backboard

Attaching the Backboard

Next, I just laid the house on the board I planned to cut up for the backboard and once again, eyeballed about where to cut, and measured to the nearest inch. I marked it, and cut a few lengths to use. Attaching them is easy, just turn it over and pound a few nails in there. The little nails seemed good enough for this too, so I didn’t bother looking for longer ones. Again, try not to nail into the holes. 

Make your Own Soap Paper

Version:1.0 StartHTML:000000216 EndHTML:000286767 StartFragment:000235000 EndFragment:000286664 StartSelection:000235026 EndSelection:000286602 SourceURL:https://www.ehow.com/how_6133091_make-paper-soap.html How to Make Paper Soap | eHow

How to Make Paper Soap

Irene A. Blake | updated on August 30, 2017

About the Author:

Irene A. Blake

Based in Southern Pennsylvania, Irene A. Blake has been writing on a wide range of topics for over a decade. Her work has appeared in projects by The National Network for Artist Placement, the-phone-book Limited and GateHouse Media. She holds a Bachelor of Arts in English from Shippensburg University.

Many people use paper soap—paper-thin soap sheets—as an alternative to bar and/or liquid soap. Paper soap is not only easy to carry, store and use (especially for travel), but quickly dissolves in water without leaving behind residual soap scum in a soap dish or on a sink as typically seen with wet soap bars or dripping soap dispensers. Although you can find several paper soap products in stores or online, you can easily make your own paper soap at home with the use your favorite soap brands and a few kitchen items.

Woman washing hands with bar of soap

(Image: Jupiterimages/Photos.com/Getty Images)

Things You’ll Need

  • Soap bar
  • Wire cheese slicer
  • Cutting board
  • Wax paper
  • Brownie or cake bake pans
  • Knife
  • Glass bowl
  • Pan
  • Water
  • Oven
  • Straight-edged scissors
  • Speed peeler (optional)
  • Decorative scissors (optional)

Slicing Method

Step 1

Lift the handle of the wire slicer.

Step 2

Place your soap bar on the cutting board and then align it under the wire as you would a block of cheese.

Step 3

Pull the handle down and slice through the end of the soap bar. Set the first paper-thin soap sheet aside and then repeat as needed to make additional sheets of paper soap.

Pouring Method

Step 1

Line your pans with wax paper.

Step 2

Cut your soap bar into 1/2-inch blocks and place the blocks in a large glass bowl.

Step 3

Create a double boiler and then melt the soap. Fill a small pot with water and place it on a burner. Put the glass bowl on top of the pot so that it sits on the rim of the mouth of the pot, turn on the burner and then wait for the generated steam to melt the soap.

Step 4

Pour the melted soap into your brownie or cake pans to coat the wax sheets with a paper-thin film about 1/2 mm thick.

Step 5

Wait for the soap to cool. Peel the soap carefully from the wax paper and cut it into palm-sized (or smaller) sheets using straight-edged scissors to make a stack of paper soap.

Tip

If you don’t mind having irregularly shaped paper soap sheets, cut paper-thin sheets from a soap bar using a handheld speed peeler.

If you want to make paper soap with special edges, cut the soap using the decorative scissors or “decorative paper edgers” typically used in paper crafts such as scrapbooking.

Recycle This~!

Instant Bathroom Storage

The Coolest 34 DIY Projects You Need To Make This Spring

Source

Homemade Milk Alternatives

1
ALMOND OR CASHEW MILK

First, soak nuts. 
 

Regardless of the nut of choice, the basic formula for nut milk is the same: 1 cup raw nuts to 3 or 4 cups water. All nuts also benefit from soaking prior to being blended, as pre-soaking creates a creamier result.

For almond milk, place 1 cup raw almonds in a bowl and cover with cold water to about 2 inches above the almonds. Allow to soak overnight or for up to 2 days. The longer the nuts soak, the creamier the milk they’ll produce. If soaking for longer than overnight, change the soaking water once. For cashew milk, soak 1 cup raw cashews and follow the same steps as almond milk.

When ready to make the milk, drain and rinse the almonds, discarding the soaking liquid.
 

TIP
No matter what nut you choose, be sure the nuts are raw, unroasted and unseasoned. Roasted, salted or seasoned nuts will negatively impact the flavor and texture of the milk.

2
BLEND THE ALMOND OR CASHEW MILK

Place drained, soaked nuts in a blender with 3 or 4 cups of very hot filtered water — the water should not be boiling. If you don’t have a blender, a food processor can be used, though a blender creates a smoother texture.

If desired for flavor, add 1 teaspoon vanilla extract, 1/8 teaspoon kosher salt or sea salt and about 1 and 1/2 teaspoons liquid sweetener such as agave nectar, stevia or honey to the blender.


Blend on low speed for a few seconds to combine. Increase speed to high and blend until creamy and smooth, about 1 to 2 minutes. The mixture will expand some as it blends, so be sure to not fill the blender to the top to start.
 

TIP
Adjust the amount of water to create the desired milk consistency, with less water yielding a thicker milk and more water yielding a thinner milk. Nut milk made with 4 cups water is about the consistency of skim dairy milk, while 3 cups water creates a consistency more similar to whole dairy milk.

3
STRAIN THE ALMOND OR CASHEW MILK

Strain the mixture through a fine mesh strainer, cheesecloth or thin kitchen towel to remove any nut bits. If using cheesecloth or a kitchen towel, place it over a large mixing bowl. Slowly pour the milk from the blender over it. Carefully gather together the corners of the cheesecloth or towel and lift up. Squeeze into the mixing bowl until all liquid is extracted.

You can store in the refrigerator for up to 3 or 4 days. Shake milk before using.
 

4
OAT MILK

First, soak oats.
 

Place 1 cup old-fashioned oats in a bowl and cover with cold water to about 2 inches above the oats. Allow to soak for around an hour. Drain and rinse the oats to remove some of the oats’ starch. Be sure to discard the soaking liquid.
 

5
BLEND THE OAT MILK

Place drained oats and 3 cups filtered water in a blender. Blend on high until smooth, about 30 seconds.
 

TIP
If using a high-powered blender, you may only need to blend the oats for about 10 seconds. Blending too long can break down the oats too much and make the milk gloppy.
6
STRAIN THE OAT MILK

Strain through a fine mesh strainer, cheesecloth or thin kitchen towel to remove any oat bits. If using cheesecloth or a kitchen towel, place it over a large mixing bowl. Slowly pour the milk from the blender over it. Carefully gather the corners and lift up. Squeeze into the mixing bowl until all liquid is extracted.

Once strained, stir in 2 teaspoons vanilla extract, 1/8 teaspoon kosher salt or sea salt and about 1 to 2 tablespoons liquid sweetener such as agave nectar, stevia or honey, to taste.

Store in the refrigerator for up to 3 or 4 days. Shake milk before using.
 

7
COCONUT MILK

First, soak coconut.
 

Coconut milk takes just two simple ingredients to make: unsweetened shredded coconut and water.

Place 2 cups unsweetened shredded coconut in a blender. Add 4 cups very hot water. Let sit for 5 minutes to allow the coconut to soften. Do not drain or discard the water.
 

8
BLEND THE COCONUT MILK

Blend at low speed a few seconds, then on high speed for 1 to 2 minutes until creamy and well combined.
 

9
STRAIN THE COCONUT MILK

First pour coconut mixture through a colander into a pitcher or bowl to get most of the coconut bits out. Then strain again through cheesecloth or thin kitchen towel to remove any remaining smaller bits.

Store in the refrigerator for up to 4 days. Shake before using.
 

TIP
Coconut milk isn’t just for drinking! You can use it in recipes too. It makes a great replacement for low-fat canned coconut milk.

Homemade Diaper Wipes

Homemade Baby Wipes

Version 1

Ingredients:

Paper towels
Water

Directions:

1.  Wet paper towels
2.  Squeeze out extra water
3.  Place in small plastic container or baby wipes container
4.  Wipe baby when changing diaper and discard

Version 2 (for cloth diapering families)

Same as above, but substitute rags or baby wash cloths for the paper towels and wash with cloth diapers after use.

“I’ll Drink To That”, Upcycle

Convert your wine bottles into small gardens

The Coolest 34 DIY Projects You Need To Make This Spring

Source

Polka Dot Shamrock~ DIY

I recently had a customer ask me if I could make a shamrock to go on her daughters skirt instead of the usual flower. My answer was, “Sure, I don’t know how I’ll do it, but it will be fun to figure it out!” And sure enough…. it was fun figuring it out. Now that it’s “figured out”, I might as well share and let you have some fun with it too.

You will need:
green fabric
thread and needle
Clover yoyo maker is optional
(Clover is the brand, not the shape. They do have a shamrock shaped yoyo maker but I thought it looked more like a flower than a shamrock. I think the heart shaped one works better.)

Make 3 heart shaped yoyo’s
If you’re using the yoyo maker just follow the instructions.
(obviously)

When you take it off of the yoyo maker it looks like this, so I’m thinking you could just stitch around the edge of a heart shaped piece of fabric if you didn’t want to get the yoyo maker.

At this point you’ll want to just pull on the thread to gather the heart into….

…a smaller, rufflier version of itself!

Lay 2 of the hearts (RIGHT SIDES TOGETHER) and hand stitch them together. Begin about 1/3 of the way down and go all the way to the point at the bottom.

This is why I wrote RIGHT SIDES TOGETHER in all caps!OOPS….just keepin’ it real. Time out while I unpick and try again.

There we go, much better. Do the same thing with the 3rd heart.

You’re almost done.

For the stem you will want a rectangle approximately 2.5 x 2 inches big.

Fold it in half so that the shorter ends are meeting.

Fold the two ends in a little bit. That way you only have one raw edge and that will eventually be beneath a little circle of felt.

Starting at one end, roll the piece of fabric into a stem.

Like so.

Hand stitch all the way down the back of the stem.Then stitch the stem onto the back of the shamrock.

And there you go…. a polka dot shamrock!

To finish it off just add a circle of felt to the back. I added a pin, since they were going on skirts, but you could do so many different things with these. You could make a giant one for your door, put a bunch on a wreath, decorate napkin holders with them…just all kinds of things!