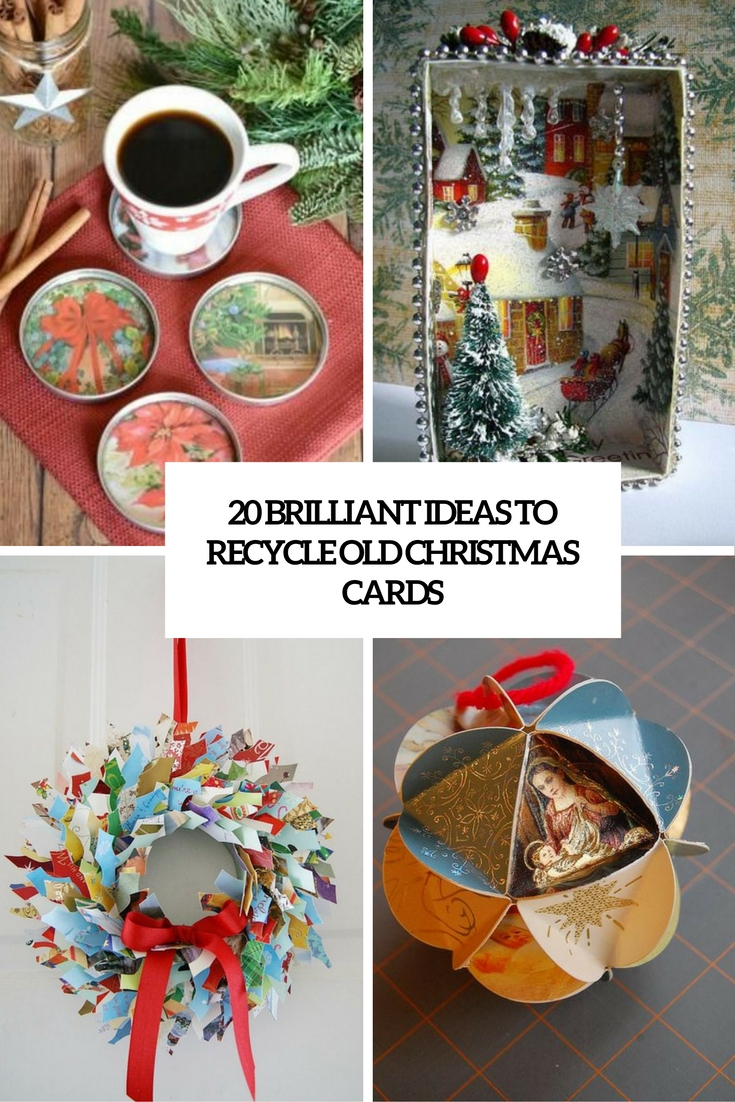
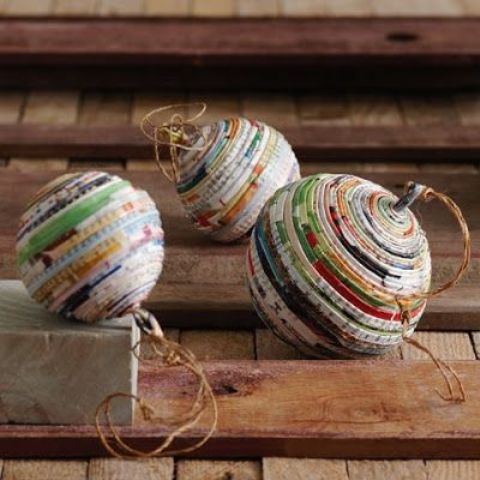
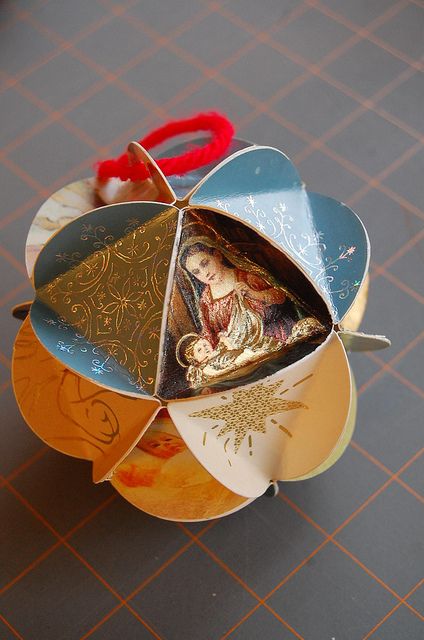
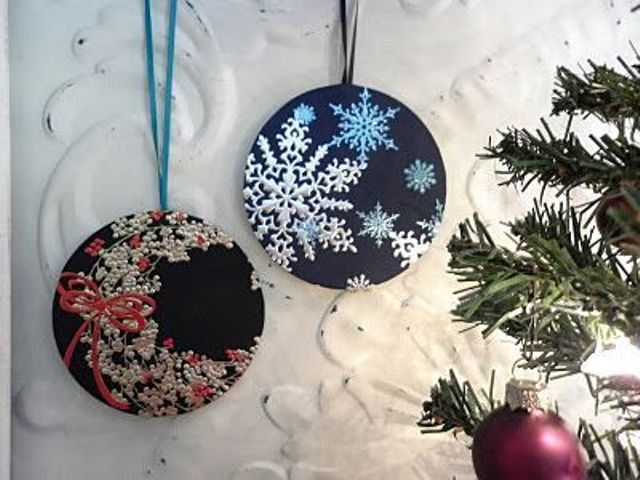
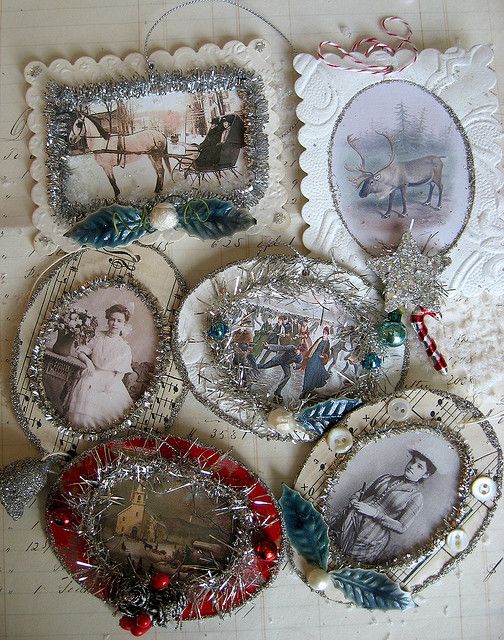
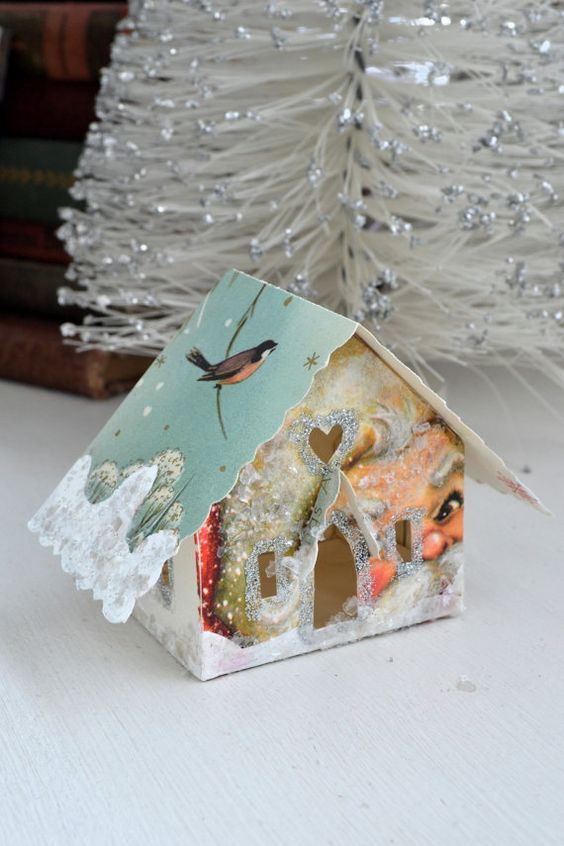
The first thing that comes to mind when we think of recycling cards is making ornaments of them. They can be dimensional or not and of various shapes and sizes, and everything depends on what you like and what cards you have at hand. Angels, baubles, houses, snowflakes and all the shapes that come to your mind – just try different ideas!
cards were used to make Christmas ornaments
dimensional bauble ornament of Christmas cards
old Christmas cards turned into nice cardboard ornaments
tinsel and old Christmas card ornaments
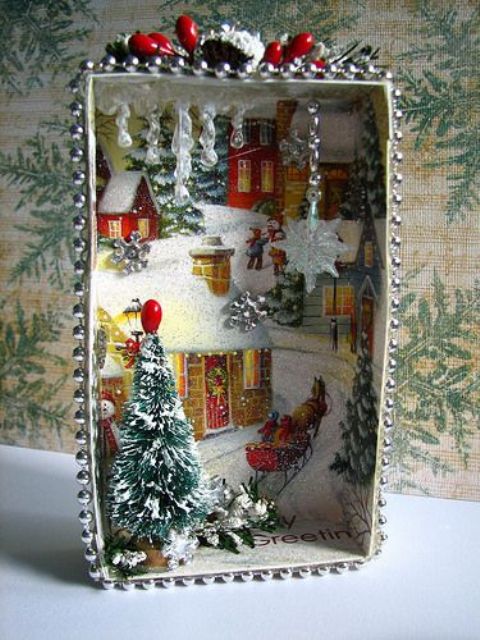
Christmas card glitter house can be used as an ornament or just decor
angel ornaments made of old Christmas cards
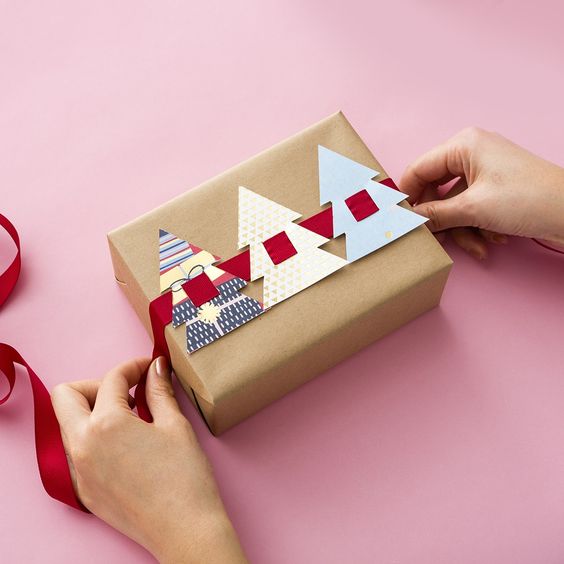
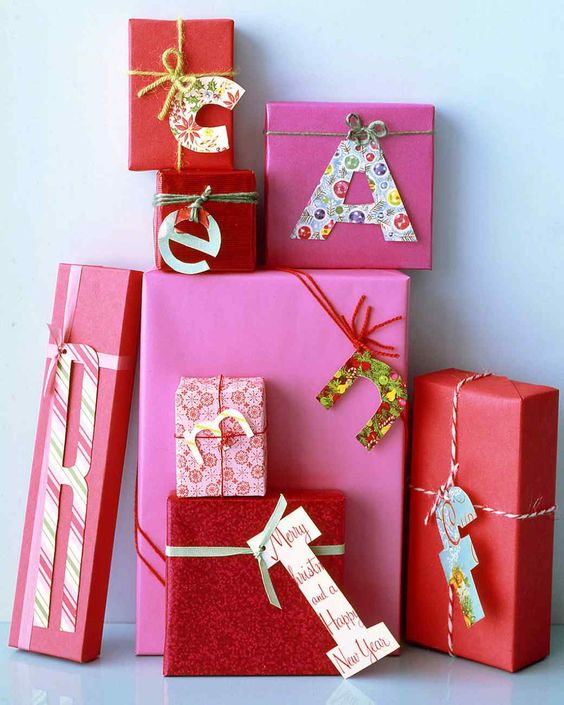
Gift Toppers And Cards
You can make some pieces to give them again to your friends and family: gift toppers or new cards. The idea is easy: cut out some trees of cards and place them on the gifts, or you can give your gift toppers any other shape. You can also make new Christmas cards of old ones – take some cardboard as a base and decorate the cards with various parts and cutouts of other cards. Add sparkles, rhinestones and other details to make your cards super special.
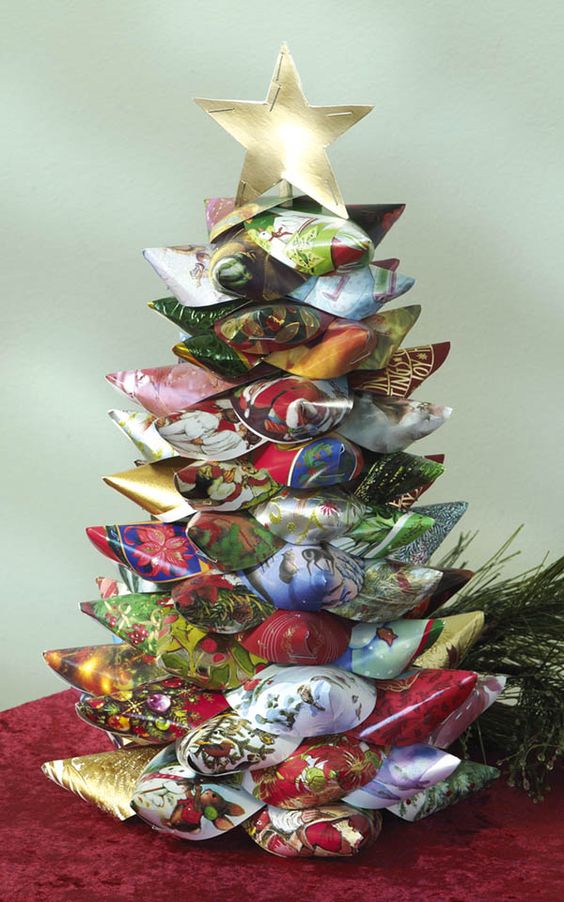
dress up plain wrapping paper with colorful trees of Christmas cards
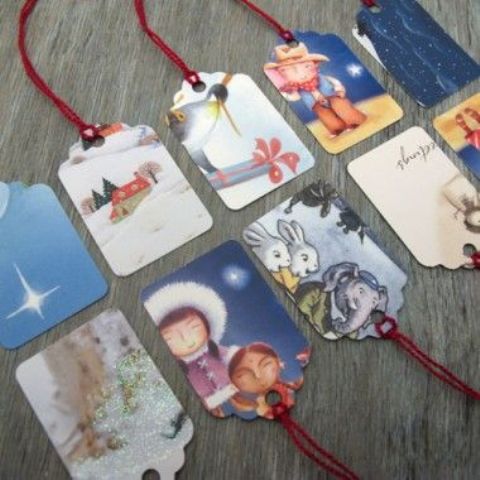
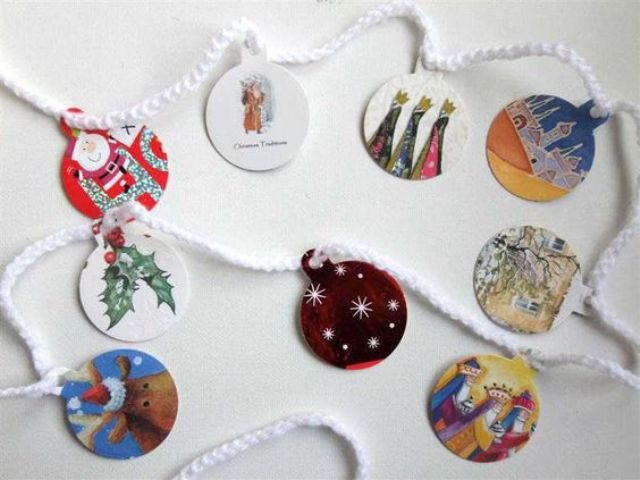
don’t buy gift tags, just make them of cards and attach strings
gift tags can be made of old Christmas cards
make new cards using parts of old ones
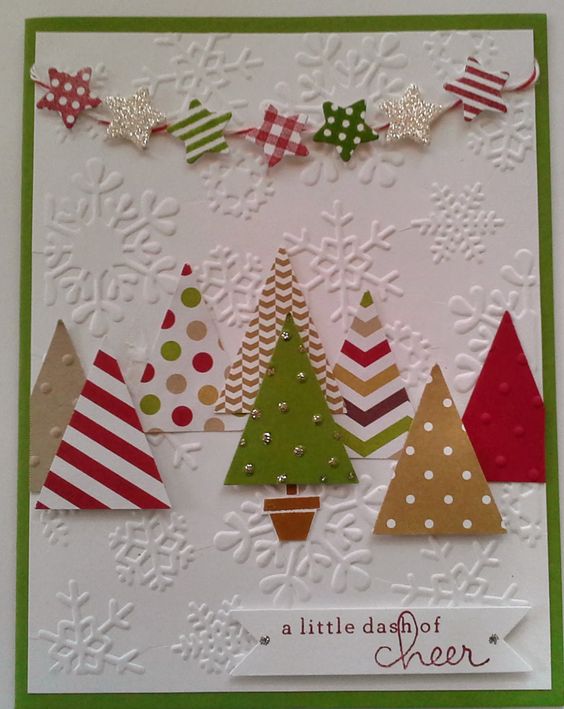
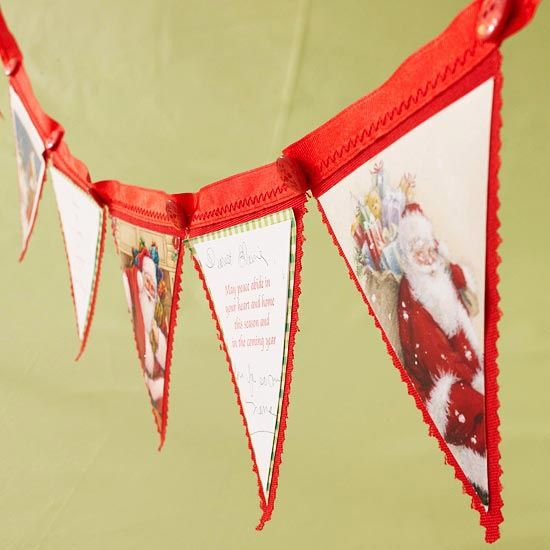
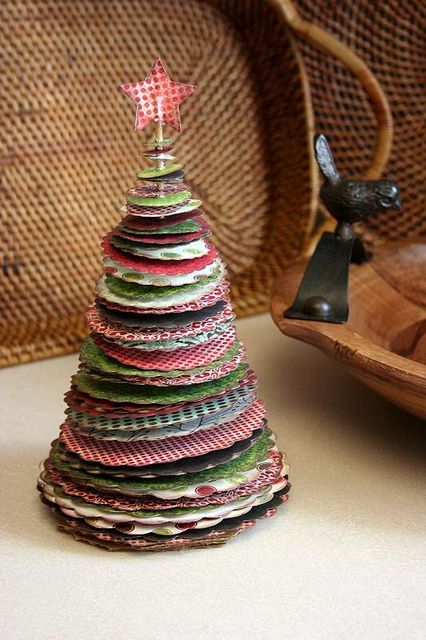
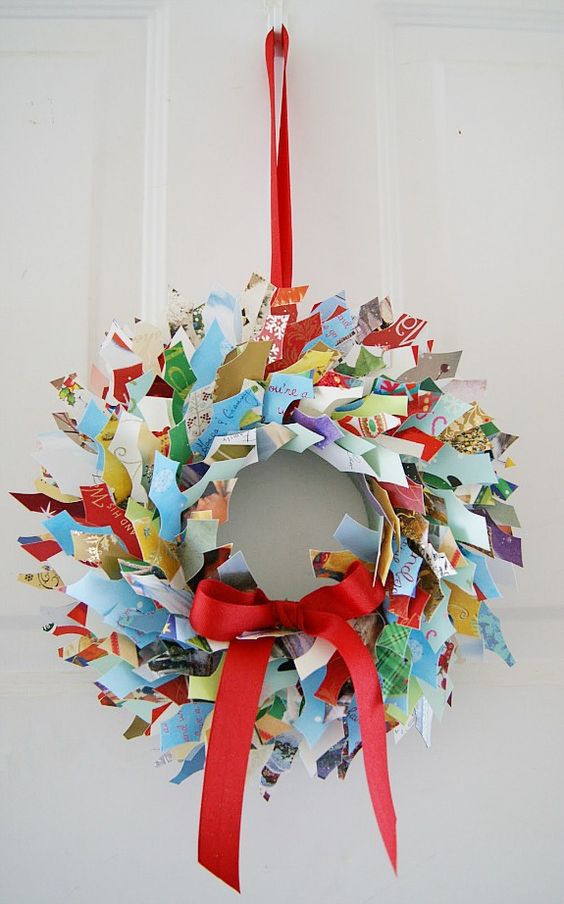
Other Ideas
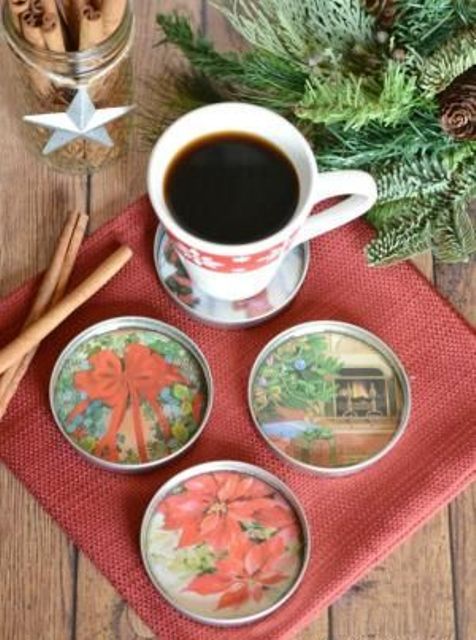
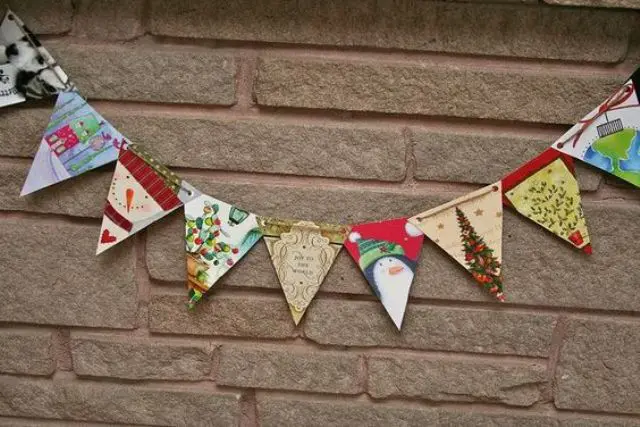
There are many more ideas to try: tabletop trees, coasters, snow globes, wreaths, banners and garlands – turn on your imagination and create something really special!
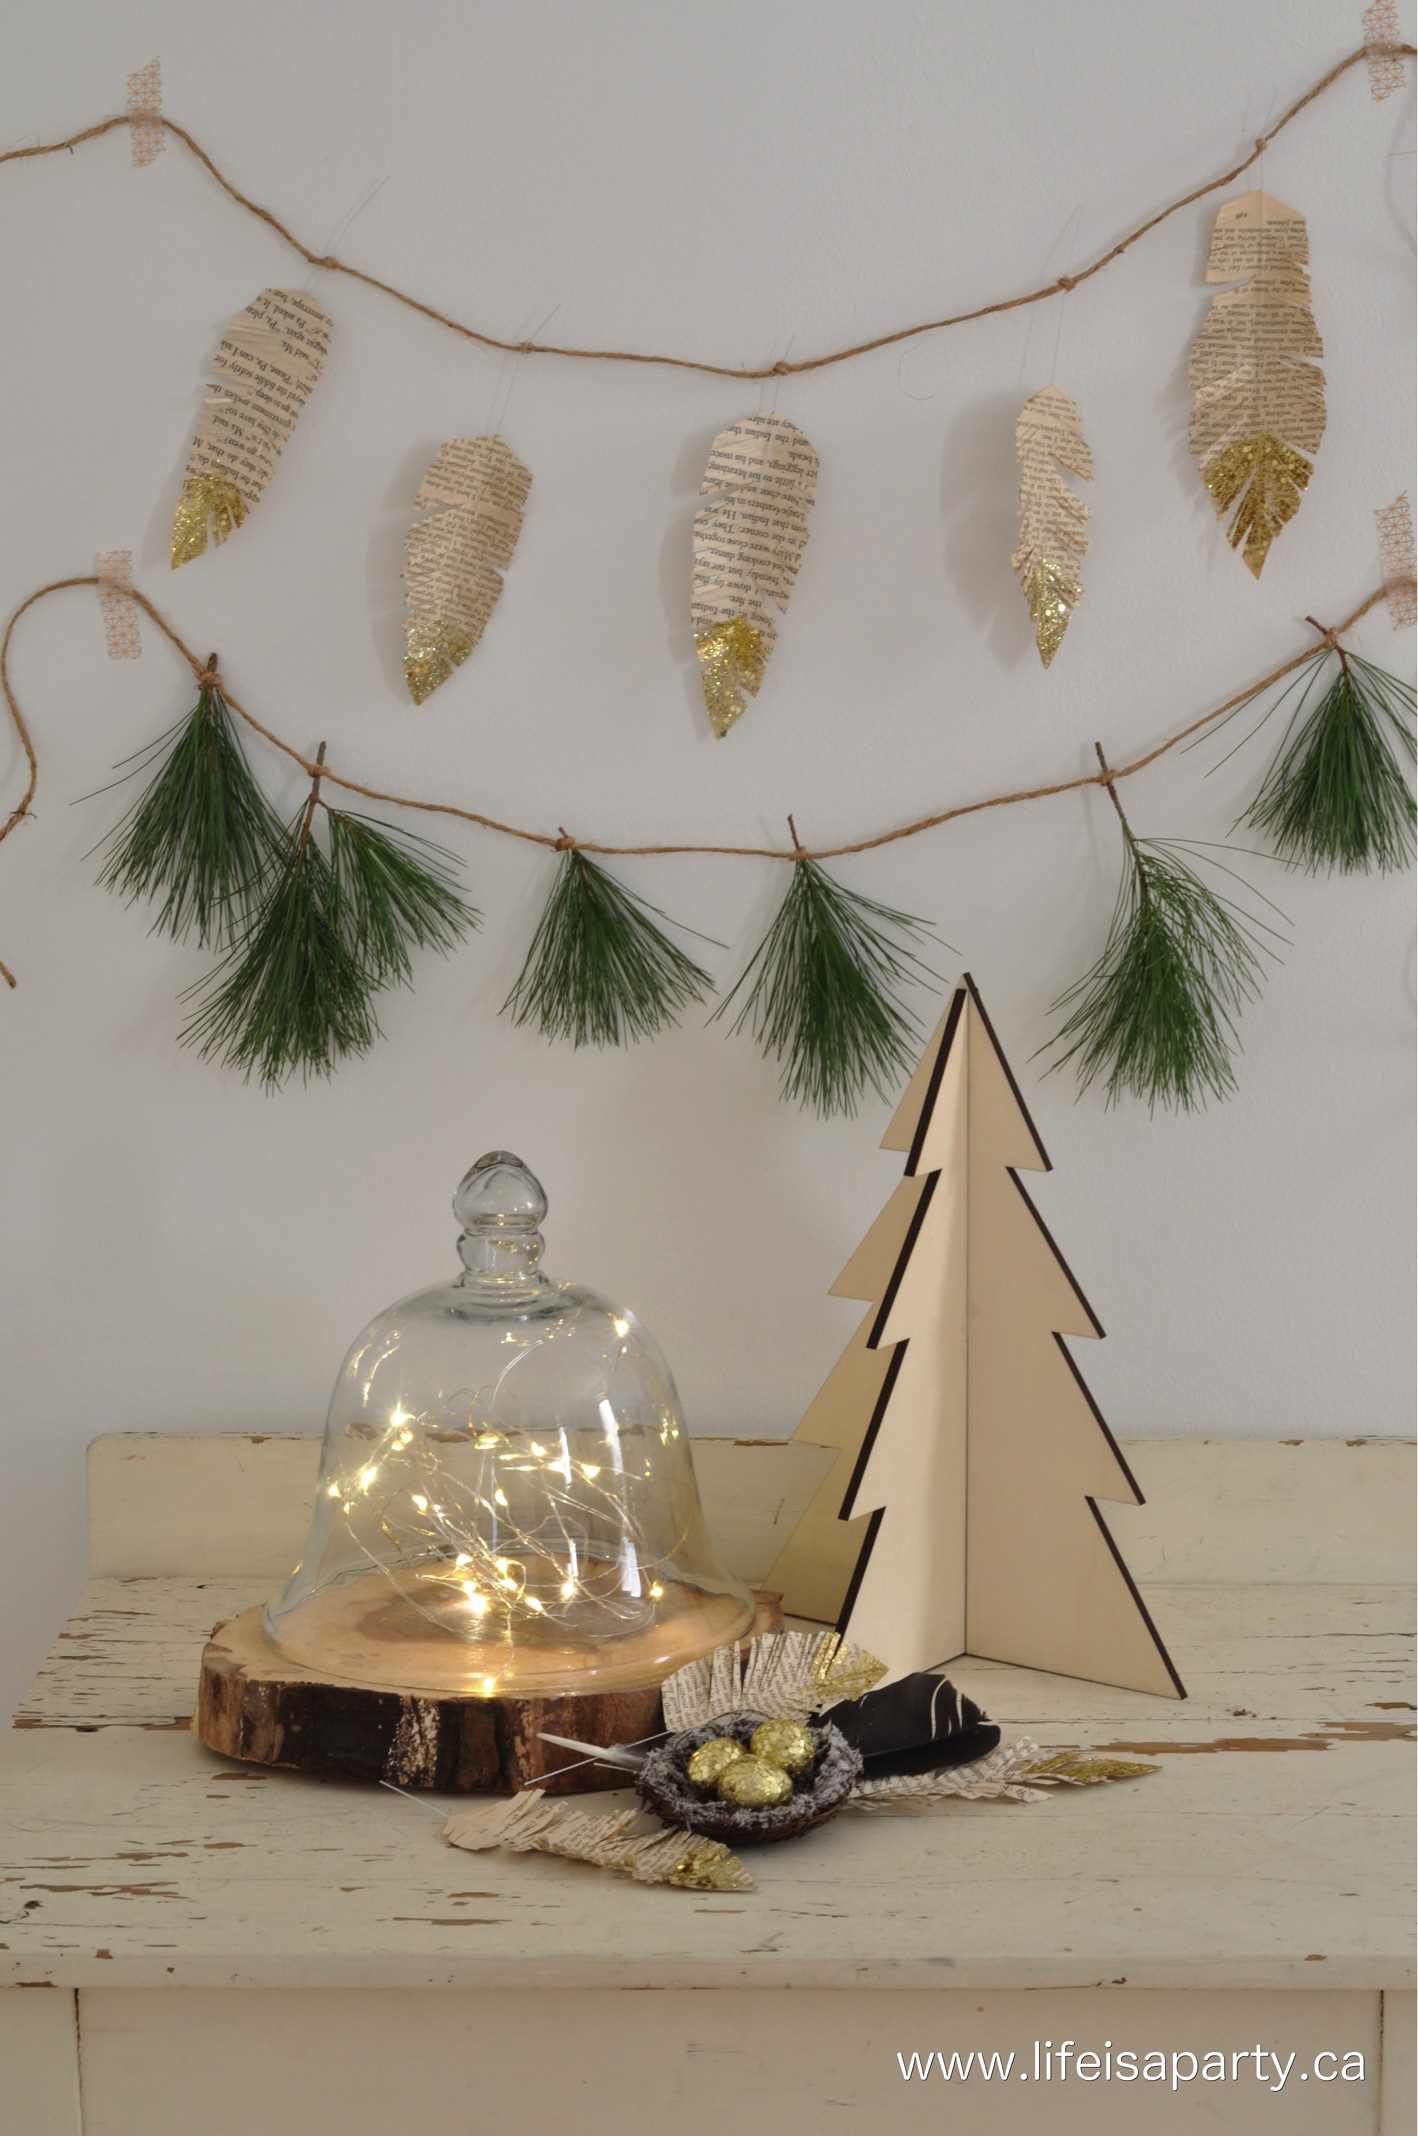
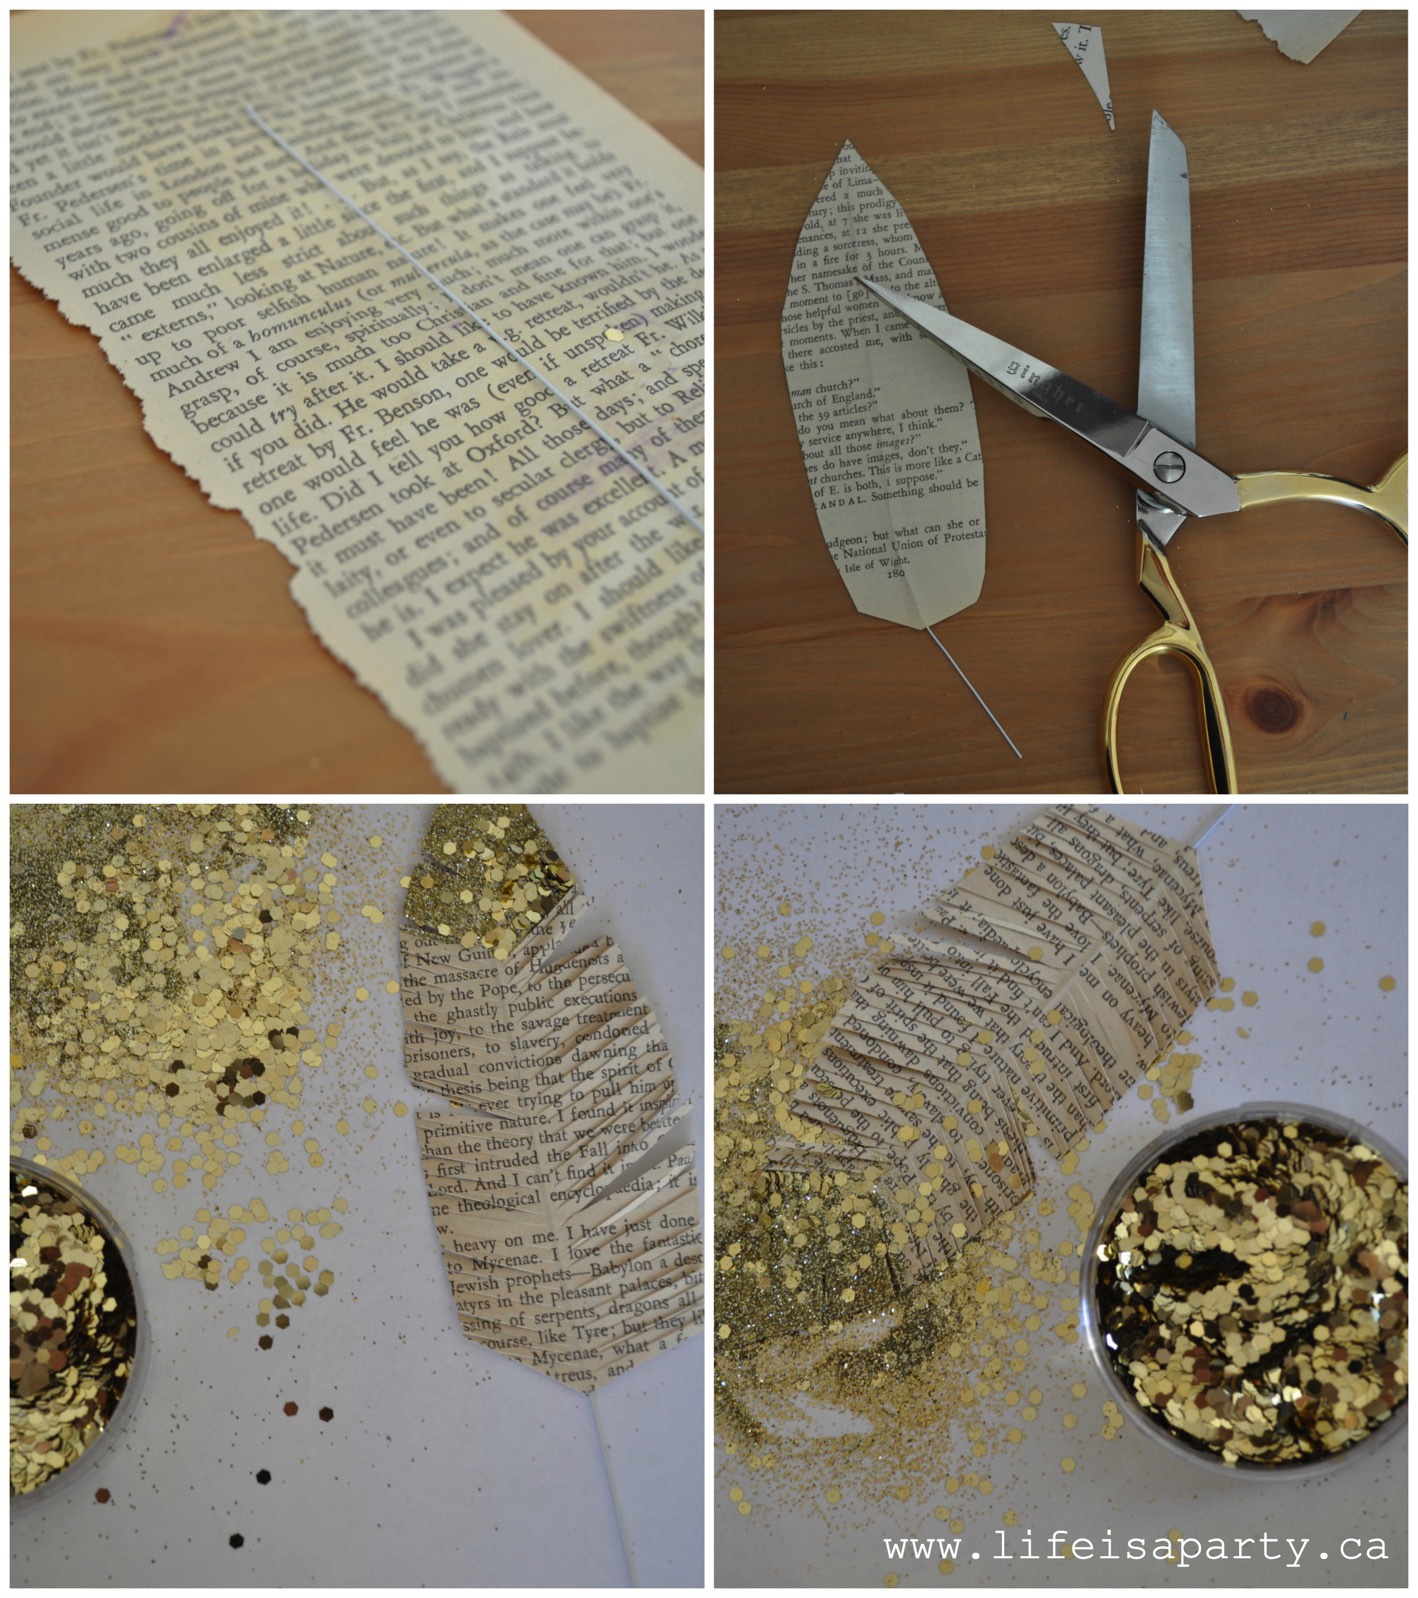
Rip a few pages out of an old book, and glue two pages together with a wire down the centre on the in-between the pages.
Cut the paper into a feather shape, with the wire as the centre of the feather.
Next, cut out a few notches in the feather, and then cut the feather like a fringe with narrow strips, and on a slight angle like a real feather. The wire ensures that you can’t cut too far, and makes this step much easier than without a wire.
Add some glitter to the tips of the feather, and after it dries ruffle up the fringe slightly to give the feather some dimension.
1. Use it as packing material. It can cushion breakable, valuable items when you’re storing them or when you’re moving.
2. Put it in under kitty litter. Since cats like depth, it can add some depth to the litter box, meaning you’ll need to use less litter.
3. Loosely stuff it into empty toilet paper rolls or cut up paper towel rolls to make kindling or fire starters.
4. Make more paper. The video below shows how easy it is if you have the right tools. (Tip: In the video they use paper towels in the process, which would get thrown away after. Try using an old cotton scarf in place of the paper towels that can be washed and reused.)
5. Stuff it in an opaque vase to keep silk flower arrangements in place.
6. Donate it to an animal shelter where they can use it for bedding or litter, but call first to make sure they need it.
7. Use as filler for gift bags.
8. Use it as a layer of mulch under fill dirt, compost or other mulch. This works best with plain white paper or newspaper. Colored paper or paper that’s glossy won’t break down as easily.
9. Make paper clay. This video below demonstrates how to make DIY shredded paper clay that can be hand molded or used in molds.
10. If you don’t want to do anything with it, offer it on Freecycle or a Facebook neighborhood swap site. There may be others who may want it for any of the above reasons.
Place the candle in the empty hurricane, then begin pouring the beans in very slowly around the candle to the desired level. Repeat layers with different beans.
The color combination possibilities are endless with so many rich fall colors to choose from! Specialty grocery stores have self-serve bins of dried lentils that you can choose from, as well. A white candle would be a beautiful contrast! The beans/corn are pretty enough to stand alone without the candle, like this “candy corn” display from last year at Halloween…
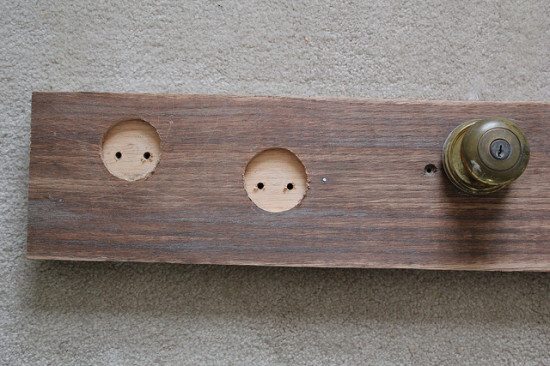
The first thing you will need to make your new key rack is a piece of wood. This is a great opportunity to repurpose bits and bobs saved from previous projects. Next you’ll need some deadbolt locks and doorknobs. If you don’t have any old ones laying about there is a great chance your local thrift shop or Habitat for Humanity Restore will.
Leave your piece of wood as is or give it a stylish stain. Then lay your locks and doorknobs out and mark where you want them to be. In order for your knobs to sit flush you will need to make a groove in the wood with a router. A router is a woodworking tool used to hollow out a piece of wood.
Once you’ve finished with your router, drill holes for attaching the door knobs and locks. At this stage your upcycled key rack will look like this:
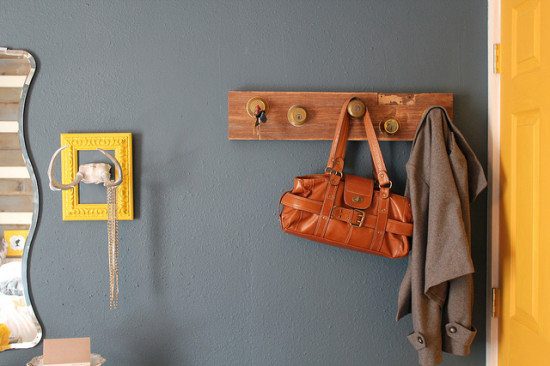
Then, simply attach the knobs/locks and you’re done. If you don’t have the original keys from the locks then just get blank keys to add to your key ring. You can now hang up your finished doorknob key rack and give your keys a place of their own.
Make ghost jugs by drawing ghost eyes and mouths on milk jugs. Cut a hole in the back of the jug to insert the lights. Share one string of lights by placing a few jugs close together.
Source: Disney Family Fun
Haunted Spirits
To make haunted spirits put a shirt on a dressing stand (or chair) and spray with fabric stiffener. Once it dries the shirts will be stiff and easy to stuff with lights. Hang your spirits from trees with hangers.
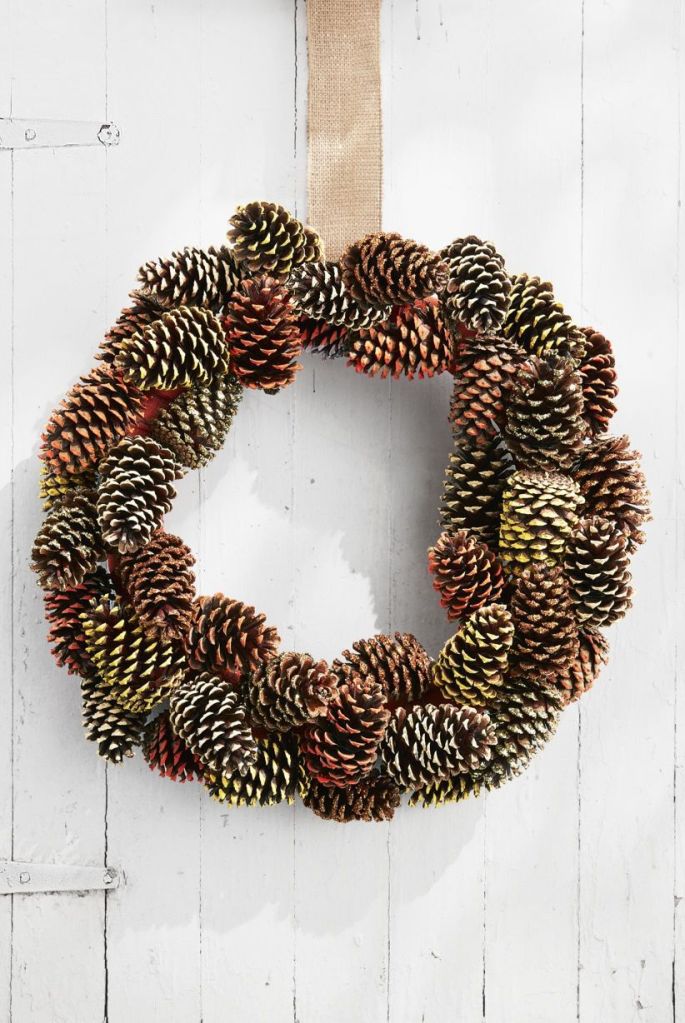
Pine cones are the most inexpensive crafting material out there, and make beautiful additions to fall wreaths. You can pick up a few right in your own backyard!
Make the Wreath: Wrap a 16-inch wreath form with burlap ribbon and loop a piece around the wreath form for hanging. Paint the tip of 40 pine cones in fall colors such as orange, yellow, and beige with acrylic paint. Brush the tips of 10 pine cones with matte Mod Podge and sprinkle with gold and copper glitter. once dry, wrap an 18-inch length of floral wire around the base of each pine cone and twist tie around the wreath form to secure, layering and overlapping them as you go.