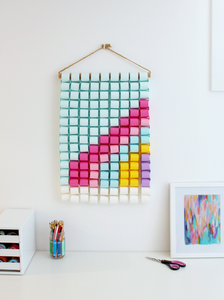
It’s a safe bet you’ve never seen a monogram wall decal quite like this before. Pick your letter—be it your first or last initial—then cut out the shape from a piece of thick cardboard. Next, hot-glue a colorful arrangement of spools to the surface and you’re officially well-stocked with a stunning new summer DIY.
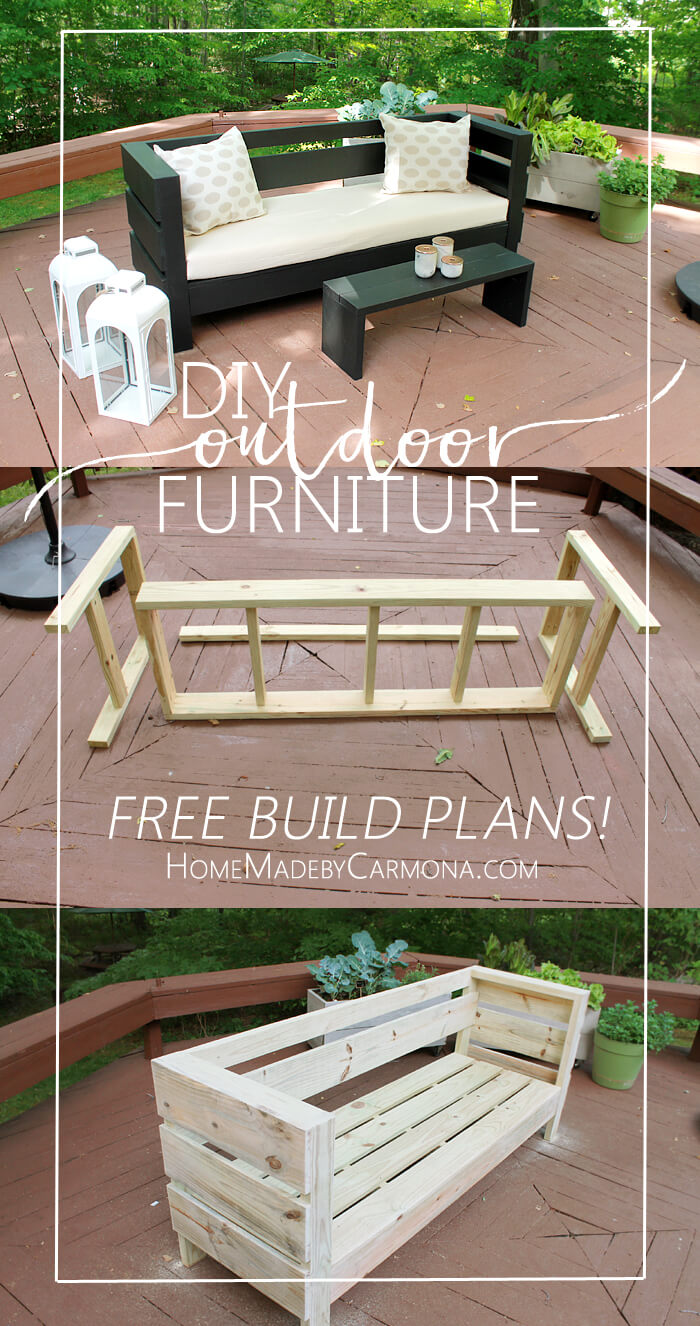
Select treated lumber so your sofa bench can stay in the outdoors year round. Pre-cut all your boards, or have them cut for you at the hardware store to save time. It is important to consider whether you have a saw that can handle 2″x 6″ and 2″ x 8″ boards…if not you will want to have them cut at the hardware store. The armrest and backrest is built solely from 2″x4″ wood, while the seat is framed out with 2″x6″ wood but I will reference the actual rather than nominal sizes moving forward.Save
2
Build Seat Frame
After making all your initial cuts, start by framing out your seat base. Using a Kreg Jig place pocket holes in either side of two 1 1/2″ x 6″ x 22.5″ seat frame pieces, and attach to inside of the 1 1/2″ x 6″ x 72″ seat frame pieces. Use a little wood glue when attaching all pieces moving forward, and a carpenter square to ensure all joining pieces are square.Save
3
Complete The Frame
Add pocket holes on either side of three of your 1 1/2″ x 4″ x 22.5″ boards. Attach them within the frame, spaced evenly apart. Attach each one flush with the top of the frame. This is your seat base where the slats will lay across later.Save
4
Assemble Armrest Frame
Place pocket holes at both ends of four 1 1/2″ x 4″ x 22.5″ boards. Screw one 22.5″ armrest boards between the two 1 1/2″ x 4″ x 32″ armrest boards, flush to the top. Mark 12″ from the bottom of either arm/leg piece, then attach the second 22.5″ board flipped on it’s side, with the top at that 12″ mark. Follow these steps again to create the second armrest.Save
5
Prepare To Assemble
Put pocket holes in either end of the 1 1/2″ x 4″ x 72″ backrest board. Then position the seat frame, armrest frames, and backrest to prepare for assembly. Place pieces so the sofa is oriented on it’s side for easier assembly.Save
6
Attach Armrest To Seat Frame
Attach the armrests to the seat frame while on it’s side. Screw directly through the armrest frame into the seat frame, and do the same from the seat frame side into the armrest. Stagger where you place your screws. Set your seat upright.Save
7
Attach Backrest
Once upright, attach the 72″ backrest piece (pocket holes facing back) flush between the two armrests.Save
8
Add Seat Slats
Evenly space the four 3/4″ x 6″ x 72″ wooden seat slats atop your seat frame, and nail down to the seating frame.Save
9
Optionally Add Decorative Slats
Optionally nail evenly spaced 3/4″ x 8″ x 25.5″ decorative slats to the outside armrest, and the single 3/4″ x 8″ x 79″ slat across the inside back. These are not necessary for support, but give a modern appeal to the bench. Sand the entire bench well, and stain!
Card stock in sky blue, two shades of pink, medium blue, yellow, purple, and white
Paper trimmer
Hot glue gun
17″ x 1″ dia. cardboard cylinder from a roll of wrapping paper
Thick jute rope
Scissors
DIRECTIONS:
First, start by trimming all 264 pieces into 1 1/2″ x 5 1/2″ strips. Broken down by colour, it goes:
1. Sky blue: 129
2. Hot pink: 30
3. Light pink: 24
4. Medium blue: 21
5. Yellow: 17
6. Purple: 7
7. White: 36
Here’s where I made my first mistake: I MEANT to have the yellow and medium blue papers reversed in the sequence to follow a rainbow pattern more closely. If you wish to go that way, you’ll need to switch the quantities around.
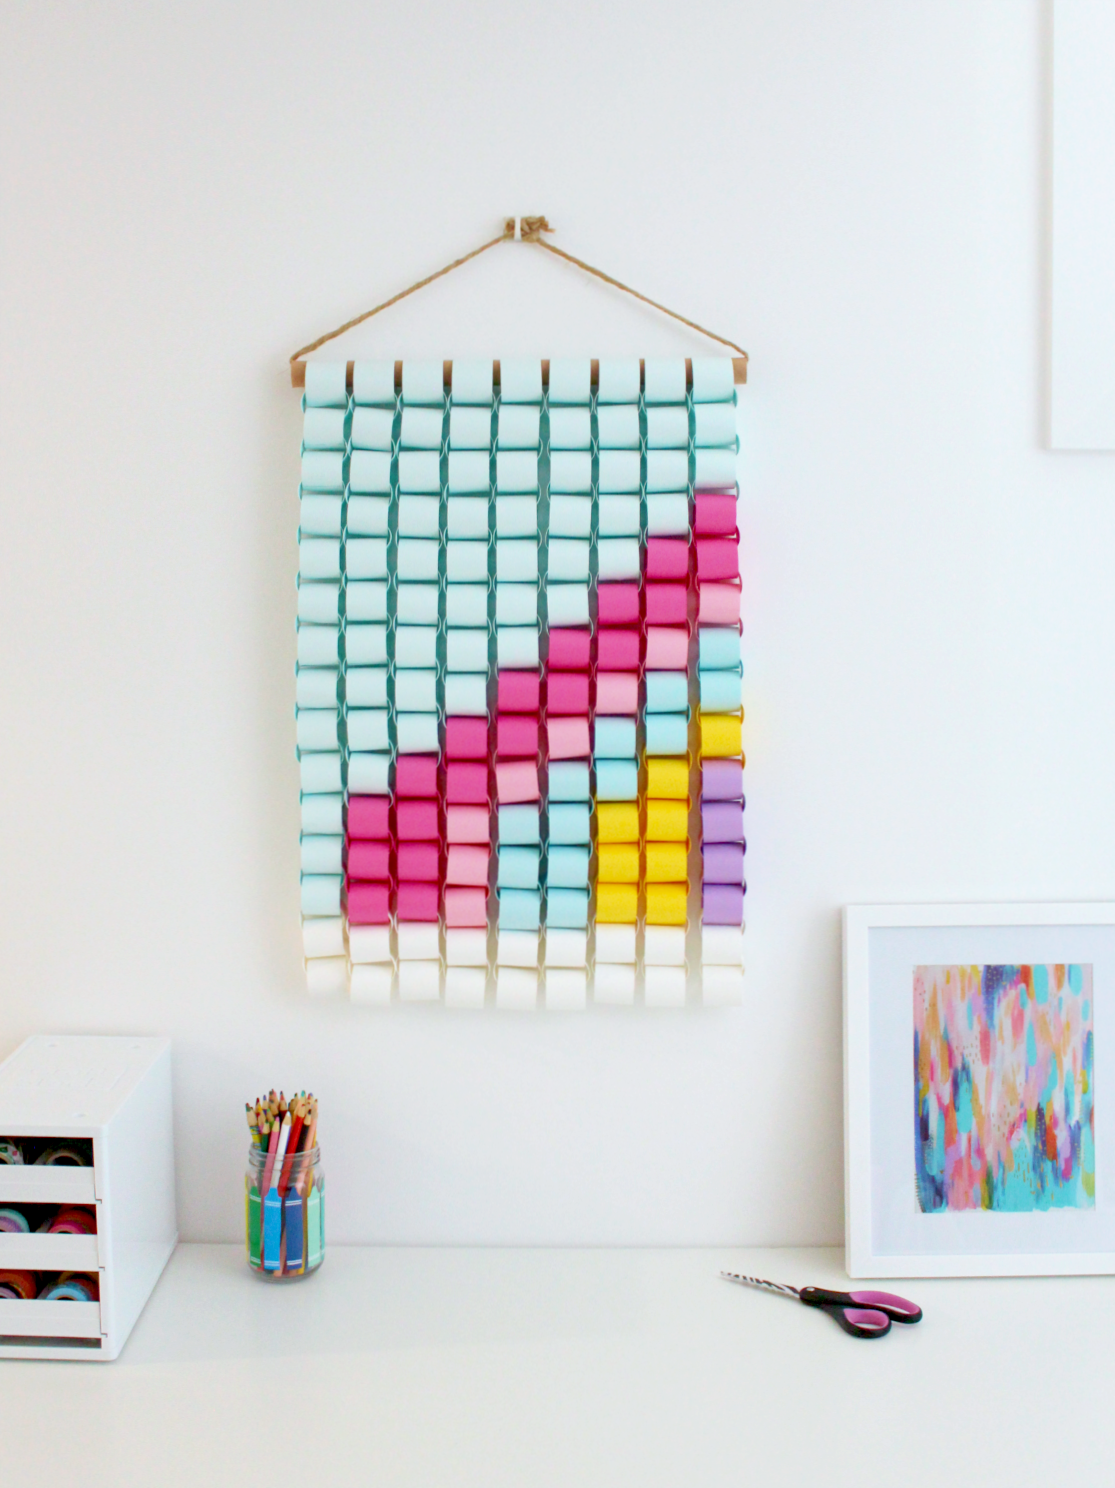
Plug in the glue gun, and follow the patterning as you see it below to make your wall hanging. There are 29 rows and 9 columns. Use the hot glue gun to adhere the strips together. You just need a little bit of glue along the edge. Also, if you’re using a dual temperature glue gun, make sure it’s on a low temperature setting. I made my rainbow from right to left as I was figuring out the pattern, but you don’t have to!
1 1 1 1 1 1 1 1 1
1 1 1 1 1 1 1 1 1
1 1 1 1 1 1 1 1 1
1 1 1 1 1 1 1 1 1
1 1 1 1 1 1 1 1 1
1 1 1 1 1 1 1 1 1
1 1 1 1 1 1 1 1 2
1 1 1 1 1 1 1 1 2
1 1 1 1 1 1 1 2 2
1 1 1 1 1 1 1 2 3
1 1 1 1 1 1 2 2 3
1 1 1 1 1 1 2 3 3
1 1 1 1 1 2 2 3 4
1 1 1 1 1 2 3 3 4
1 1 1 1 2 3 3 4 4
1 1 1 1 2 3 3 4 5
1 1 1 2 2 3 4 4 5
1 1 1 2 3 3 4 5 5
1 1 2 2 3 4 4 5 6
1 1 2 3 3 4 5 5 6
1 2 2 3 4 4 5 5 6
1 2 2 3 4 4 5 5 6
1 2 2 3 4 4 5 5 6
1 2 2 3 4 4 5 5 6
1 2 2 3 4 4 5 5 6
7 7 7 7 7 7 7 7 7
7 7 7 7 7 7 7 7 7
7 7 7 7 7 7 7 7 7
7 7 7 7 7 7 7 7 7
My original idea was to have the wall hanging stop at row 19, and if you can imagine that the pattern I started with would have made more sense. BUT, I didn’t like how short it looked, so I kept on adding paper of the same colour down the columns, and then finished it with four rows of white paper to make up the “clouds”.
Once all nine chains are assembled, slide the top ends thru the cardboard cylinder of an old or nearly finished wrapping paper roll. Note: the measurements in this post are to specifically fit a roll that is 17″ long and 1″ in diameter. Anything shorter or thicker will pose a problem.
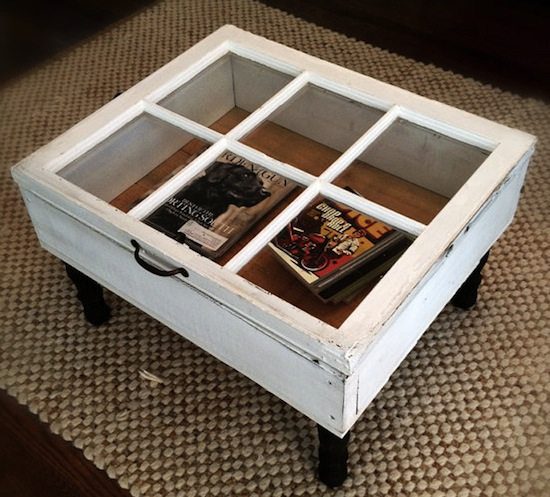
It should come as no surprise that with our passion for old items and repurposed treasures, we are also mad about collectables. Vintage trays, antique keys, He-man and the Masters of the Universe collection, if it’s from an era bygone we are into it. But with this kind of hobby comes a need for display cabinets, and the best kinds of display cabinets are multi-functional. Enter the window coffee table. This clever unit combines our love for collecting with our passion for upcycling, turning an old window into a display coffee table. Brilliant.
When you take a good look at this window coffee table you will see that the construction is actually quite simple. It is comprised of a salvaged window placed on top of a wooden frame with some unfinished wood as the backing. Add some table legs and you’ve got a complete window coffee table. It’s so simple and so gorgeous that we’ll bet you’re gonna start looking at old windows a bit differently. Here’s how to make your own.
How to make a window coffee table
To make your own window coffee table first measure your window. Now decide if you’d like your table to have a lip with the top of the table hanging slightly over the bottom. If so subtract an inch from the length and width from the measurement and build your window base to this specification. Otherwise cut your 2x4s to the exact measurements. These 2x4s will become the box that the window rests on. Cut a sheet of plywood to the same size as the 2×4 base. Screw the 2x4s together, attach the sheet of plywood to the bottom and flip this box over. With the plywood sheet on top, pre-drill holes in each corner and screw in the wooden coffee legs. For this project you can use salvaged coffee table legs or even buy ready made ones.
Now flip the table back onto it’s legs and attach the hinges to the window frame and top of the 2×4 frame.
Next prepare the window coffee table for paint by sanding down the window frame and wooden box. Prime the wood and let it dry. Next prep your window for paint by lining the window panes with tape to avoid getting paint on the glass. Choose your paint treatment and decide how much of a vintage look you’d like your coffee table to have. From crackle paint to high gloss it’s up to you.
Paint and then allow time for your window coffee table to dry. Complete the project by adding a handle to the window pane top. Place your collectibles inside and admire your handiwork. Ready for more upcycling ideas?


