There’s nothing better than growing your own strawberries! If you’ve ever wondered how to care for strawberry bushes to get a healthy, strawberry patch, here are a few simple but efficient tips for strawberry plant care!
HOW TO CARE FOR STRAWBERRIES
Have you ever thought about growing you own supply of juicy, healthy strawberries? It’s so much fun and oh, so easy if you know the basics! Read along and I’ll give you some simple and easy tips for strawberry plant care so you enjoy your delicious strawberries all summer long!
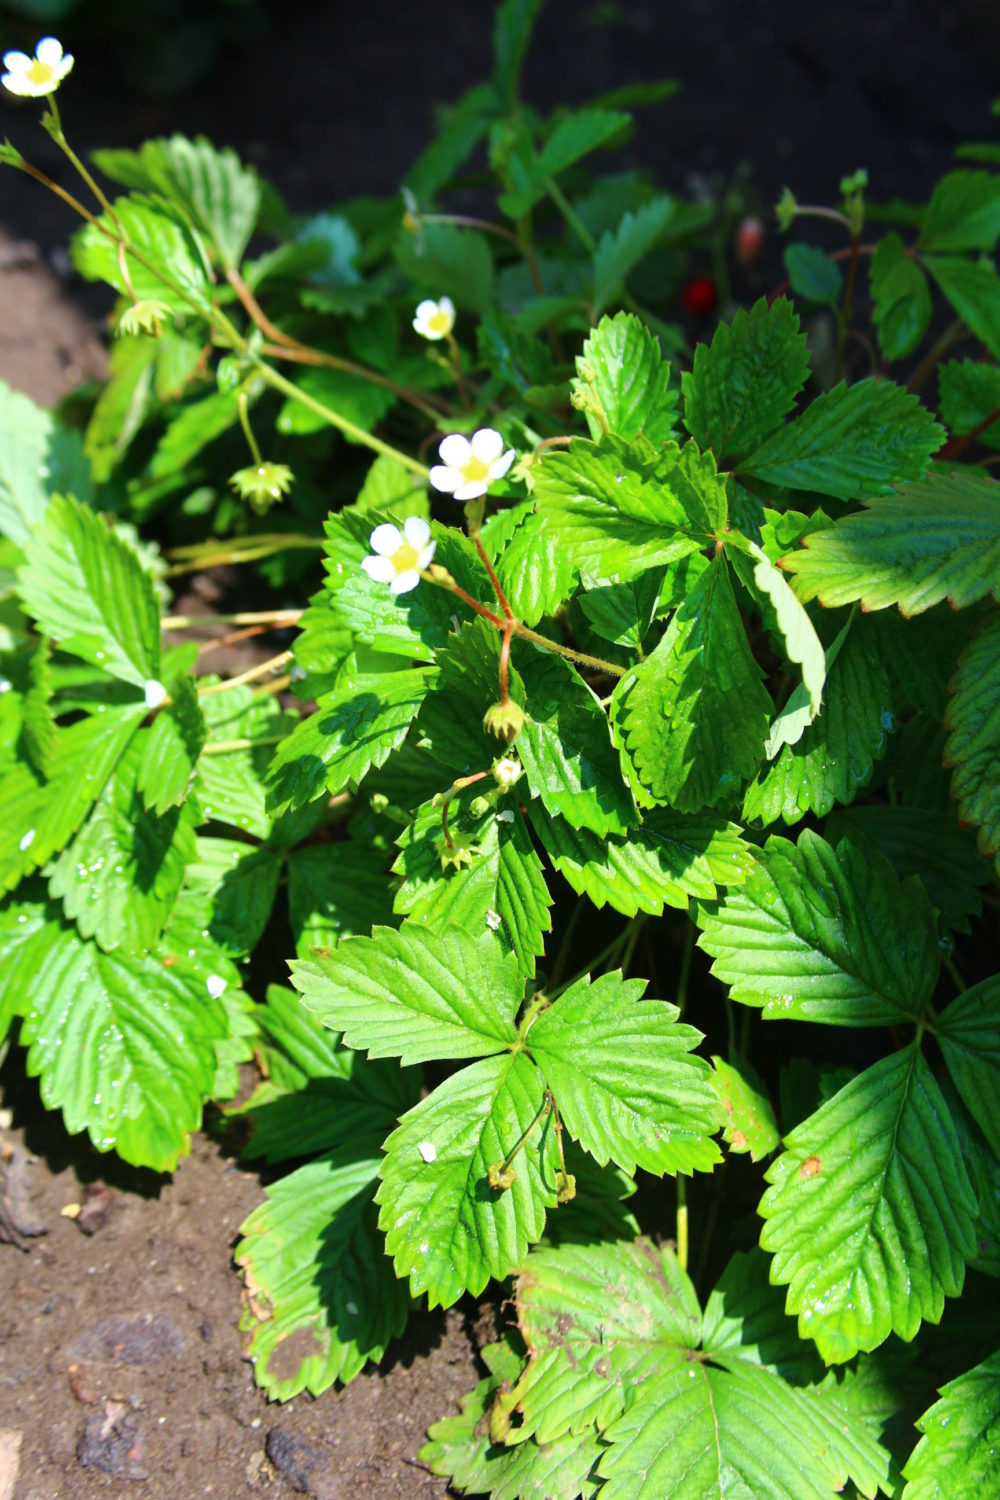
Before growing strawberry plants you need to know there are three types of strawberries: spring bearing which produces fruit in spring, June bearing which will give fruit in early summer and everbearing, providing fruit all summer long. I chose the spring and everbearing ones so I could enjoy my strawberries from spring to end of summer.
When planning for strawberry care, bear in mind the spring and June plants will grow daughters also known as runners (which will form new plants and will expand rapidly). So when making your strategy for strawberry plant care, make sure you leave plenty of room between plants, for the daughters to roam around freely. Allow about 20-30″ between plants on each row and about 3 feet between rows. On the other hand, the ever bearing plants won’t grow daughters so you won’t need that much space for these. They’ll grow bigger strawberries though so don’t plant too close either, strawberries need light and sun to grow healthy and strong.close
Volume 0%
STRAWBERRY PLANT CARE
Strawberries need at least 6 hours of sun every day so before planting them, make sure the spot you choose gets plenty of full sun.
They’ll also need good drainage so you may need to add some sand to your soil if it’s too heavy in clay or even plant strawberries in a raised bed.
Plant strawberries very early in spring, as soon as the ground is workable. I planted mine first week of March.
Plant when the sun is not too strong, preferably in the morning, late morning on cooler days.
Leave enough room for plants to grow and for daughters/runners to spread.
Dig a small hole that barely fits the root, about 2/3. Lightly cover roots with dirt.
Apply some organic fertilizer right after planting and water plants to give them a jump start.
During hot summer days, water 3 times a week, preferably early in the morning and apply organic fertilizer every 2 weeks. Spreading some mulch around the roots will help retain moisture.
Pinch blossoms and runners in the first year to encourage the plant to grow stronger and supply more fruit.
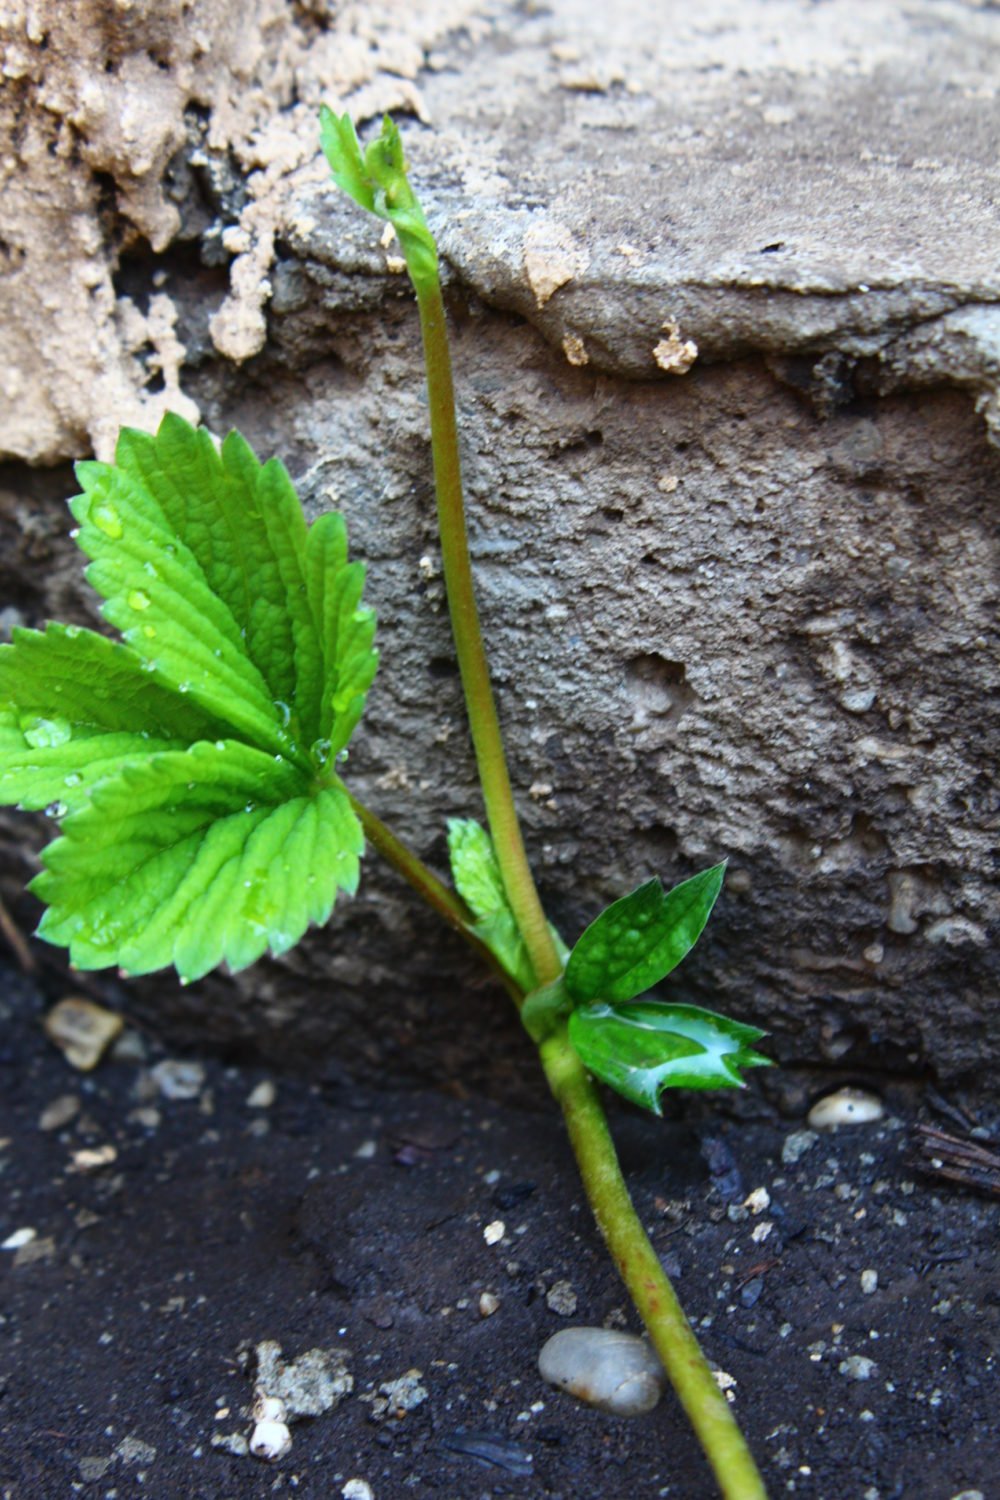
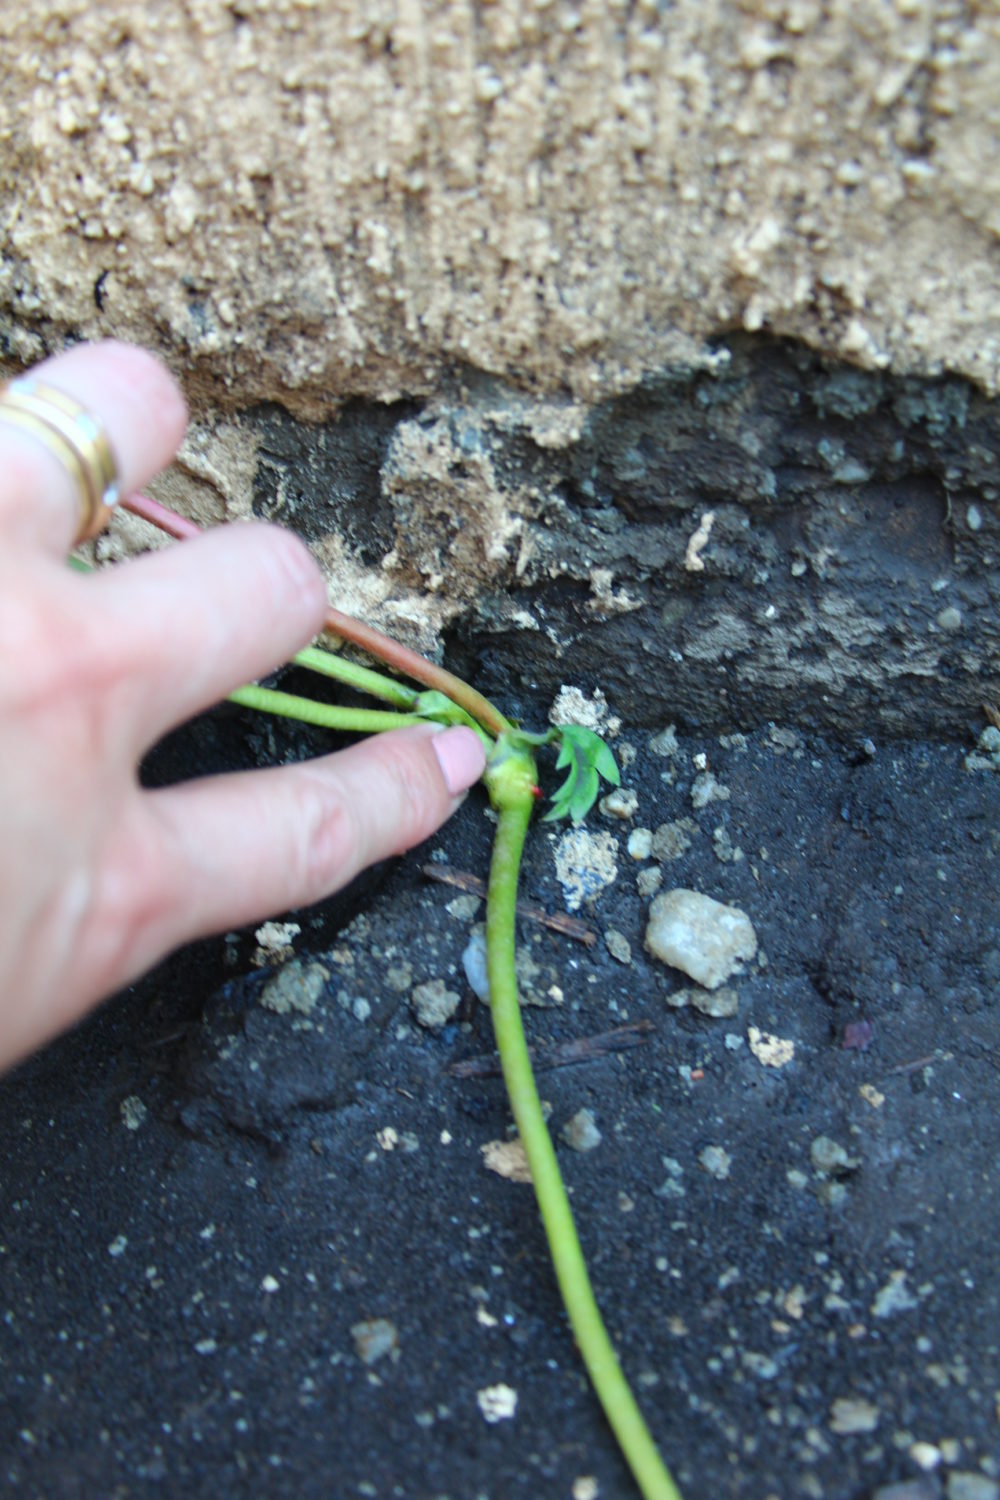
When the runners (daughters) start growing, pinch them out and plant on other spots if you want to expand your strawberry patch but would like to keep it tidy.
If you don’t want the runners to spread, cover the soil around and between plants in foil, then spread mulch. This will also help control weeds.
Pick weeds regularly, preferably when the soil is moist.
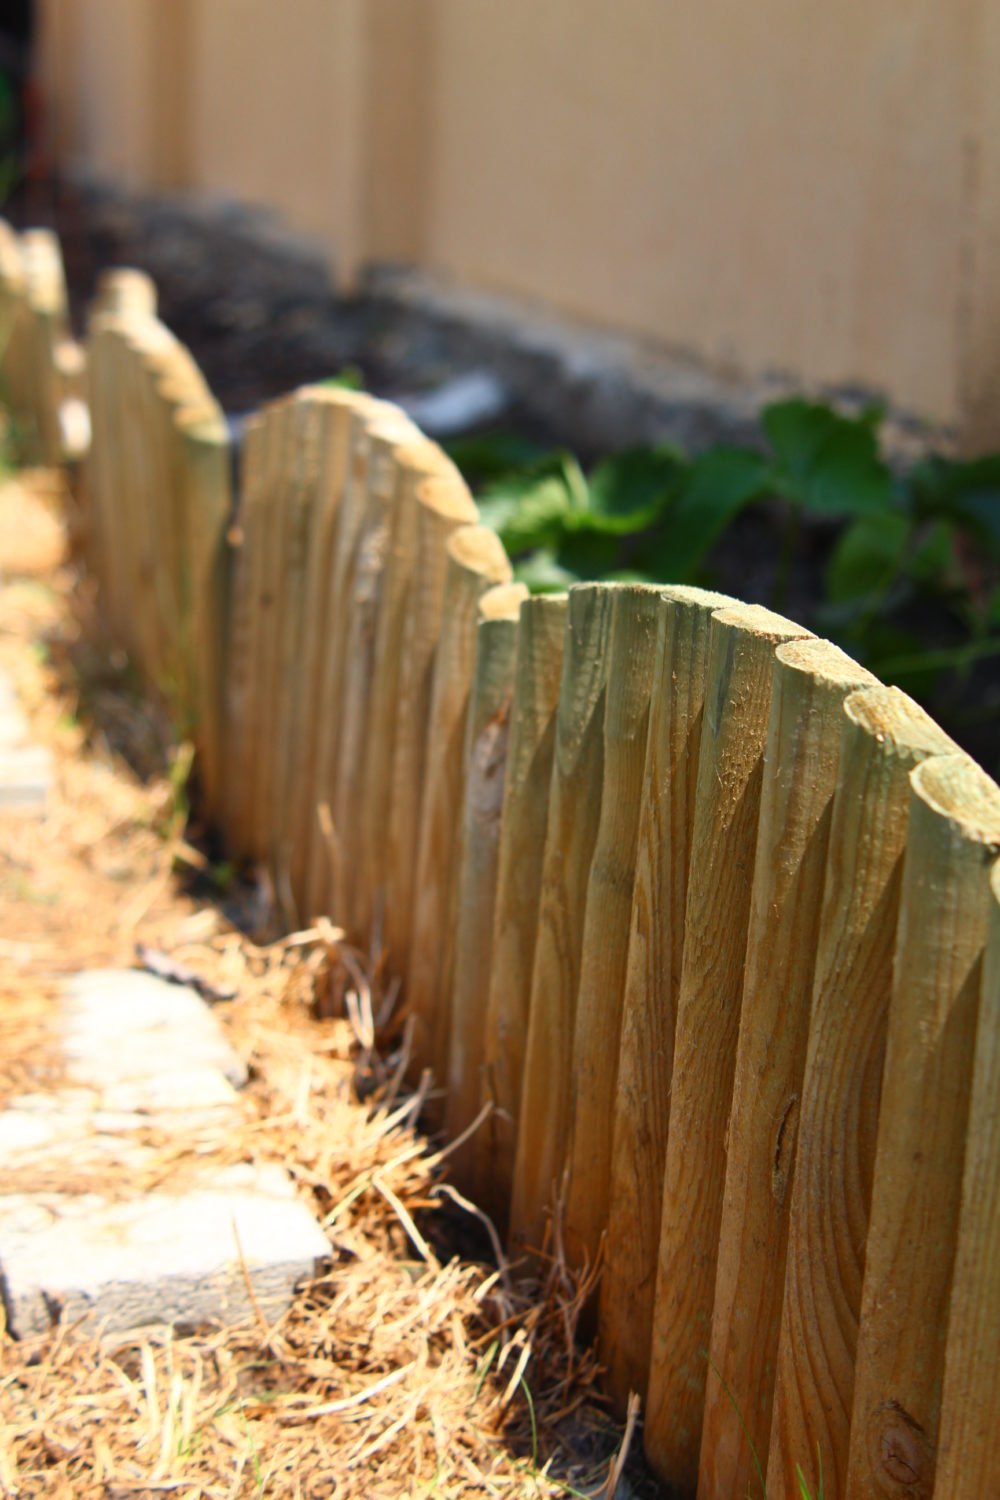
Surround your patch with a fence if your bushes produce daughters; left alone, strawberries tend to spread rapidly and are hard to control once they took over other parts of the garden.
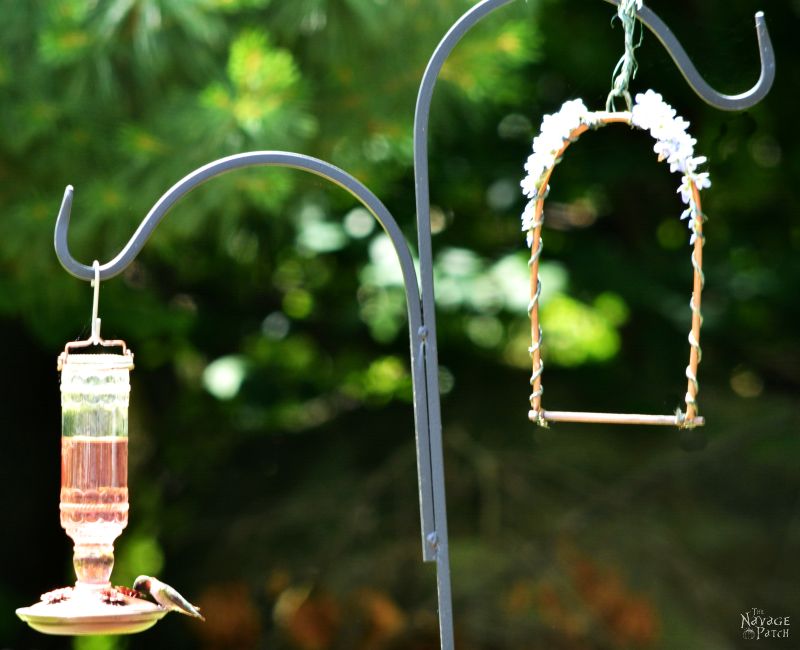
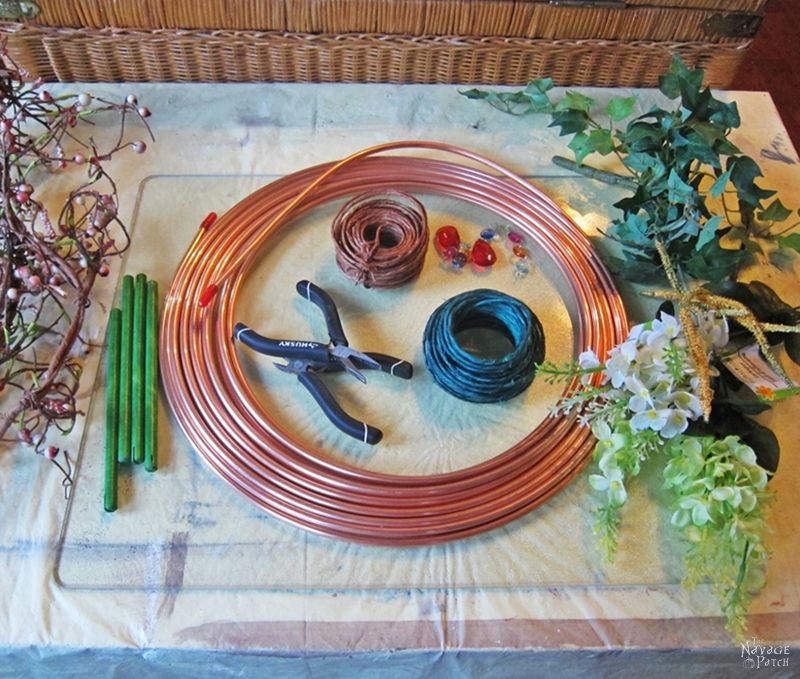
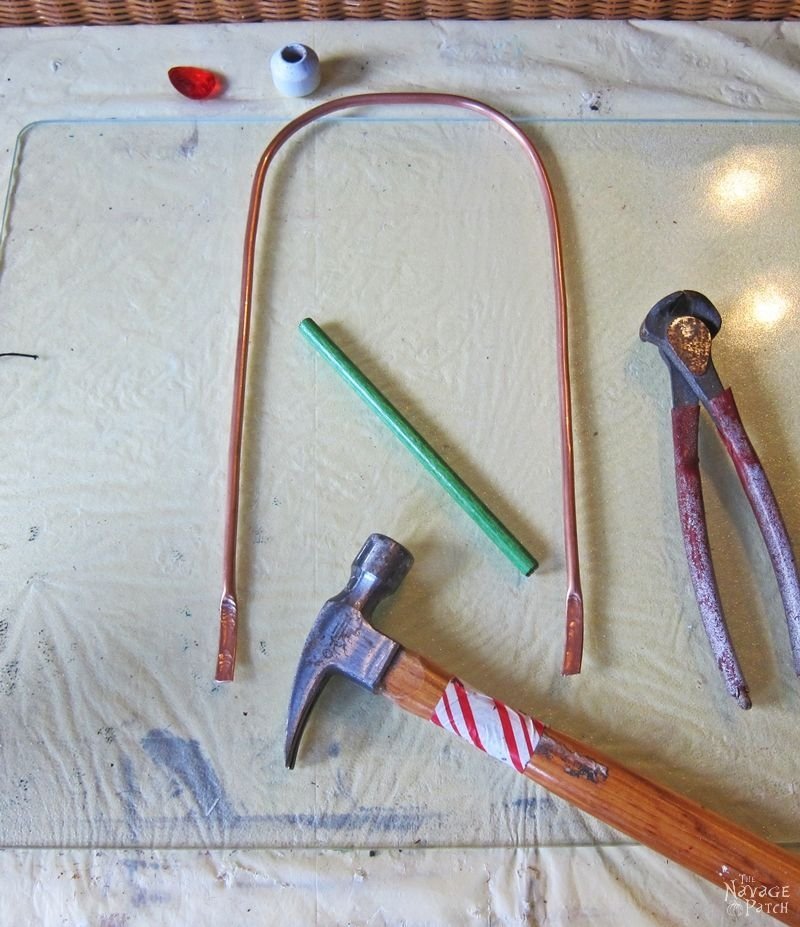
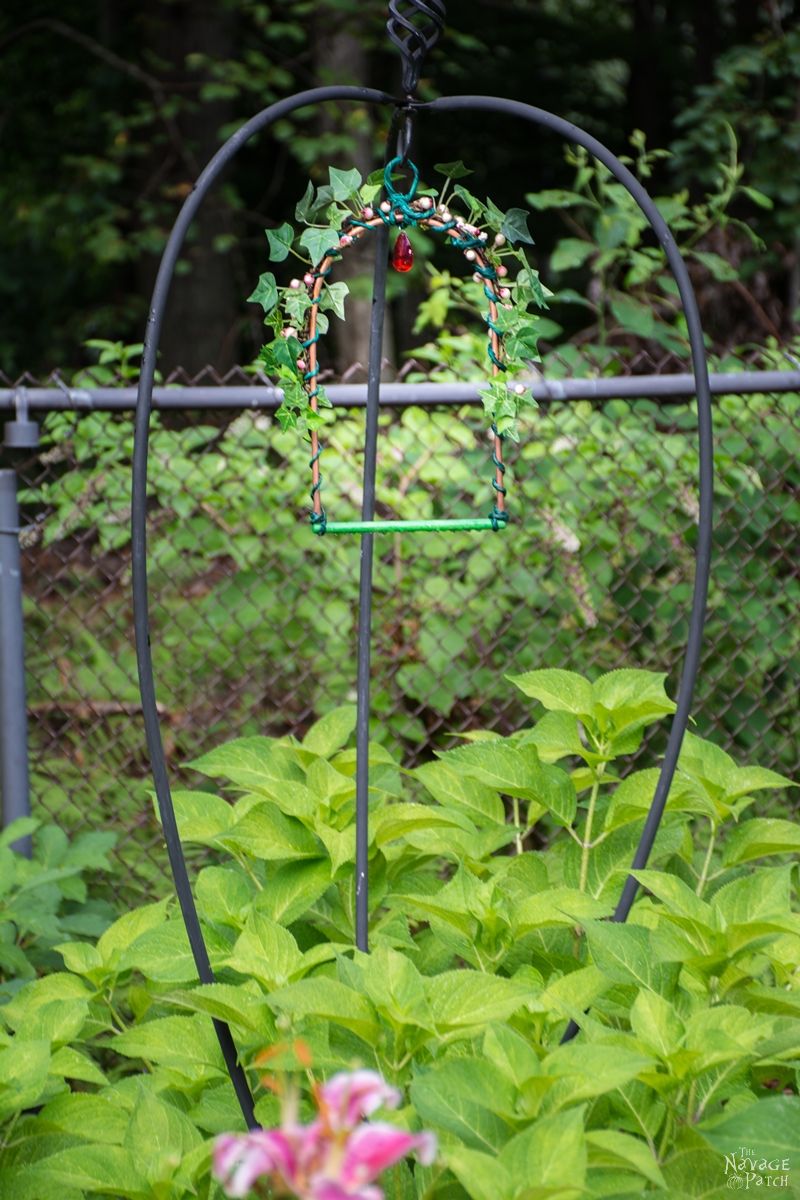
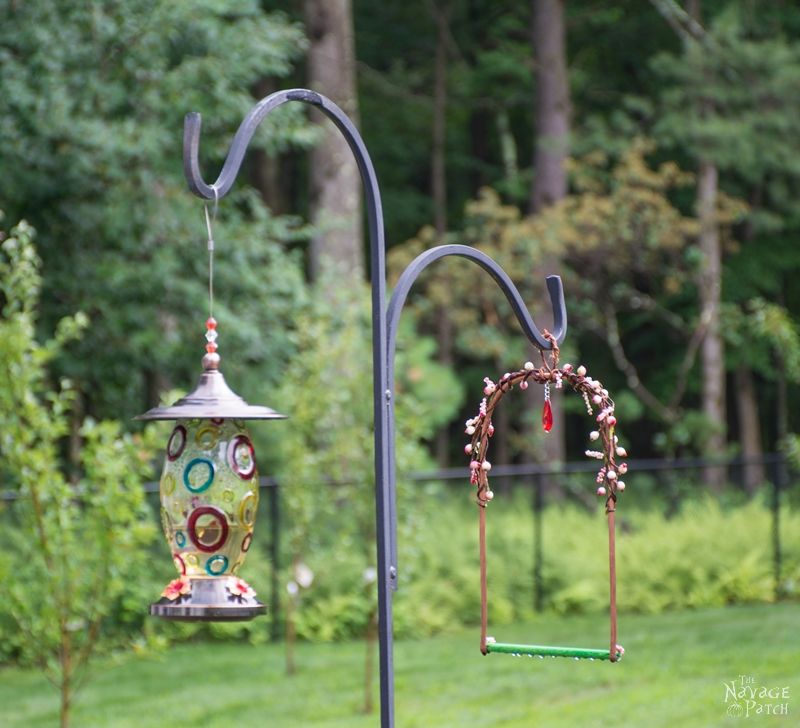
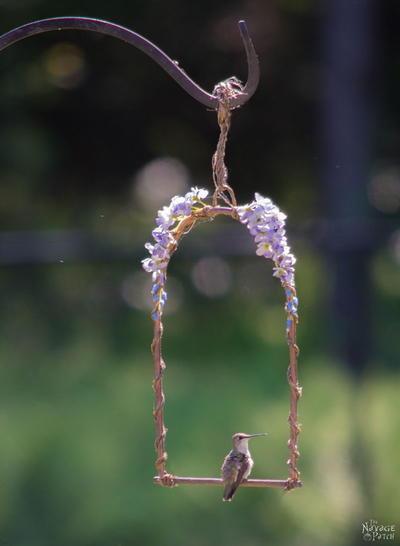
To make a hummingbird perch, all I used was a short dowel (which I found among our son’s old toys), some floral wire, copper pipe (thick and sturdy wire could substitute) and some old faux flowers. I also used a red prism/faux gem, because the red color attracts hummingbirds.
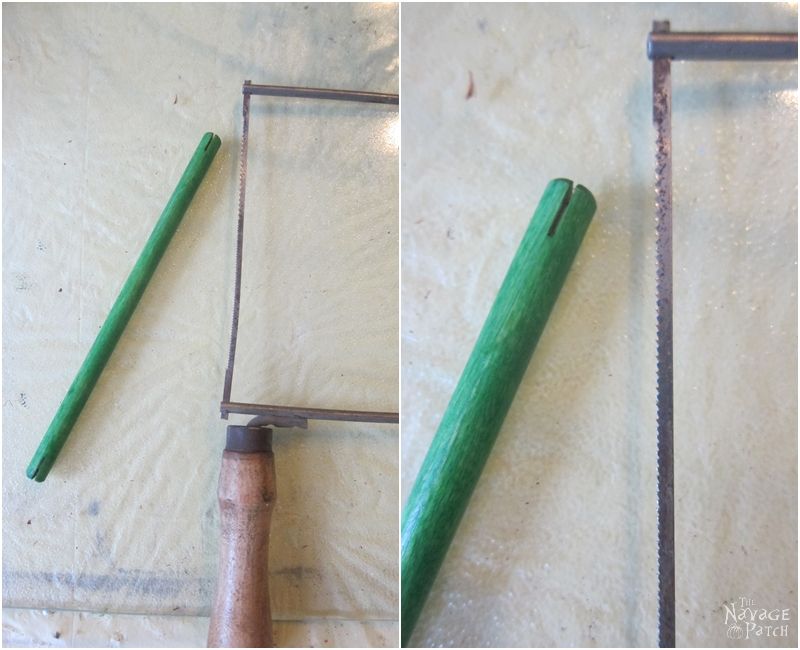
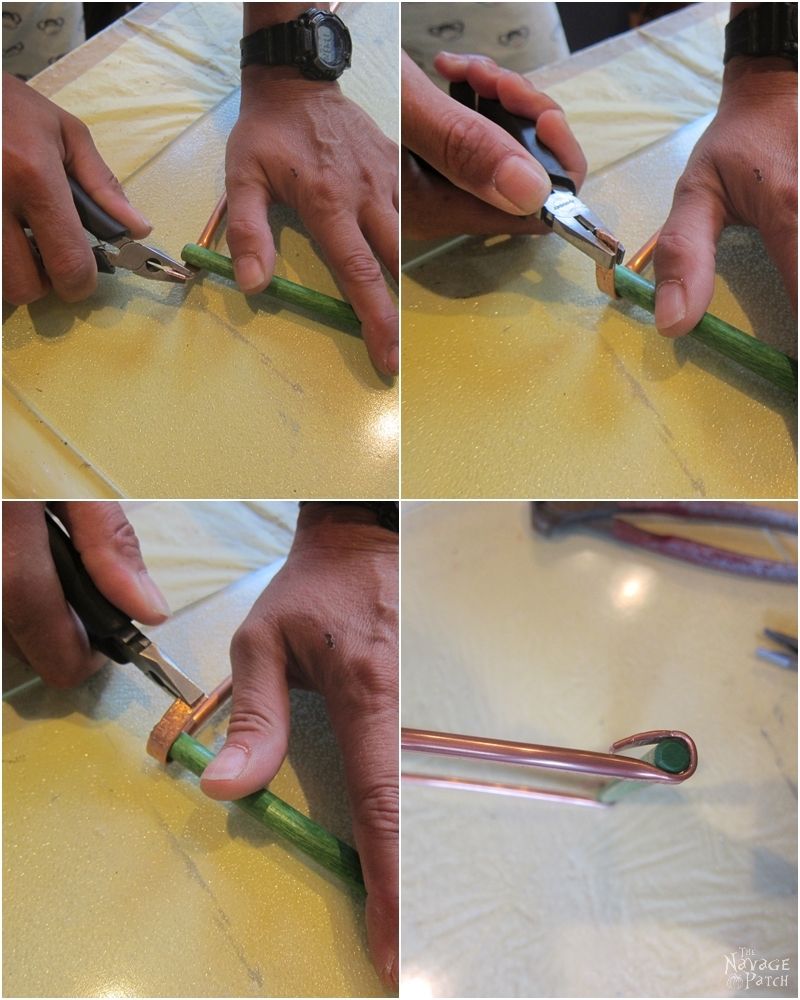
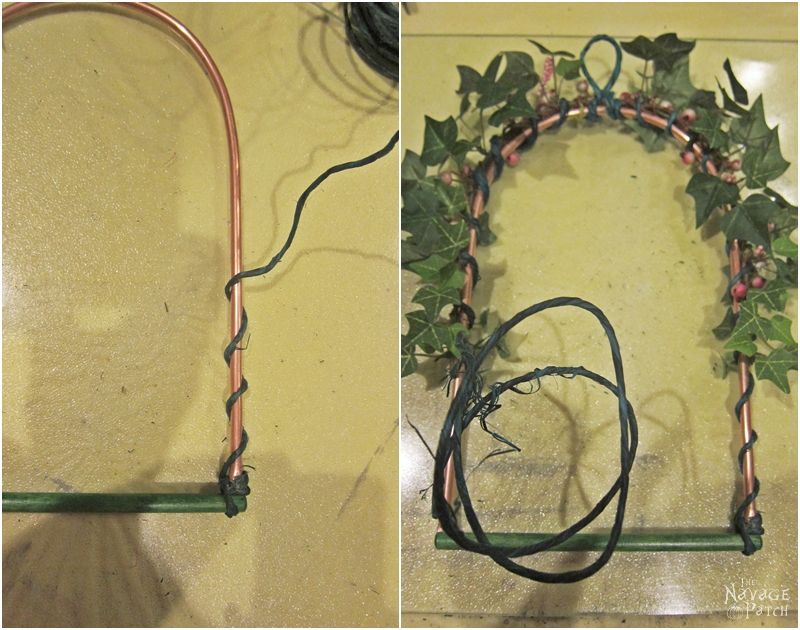
First, I prepared my dowel pieces. I cut the dowels into 7 inch lengths, then I cut a notch at the both ends of the dowel.
Now, you might be thinking cutting a notch like that is not easy. I am not going to argue with that, but instead I will give you a workaround. Therefore, if you don’t want to bother with the notches, then just have your 7 inch dowel and move on to the next step.
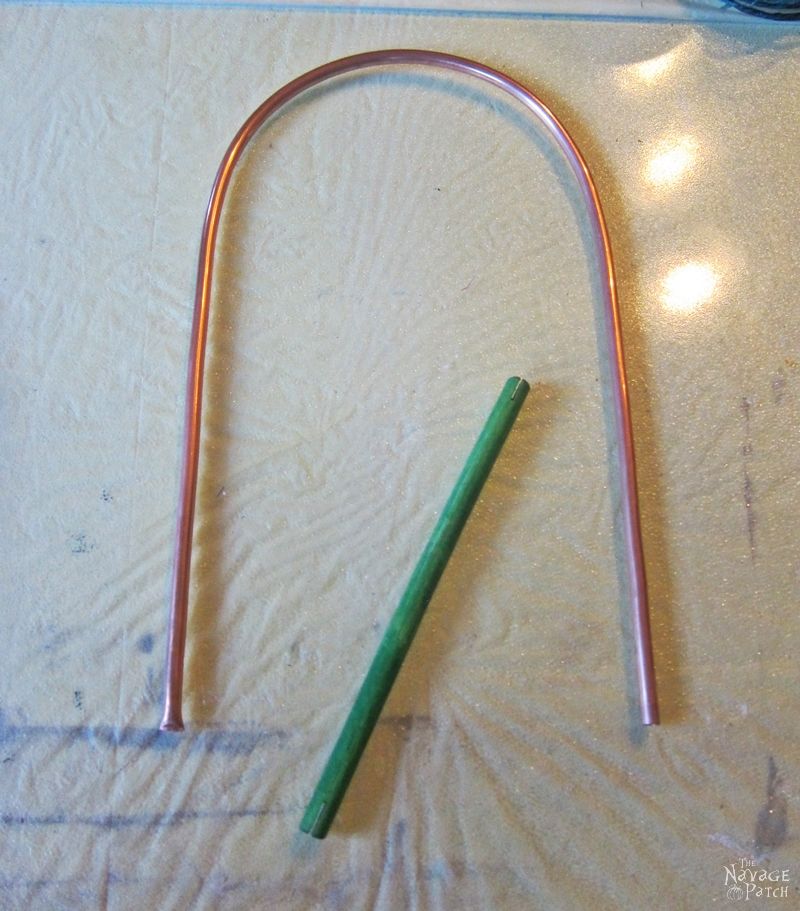
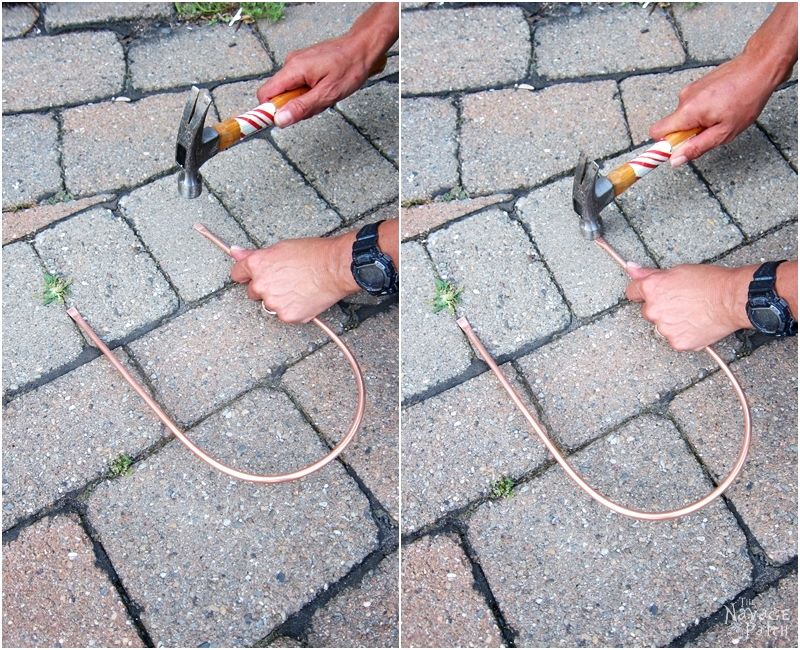
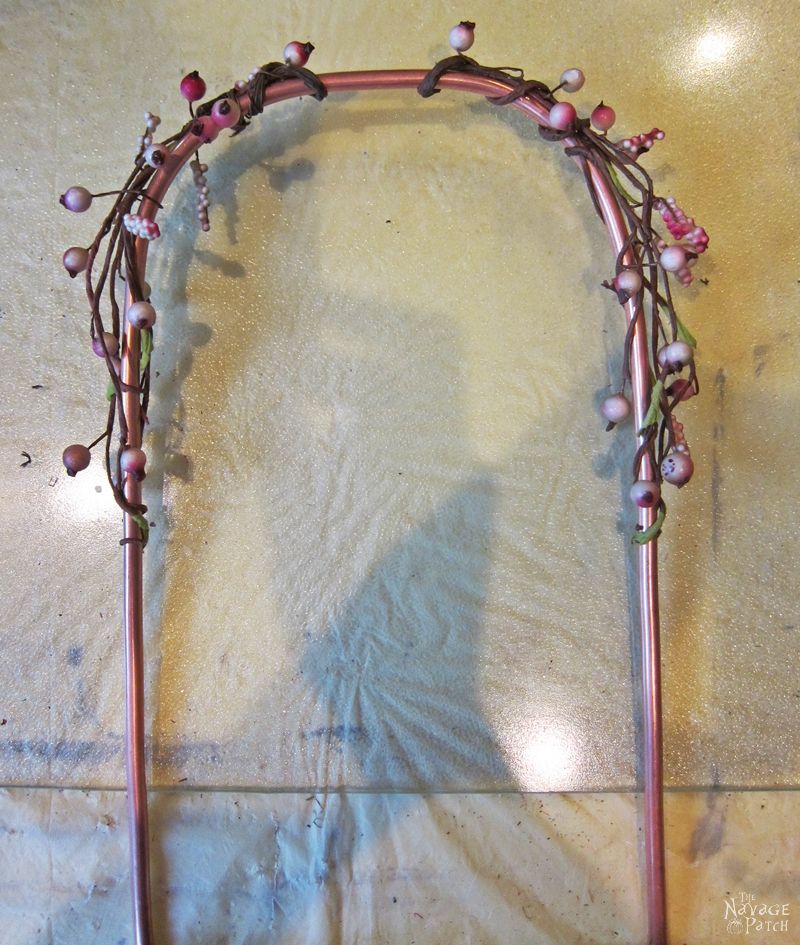
Next, I cut a 24 inch length of copper pipe and bent it to make an arch shape.
Then, I took my hammer and the copper arch outside to a stone (or concrete) surface, and hammered the ends of the arch to flatten them. For the dowel with the notches, I flattened only a little part of the ends…
…but for the dowel with no notches, I flattened a longer part of the copper arch, as shown in picture below.
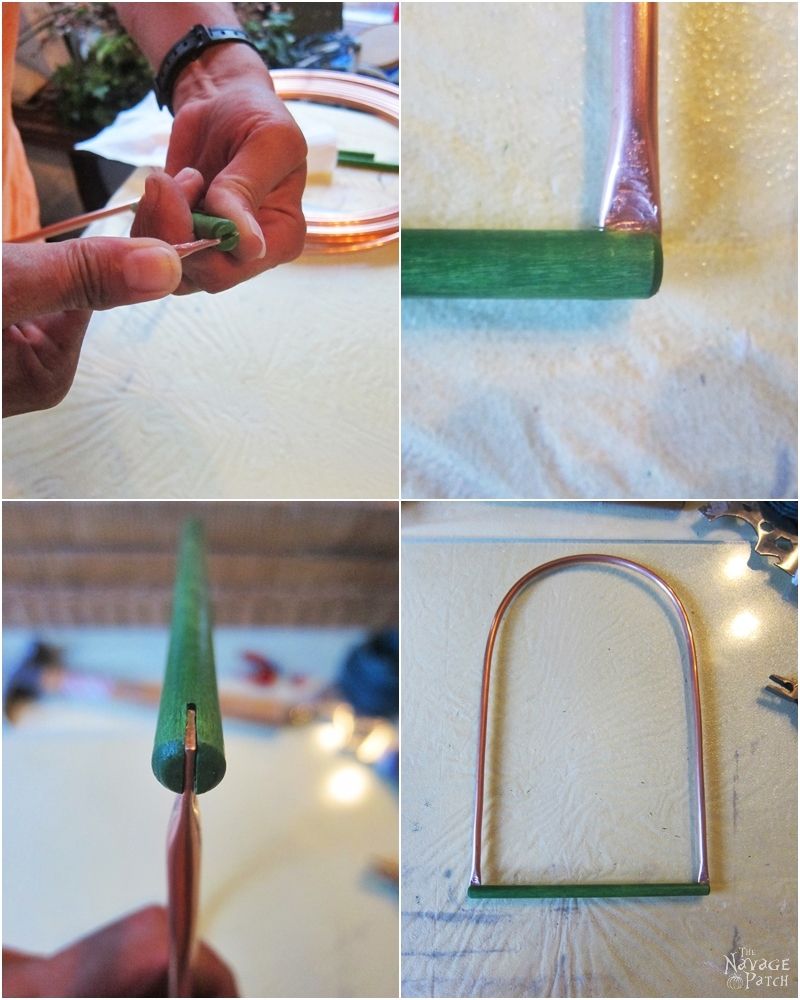
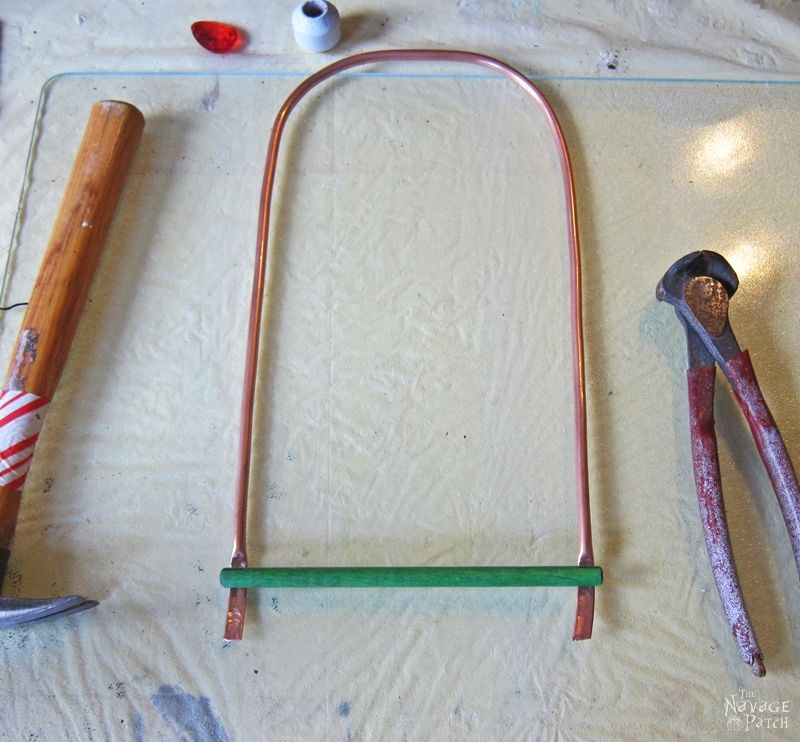
With the notch version, I inserted the flattened copper ends into those notches.
With the notchless version, I placed the dowel on the flattened part and…
…started to wrap the flattened ends around the dowel.
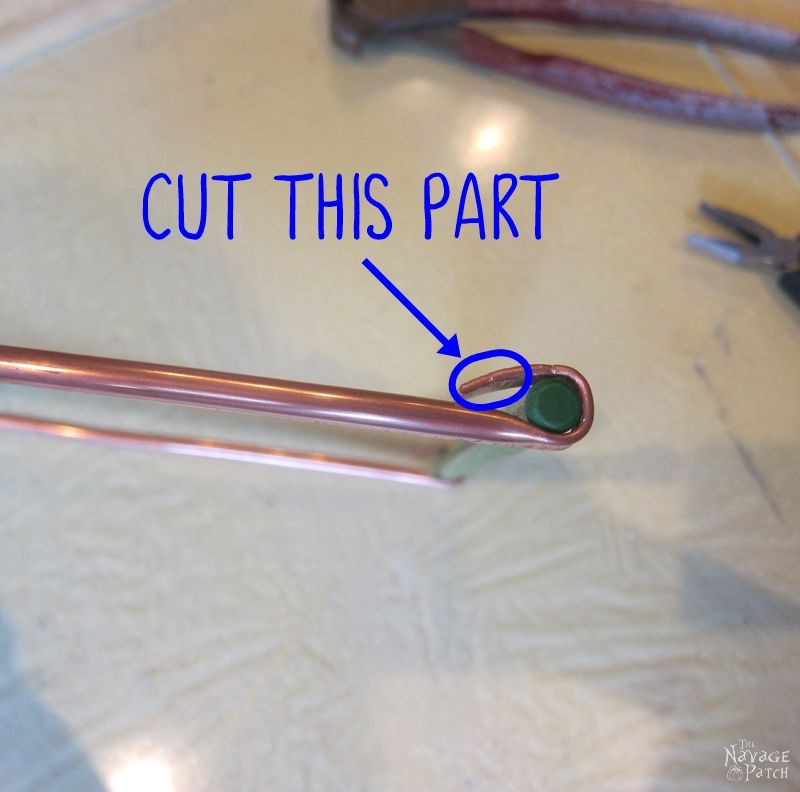
Then, I cut the excess part and…
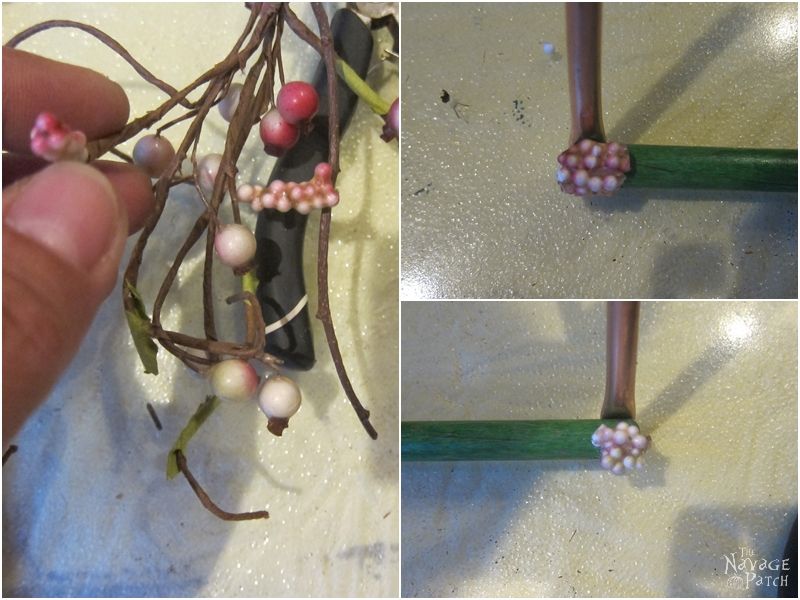
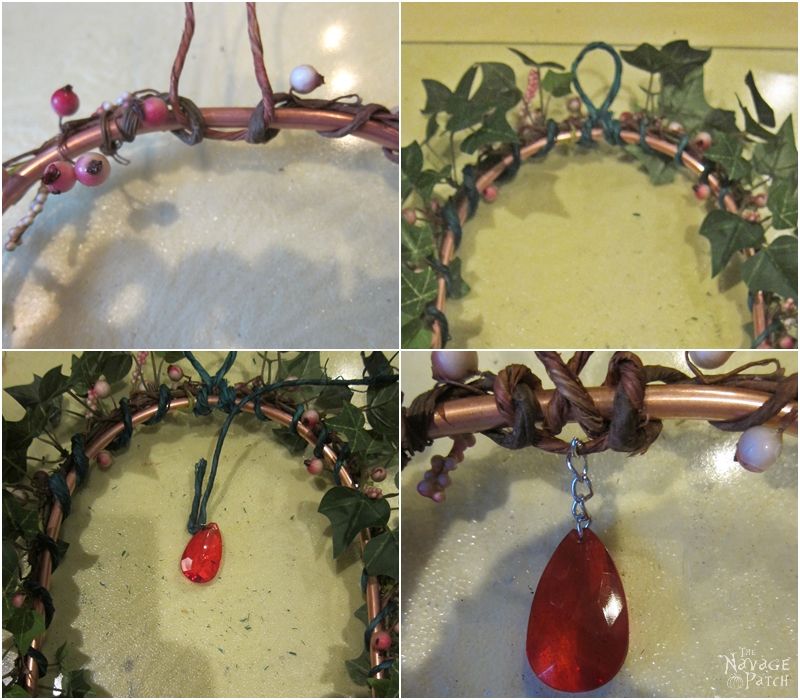
…hot glued some faux berries on the cut part. This was so the cut copper would be covered and wouldn’t hurt anyone when touched.
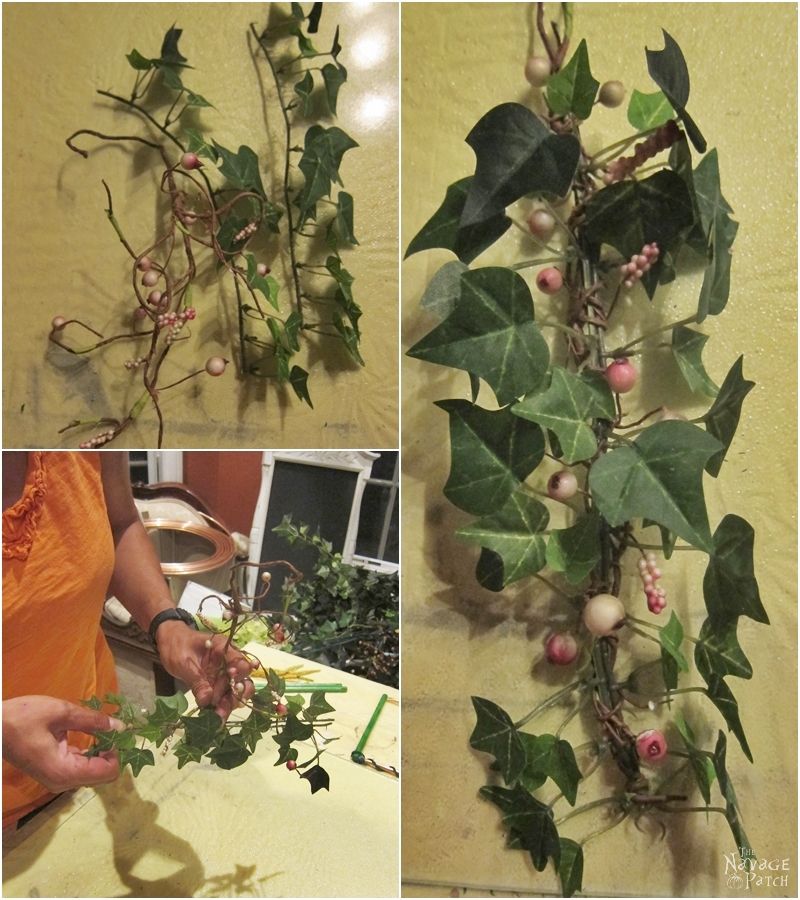
Now that both perch versions were complete, it was time to pretty them up a little bit. For that, I put together a small arrangement of floral picks I had on hand.
Then, using a floral wire, I attached it along the copper arch.
This is the one with notch.
This is the notchless one.
Next, using floral wire, I created hanging loops on the copper arch. As the final touch, I added a red teardrop prism on top.
1. Know your USDA Hardiness Zone. Use it as a guide so you don’t plant trees, shrubs, and perennials that won’t survive conditions in your area. You’ll also get a better idea of when to plant vegetables and fruits in your area.
2. Not sure when to prune? Prune spring-flowering shrubs, such as lilacs, and large-flower climbing roses immediately after the blooms fade. They set their flower buds in autumn on last year’s growth. If you prune them in fall or winter, you remove next spring’s flower buds.
MARTY BALDWIN
3. Apply only composted, rotted manure that has cured for at least six months to your soil. Fresh manure is too high in nitrogen and can “burn” plants; it may also contain pathogens or parasites. Manure from pigs, dogs, and cats should never be used in gardens or compost piles because they may contain parasites that can infect humans.
4. Perennials generally need three years to achieve mature growth. Remember the adage that they “sleep, creep, and leap” over the three-year period.
5. Learn how long your growing season is—your last frost in spring and first frost in fall—so you can start some plants inside or avoid growing them.
JASON DONNELLY
6. Deadheading is a good practice for perennials and annuals. Because the goal of annual plants is to flower, set seed, and die, removing the old blooms tells annual plants to produce more flowers. Removing spent flowers also encourages plants to place energies into stronger leaves and roots instead of seed production. Avoid deadheading plants grown especially for their fruits or pods, such as money plant (Lunaria).
7. How much light do plants need? Grow vegetables in a location that gets at least 8 hours of direct sunlight every day. Most vegetables need full sun to perform well. If you have some shade, try growing cool-season crops such as lettuce, spinach, radishes, and cabbage.
8. The best approaches to controlling weeds in the garden are hand-weeding and hoeing. Avoid deep hoeing or cultivating that can bring weed seeds to the soil’s surface. Weed early and often so weeds don’t go to seed. Use mulch to smother and prevent annual weeds.
9. Hostas don’t need to be divided unless you want to rejuvenate an old plant or increase the numbers you have, or because you simply prefer the look of single plants.
10. Not all hydrangeas grow in the shade. Panicle hydrangeas (Hydrangea paniculata) need sun for best flowering. Some top panicle varieties include ‘Limelight’, Little Lime, Vanilla Strawberry, and Bombshell.
11. Don’t clean up everything in your garden in fall. Leave ornamental grasses for beauty and the seed heads of perennials such as coneflowers to feed the birds. Avoid cutting back marginally hardy perennials, such as garden mums, to increase their chances of surviving a harsh winter.
SCOTT LITTLE
12. Vegetable gardening tip: The optimal temperature for ripening tomatoes is between 68-77 degrees F. And at 85 degrees F, it’s too hot for the plants to produce lycopene and carotene, the pigments responsible for the fruit color. Once temperatures consistently drop below 50 degrees F, green fruits will not ripen. Tomatoes that have a bit of color change can be brought inside to finish ripening.
13. Plant spring-blooming bulbs, such as tulips, daffodils, crocuses, and hyacinths, in the fall before the ground freezes. In general, place the bulb in a hole that’s two to three times the depth of the bulb.
14. Deadhead spent flowers on spring-blooming bulbs so the plants send energy to the bulbs instead of into making seeds. Leave the foliage until it turns brown and can be removed with a gentle tug. The leaves store nutrients needed for the bulb to bloom the following year. Braiding or tying the leaves is not recommended because it reduces the amount of light to the leaf surfaces.
MARTY BALDWIN
15. Fertilizer is not the answer to growing the best plants; soil quality is. Add organic amendments such as compost and well-aged manure to your soil. The best soil structure is crumbly, easy to dig, accepts water easily, and offers oxygen for plant roots. If you choose to use fertilizer, use an organic one to add nitrogen, phosphate, and potash.
16. Late summer or early autumn is the best time to divide and transplant spring-blooming perennials. The most commonly divided perennials are irises, peonies, hostas, and daylilies.
17. If your rhubarb sends up flower stalks, remove them so the plant will focus on foliage production, not seed production.
18. When transplanting container-grown plants, dig a hole larger than the soil ball of the plant to aid with root establishment.
19. Mound your potato plants deep under the soil and store harvested potatoes in complete darkness. Exposure to light turns the skin of potatoes green, an indication that the potato has produced a colorless alkaloid called solanine, a bitter-tasting toxin that, consumed in large quantities, can cause illness. Cutaway any green portions or sprouts on potatoes to avoid the problem.
20. Most in-ground garden plants grow best with 1 to 2 inches of water per week. If not enough rain falls, water deeply once a week instead of watering lightly daily. Frequent, shallow watering only moistens the top layer of soil and encourages the plant’s roots to move there instead of growing deeper.
21. Don’t send your fall leaves away! Chop them up and use them as compost ingredients. Pulverized leaves can be left to nourish the lawn. After several hard freezes, when plants have gone completely dormant, you also can use 3-6 inches of shredded leaves as mulch over tender perennials to keep them dormant over winter. Remove the mulch in spring.
22. Avoid digging or planting in wet soil; working it damages the soil structure. Wait until the soil is crumbly and no longer forms a ball in your hand (it doesn’t have to be bone-dry) to till or dig.
23. Understand your soil’s drainage. Roots need oxygen, and if your soil is consistently wet, there are no air pockets for the roots to thrive. Many plants prefer well-drained soil, so amend your soil with organic materials to improve the soil quality.
MARTY BALDWIN
24. Some plants flower in response to day length. Chrysanthemums, poinsettias, strawberries, and others need long nights to produce flowers. If you want strawberries that flower and produce fruit when temperatures are between 35 degrees F and 85 degrees F, choose a variety labeled “day-neutral.”
25. The roots of walnut trees produce a substance called juglone that is toxic to many sun-loving garden plants, including tomatoes and potatoes. (Black walnuts do not harm many shade-loving plants.) The toxic zone from a mature tree can be 50-80 feet away from the trunk. And the juglone chemical can get into your compost if you compost walnut leaves or nuts.
1 tablespoon oil (we used coconut; you could also use olive or vegetable)
3/4–2 cups boiling water
food coloring
First, figure out your workspace and prep accordingly. One of our most beloved, multipurpose tools is a large roll of brown kraft paper. It plays a multitude of roles in our craft projects, mostly as standard drawing and painting canvases, but also as a protective layer for whatever surface we are creating on. Pro tip: If you want to go all out, get a paper cutter, too.
Next, grab all your ingredients, and work out a game plan for what color you’d like your playdough to be. It will be easiest to use a color that comes straight from the selection of food coloring bottles in the box, and then choose how dark or light you want it. We tried for purple and were way off on the ratio.
I like to pre-measure everything and set it out to make it easier (read: less messy) for my kids to participate in the process of making the playdough.
How to make playdough
Start your water boiling.
Combine all dry ingredients in your large bowl.
Make a well, add in the oil, and stir.
When the water is boiling hot, safely transfer it to a container that will hold at least 2 cups. We love our clear Pyrex 2-cup measuring cup for this purpose.
Then add your food coloring directly to the water. Your other option is to NOT add any food coloring at this point. You can make the whole batch plain, then divide it into a number of smaller chunks, and follow the directions below for adding dye later to create an array of colors.
Start by pouring in 3/4 cups of water. We only needed to add a splash or two more to be able to combine everything well, but follow your own preference and add water as desired. Ultimately, you want the playdough to be mixed but sticky.
Let the mixture cool, then knead well. If you, like us, want to make an adjustment to the color of the playdough (like if you tried but failed to use enough red), now is your chance to add it in; just make a well in the dough first.
Let your little ones relish in their successful project by utilizing their fine motor skills with some cookie cutters and any other rolling, cutting, and smushing toys.
If you keep it in a zip-top bag or airtight container, the playdough should last up to three months. If you notice it drying out before then, add a drop or two of water and knead thoroughly. Read the original article on Insider
Old catalogues or magazines (they should be of the same size)
A record (or alternative table-top)
Paperclips
Coloured sticky/duct tape
All-purpose glue (or hot glue)
Firstly, take a magazine and open it to the 10th (or so) page. Roll it up to the left until the left edges of the pages touch the spine of the magazine.
Roll up the next 10 pages (you don’t have to count, just estimate it 🙂 ) until their edges touch each other. Then fix it with a paper clip as close as possible to the back of the magazine.
Repeat the second step until you’re at the second to last page. The last page shouldn’t be rolled up, yet.
Now you need the next magazine of the same size. Put the last page of the first magazine on top of the cover of the second one and roll them up as before, together with the first few pages of the magazines.
Repeat this until you think it is enough 🙂 (It depends on the thickness of the pages and how many pages your magazines have.) Don’t roll the last few pages, yet.
Now stand the whole thing up (hereby the paper clips are important, otherwise the pages might open again). Now you can roll in the last pages and fix them to the first pages of the first magazine using a paper clip.
Next you stick the sticky tape around the whole thing on top and again on the bottom.
Now you can remove the paper clips and make the second level as you did the first. It is important that the magazines of one level are of the same size, but all the levels don’t necessarily have to be even. However you prefer 🙂
Make as many levels as you want, depending on how high you want the table to be.
Now cut a piece of paper so that it matches the top of the table leg (in a circle) and stick one piece on top of each level. Glue the levels on top of each other and glue the record on top.
Done 🙂 I hope this was understandably phrased!
At our place the environmental-friendly table embellishes one corner of our living room together with my globe lamp 🙂


 © Alyson Aladro Your kids can help you make the playdough. Alyson Aladro


