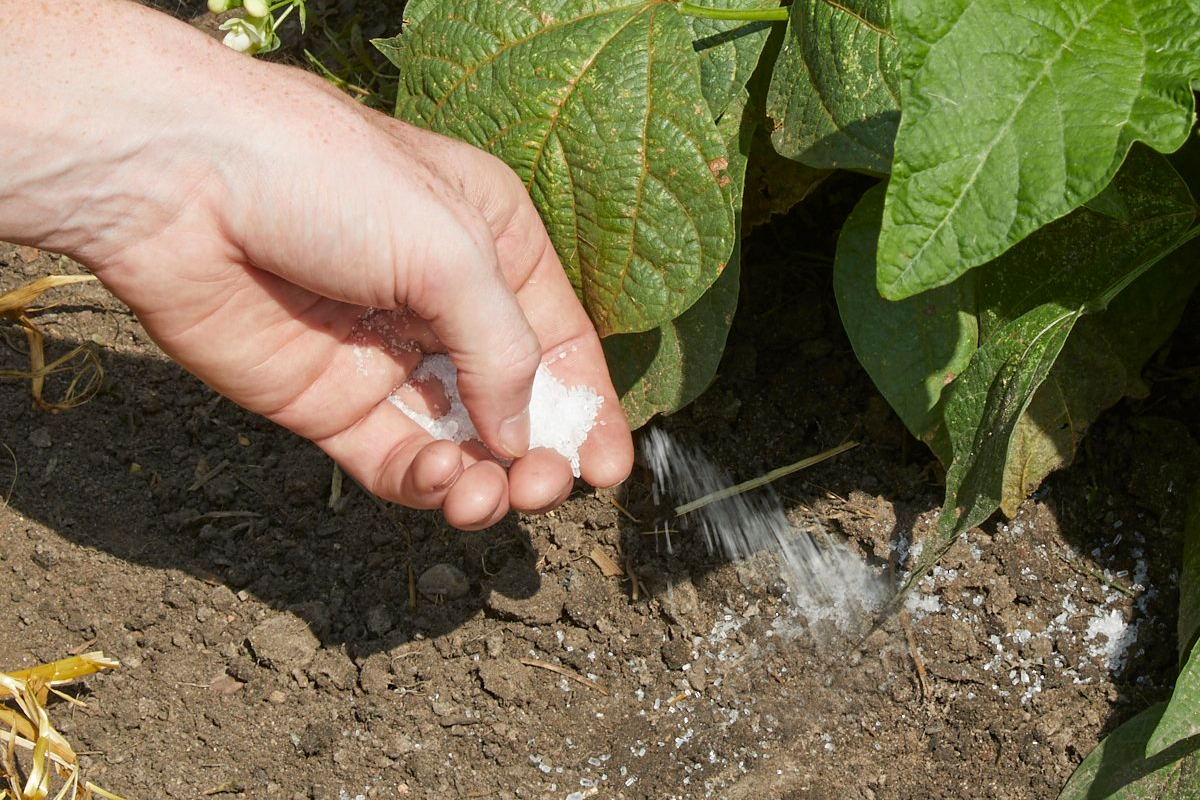
While fertilizer is an essential part of keeping your plants healthy, you might not know that Epsom salt acts as an incredibly effective fertilizer for your shrubs. Epsom salt contains magnesium, which allows your seeds to germinate and helps your plants absorb vital nutrients they need to stay alive. It’s cheap, easy-to-use, and it will keep your plants healthy and your garden filled with greenery.
Family Handyman
Use roughly two teaspoons of Epsom salt mixed with one gallon of water per month. Pour the mixture onto the base of your plants, then sit back and watch them grow!
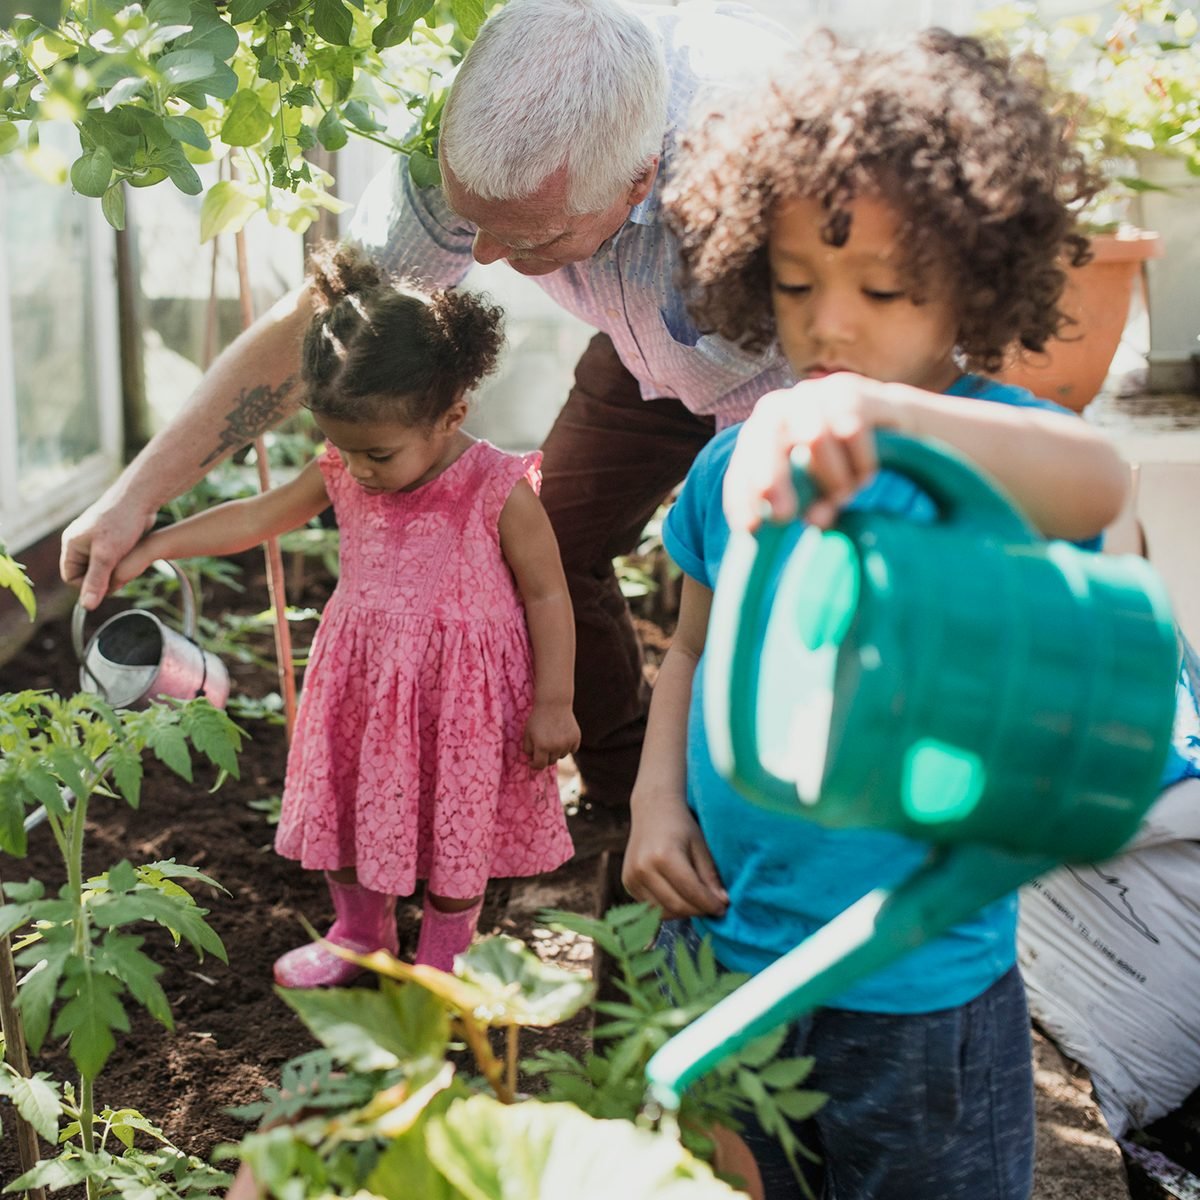
People are starting vegetable gardens big and small, including a plethora of backyard plots and windowsill herbs.
Some plant lovers are engaged in community gardens where they work in timed shifts, maintaining proper distance while wearing masks and cleansing tools for the next use.
As people sheltering in place take up hobbies and start projects to fill the time during the coronavirus pandemic, gardening is blooming.
Caring for a garden can be a respite from the horrors of the pandemic, as it serves several natural desires related to accomplishment, community and belonging and staying connected with nature.
It can get partners and the whole family outside, happily bonding while doing an activity together.
It can also help to alleviate food insecurity as some incomes dwindle and concerns about the food supply grow.
“There’s just a greater cohesiveness within the family unit that occurs outside with your hands in the dirt,” said Charlie Hall, professor and Ellison Chair of the department of horticultural sciences at Texas A&M University.
“There’s not as much eye-rolling when teenagers are told to do something, not as much fighting between siblings. There’s fewer harsh words between spouses.”
Fulfilling human needs
Getting your hands in the dirt keeps you connected to nature while we’re staying indoors more these days. The orderliness gardening requires, with its rules and rows, can carry over into the manageability of other life tasks, Hall said. And the calmness of the activity may relieve some pent-up frustrations.
“Your cortisol levels go down dramatically when you’re in the midst of gardening,” Hall said. “And cortisol is the stress hormone in your body, so you’re less stressed.”
There’s a risk-reward ratio inherent in gardening. You have to learn to balance weather that may thwart your efforts. But that experience bears sweet tomatoes or refreshing cucumbers — offering a tangible sense of accomplishment when we’re floundering around, looking for something to focus our minds.
“You’re able to see the fruit of that effort,” Hall said. “That’s a teachable moment in people’s lives.”
And gardening may have a fitting philosophical lesson for us during this time.
“Sometimes pruning occurs,” Hall said. “That’s where the [correction in times of stress comes from]. You prune a plant so that it’s even healthier when it comes out from its pruning.”
As plants need water, fertilizer and sunlight to grow, we’re nurtured by challenge and engagement with things we enjoy, Hall added. And when plants grow so well they outgrow the space in which they’re needed, gardeners must replant them in a different space where they have the room to thrive.
“People move up into bigger areas of responsibility during their careers. There’s all kinds of metaphors that come out of gardening and how it applies to everyday life,” Hall said. “Sometimes you have to be transplanted into areas where you could grow even further.”
Good for your overall health
Gardening can be a coping mechanism during this unsettling stage of life, but it also comes with benefits for your physical and mental health.
One study found gardening, among other leisurely activities, may prevent brain shrinkage in older adults. Our cognitive abilities, including learning and memory, largely depend on the size of our brains.
Gardening has also been connected with mindfulness and alleviation of depressive symptoms. It’s a mild form of activity offering respite from staring at your screen all day. And it can improve hand-eye coordination and finger flexion — the ability to bend your joints — that carries over to everyday life.
How to start a home garden
May is not too late to start a garden. Here’s how to begin a vegetable garden for beginners, according to The Old Farmer’s Almanac, a print and online periodical providing planting charts for gardeners, sky schedules, weather forecasts and recipes since 1792.
Pick the right spot. Choosing a suitable location is important because it affects the quality of the vegetables, the guide says. Most vegetables need at least six hours of sunlight daily, so pick a sunny location.
If you’re not buying soil, you should have the soil in your yard tested for lead. Lead contamination is common in urban areas due to years of industrial development and pollution from manmade toxins, according to Garden Collage Magazine. If your vegetables are contaminated from the soil, that could mean lead poisoning for you or any pets roaming around. You can have your soil assessed by sending several samples to a testing site for a low cost.
Plant the vegetables in damp, not totally saturated, soil. If you have soil that doesn’t drain well, plant vegetables in a pot that’s raised from the ground. You should also garden in a place where your plants can remain stable — exposure to strong winds, floods or constant foot traffic could damage your plants.
Choose a plot size. Beginners should start small, considering what they can handle and what they’ll actually eat, the guide suggests. The size it recommends is 11 rows wide, each 10 feet long. But this guideline is to feed a family of four through an entire summer, so feel free to downsize if it’s just you.
Make sure there’s enough space between each row to be able to easily walk through to weed and harvest your plants. The rows shouldn’t be more than 4 feet wide, as you probably won’t be able to reach over a bigger width to care for the vegetables.
Select your vegetables (or any other produce). There are several vegetables that are common and easy to grow: tomatoes, radishes, chard, zucchini squash, peppers, cabbage, lettuce and carrots. Also consider what you like to eat, and again, how much you’re likely to consume. Here’s a guide to figuring out which vegetables grow best in your state.
You could buy individual starter plants or opt to start from scratch with seeds. But the seeds should be high quality, the guide says, so your money isn’t wasted if the seeds don’t germinate. The almanac recommends buying seeds from a plant nursery; you can order them online, too.
Decide where and when to plant. Planting one or two vegetables doesn’t require much strategic planning. But if you’re growing a whole garden, you’ll have to think about where each vegetable will go and when it needs to be planted.
Some vegetables, such as lettuce and root vegetables, grow in the spring. Others, including tomatoes and peppers, should be planted in the warmer months.
Plant taller vegetables on the north side of your garden so they don’t shade shorter plants. Check to see whether the information along with your plant says it needs a permanent bed.
Lastly, stagger your plantings. Don’t plant all your seeds at one time, or you’ll have a vegetable bounty that needs to be harvested and consumed in a tight time window. If you stagger your plantings, you’ll have a steady supply of food coming in.
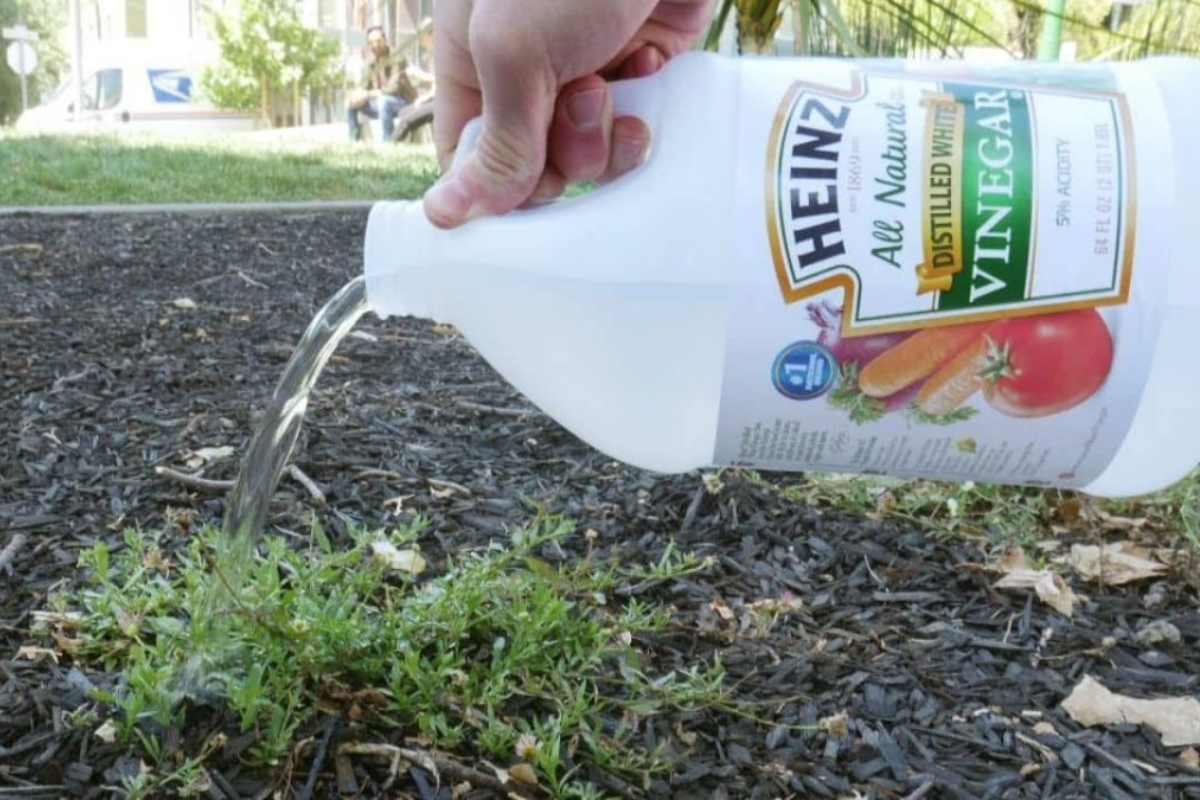
Keeping the weeds at bay is an essential part of caring for your garden. If you’re looking for a quick and easy way to get rid of those unwanted plants, you’re probably turning to weed killer.
High Profile Green
While store-bought weed killer is effective, it’s also filled with harsh chemicals that may damage your garden, rather than help it. Plus, the cost of weed killer can add up over time. To eliminate those problems, make your own weed killer at home using natural ingredients. Simply mix up a little dish soap, vinegar, and salt, pop it into a spray bottle, and watch those weeds disappear.
How To Use Aspirin In The Garden March 17, 2020 By Admin
How To Use Aspirin In The Garden
How To Use Aspiring In The Garden: Take 2-3 pills of aspirin and stir them in gallon of water. Allow it to dissolve completely, then add little amount of liquid soap in it. Now fill the solution in a sprayer, make sure it is completely dissolved.
How To Use Aspirin For Vegetables? Aspirin can be used to many vegetables like tomatoes, eggplants, basil etc. using it for your vegetables instead of fertilizers will increase the production. So use it for every three weeks, because salicylic acid in aspirin enhances the natural protection of plants along with growth rate.
Even according to a study of US department of agriculture showed that, fungal diseases of plants can be decreased using aspirin spray. It even helps in preventing infection by blight, which can easily turn them in to mouth.
How To Use It For Tomato Plants? A fungus is a major problem to deal with especially when growing tomatoes. Aspiring is a wonderful medicine to harvest healthy tomatoes. It even helps in removing diseases and increasing the yield.
Aspirin is also used as a rooting hormone for your tomato plants. To make rooting hormones, take a glass of water and put a tablet in it. Allow it to dissolve completely then coat it on the lower surface of the plant which is to the propagation and leave it for some time. Plant it later.
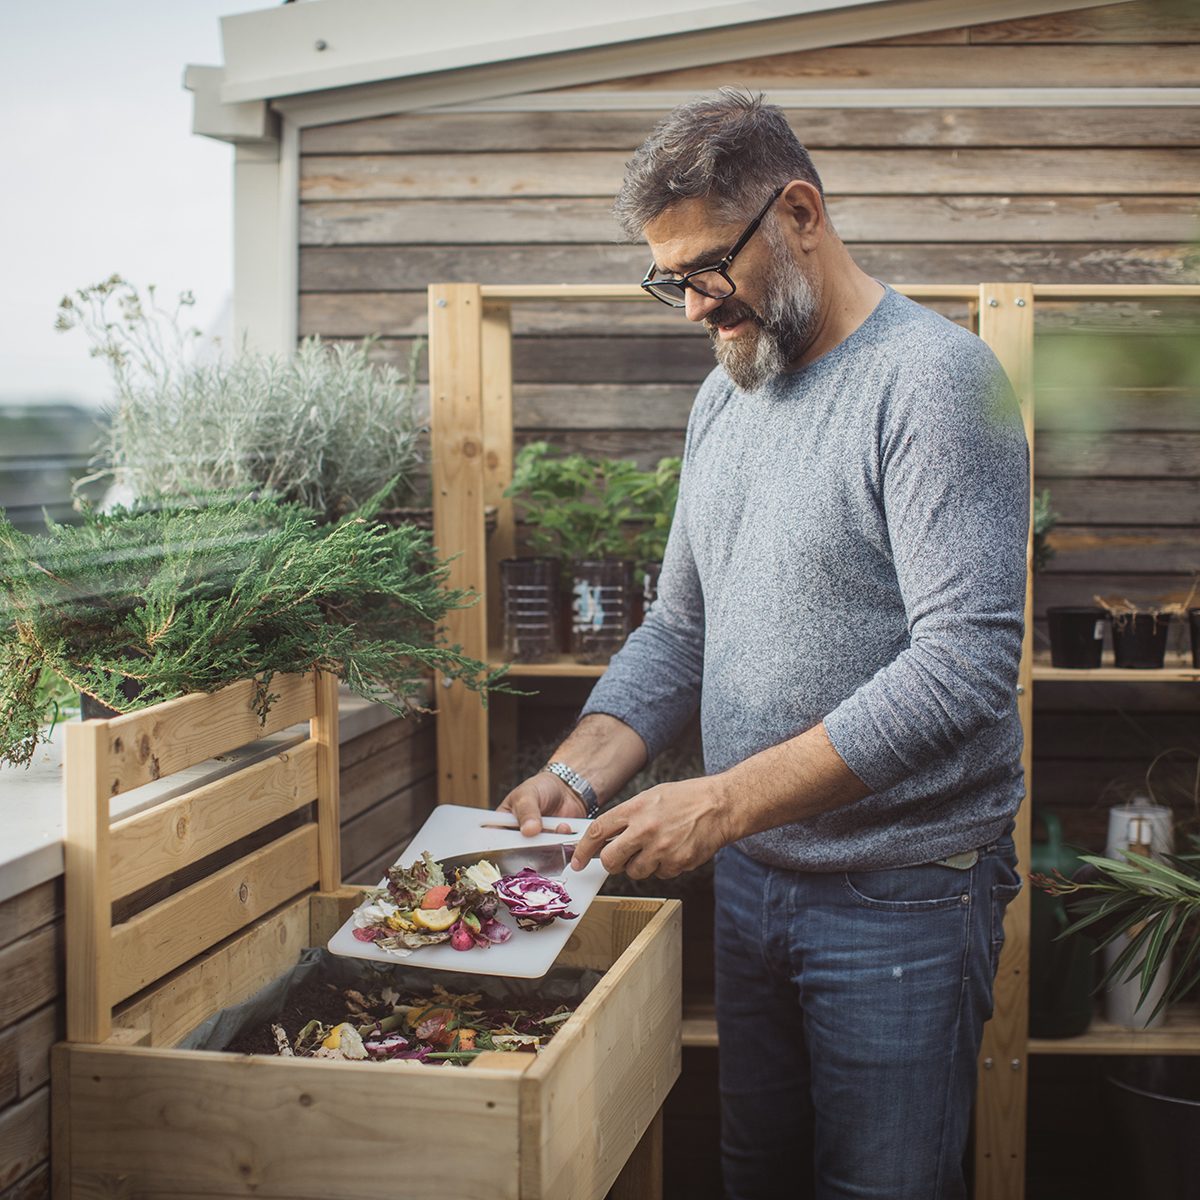
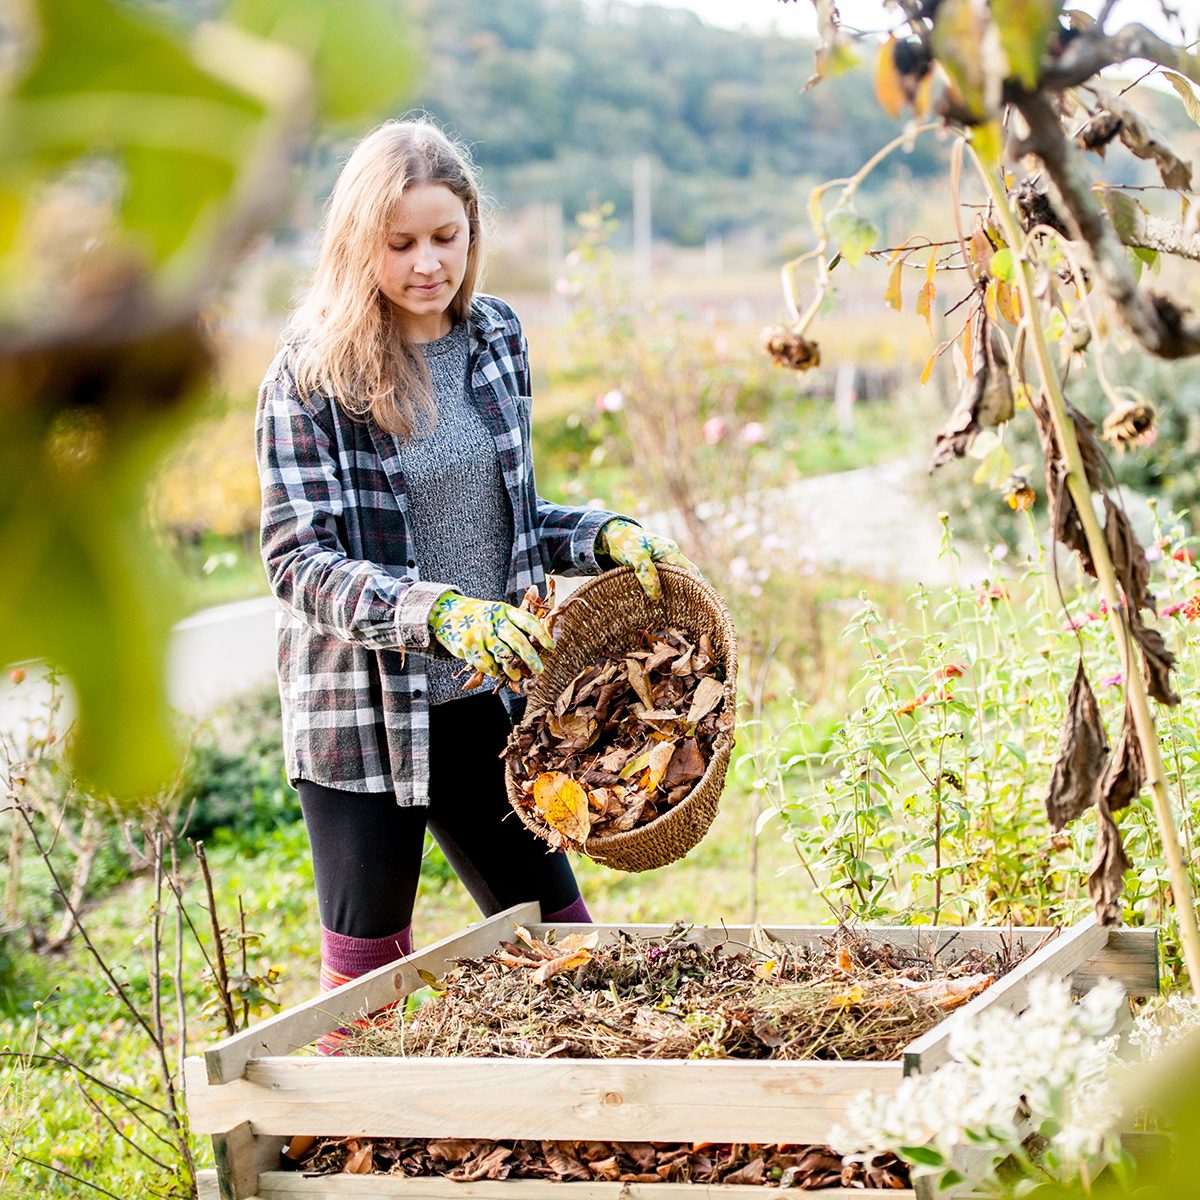
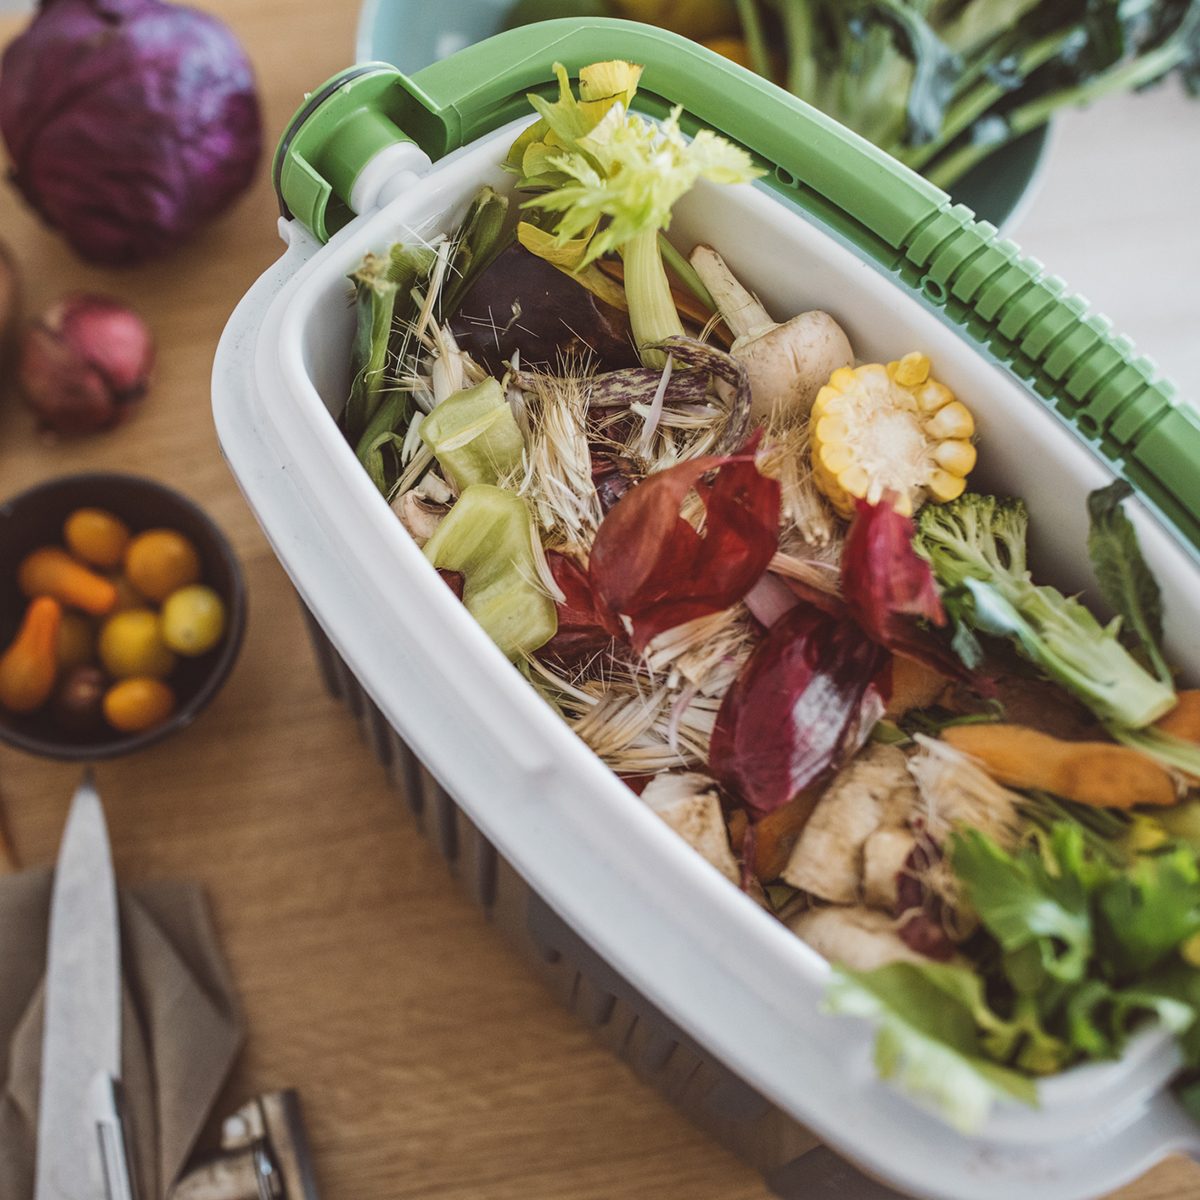
Maybe you first heard about composting from a local farmer. Maybe your neighbor is a gardener. Or maybe a nearby restaurant boasts that it composts food scraps in a green space outback. Whether you’ve known about composting since childhood or just started looking into it for yourself, there’s always more to learn. If you’re willing to put in a bit of thought and effort, there’s good to be done by simply changing the way you get rid of your trash. Find out more ways to go green in the kitchen.2 / 12
SVETIKD/GETTY IMAGES
What is composting?
Natural decomposition is the basis of composting. Composting vegetation already fills our parks, forests and other un-manicured outdoor spaces. “Compost is organic material that can be added to soil to help plants grow,” according to the Environmental Protection Agency (EPA). When you choose to use a compost pile or compost bin at home to cut back on trash services or use nature’s own recycling method, you’re composting. So, really, composting is simple: It means you’re separating your organic waste (food scrap, yard clippings, and other once-living things) into a special spot for composting instead of adding it to the recycling bin or trash can. Look at 8 easy composting tips.
3 / 12
SOLSTOCK/GETTY IMAGES
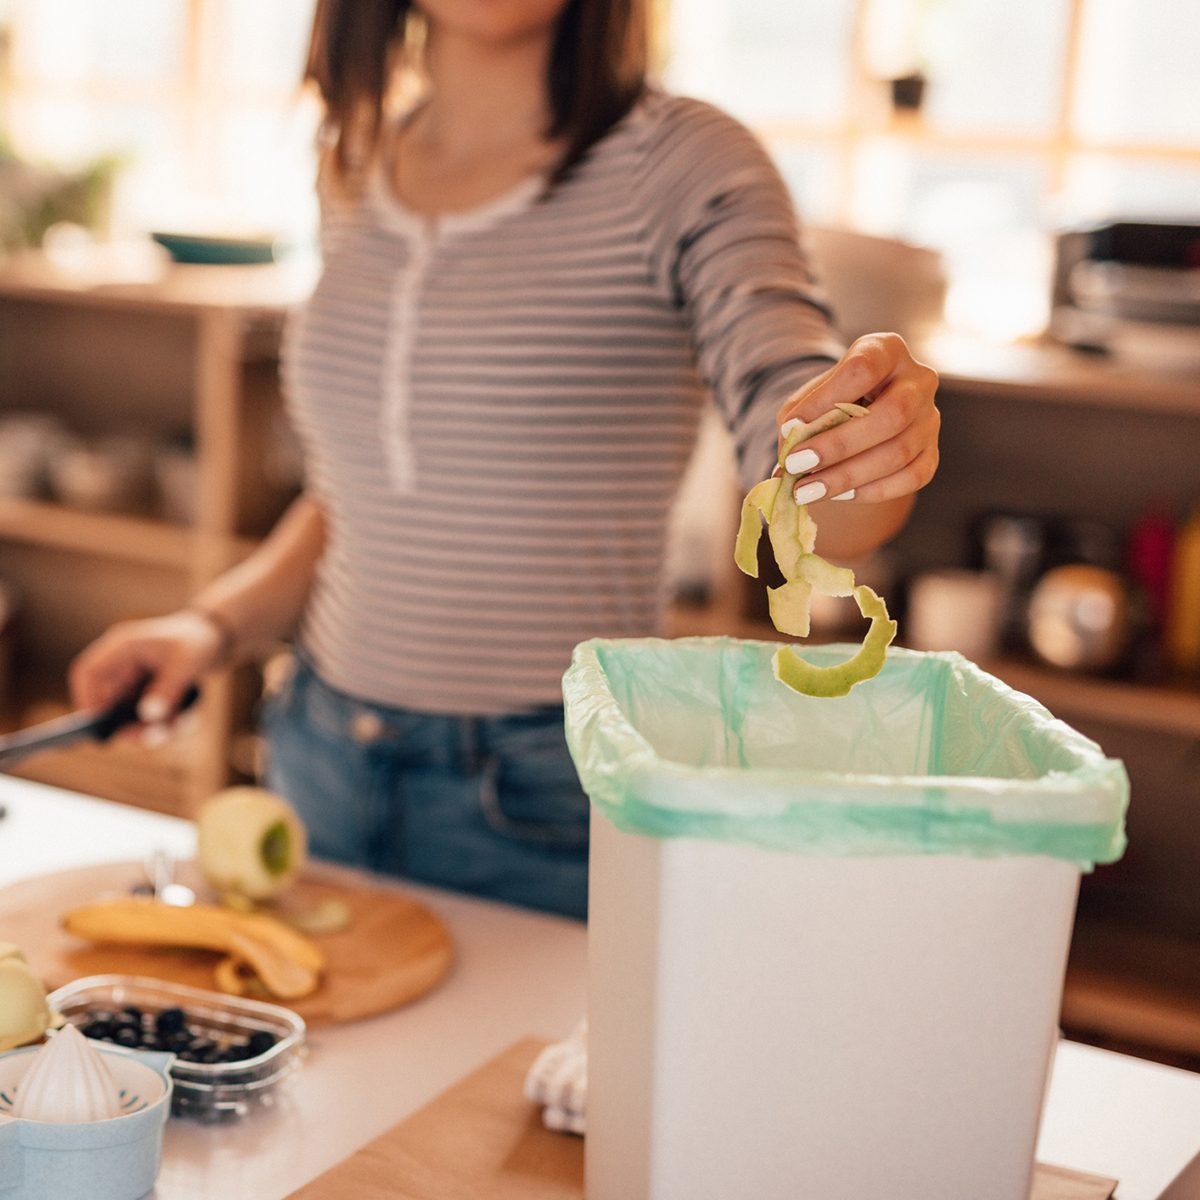
Why is composting earth-friendly?
Composting your organic waste helps the environment in two big ways. First, compost enriches soil so that it can give precious nutrients to plants that are still growing. If you have a garden or even potted plants or flowers, you can eventually use your composted soil to help plants grow more quickly and vibrantly. Secondly, composting keeps food scraps out of the landfill. Though landfills and compost piles look similar at face value, food decomposes more quickly—and in a more earth-friendly way—when composted. “Waste sent to landfill breaks down anaerobically—that is, without any oxygen present. It is squashed down then capped with soil and clay… As the rubbish breaks down over time, it emits methane, a greenhouse gas that is 21 times more powerful than CO2,” an article by the Guardianexplains. Food scraps also decompose slower in a landfill. Learn the truth about common “going green” myths. TOP ARTICLES2/5Sour Patch Kids Jelly Beans Are Here to Make Your Easter Basket SO Much Better4 / 12
CASARSAGURU/GETTY IMAGES
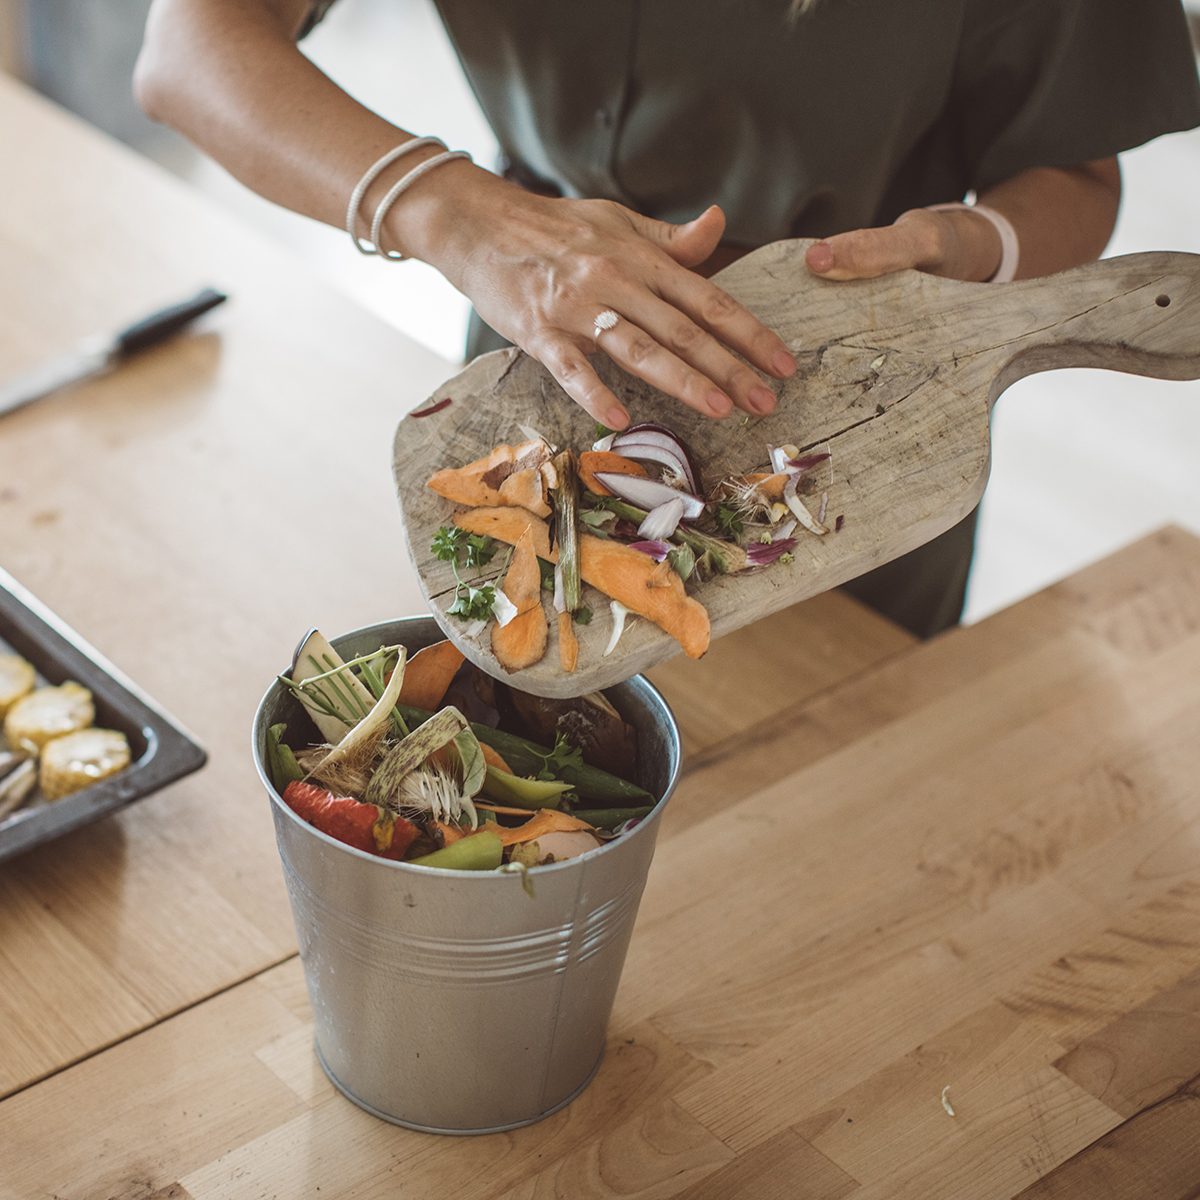
Why does it help the environment?
If everyone in the United States started composting, it would reduce 30 percent of the trash sent to landfills and incinerators, suggests a report published by U.S. Public Interest Research Groups (U.S. PIRG). Composting keeps food waste out of landfills, which are notorious for releasing a combination of methane and carbon dioxide (CO2), aka greenhouse gases, reports the EPA. These greenhouse gases, in turn, trap radiation from the sun, keeping our planet warm. As humans burn more fossil fuels and keep piling trash onto landfills, the swell of greenhouse gases contributes to global warming. So when you compost, you’re actively helping to prevent global warming! These are some ways green living can make you healthier.5 / 12
You can start by making or buying a compost bin to keep your decomposing waste contained, ideally in a shady corner of your yard. It’s important to constantly add water and mix up the waste with a shovel, pitchfork or another yard tool. Some people cover outdoor compost bins with a tarp to hold in moisture and promote decomposition.
So what about indoor composting? The process is the same but on a smaller scale. Keep a small, kitchen-friendly compost bin on your countertop or next to your trash can. If you want to try indoor composting, it is important to maintain the correct ratio of waste types so that you don’t attract bugs. The good news is that even if you don’t have the capacity to compost in your own home, you may be able to bring food scraps to your local farmer’s market for collection. New York City, for example, has drop-off sites around the city. If you’re worried about scraps beginning to rot before you can take them to the farmer’s market, freeze your waste. This stops the decomposition process in its tracks. Get more info on how to start composting here.7 / 12
CURTOICURTO/GETTY IMAGES
What can you compost?
It’s tempting to compost anything that seems like it could decompose naturally, but you might end up with a compost pile infested with insects or rodents. So carefully consider what you compost. Remember, it’s always easier to add more to the compost pile than remove stinky waste. Per the EPA, the following items are OK to compost:
Grass clippings and tree leaves
Vegetable and fruit scraps
Eggshells
Plain rice or plain pasta (no oil or butter)
Coffee grounds
Teabags and tea leaves
Black and white newspaper or plain white printer paper
Any waste that seems unhealthy or dangerous in your house is also dangerous in your compost pile. For instance, if you have a houseplant that dies of insect infestation or plant disease, don’t compost the leaves. You should also skip composting these items:
Anything dairy
Food scraps that include dairy, oil or meat (these foods attract rodents and bugs)
Whole eggs
Charcoal or coal ashes
Meat
Dog or cat waste
9 / 12
PIOTR_MALCZYK/GETTY IMAGES
How to keep a balanced compost pile
Healthy compost piles have a 50/50 mix of browns and greens—brittle dead things and organic scraps, according to the EPA. Brown waste supplies carbon and it comes from twigs, dried leaves or even broken branches. Green waste, including food scraps, grass clippings and coffee grounds, supplies nitrogen. Your compost pile requires one other key ingredient: water. Keep your compost pile moist, but not saturated with water. Stir it up often to mix the green and brown scraps. Find out how to cut back on food waste.10 / 12
SVETIKD/GETTY IMAGES
What tools make composting easier?
Composting is easy and cheap; you only need a bit of shade, water, and the right mix of organic waste. But composting can seem a little messy, which is where these tools come in.
Some outdoor composters prefer using an aerator instead of a shovel to turn the soil.
A pretty compost bin keeps the process neater and you won’t mind having it sit out on your kitchen counter.
Live composting worms eat their own body weight in organic waste each day, aerating the compost and adding fertilizer to the soil, which can help speed up decomposition.
Though composting is easy once you get the hang of it, there are several common issues many beginning composters struggle with for a while. Some composters overwater their piles, creating a slimy sludge, while others don’t water enough, growing a dusty pile of dirt. But one of the most common annoyances about composting is the insects. The UC Master Gardeners of Monterey Bay have a few tips for dealing with pests: “Raise the heap’s temperature to above 120°F…Turn the pile over and rebuild it, watering it well as you go. If it contains lots of leaves or straw, mix in a nitrogen source like blood meal, manure or shellfish shells. It should start heating soon, and when it does, those bugs will depart for a more comfortable place.” By the way, here’s how to revive a nearly dead plant.
12 / 12
What to do with finished compost
So you’ve successfully turned your first batch of food scraps until they’ve turned into a beautiful dark brown soil—congrats! Now, what should you do with the fruits of your labor? The Minnesota Pollution Control Agency recommends spreading compost over the low spots in your yard. This is a cheap, effective way to level your lawn. You could also use the compost for re-potting plants or mulching around bushes or outdoor gardens. Read on for the backyard trends you should try this season.
Get your garden off to a good start by planting your perennials at the right time and handling them the right way. One guiding philosophy: Perennial plants are all about the roots. Keeping the roots strong and healthy is the number one consideration when planting perennials. It’s those roots that will keep the plants coming up year after year. Here’s what you need to know about planting perennials to give them what they need to grow up and be beautiful.
Fall or Spring?
Knowing when to plant perennials is essential. Spring is generally the best time to plant, for obvious reasons. The soil is warming, the sun is shining, the days are lengthening and the rain if falling. Spring is also a good time to divide existing perennials that have gotten bigger and better and plant the smaller pieces in other locations.
Fall is a good planting time for perennials that bloom in the spring or summer. Fall planting gives them time to grow strong roots to prepare for the big flower show the following year. Another plus to fall planting: Nurseries are cutting prices on perennials at the end of the season, so you can save a lot of money.
Do not plant in the summer. It’s too hot, the days are too long and rain is unreliable in many climates. There’s too much stress for a new plant to thrive. And winter? No. Just, no.
How Do I Plant?
New plants come in three forms. Knowing how to plant perennials correctly depends on which form you’re planting.
Container-grown perennial plants are the ones you buy at a nursery or plant center, already growing in a pot. They’re the easiest to transplant successfully. Dig a hole twice as wide as the container but no deeper. Pull the plant out of the pot, gently loosen the roots and place in the hole. Fill the hole with soil mixed with compost and water well. Fertilize a week after planting.
Bare-root perennial plants are less expensive than the container-grown ones, but they’re a little trickier. They are just as billed: a clump of plant roots. They’re not for beginners. Soak them in water before planting them in the ground. Add compost to the soil at time of planting and pamper them till they sprout leaves.
Seeds are the least expensive way to start a garden of perennial plants. Growing from seed takes more skill and patience than transplanting container-grown perennial plants. Perennials are slow growing, so if you sow seeds directly in the ground after the last frost you won’t have adult plants till late in the season. Best to start them in the winter, indoors, in small pots and pamper them until they are large enough to transplant outdoors.
Can you save seeds from citrus fruit and grow them into plants? Yes. And it really is easy.
Whether the fruit came from a grocery store or farmer’s market, if it has seeds, you can grow them.
Orange, lemons including Meyer lemon, tangerine, clementine, mandarin, lime, kumquat, and grapefruit with seeds are all candidates.
The steps (below) show you how to prepare the seeds, germinate them, and plant them pots.
While citrus is a tropical plant, it can be grown in colder climates as a potted houseplant, spending summers outdoors and winters indoors.
Will they grow fruit?
Yes, it is possible. But only if the plant has just what it needs.
Citrus plants are slow-growing, so it will take several years with good growing conditions to flower and then fruit. Some may never flower.
Most of the citrus fruits we enjoy are hybrids. Grapefruit is a good example. It was an accidental hybrid created from sweet orange (C. sinensis) and pomelo (C. maxima) cross-pollinating.
And that means, while any viable citrus seeds you sow can become beautiful, productive plants, hybrid plants—if they produce fruit—the fruit will not be the same in taste or appearance as the one it came from. This isn’t necessarily a bad thing, it’s just different.
Satsuma tangerines are one of the few citrus plants that bears fruit similar to the parent when grown from seed.
To me, growing a plant from seed all the way to the fruiting stage is a big, fun accomplishment regardless of the taste.
How do commercial growers do it? How do they get the same fruit over and over again?
They use grafted plants. Cuttings are taken from the desired plant (scion) and attached to a rootstock from another citrus variety. This is cloning and it’s essentially the same plant making more fruit.
If you want to be sure your citrus tree grows fruit true to the parent, start with a grafted tree, or use species seeds (not hybrids).
TIP: Winter is a good time to germinate citrus seeds so you have the warmth and light of spring and summer to get the plants established.
Can’t I just toss seeds in some soil and get a plant that way?
Yes, absolutely! But, if you want a 100% success rate—and know ahead of time that the seeds will germinate and do so quickly—instead of waiting many weeks to discover it’s not going to work—do the extra steps listed (below).
How big will a potted citrus tree grow?
It’s up to you. Citrus trees in-ground get quite large but, by growing in containers, growth is somewhat inhibited.
As your plant grows, you can repot it into the next size container until it’s as large as you want it.
Often the weight of the container determines the stopping point because it gets too heavy to lug around.
Once the plant is as large as you want (years from now), you can root prune it to keep it healthy. This is just how it sounds: you remove the plant from the container, trim back the roots, replenish the potting mix, and repot it.
How to Sprout Citrus Seeds
Supplies
Citrus fruit (choose varieties that have seeds)
Plant tags and binder clips
Sieve (for rinsing seeds – optional)
Paper towel
Nail clippers
Food storage container or food bags
Small cups or plant pots with drainage holes
Potting mix (see options, below)
Fertilizer for citrus plants
1 Get Citrus Fruit
Depending on the time of year and your location, you may have quite a variety of fruit to choose from at the store.
When I first tested this out, I bought one of everything because I had never really paid attention to the seeds before.
Be sure to get the ID stickers that come with the fruit in many stores (they have the SKU barcode on them). You want to know exactly what the name of the fruit is, where it’s from, and have this info to further research it (if desired).
Some citrus fruit has nice, plump seeds—that we may not like for eating but work great for germinating.
Others have odd, flat seed-like shells, seemingly devoid of any real growing power. Those are not likely to germinate.
Either way, the next steps will get this sorted out.
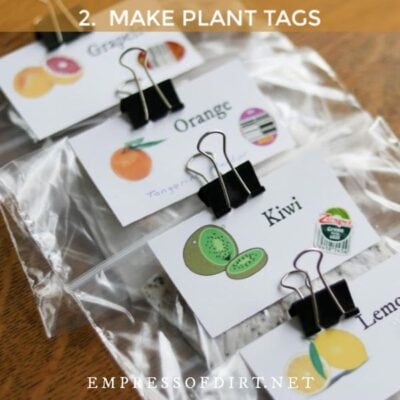
2 Make Plant Tags
Kiwi? No, it’s not citrus but you can sprout those seeds too!
It’s always helpful to know what you’re growing and keep that info with the seed/ plant for future reference.
I had some old nametag cardstock (Avery nametags 5390) for my printer so I made labels. You can email me to request a copy of my Word template if you want to use mine.
If possible, make the tags water-resistant (so the ink doesn’t run) and get some binder clips to attach them to your seed / plant containers.
I put the SKU stickers on the tags for future reference.
3 Gather Seeds
Cut the fruit in half, top to bottom (if top navel is visible). This avoids damaging too many seeds with the knife, as many seeds tend to form around the middle horizontally.
Gently remove all seeds and set fruit aside.
Discard any seeds that look strange—small, flat, empty shells, etc.
Some fruit has a lot of seeds, others may have few. The grapefruit (photo, above) had just one seed total but it was a good one and grew into a tree.
4 Test for Seed Viability
Place seeds in a small cup of water.
If they sink to the bottom, they should be viable.
If they float, they are not (discard them).
If seeds have jelly-like coating, rinse in a strainer and gently push it off with soft towel.
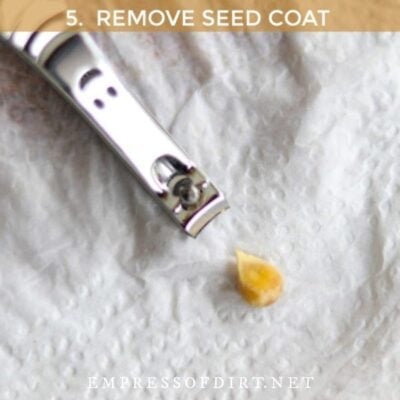
5 Remove Seed Coat
This step can significantly speed up the germination time.
Seeds naturally come with outer protection that prevents unwanted germination. It’s super smart.
For citrus, the seeds have both a hard seed coat (made of two half shells sealed together), protecting the tender seed inside, and there may also be gel around the seed, to provide an additional barrier.
That’s why the seeds don’t sprout in the fruit—the moisture can’t reach them—it’s very cool!
To make germination go faster, we can remove both that gel coat (Step 3) and the hard shell.
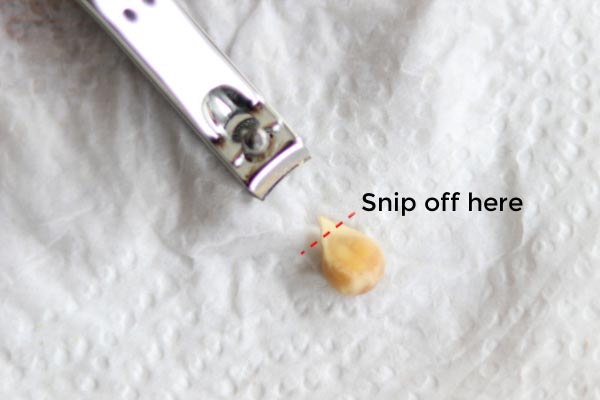
Look for the hard, flat pointed end of the seed shell and snip it off with nail clippers, careful not to damage the actual seed inside.
Gently slide your fingernail between the two shell pieces to pry them open/apart and remove them (break them apart).
There are also skin-like layers inside which I leave alone (the seed will grow fine with the skin there). Don’t worry if some skin falls off.
Now you’ve got the soft seed. Be gentle with it!
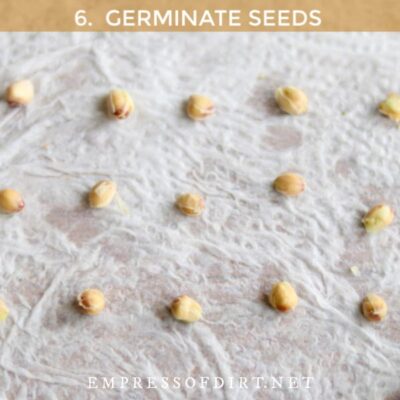
6 Germinate the Seeds
Moisten a few sheets of paper towel and place the seeds on it, at least an inch apart in all directions to leave room for root growth.
Cover with another layer of moist paper towel and place in a food storage tub with lid or food storage bag.
You want the seeds in contact with warm moisture ongoing. Not too damp. And don’t let them dry out.
Attach your plant tag with a binder clip and place everything in a warm, dark location. I put them in a kitchen cupboard.
I put reminders in my phone to check on them every 2-3 days. Occasionally I forget and weeks later find this crazy-good thing growing in my cupboard!
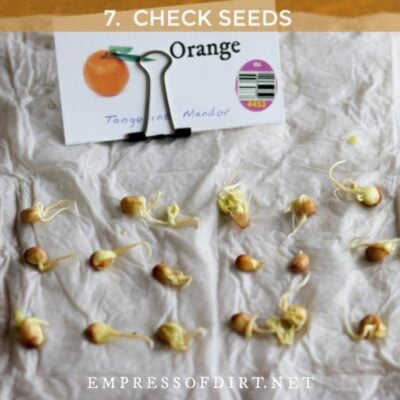
7 Check on the Seeds
Check the seeds every few days.
If needed, spritz the towel to keep it moist. You want it moist, not dry or soaking wet.
Some will sprout really fast! Others may take weeks. Some will be duds.
Wrap it back up and put it back in the cupboard. We want roots at least an inch long before planting.
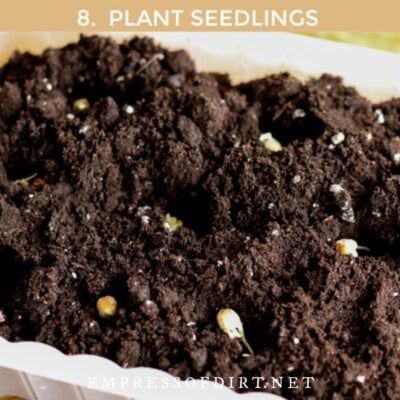
8 Plant Seedlings
When there is at least an inch of roots, you can sow the seedlings in potting mix.
The roots often look thick and off-white, like bean sprouts.
In some cases, the plant stem may also start growing.
Plant the sprouted seed in a small cup, pot, or other container with drainage holes.
A regular organic potting mix is good for clay and other non-plastic pots. You could also use a cacti potting mix with plastic pots because they retain more moisture.
I prefer to use separate little pots but sometimes I have limited room for lighting so I will put them all in one container for the first few months.
Position the roots just below the soil surface. Any other growth can be above soil level. Gently press the potting mix around the plant so it’s snugly in place.
Water thoroughly, top up potting mix if needed, and gradually transition plant to a warm, sunny location over a few weeks.
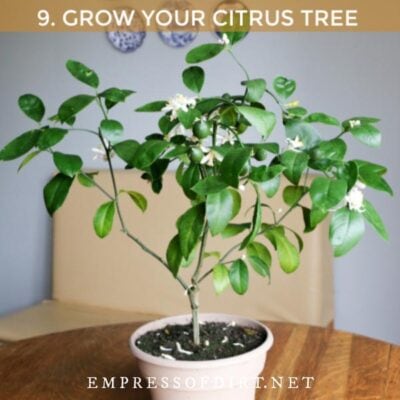
9 Grow a Citrus Tree
How long will it take to grow my citrus plant?
Citrus trees are slow-growers and heavy feeders, doing best with 8-12 hours of sunlight per day.
The less light, the slower the growth.
I started several different hybrids from seed and after 5 months (from the day I removed the seed from the fruit) they range in size from 4 to 7 inches tall.
Keep in mind that reduced light and warmth in winter (indoors) will slow or stall growth.
It may be 3-5 years before flowers form, then pollination can occur (you can help it), and fruit forms.
Small fruit may ripen over several months, larger fruit can take much longer.
You can help the plant grow faster by using supplemental grow lights.
Use fertilizer specifically for citrus plants and follow the application instructions on the label.
Basic Citrus Tree Care Tips – Container Growing
1. Provide 8-12 hours of sunlight each day. Avoid direct, burning sun. 2. Ensure pot has good drainage. 3. Use a slow-release fertilizer for citrus plants as directed. 4. Keep outdoors until temperatures reach 40°F (4°C), then bring inside for winter. 5. Transition the plant (over days or weeks) gradually to avoid shock. 6. Do not allow soil to dry out. Moderate, even moisture is best. Use a moisture meter to be sure. 7. Most citrus plants are self-pollinating; some benefit from pollination assistance (you or insects). 8. Treat spider mites with neem oil spray. 9. Remove mealybugs with rubbing alcohol.


 CURTOICURTO/GETTY IMAGES
 SKYNESHER/GETTY IMAGES
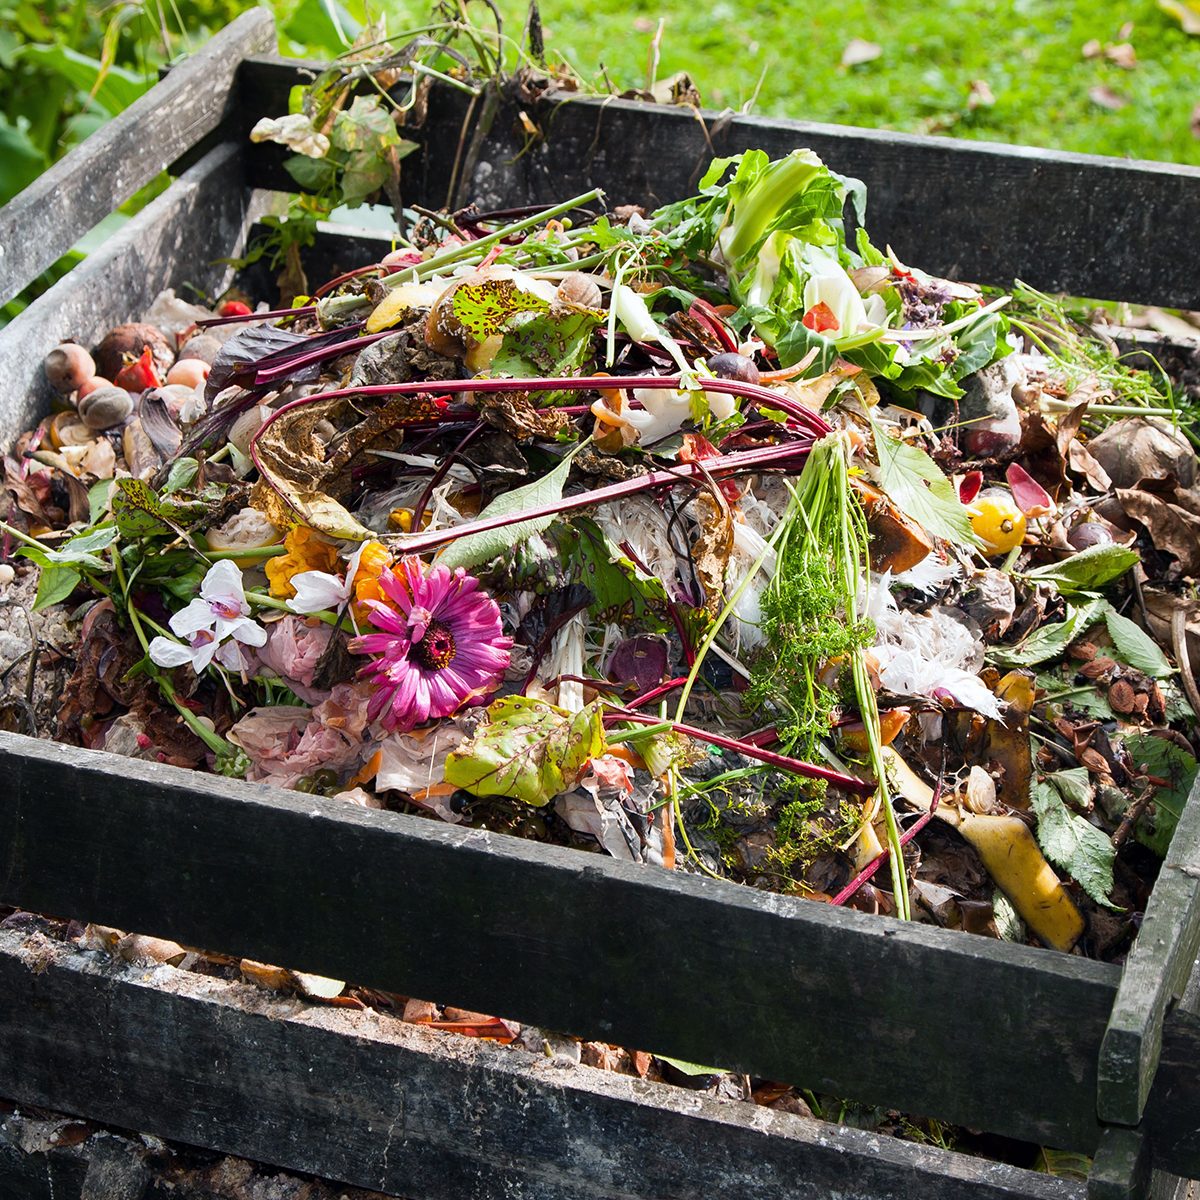
 SVETIKD/GETTY IMAGES