Make your Own Soap Paper

Version:1.0 StartHTML:000000216 EndHTML:000286767 StartFragment:000235000 EndFragment:000286664 StartSelection:000235026 EndSelection:000286602 SourceURL:https://www.ehow.com/how_6133091_make-paper-soap.html How to Make Paper Soap | eHow

How to Make Paper Soap

Irene A. Blake | updated on August 30, 2017

About the Author:

Irene A. Blake

Based in Southern Pennsylvania, Irene A. Blake has been writing on a wide range of topics for over a decade. Her work has appeared in projects by The National Network for Artist Placement, the-phone-book Limited and GateHouse Media. She holds a Bachelor of Arts in English from Shippensburg University.

Many people use paper soap—paper-thin soap sheets—as an alternative to bar and/or liquid soap. Paper soap is not only easy to carry, store and use (especially for travel), but quickly dissolves in water without leaving behind residual soap scum in a soap dish or on a sink as typically seen with wet soap bars or dripping soap dispensers. Although you can find several paper soap products in stores or online, you can easily make your own paper soap at home with the use your favorite soap brands and a few kitchen items.

Woman washing hands with bar of soap

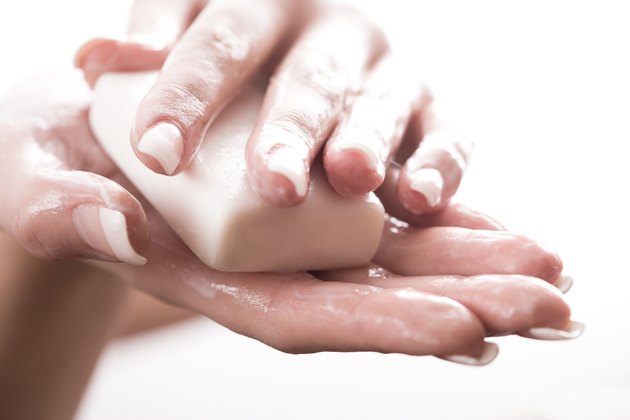
(Image: Jupiterimages/Photos.com/Getty Images)

Things You’ll Need

  • Soap bar
  • Wire cheese slicer
  • Cutting board
  • Wax paper
  • Brownie or cake bake pans
  • Knife
  • Glass bowl
  • Pan
  • Water
  • Oven
  • Straight-edged scissors
  • Speed peeler (optional)
  • Decorative scissors (optional)

Slicing Method

Step 1

Lift the handle of the wire slicer.

Step 2

Place your soap bar on the cutting board and then align it under the wire as you would a block of cheese.

Step 3

Pull the handle down and slice through the end of the soap bar. Set the first paper-thin soap sheet aside and then repeat as needed to make additional sheets of paper soap.

Pouring Method

Step 1

Line your pans with wax paper.

Step 2

Cut your soap bar into 1/2-inch blocks and place the blocks in a large glass bowl.

Step 3

Create a double boiler and then melt the soap. Fill a small pot with water and place it on a burner. Put the glass bowl on top of the pot so that it sits on the rim of the mouth of the pot, turn on the burner and then wait for the generated steam to melt the soap.

Step 4

Pour the melted soap into your brownie or cake pans to coat the wax sheets with a paper-thin film about 1/2 mm thick.

Step 5

Wait for the soap to cool. Peel the soap carefully from the wax paper and cut it into palm-sized (or smaller) sheets using straight-edged scissors to make a stack of paper soap.

Tip

If you don’t mind having irregularly shaped paper soap sheets, cut paper-thin sheets from a soap bar using a handheld speed peeler.

If you want to make paper soap with special edges, cut the soap using the decorative scissors or “decorative paper edgers” typically used in paper crafts such as scrapbooking.

Poem by MwsR

PERHAPS

Perhaps this is a test

Maybe a trial

Should we all sit back and think of it a while

Does our future lie in wait?

Maybe dreams are second to this

Perhaps there is something greater we might miss.

A greater force is present

Something more to the equation, despite

Our best efforts, from everyone running with fright.

There is a time for everything

A time to mend,

A time to bend

There is time to heal and resist being ill

Somethings under the sun will hurt like a quill

Sometimes there will be rumors and such

Bringing our full attention, we should, very much

Time to help, if we will

Give back and support others still.

Things are meant to change

This sometimes means making a radical move

Making sense of this, because there is much to prove

Our minds need rest,

Our bodies need strength

The people need answers, the need restrictive covenant.

Did You Know This? I Sure Didn’t

I know when you see these you will think like me, “I have already done the reheating on those before and nothing happened.” Truth is, it is never the same scenario and we cannot be sure that we are totally safe in our practices of reheating food. So, I thought these were worthy to mention. MwsR ❤

Foods You Should Never Reheat!

https://www.msn.com/en-us/health/nutrition/foods-you-should-never-reheat-and-why/ss-BB11jrr7?ocid=msedgntp&fullscreen=true#image=21

`Anything that’s already been reheated

Technically, most food can be safely reheated multiple times as long as its interior temperature gets hot enough to kill bacteria, but the more times you reheat something, the greater the chance of it not being properly heated all the way through. Unless you consistently use a food thermometer while cooking, it’s best to err on the side of caution and not reheat leftovers that have already been reheated once.

`Oils

Slide 3 of 21: Reheating cooking oil (or deep-fried food) could be potentially hazardous. The trans-fat content of frying oil increases each time the oil is reheated.

Reheating cooking oil (or deep-fried food) could be potentially hazardous. The trans-fat content of frying oil increases each time the oil is reheated.

Spring rolls

Slide 4 of 21: While you’ll likely want to avoid reheating deep-fried spring rolls for health reasons, there are also taste-related reasons for not doing so. A spring roll's multiple layers make it very difficult to recreate its crunchy texture once it’s been cooked and allowed to cool.

While you’ll likely want to avoid reheating deep-fried spring rolls for health reasons, there are also taste-related reasons for not doing so. A spring roll’s multiple layers make it very difficult to recreate its crunchy texture once it’s been cooked and allowed to cool.

Breast milk

Slide 5 of 21: Breast milk should never be reheated in a microwave. Not only can reheated breast milk become less nutritious, it may also pose a risk to infants.

Breast milk should never be reheated in a microwave. Not only can reheated breast milk become less nutritious, it may also pose a risk to infants.

Eggs

Slide 6 of 21: Eggs may contain bacteria, called Salmonella enteritidis, which can cause food poisoning. They may hold up to a second reheating in some cases, but as a potentially hazardous food, it may not be worth the risk. Cooked eggs that have been left at room temperature for more than two hours should be thrown out.

Eggs may contain bacteria, called Salmonella enteritidis, which can cause food poisoning. They may hold up to a second reheating in some cases, but as a potentially hazardous food, it may not be worth the risk. Cooked eggs that have been left at room temperature for more than two hours should be thrown out.

Chicken

Slide 7 of 21: Rotisserie chicken loses moisture as it cools, which is why it should be consumed immediately, when it’s most palatable. As for chicken cooked in other ways, be aware that chicken is a potentially hazardous food that can contain Salmonella. Heating and reheating it can increase the risk of cooking error and food poisoning. Whatever you do, don’t use a microwave to reheat chicken.

Rotisserie chicken loses moisture as it cools, which is why it should be consumed immediately, when it’s most palatable. As for chicken cooked in other ways, be aware that chicken is a potentially hazardous food that can contain Salmonella. Heating and reheating it can increase the risk of cooking error and food poisoning. Whatever you do, don’t use a microwave to reheat chicken.

Clams, mussels, oysters

Shellfish, such as clams, mussels, oysters and scallops, is a potentially hazardous food and can carry bacteria that cause food poisoning. Handle such food with care during storage and cooking. Most bivalve shellfish are safest to eat immediately after being appropriately cooked.

Mushrooms

Slide 9 of 21: Mushrooms are delicate and, if not cooked and stored properly, can deteriorate and cause an upset stomach. If you’re eyeing mushrooms that were cooked over 24 hours ago, do not reheat them.

Mushrooms are delicate and, if not cooked and stored properly, can deteriorate and cause an upset stomach. If you’re eyeing mushrooms that were cooked over 24 hours ago, do not reheat them.

Potatoes

Slide 10 of 21: Cooked potatoes that sit at room temperature after cooking should not be reheated. Potatoes can contain Clostridium botulinum, the bacteria that causes botulism, a potentially deadly form of food poisoning. These bacteria can proliferate at room temperature, so it’s best to eat potatoes immediately after cooking or cool them down promptly for cold dishes like potato salad.

Cooked potatoes that sit at room temperature after cooking should not be reheated. Potatoes can contain Clostridium botulinum, the bacteria that causes botulism, a potentially deadly form of food poisoning. These bacteria can proliferate at room temperature, so it’s best to eat potatoes immediately after cooking or cool them down promptly for cold dishes like potato salad.

Beets

Beets are rich in nitrates, which break down into nitrites if over processed through reheating. Consumed fresh or immediately after cooking, beets are a wonderfully healthy food, but it’s best to avoid reheating them.

There is some controversy over how harmful nitrites really are, but some doctors believe them to be carcinogenic. For now, it may be best to err on the side of caution and consume nitrate-rich food in a state as close to fresh as possible.

Plain rice

Ideally, rice should be consumed immediately after cooking. Raw rice may contain spores of a bacterium called Bacillus cereus, which can cause food poisoning. The longer cooked rice is left sitting at room temperature, the higher the chance that these spores (which can survive the cooking process) will develop into bacteria and multiply.

Risotto

Slide 13 of 21: A creamy risotto can quickly go sour in the fridge. When cooking, adjust portions appropriately so that you cook only what you need and avoid leftovers.

A creamy risotto can quickly go sour in the fridge. When cooking, adjust portions appropriately so that you cook only what you need and avoid leftovers.

Celery

Slide 14 of 21: As with beets, celery contains naturally occurring nitrites that can become toxic if reheated.

As with beets, celery contains naturally occurring nitrites that can become toxic if reheated.

Turnips

Slide 15 of 21: Turnips are also high in nitrites and should be cooked only once.

Turnips are also high in nitrites and should be cooked only once.

Spinach and lettuce

Spinach and lettuce are both high in nitrates. If you’re concerned about those nitrates becoming nitrites, avoid reheating these leafy greens. Eat them raw or immediately after cooking.

Processed meats

Slide 17 of 21: Microwaving processed meats increases their volume of cholesterol oxidation products, which can damage your cardiovascular health.

Microwaving processed meats increases their volume of cholesterol oxidation products, which can damage your cardiovascular health.

Leftovers more than 3 days old

Slide 18 of 21: Toss out anything in your fridge that’s more than two to three days old—it’s not worth the risk of food poisoning. If you want to keep leftovers for longer, pop them in the freezer.

Toss out anything in your fridge that’s more than two to three days old—it’s not worth the risk of food poisoning. If you want to keep leftovers for longer, pop them in the freezer.

Anything left at room temperature for more than two hours

Has your food been sitting at room temperature for more than two hours? If it has, throw it out.Anything left at room temperature for more than two hours Has your food been sitting at room temperature for more than two hours? If it has, throw it out.

Coffee

Slide 20 of 21: Reheating cold coffee in the microwave will leave it tasting acidic and stale.

Reheating cold coffee in the microwave will leave it tasting acidic and stale.

Anything that smells off

This one goes without saying. Don’t reheat (or eat!) anything that smells like it’s gone bad.Anything that smells off This one goes without saying. Don’t reheat (or eat!) anything that smells like it’s gone bad.

Recycle This~!

Instant Bathroom Storage

The Coolest 34 DIY Projects You Need To Make This Spring

Source

Diabetes And Corona Virus

Here’s what you need to know:

People with diabetes are not more likely to get COVID-19 than the general population.

The problem people with diabetes face is primarily a problem of worse outcomes, not greater chance of contracting the virus. In China, where most cases have occurred so far, people with diabetes had much higher rates of serious complications and death than people without diabetes—and generally we believe that the more health conditions someone has (for example, diabetes and heart disease), the higher their chance of getting serious complications from COVID-19. We expect the death rate to decline over time as we get better at detecting and treating this specific virus.

People with diabetes do face a higher chance of experiencing serious complications from COVID-19.

In general, people with diabetes are more likely to experience severe symptoms and complications when infected with a virus.If diabetes is well-managed, the risk of getting severely sick from COVID-19 is about the same as the general population.

When people with diabetes do not manage their diabetes well and experience fluctuating blood sugars, they are generally at risk for a number of diabetes-related complications. Having heart disease or other complications in addition to diabetes could worsen the chance of getting seriously ill from COVID-19, like other viral infections, because your body’s ability to fight off an infection is compromised.

Viral infections can also increase inflammation, or internal swelling, in people with diabetes. This is also caused by above-target blood sugars, and both could contribute to more severe complications.

When sick with a viral infection, people with diabetes do face an increased risk of DKA (diabetic ketoacidosis), commonly experienced by people with type 1 diabetes. DKA can make it challenging to manage your fluid intake and electrolyte levels—which is important in managing sepsis. Sepsis and septic shock are some of the more serious complications that some people with COVID-19 have experienced.

COVID-19 is different from the seasonal flu.

COVID-19 is proving to be a more serious illness than seasonal flu in everyone, including people with diabetes. All of the standard precautions to avoid infection that have been widely reported are even more important when dealing with this virus.

Recommended safety precautions are the same as for flu, such as frequent hand washing and covering coughs and sneezes with a tissue or your elbow. The CDC does not recommend the use of face masks by people who are not infected.

We encourage people with diabetes to follow the guidance of the CDC and to review how you manage sick days—preparing for a sick day can make it easier.

The risks are similar for people with type 1 and type 2 diabetes.

In general, we don’t know of any reason to think COVID-19 will pose a difference in risk between type 1 and type 2 diabetes. More important is that people with either type of diabetes vary in their age, complications and how well they have been managing their diabetes.

People who already have diabetes-related health problems are likely to have worse outcomes if they contract COVID-19 than people with diabetes who are otherwise healthy, whichever type of diabetes they have.

Manufacturers are not reporting that COVID-19 is impacting access to insulin and other supplies.

Leading manufacturers are reporting that COVID-19 is not having an impact on their current manufacturing and distribution capabilities for insulin and other supplies at this time. We are continuing to monitor the situation and will provide updates should anything change. If you are struggling to pay for insulin or know someone who is, the ADA has resources to help—visit InsulinHelp.org.

If COVID-19 is spreading in your community, take extra measures to put distance between yourself and other people to further reduce your risk of being exposed to this new virus. Stay home as much as possible.

Before you get sick, make a plan:

Gather your supplies:

  • Phone numbers of your doctors and healthcare team, your pharmacy and your insurance provider
  • List of medications and doses (including vitamins and supplements)
  • Simple carbs like regular soda, honey, jam, Jell-O, hard candies or popsicles to help keep your blood sugar up if you are at risk for lows and too ill to eat
  • If a state of emergency is declared, get extra refills on your prescriptions so you do not have to leave the house
    • If you can’t get to the pharmacy, find out about having your medications delivered
  • Always have enough insulin for the week ahead, in case you get sick or cannot refill
    • If you are struggling to pay for insulin or know someone who is, the ADA has resources to help—visit InsulinHelp.org
  • Extra supplies like rubbing alcohol and soap to wash your hands
  • Glucagon and ketone strips, in case of lows and highs
  • Have enough household items and groceries on hand so that you will be prepared to stay at home for a period of time

Talk to your health care team about the following:

  • When to call your doctor’s office (for ketones, changes in food intake, medication adjustments, etc.)
  • How often to check your blood sugar
  • When to check for ketones
  • Medications you should use for colds, flu, virus, and infections
  • Any changes to your diabetes medications when you are sick

Take everyday precautions:

  • Avoid close contact with people who are sick
  • Take preventive actions:
    • Clean your hands often
    • Wash your hands often with soap and water for at least 20 seconds, especially after blowing your nose, coughing, or sneezing, or having been in a public place.
    • If soap and water are not available, use a hand sanitizer that contains at least 60% alcohol.
    • To the extent possible, avoid touching high-touch surfaces in public places–elevator buttons, door handles, handrails, handshaking with people, etc. Use a tissue or your sleeve to cover your hand or finger if you must touch something.
    • Wash your hands after touching surfaces in public places.
    • Avoid touching your face, nose, eyes, etc.
    • Clean and disinfect your home to remove germs: practice routine cleaning of frequently touched surfaces (for example: tables, doorknobs, light switches, handles, desks, toilets, faucets, sinks & cell phones)
    • Avoid crowds, especially in poorly ventilated spaces. Your risk of exposure to respiratory viruses like COVID-19 may increase in crowded, closed-in settings with little air circulation if there are people in the crowd who are sick.
    • Avoid all non-essential travel including plane trips, and especially avoid embarking on cruise ships.

Watch for emergency warning signs:

If you develop emergency warning signs for COVID-19 get medical attention immediately. In adults, emergency warning signs include:

  • Difficulty breathing or shortness of breath
  • Persistent pain or pressure in the chest
  • New confusion or inability to arouse
  • Bluish lips or face

If you feel like you are developing symptoms, call your doctor:

Pay attention for potential COVID-19 symptoms including fever, dry cough and shortness of breath. If you feel like you are developing symptoms, call your doctor.

When you call:

  • Have your glucose reading available
  • Have your ketone reading available
  • Keep track of your fluid consumption (you can use a 1-liter water bottle) and report
  • Be clear on your symptoms (for example: are you nauseated? Just a stuffy nose?)
  • Ask your questions on how to manage your diabetes

If you do get sick, know what to do:

Here are some common tips, which may vary for each person:

  • Drink lots of fluids. If you’re having trouble keeping water down, have small sips every 15 minutes or so throughout the day to avoid dehydration.
  • If you are experiencing a low (blood sugar below 70 mg/dl or your target range), eat 15 grams of simple carbs that are easy to digest like honey, jam, Jell-O, hard candy, popsicles, juice or regular soda, and re-check your blood sugar in 15 minutes to make sure your levels are rising. Check your blood sugar extra times throughout the day and night (generally, every 2-3 hours; if using a CGM, monitor frequently).
  • If your blood sugar has registered high (BG greater than 240mg/dl) more than 2 times in a row, check for ketones to avoid DKA.
  • Call your doctor’s office immediately, if you have medium or large ketones (and if instructed to with trace or small ketones).
  • Be aware that some CGM sensors (Dexcom G5, Medtronic Enlite, and Guardian) are impacted by Acetaminophen (Tylenol). Check with finger sticks to ensure accuracy.
  • Wash your hands and clean your injection/infusion and finger-stick sites with soap and water or rubbing alcohol.

Know your rights:

A reminder: If you have diabetes, you have legal rights that do not go away during a health crisis like COVID-19.

  • Even in a pandemic, you have the right to reasonable accommodations at work, which could include medical leave or alternate work arrangements.
  • Your child’s Section 504 Plan should include accommodation for extra sick days without penalty. This would apply if your child is sick or if you choose to keep him or her home from school to avoid contagion with COVID-19.
  • People with diabetes who are incarcerated or in police custody are entitled to appropriate and adequate medical care, and their medical needs may change during infectious disease outbreaks.

If you are concerned you are being treated unfairly because of your diabetes, contact us to seek help from our Legal Advocacy team.

For more information, please call 1-800-DIABETES (800-342-2383).Related pagesPlanning for Sick Days

Partner sites

American Diabetes Association

askada@diabetes.org

1995 – 2020. American Diabetes Association®. All rights reserved.

Homemade Milk Alternatives

1
ALMOND OR CASHEW MILK

First, soak nuts. 
 

Regardless of the nut of choice, the basic formula for nut milk is the same: 1 cup raw nuts to 3 or 4 cups water. All nuts also benefit from soaking prior to being blended, as pre-soaking creates a creamier result.

For almond milk, place 1 cup raw almonds in a bowl and cover with cold water to about 2 inches above the almonds. Allow to soak overnight or for up to 2 days. The longer the nuts soak, the creamier the milk they’ll produce. If soaking for longer than overnight, change the soaking water once. For cashew milk, soak 1 cup raw cashews and follow the same steps as almond milk.

When ready to make the milk, drain and rinse the almonds, discarding the soaking liquid.
 

TIP
No matter what nut you choose, be sure the nuts are raw, unroasted and unseasoned. Roasted, salted or seasoned nuts will negatively impact the flavor and texture of the milk.

2
BLEND THE ALMOND OR CASHEW MILK

Place drained, soaked nuts in a blender with 3 or 4 cups of very hot filtered water — the water should not be boiling. If you don’t have a blender, a food processor can be used, though a blender creates a smoother texture.

If desired for flavor, add 1 teaspoon vanilla extract, 1/8 teaspoon kosher salt or sea salt and about 1 and 1/2 teaspoons liquid sweetener such as agave nectar, stevia or honey to the blender.


Blend on low speed for a few seconds to combine. Increase speed to high and blend until creamy and smooth, about 1 to 2 minutes. The mixture will expand some as it blends, so be sure to not fill the blender to the top to start.
 

TIP
Adjust the amount of water to create the desired milk consistency, with less water yielding a thicker milk and more water yielding a thinner milk. Nut milk made with 4 cups water is about the consistency of skim dairy milk, while 3 cups water creates a consistency more similar to whole dairy milk.

3
STRAIN THE ALMOND OR CASHEW MILK

Strain the mixture through a fine mesh strainer, cheesecloth or thin kitchen towel to remove any nut bits. If using cheesecloth or a kitchen towel, place it over a large mixing bowl. Slowly pour the milk from the blender over it. Carefully gather together the corners of the cheesecloth or towel and lift up. Squeeze into the mixing bowl until all liquid is extracted.

You can store in the refrigerator for up to 3 or 4 days. Shake milk before using.
 

4
OAT MILK

First, soak oats.
 

Place 1 cup old-fashioned oats in a bowl and cover with cold water to about 2 inches above the oats. Allow to soak for around an hour. Drain and rinse the oats to remove some of the oats’ starch. Be sure to discard the soaking liquid.
 

5
BLEND THE OAT MILK

Place drained oats and 3 cups filtered water in a blender. Blend on high until smooth, about 30 seconds.
 

TIP
If using a high-powered blender, you may only need to blend the oats for about 10 seconds. Blending too long can break down the oats too much and make the milk gloppy.
6
STRAIN THE OAT MILK

Strain through a fine mesh strainer, cheesecloth or thin kitchen towel to remove any oat bits. If using cheesecloth or a kitchen towel, place it over a large mixing bowl. Slowly pour the milk from the blender over it. Carefully gather the corners and lift up. Squeeze into the mixing bowl until all liquid is extracted.

Once strained, stir in 2 teaspoons vanilla extract, 1/8 teaspoon kosher salt or sea salt and about 1 to 2 tablespoons liquid sweetener such as agave nectar, stevia or honey, to taste.

Store in the refrigerator for up to 3 or 4 days. Shake milk before using.
 

7
COCONUT MILK

First, soak coconut.
 

Coconut milk takes just two simple ingredients to make: unsweetened shredded coconut and water.

Place 2 cups unsweetened shredded coconut in a blender. Add 4 cups very hot water. Let sit for 5 minutes to allow the coconut to soften. Do not drain or discard the water.
 

8
BLEND THE COCONUT MILK

Blend at low speed a few seconds, then on high speed for 1 to 2 minutes until creamy and well combined.
 

9
STRAIN THE COCONUT MILK

First pour coconut mixture through a colander into a pitcher or bowl to get most of the coconut bits out. Then strain again through cheesecloth or thin kitchen towel to remove any remaining smaller bits.

Store in the refrigerator for up to 4 days. Shake before using.
 

TIP
Coconut milk isn’t just for drinking! You can use it in recipes too. It makes a great replacement for low-fat canned coconut milk.

Pandemic Prep

Pandemic

Before a Pandemic

  • Store additional supplies of food and water. 
  • Periodically check your regular prescription drugs to ensure a continuous supply in your home.
  • Have any nonprescription drugs and other health supplies on hand, including pain relievers, stomach remedies, cough and cold medicines, fluids with electrolytes, and vitamins.
  • Get copies and maintain electronic versions of health records from doctors, hospitals, pharmacies and other sources and store them, for personal reference. Get help accessing electronic health records.
  • Talk with family members and loved ones about how they would be cared for if they got sick, or what will be needed to care for them in your home.

During a Pandemic

Limit the Spread of Germs and Prevent Infection

  • Americans can continue to use and drink tap water as usual during the COVID-19 pandemic.  Please be sure to follow public health guidance as the situation develops.
  • Avoid close contact with people who are sick.
  • When you are sick, keep your distance from others to protect them from getting sick too.
  • Cover your mouth and nose with a tissue when coughing or sneezing. It may prevent those around you from getting sick.
  • Washing your hands often will help protect you from germs.
  • Avoid touching your eyes, nose or mouth.
  • Practice other good health habits. Get plenty of sleep, be physically active, manage your stress, drink plenty of fluids, and eat nutritious food.

Homemade Diaper Wipes

Homemade Baby Wipes

Version 1

Ingredients:

Paper towels
Water

Directions:

1.  Wet paper towels
2.  Squeeze out extra water
3.  Place in small plastic container or baby wipes container
4.  Wipe baby when changing diaper and discard

Version 2 (for cloth diapering families)

Same as above, but substitute rags or baby wash cloths for the paper towels and wash with cloth diapers after use.