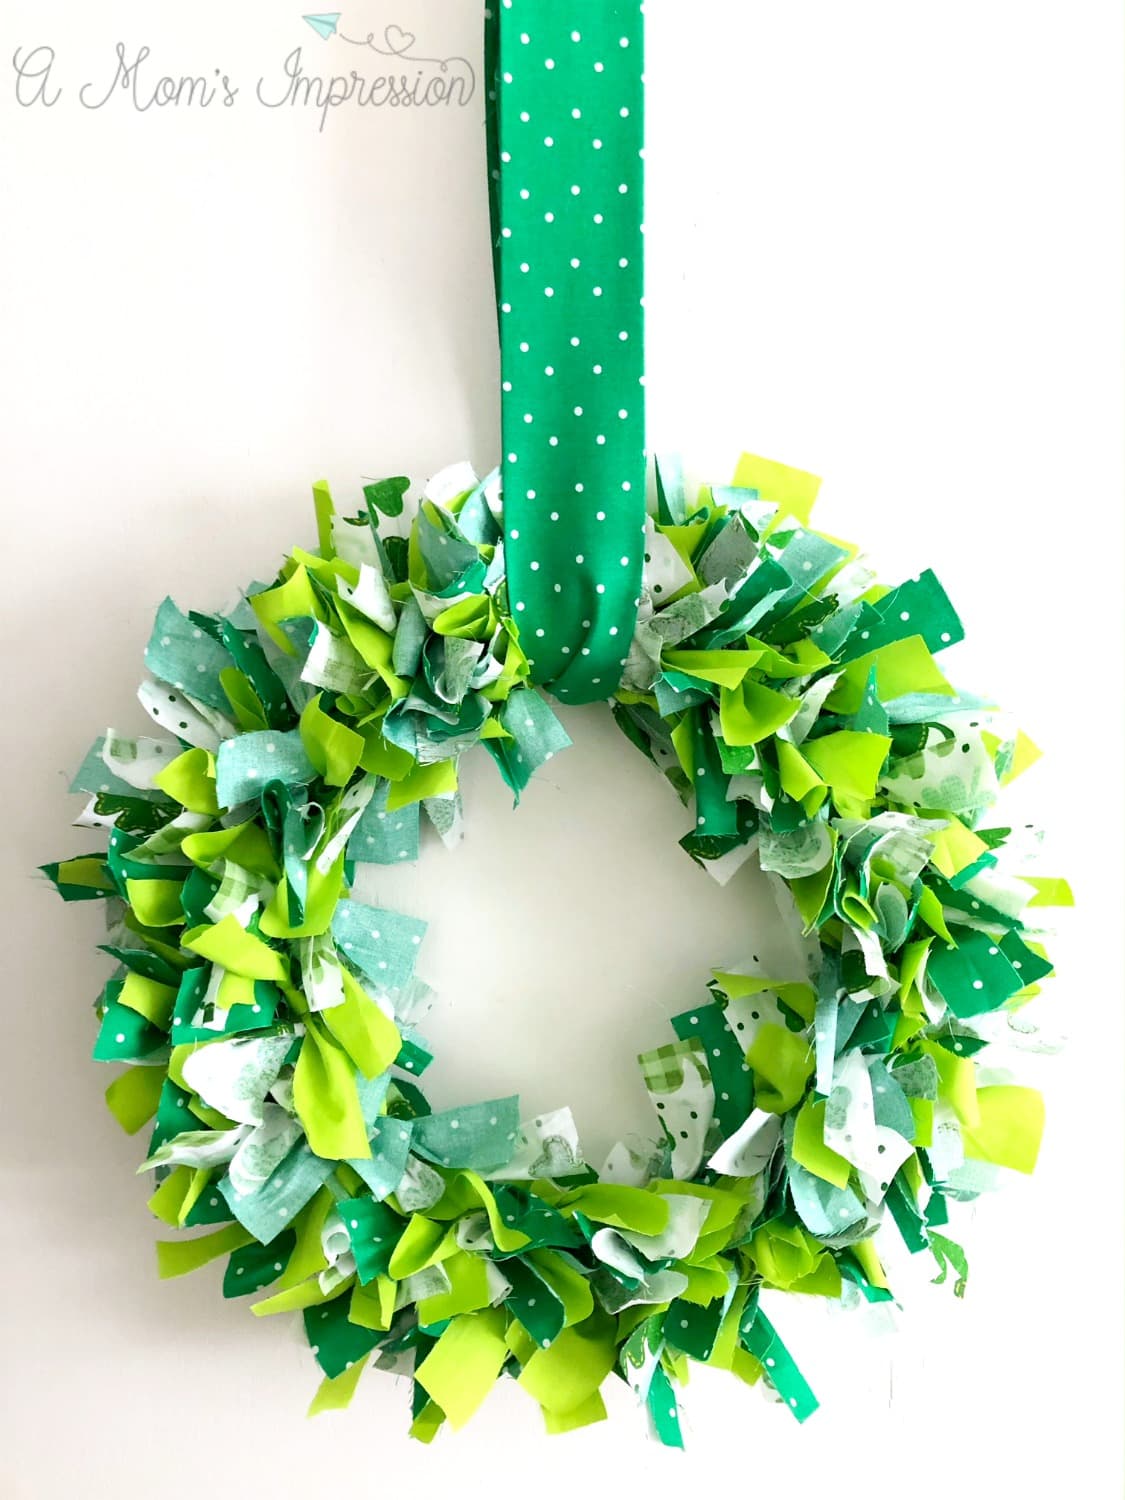
How to Make a Shamrock Wreath – DIY St. Patrick’s Day Decor Idea
This project was a bit time consuming, but it wasn’t hard at all. You can get your kids involved and make it a fun family project.
DIY Shamrock Wreath
Shamrock Wreath Supplies
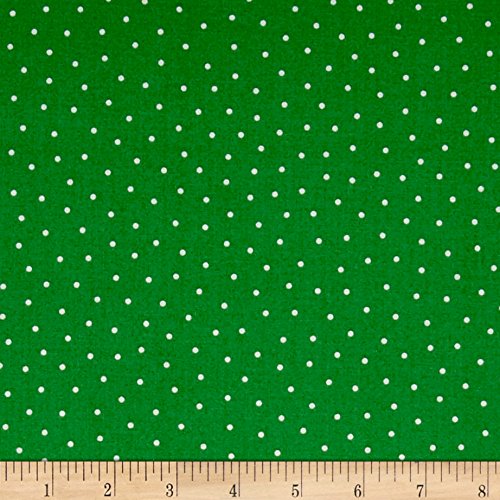
1-yard green polka dot fabric
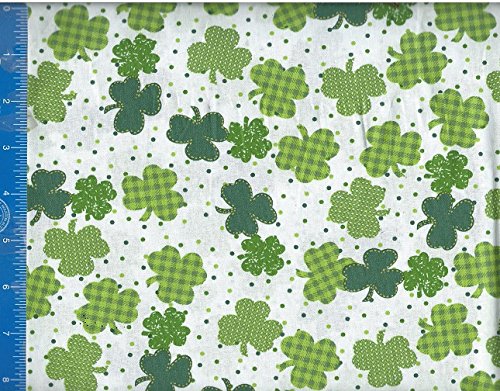
1-yard shamrock fabric
1-yard lime green fabric
1/4” yard green polka dot fabric
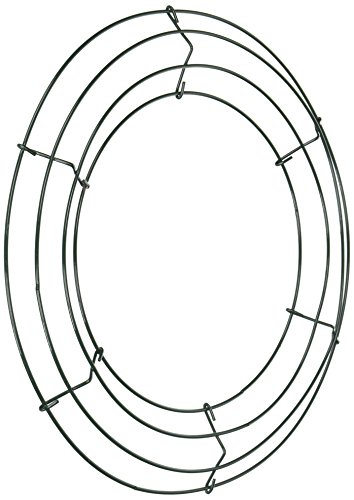
12” wire wreath frame
Scissors
Iron/ironing board
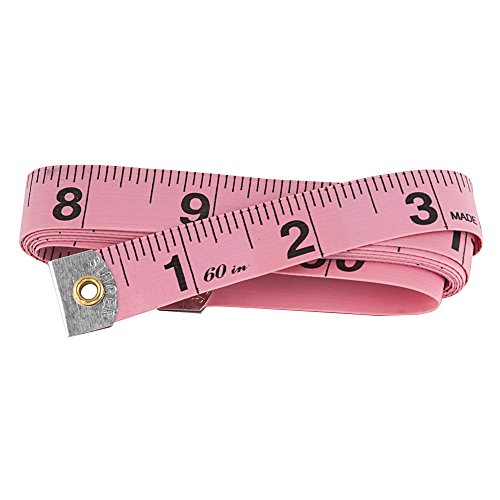
Measuring tape
How to Make A Shamrock Wreath For St. Patrick’s Day
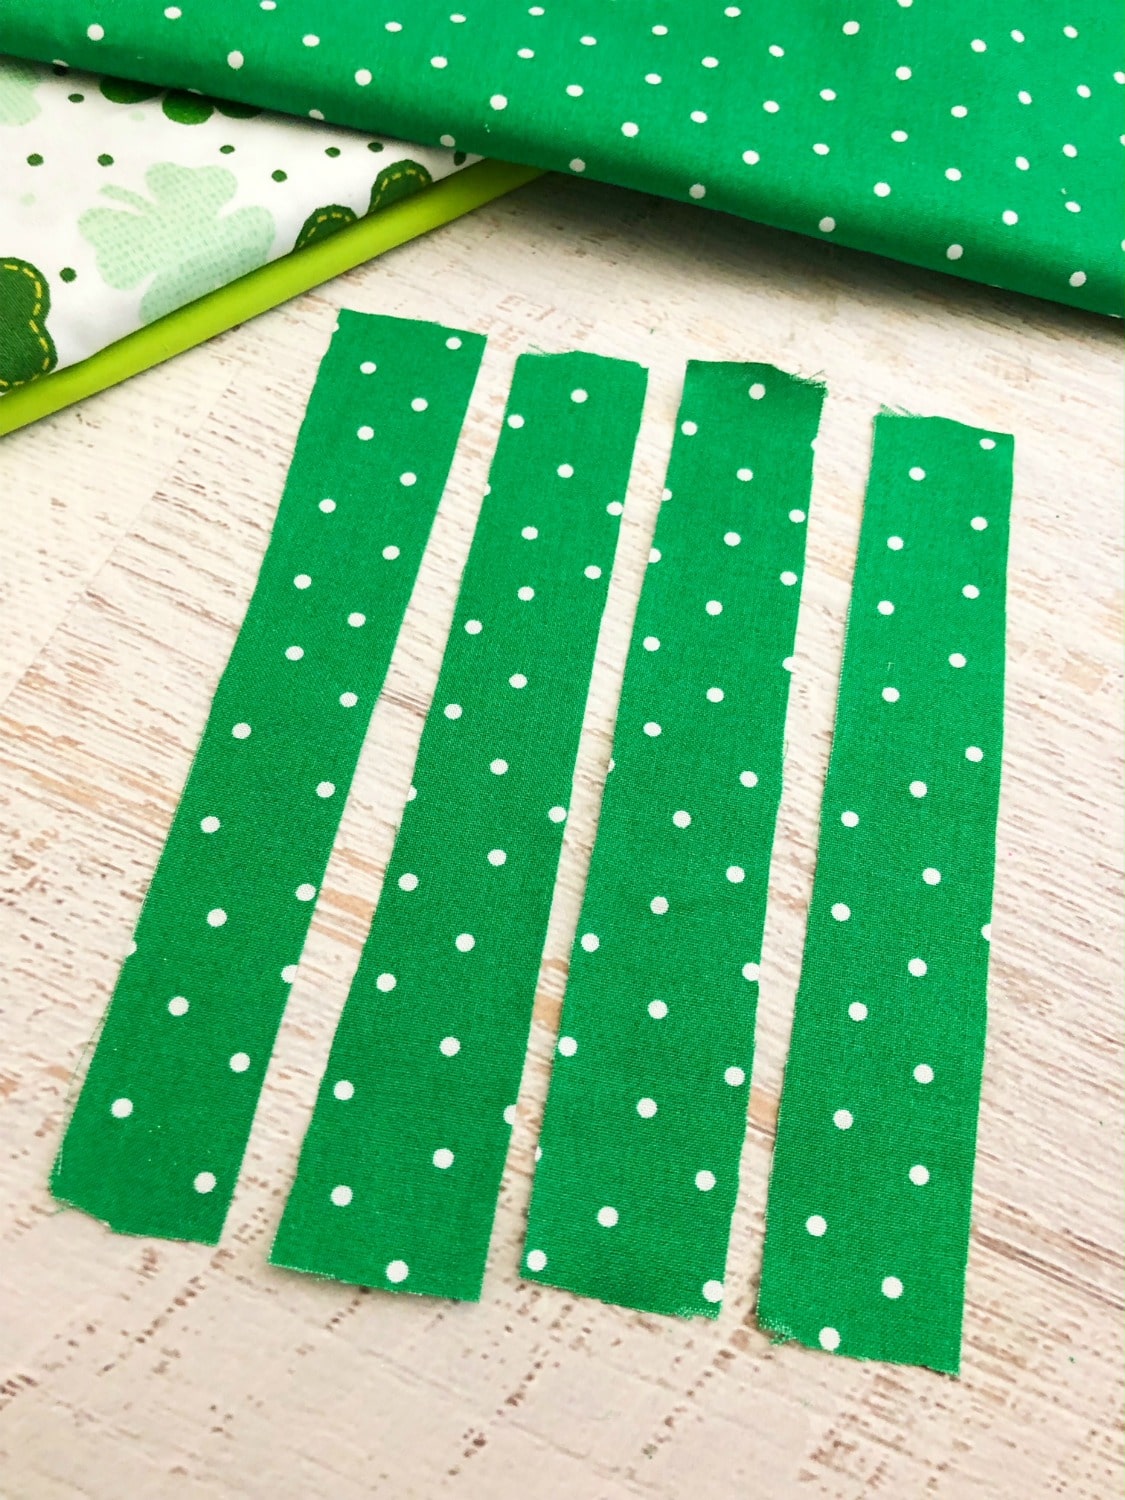
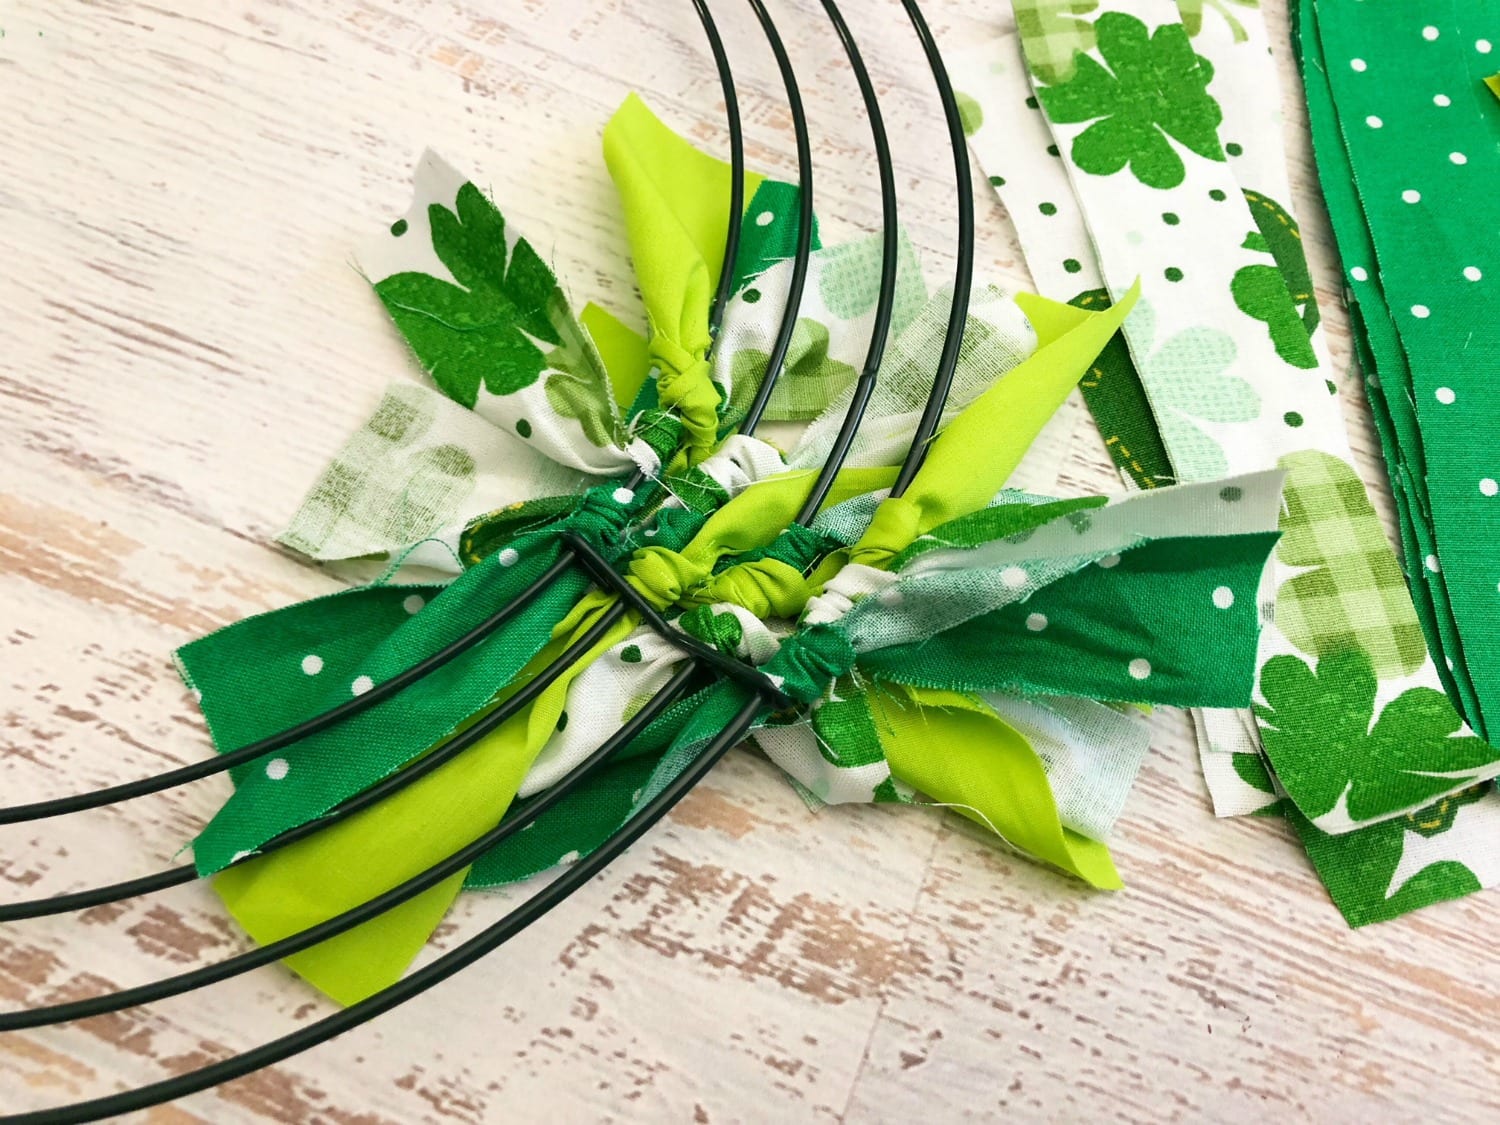
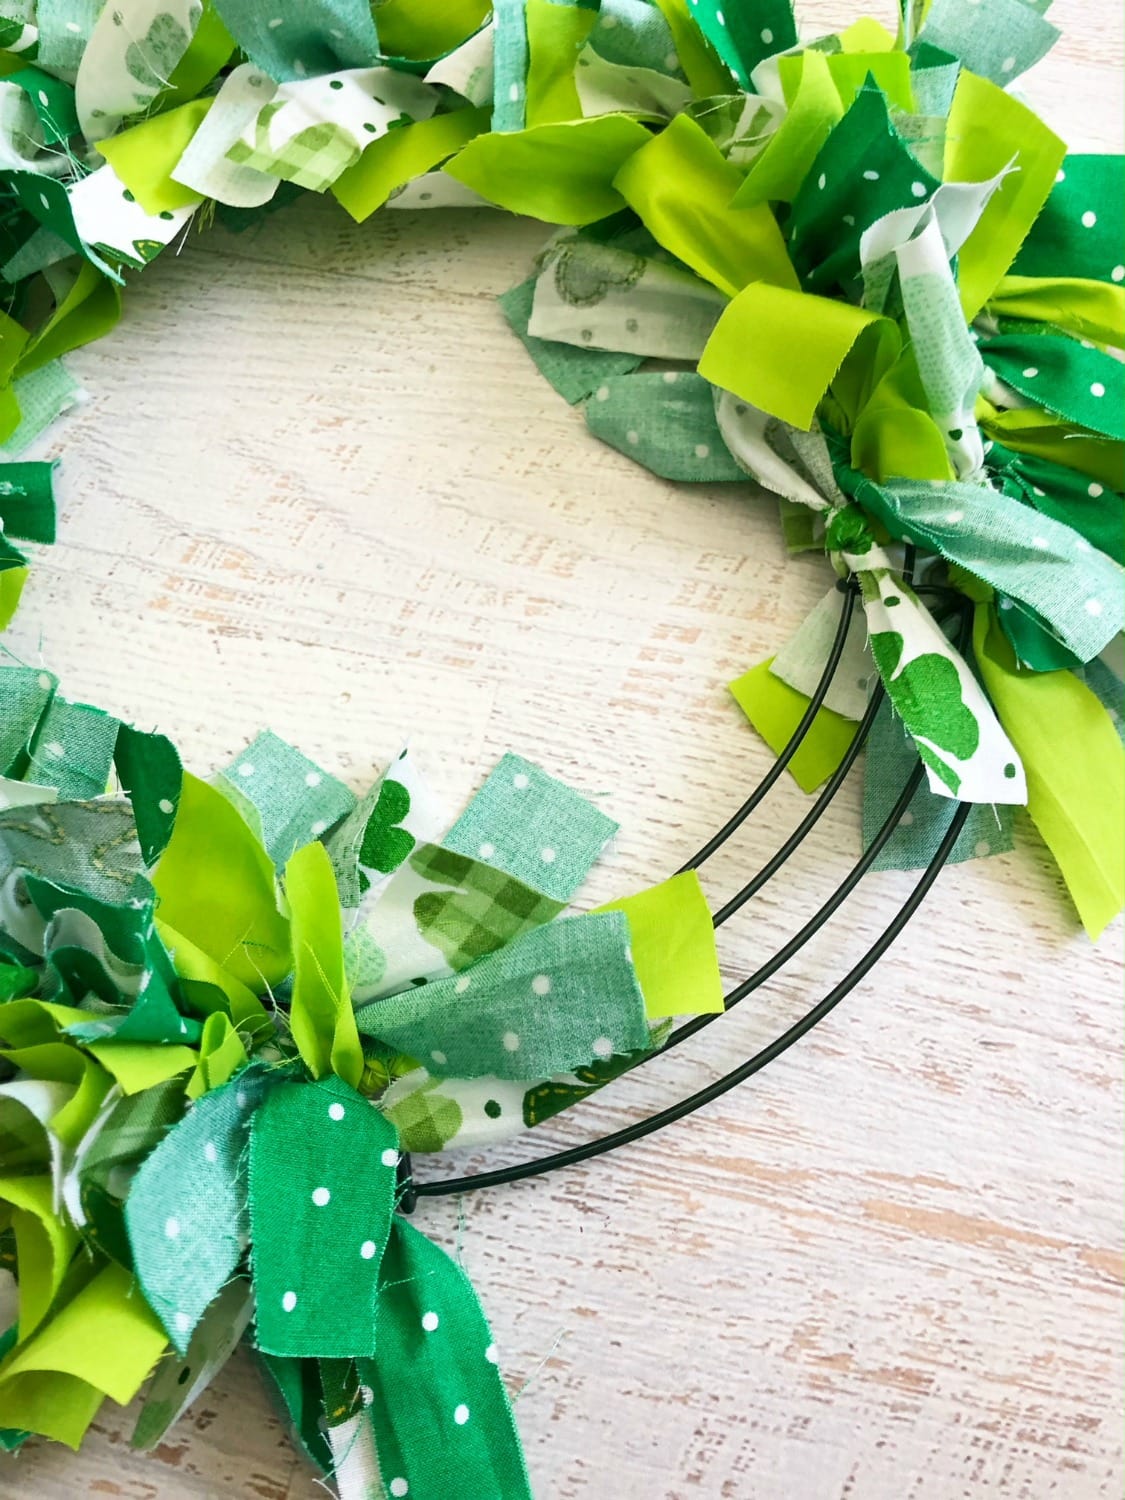
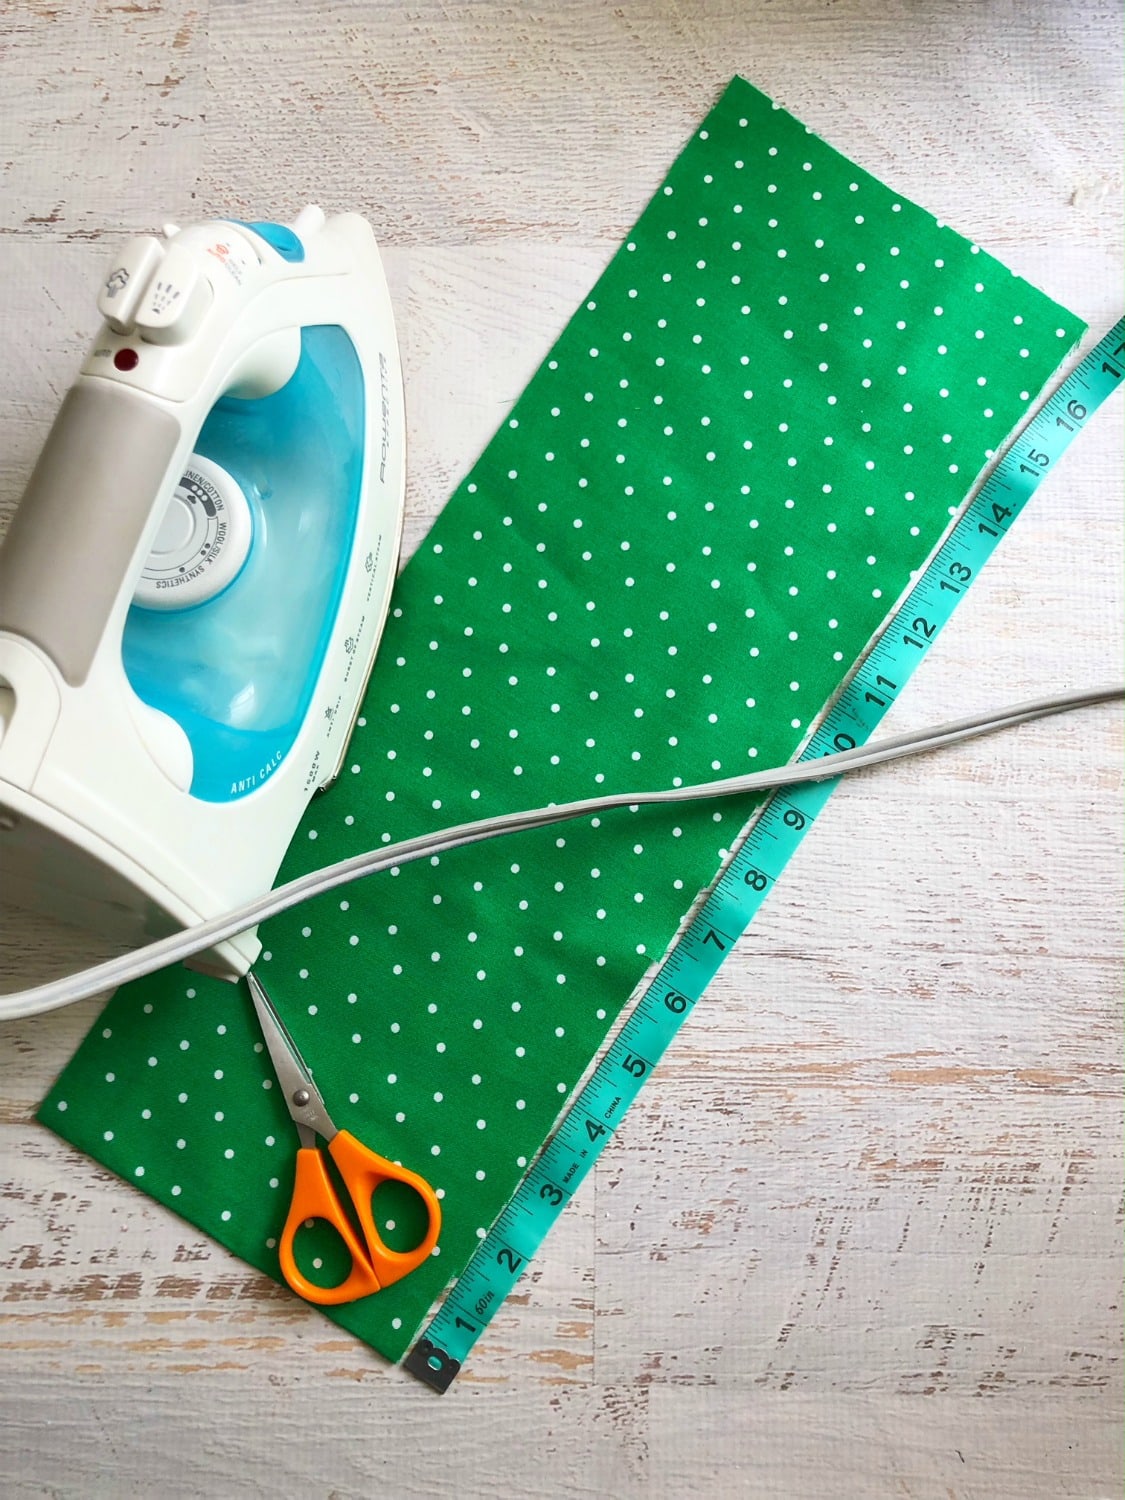
1. Measure and cut your 3 yards of fabric into 1.5” x 7” strips of fabric. 2. Tie on strips of fabric on your wire wreath in a pattern (green polka dot, shamrock, lime green) one at a time starting on the outer edge and working your way in. 3. Keep tiring your fabric strips on in a pattern once section at a time.
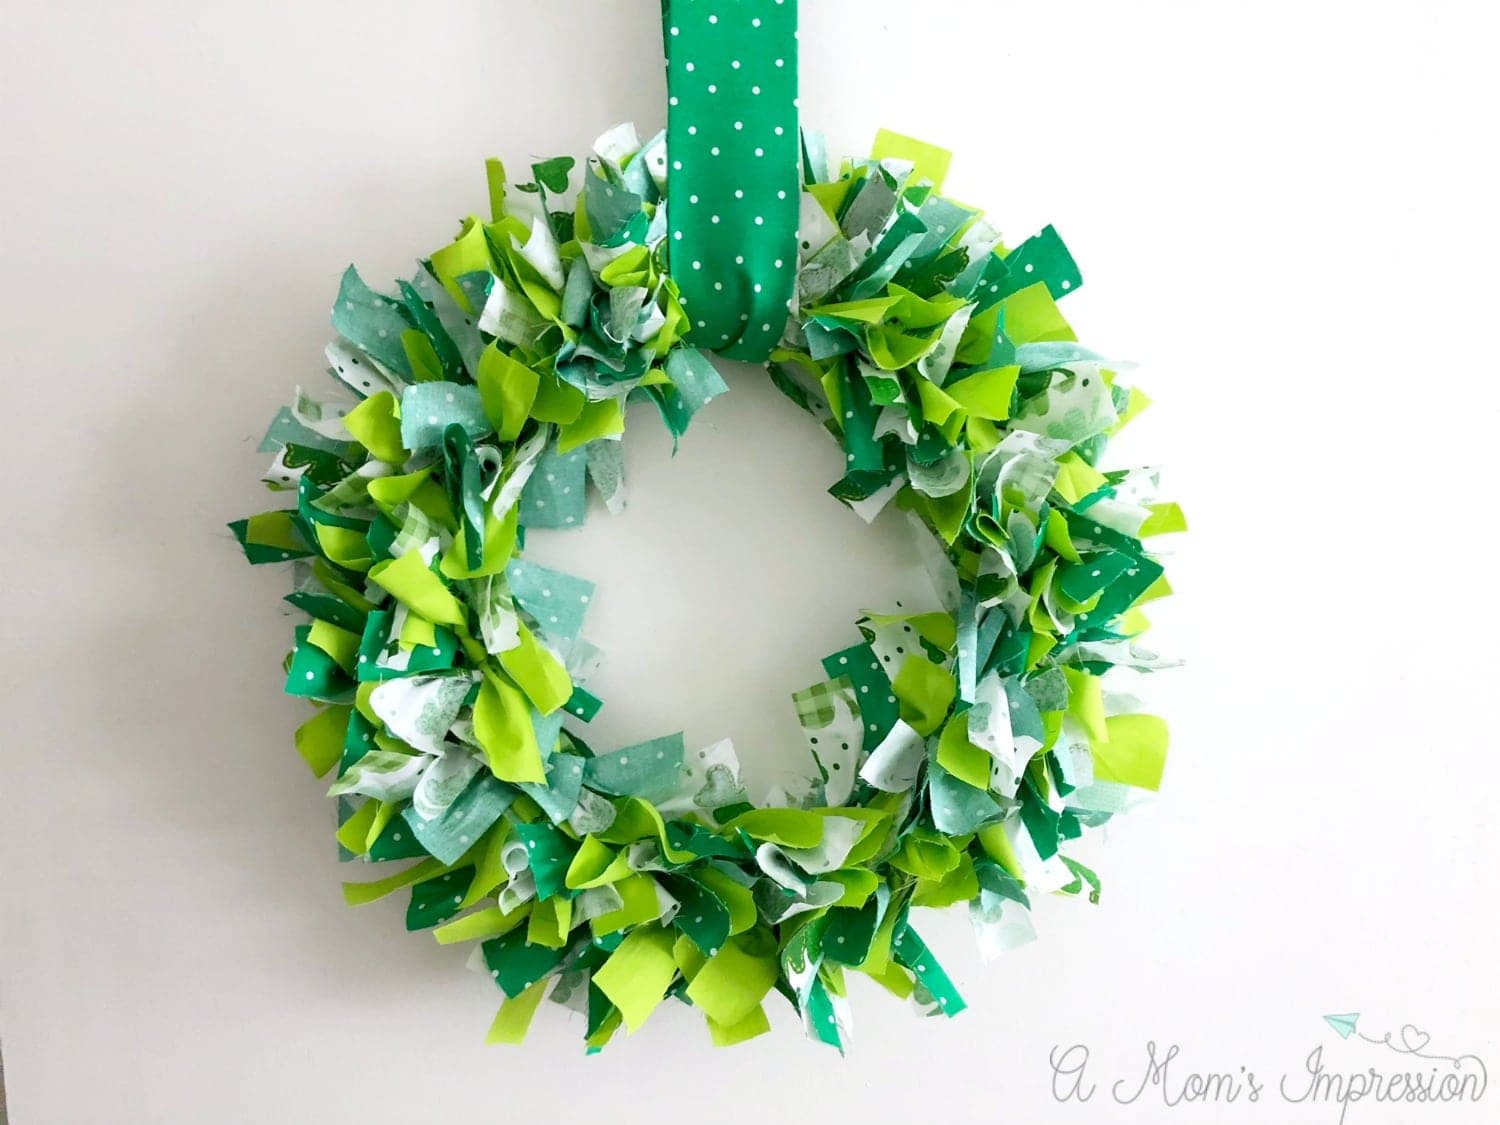
4. When your wreath is full cut a piece of fabric that is 34” x 7” from your 1/4” yard green polka dot fabric. 5. Fold the vertical sides in and iron in place making the fabric look like a strip of 3” wide ribbon. 6. Place your strip of fabric through the center of the wreath and tie the ends into a knot. Pull the knot behind the wreath and your wreath is ready to hang.
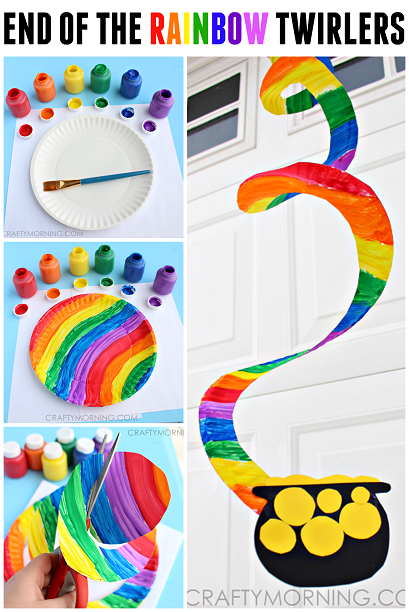
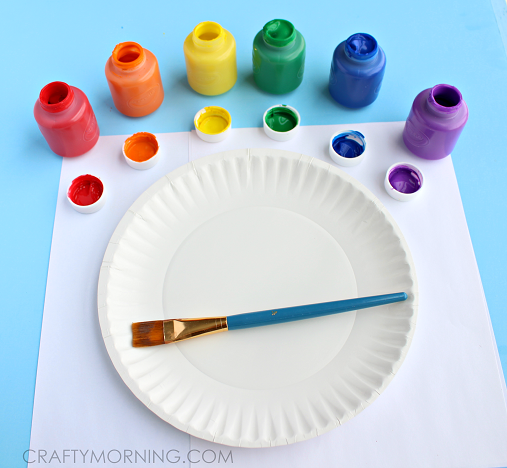
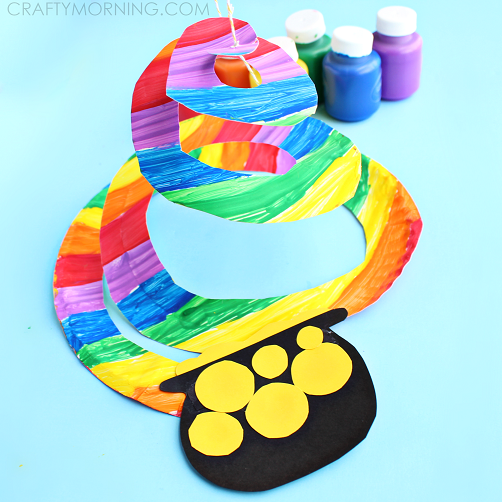
End of the Rainbow Paper Plate Twirler (Kids Craft)
Materials Needed:
Paper plate
Paint
Black and yellow paper
Scissors
Glue
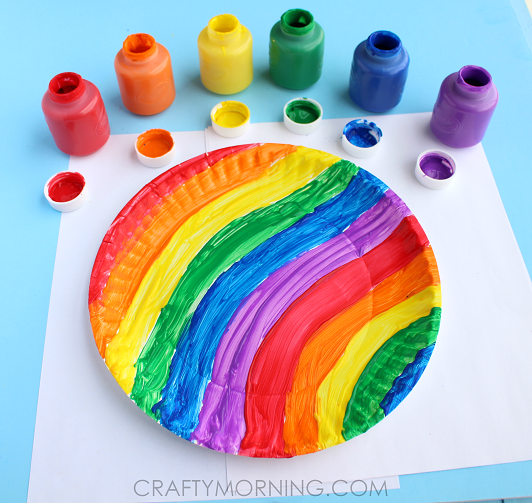
Start by having the kids paint rainbow stripes on the front of a paper plate.
Let dry and flip it over to paint the back as well. Blow dryers are great if you’re impatient!
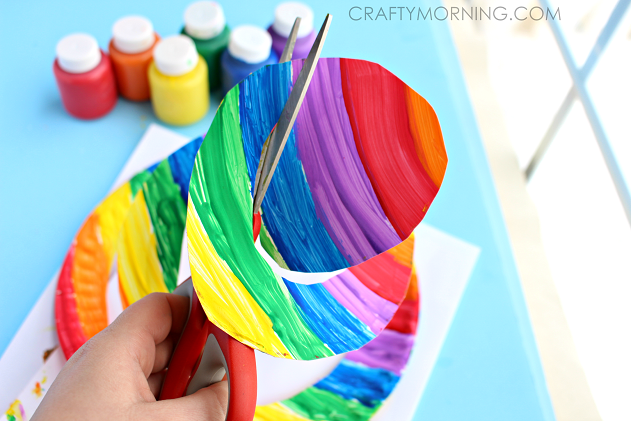
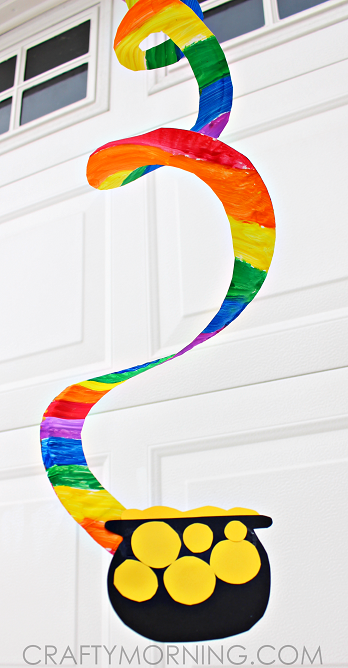
Grab a scissors and start at the outside of the plate to cut spirals. Cut out a black pot of gold and glue it to the end of the plate (we trimmed the spots that were pointy).
Glue on some yellow circles to make the gold…you can add some sparkles too! Poke a hole in the middle of the plate and add a string to hang it up!
Valentines Day is the most romantic holiday of the year so it is no wonder there are so many craft projects out there to help celebrate the occasion!
Craft Ideas For Valentines Day
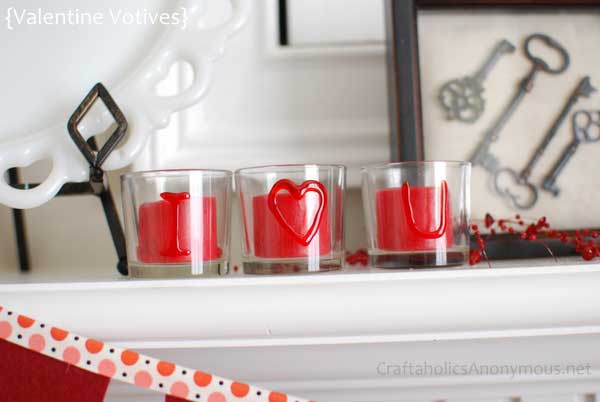
1. Write A Message On Glass With 3D Paint
Use 3D paint to write out a romantic message on glass. These candle holders are a good example. You can also write on picture frames, glass vases, or wine goblets.
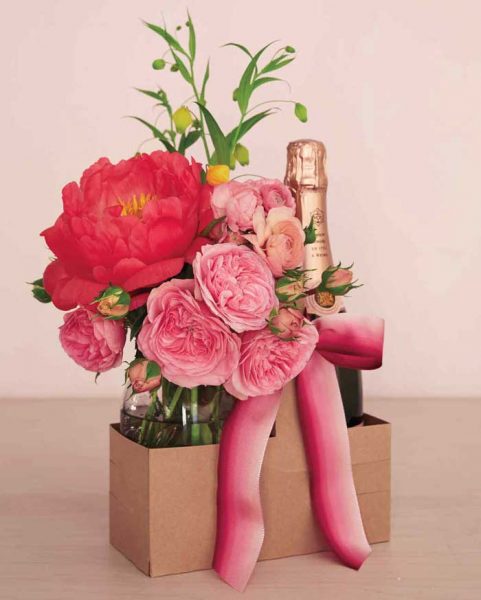
2. Fill A Drink Carrier With Champagne And Treats
Simply fill a drink carrier with champagne bottles and flowers or treats. It would be great to decorate and recycle a six pack container for this and fill with mini bottles and other goodies.
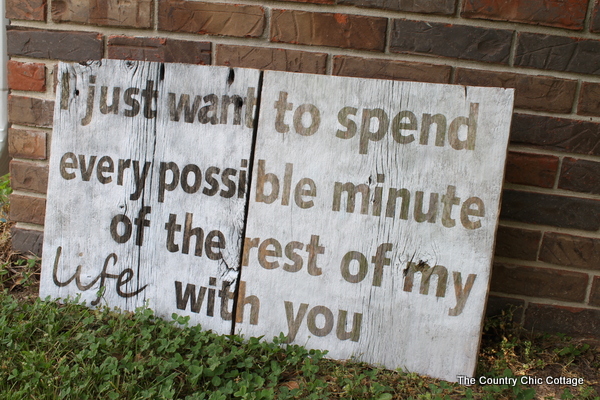
3. Make A Rustic Valentine Sign To Display
All it takes is some barnwood and paint to display a romantic sign for Valentines day or all year long.
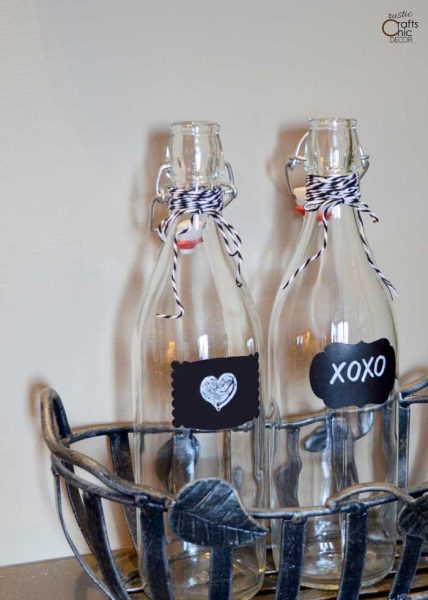
4. Decorate Glass Water Bottles For A Valentine Table
You can purchase these water bottles or recycle other beverage bottles to use to serve sparkling water. Then, simply decorate with chalkboard labels and twine.
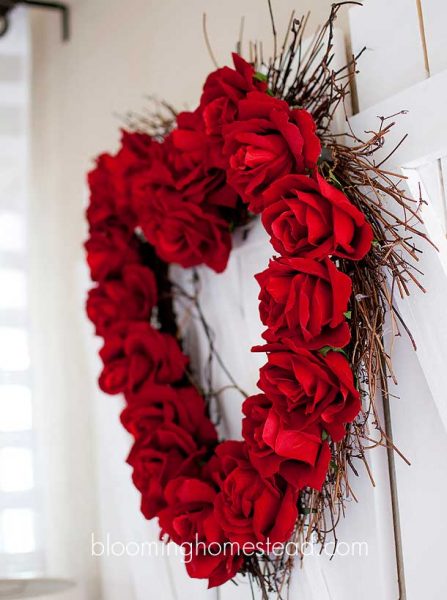
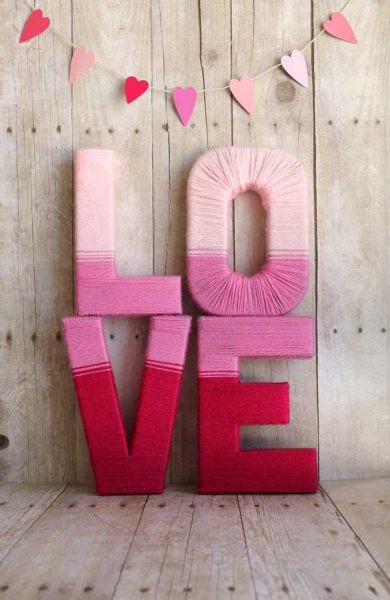
5. Make A Valentine Topiary To Decorate Your Home
These topiaries are easy to make and perfect for Valentine’s day with the red, white and pink rosettes.
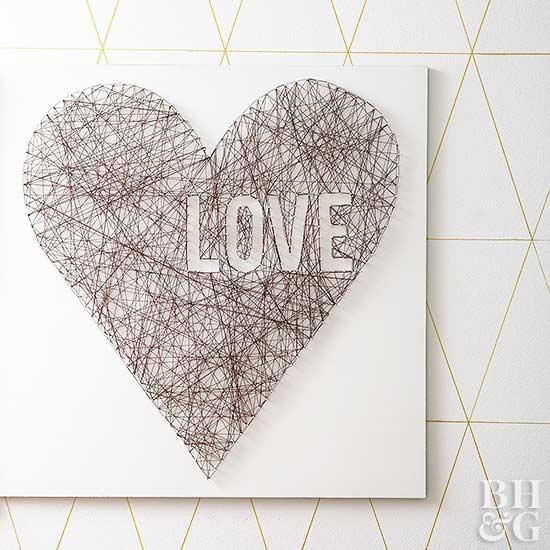
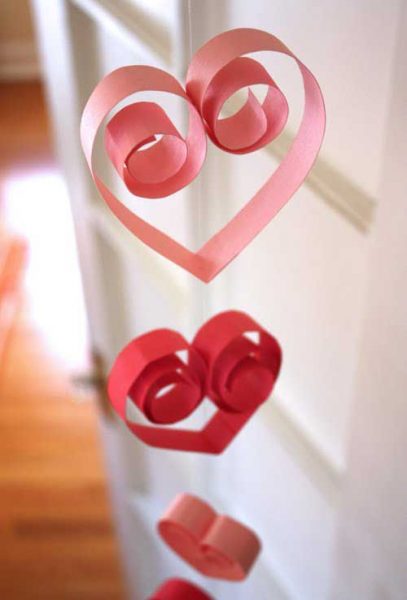
6. Create Some Valentine String Art
This art only looks complicated. The string heart is easy and fun to make.
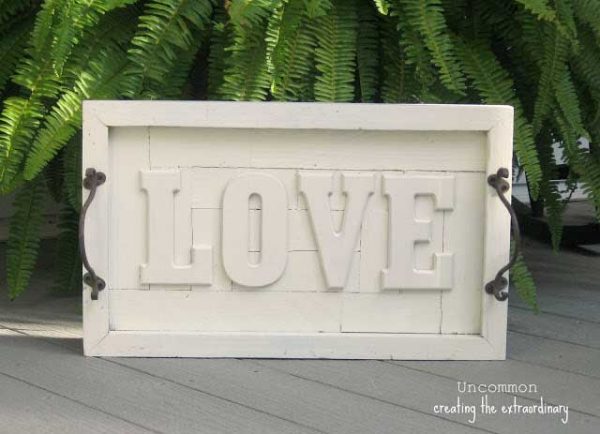
7. Serve Your Treats On A Tray Of Love
This Pottery Barn inspired love art can be used as a tray or for wall art.
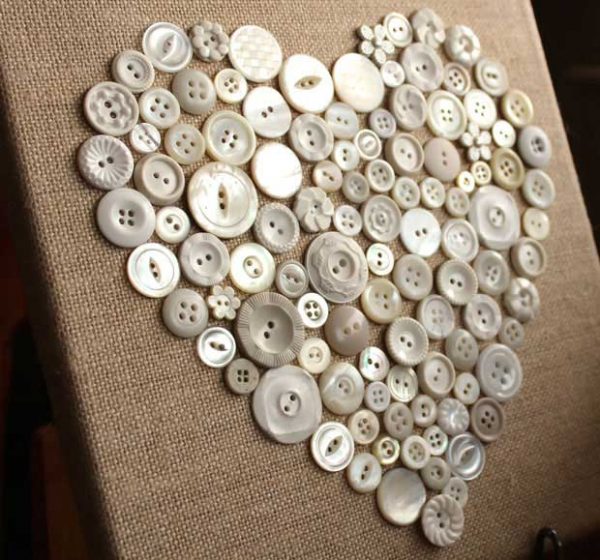
8. Make A Heart Out Of Buttons
Creamy buttons on a burlap base make such a rustic chic heart for Valentines Day.
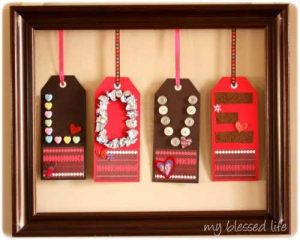
9. Make A Sign With Tag Letters And A Frame
Use tags to make letters and then hang them inside a frame. Spell out a Valentine message to fit inside.
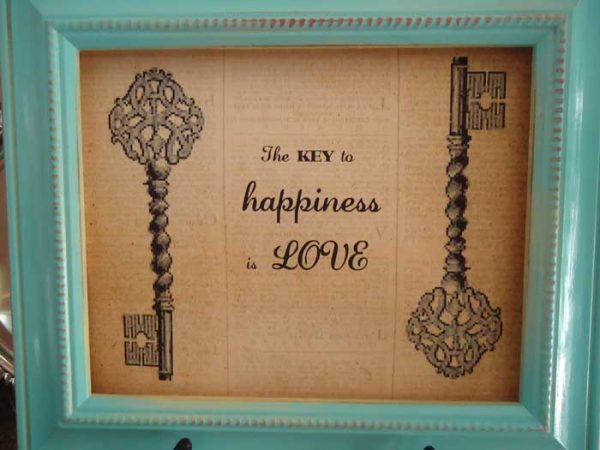
10. Create The Key To Happiness
Use graphics and frame the art for a festive valentine sign.
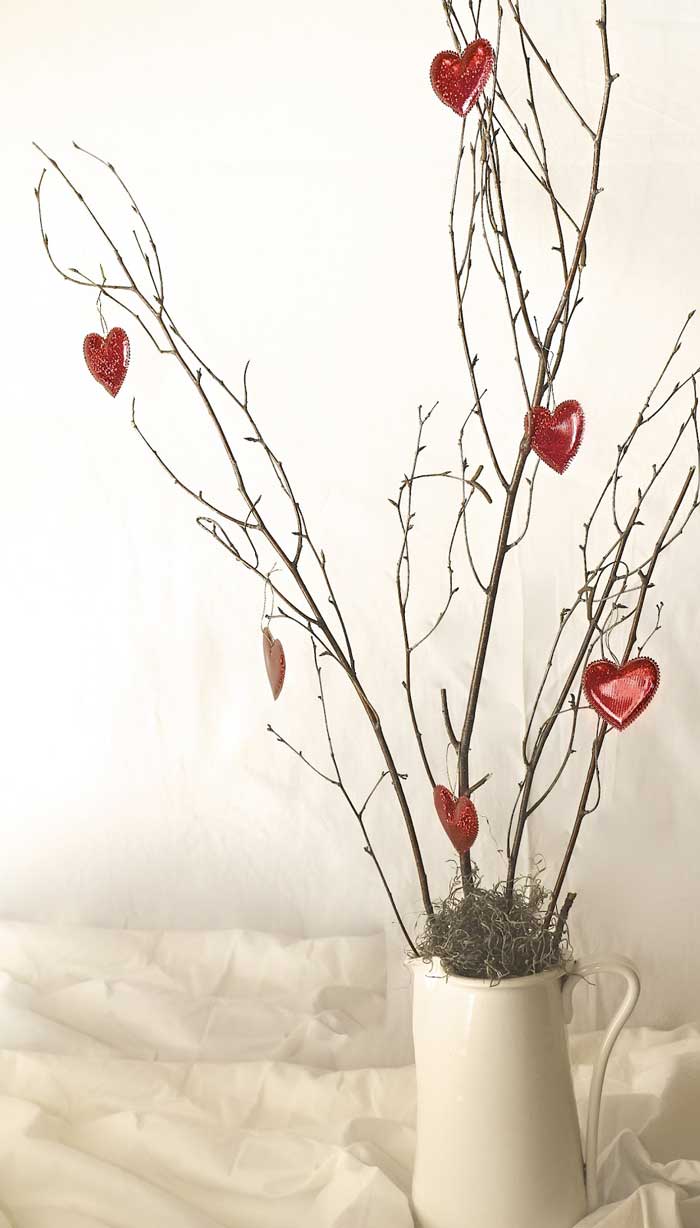
11. Make A Rustic Valentine Tree
Rustic, simple, festive and chic. This Valentine tree is the perfect craft for holiday decorating.
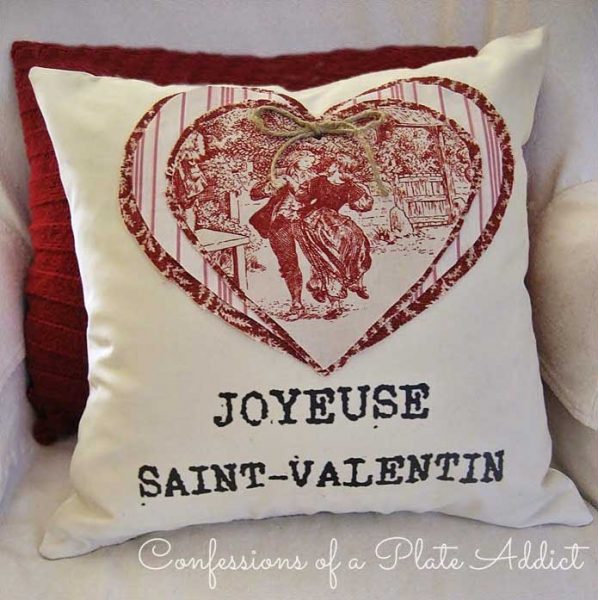
12. Create A French Inspired Pillow
Create something French inspired to get in the Valentine mood. This valentine pillow is perfectly romantic.
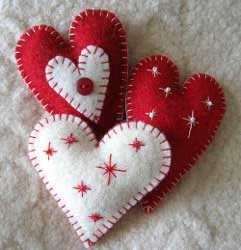
13. Craft Some Felt Hearts
Make a handful of felt hearts to strewn about or create a garland with.
14. Make A Rustic Heart Out Of Wood
Create a heart out of wood for a rustic way to celebrate the holiday.
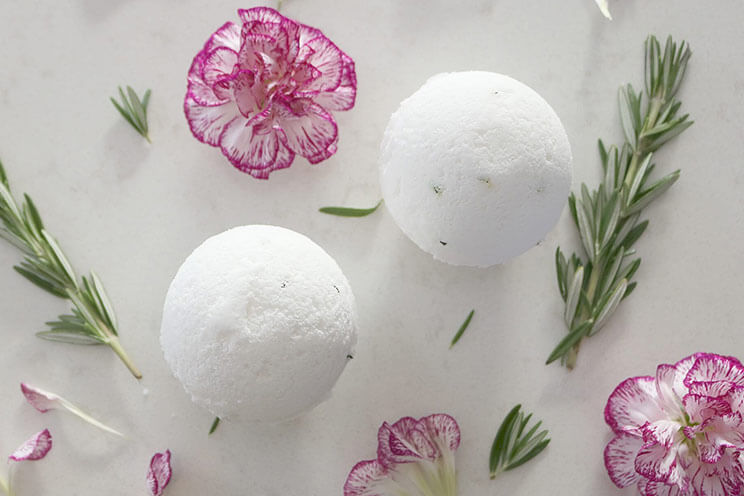
Start by combining dry ingredients and chopped rosemary in a medium glass bowl. Whisk to blend. Whisk in coconut oil and peppermint oil.
Using a spray bottle, spritz water to moisten mixture as you stir. The mixture should be crumbly, but hold when squeezed.
Use a spoon to scoop mixture into bomb molds or ice cube trays. Press firmly. If using a bomb mold, overfill each side slightly before putting together. Allow to set at least 4 hours in a cool, dry area.
Loosen bombs from molds and place in warm bath water to dissolve.
3 tbsp baby oil (I normally use vegetable oil, but was out. Baby oil worked great and provided a lovely scent!)
3 tsp Cream of Tartar
purple and pink food dye
Directions:
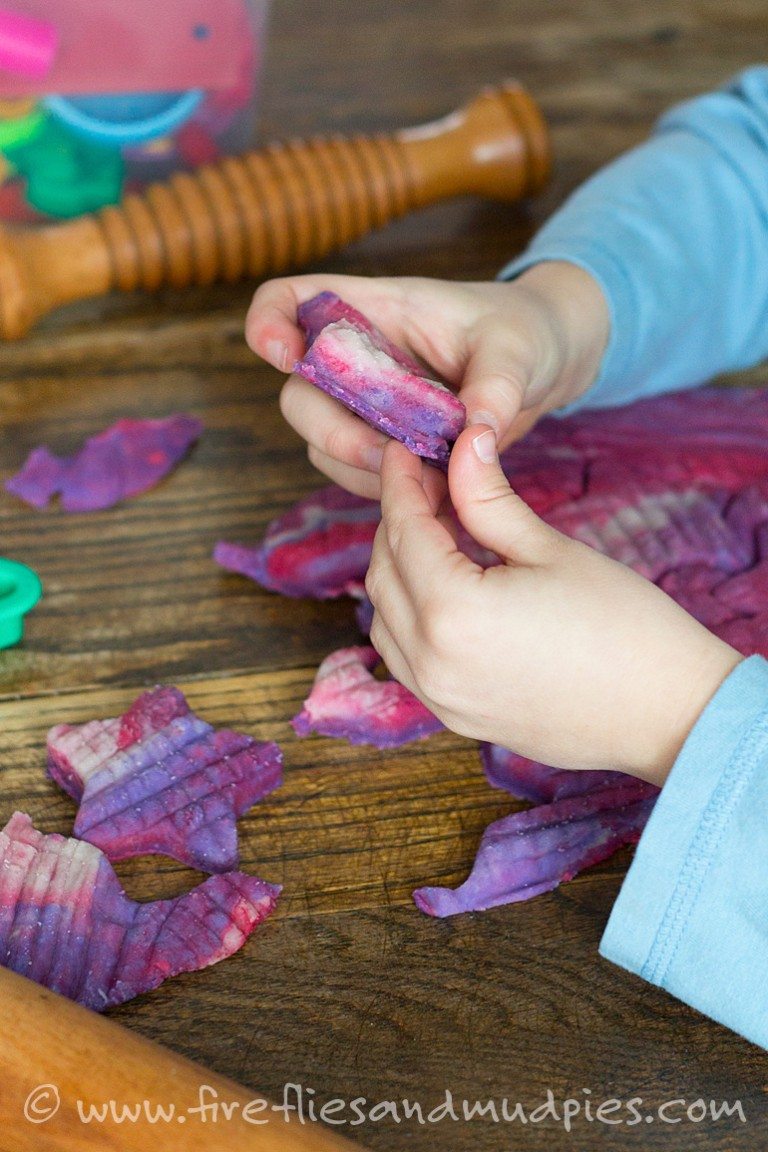
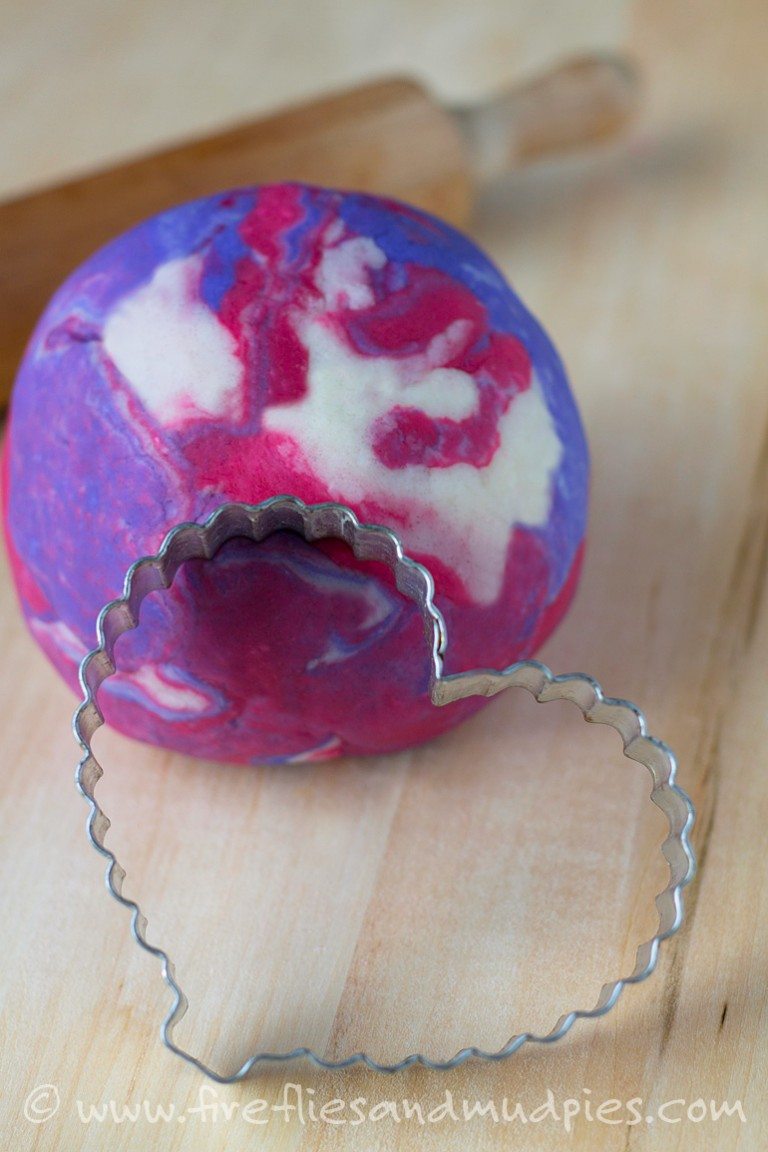
Whisk 1 cup water, 1 cup flour, ½ cup salt, 1 tbsp oil, 1 tsp Cream of Tartar, and several drops of purple or pink dye in a saucepan. Heat the dough mixture until it forms a ball. Remove from the pan and knead well. Repeat 2 more times to make the other colors (for white, leave out the food dye). Twist the playdoughs together and roll into a ball to create a marbled effect!
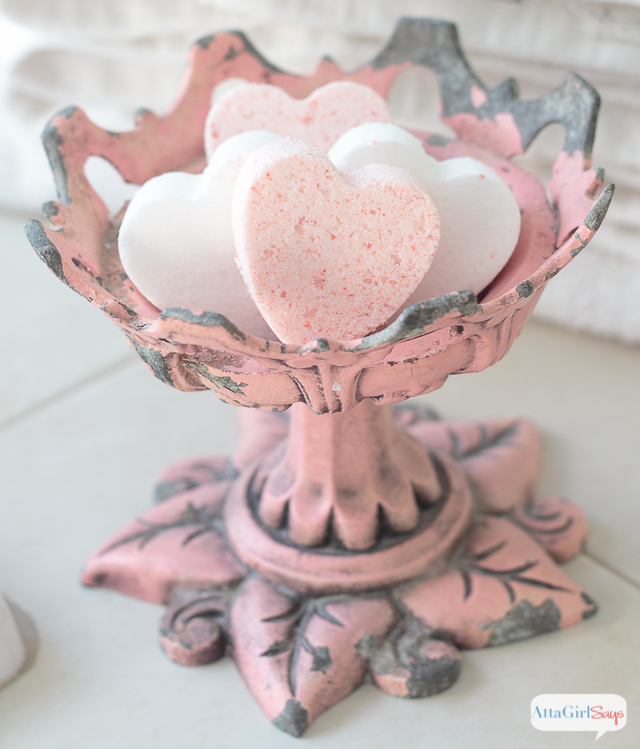
To make your own Love Potion homemade bath bombs, you will need the following supplies.
Baking Soda
Citric Acid
Fine Epsom Salts
Jojoba Oil
Love Potion Essential Oil
red food coloring
Witch hazel
Mesh strainer
Spray bottle
Silicone heart mold
plastic gloves
Place a mesh strainer over a large bowl and pour in 1 cup of baking soda, 1/2 cup citric acid and 1/4 cup of fine epsom salts. Sift to remove any lumps.
If you’re unable to find fine epsom salt, put it in a food processor or blender and pulse until fine.
Stir baking soda, citric acid and epsom salts until well blended, making sure there are no lumps.
Next, slowly add 1/2 Tablespoon of jojoba oil to the dry mixture. Add 10 drops of Love Potion essential oil and 1-2 drops of food coloring.
Wearing plastic gloves, mix the oils and food coloring through the dry mixture, until it is well incorporated and pink.
Once mixture is blended, slowly add witch hazel, one spritz at a time, until the bath bomb mixture sticks together when squeezed.
You’ll need about 8 to 10 spritzes of witch hazel to get the right consistency. The mixture should not be crumbly. It should stick together when squeezed, but you don’t want it too wet or it may begin to fizz.
Pack the slightly damp mixture tightly into the heart shape molds. Be sure to pack the mixture well, fitting in as much as possible into each mold. (This recipe should make 5 to 6 heart-shaped bath bombs.)
Allow to dry for several hours, or ideally overnight, then remove the homemade bath bombs from the molds.
They should be very hard when you remove them from the molds. Wrap bath bombs tightly in plastic wrap and store in a cool, dry place, away from any moisture.
If you want to make larger bath bombs, you may want to use these heart-shaped silicon cupcake baking cups.
If you run into any issues when making your bath bombs, definitely check out the Bath Bomb Questions & Answers post on Soap Queen. That really helped me anticipate and prevent any problems.
I also made these bath bombs in sweet orange and vanilla scents.
For the sweet orange bath bombs, I followed the same recipe, but substituted Sweet Orange essential oil for the Love Potion, and colored them with a drop each of orange and yellow food coloring. You may switch out the regular jojoba oil for use vanilla-infused jojoba oil to add more depth of fragrance. You could also use a few drops of vanilla absolute or vanilla oleoresin, in combination with the sweet orange essential oil. But keep in mind that this will leave brown flecks in your homemade bath bombs.
For the white vanilla-scented heart bath bombs, I substituted 1/2 Tablespoon of vanilla perfumed oil from The Body Shop for the jojoba oil. (The oil I used isn’t available anymore, but it is similar to this vanilla body oil.) I didn’t add any more essential oil scent to these bath bombs, just skipped straight ahead to spritzing the mixture with witch hazel.
My kitchen has turned into a regular bath shop lately. In addition to these homemade bath bombs, I’ve also been making some sugar scrub soaps.
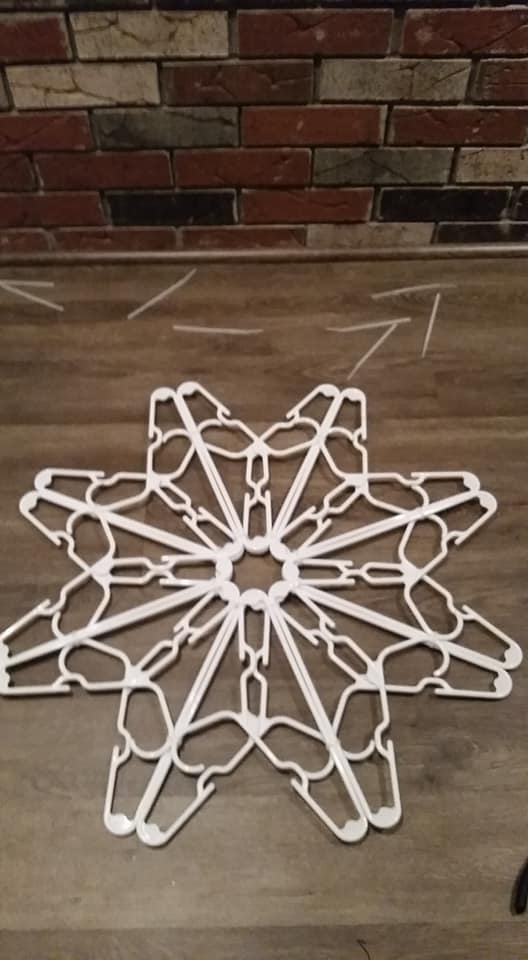
This Christmas craft tutorial with pictures gives you instructions on how to make a snowflake wall art using plastic coat or clothes hangers. The hangers that we used were all store bought and can be customized to fit your style, design or color. Hope you have fun creating this super simple idea!
What you need
For this project, you will need a total of 16 coat hangers (I have found that the kid sized (aka baby hangers) work best.) Zip ties Scissors
Instructions
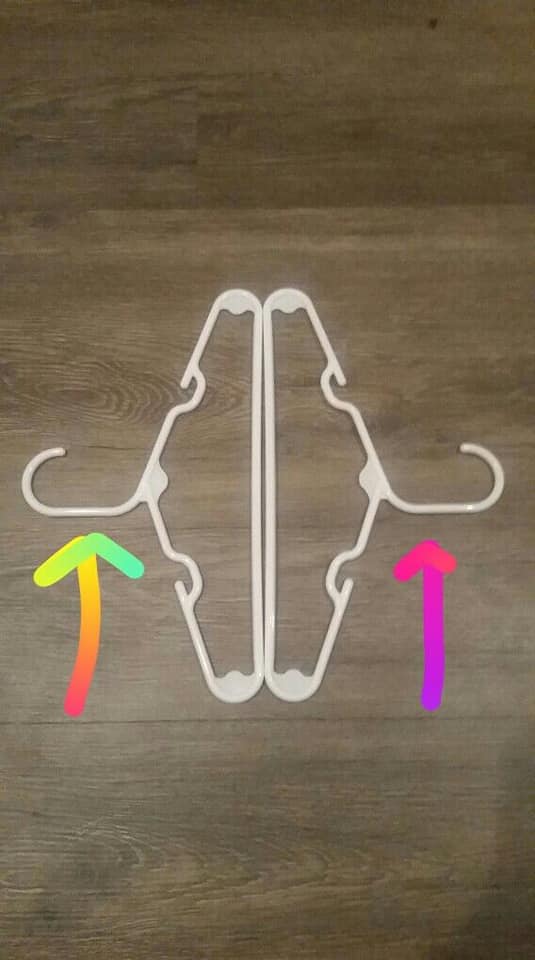
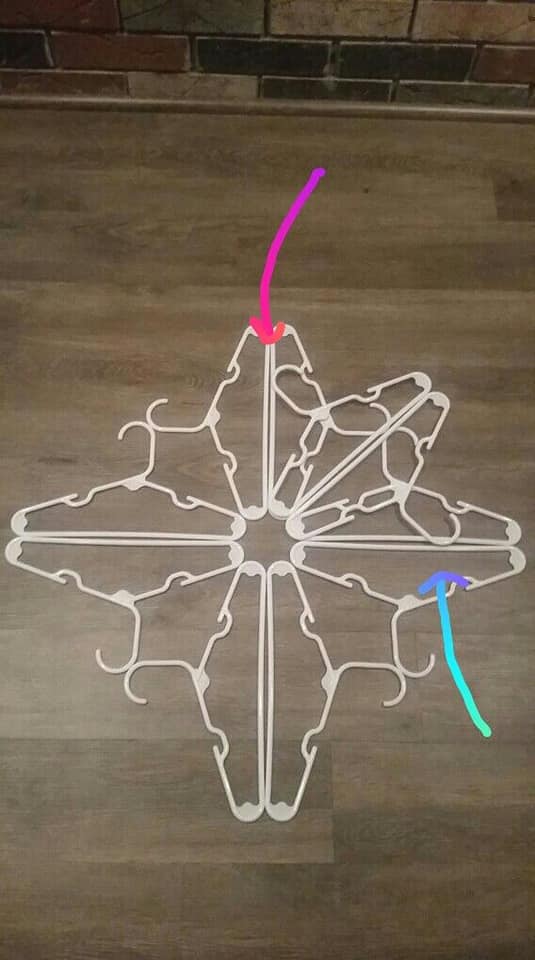
Step 1: Start with 2 hangers and place them as pictured. This is what I will call the “basic pair”. Make sure that the hooks of ALL of the clothes hangers face the same way!
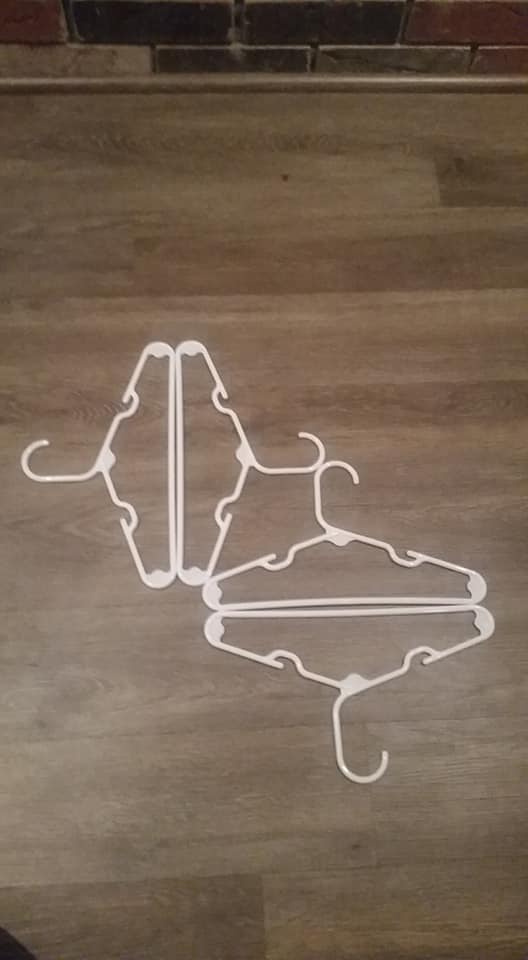
Step 2: Continue with the same pairing of clothing hangers to complete the first layer.
Step 4: 8 hangers, 4 pairs of hangers. This completes the 1st layer. Use the same base pair to begin layer 2, which is placed directly on top on the 1st layer. DO NOT zip tie your snowflake until BOTH layers are assembled.
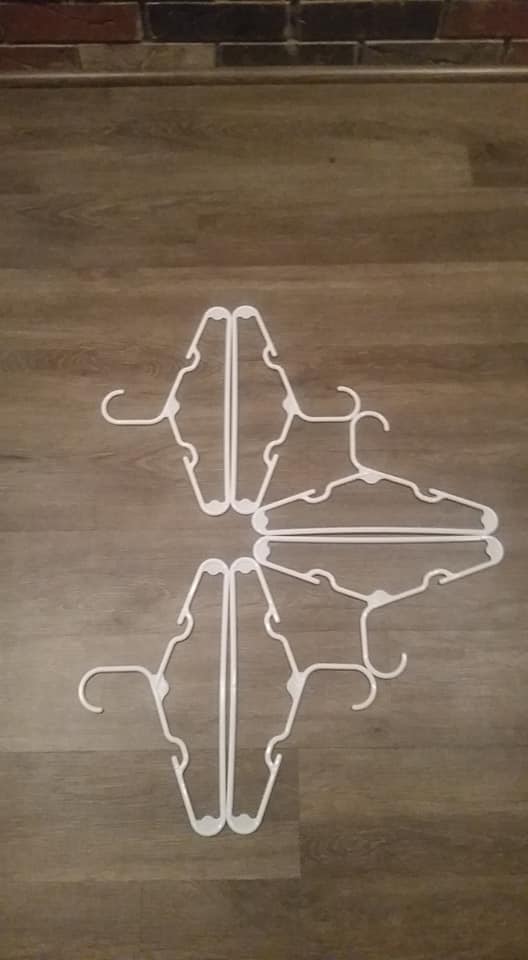
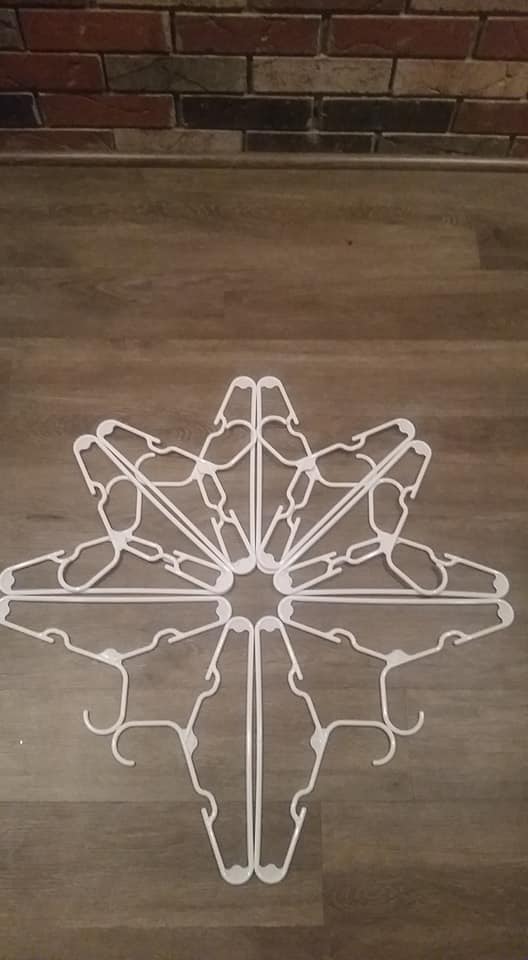
Step 5: Align 2 hangers again to form your “base pair”. Place them on top of 2 hangers from the 1st layer, with the hooks of the hangers lining up with the bottom of the hangers in the 1st layer.
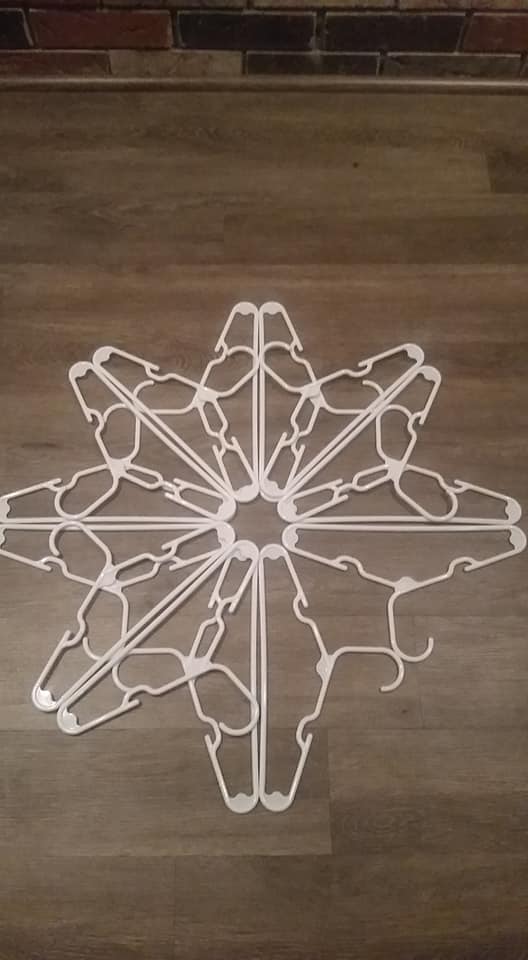
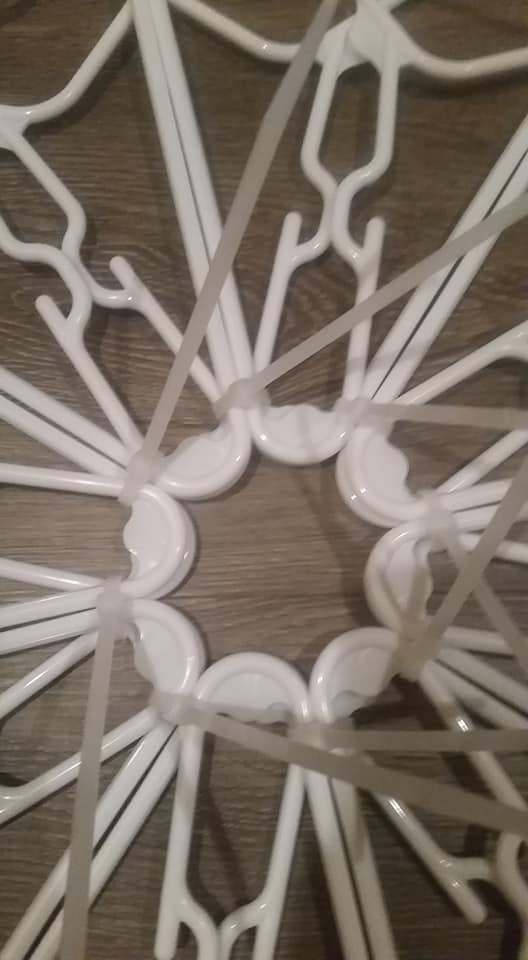
Step 6: Continue adding pairs of hangers as directed, until you have 8 hangers in layer #2 on top of your 8 hangers in layer #1. (See steps 6 and 7 for visual)
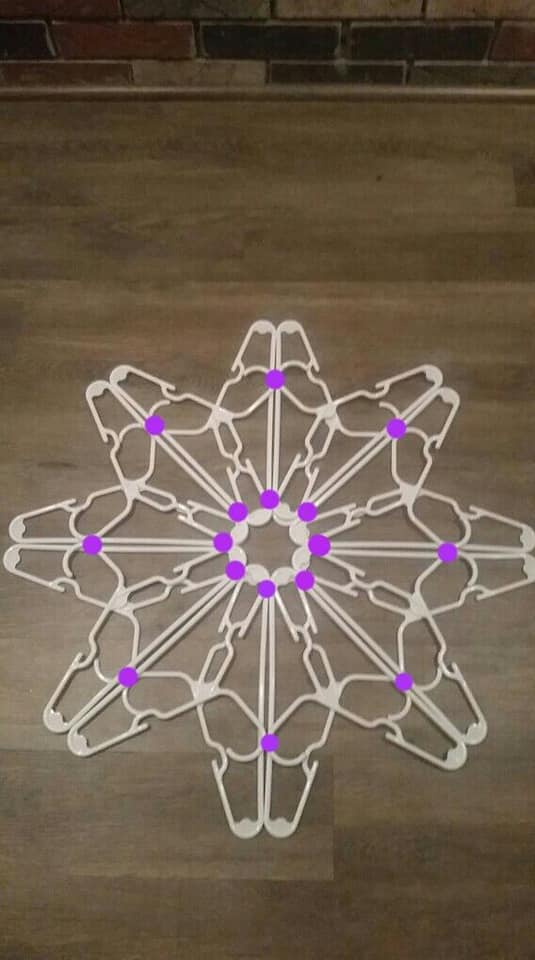
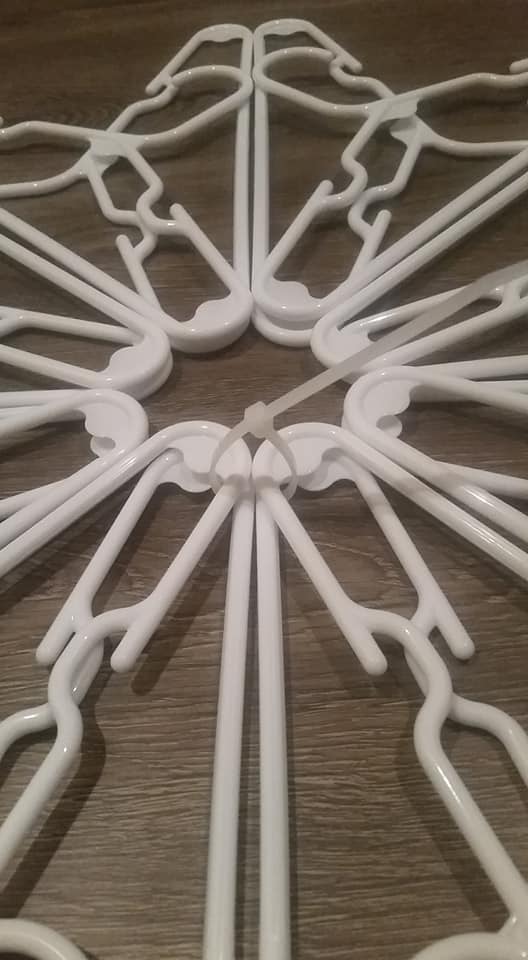
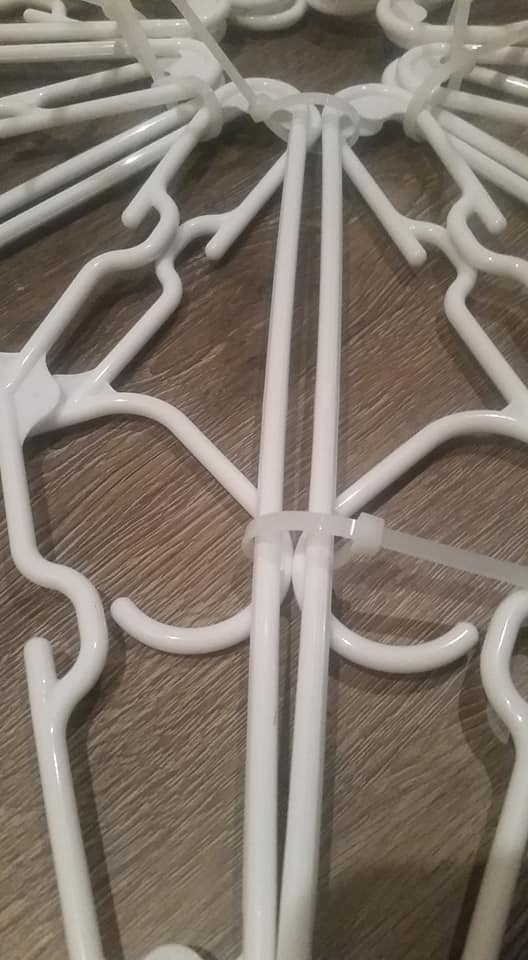
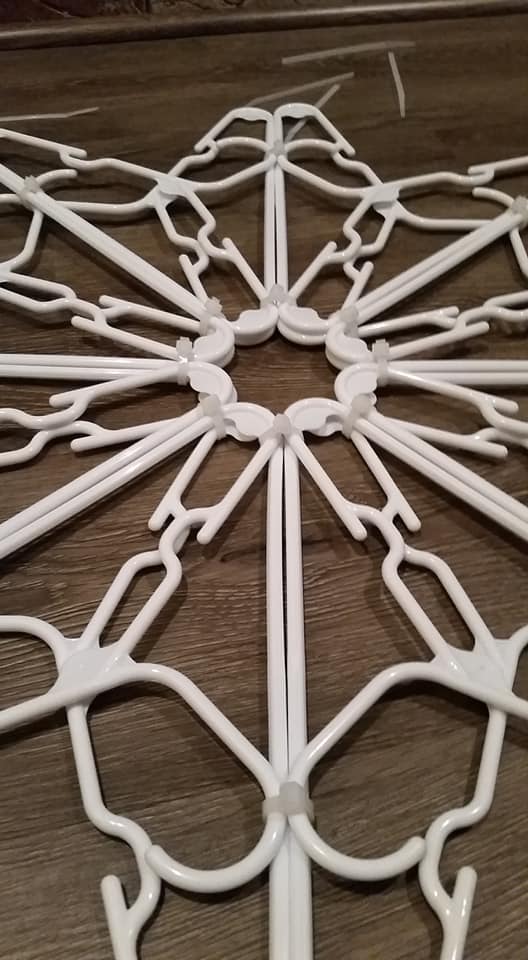
Step 7: The overall base of your snowflake is now complete, and ready for zip ties. Starting with the center, place a zip tie at each place 4 hangers meet. (See dots in picture) You should use 8 zipties for the center circle, and 8 for the outer circle. Each ziptie should hold 4 hangers
Step 8: Be sure NOT to tighten the ziptie all the way, until ALL 16 zipties have been placed. This will allow you to adjust and reposition your snowflake if needed
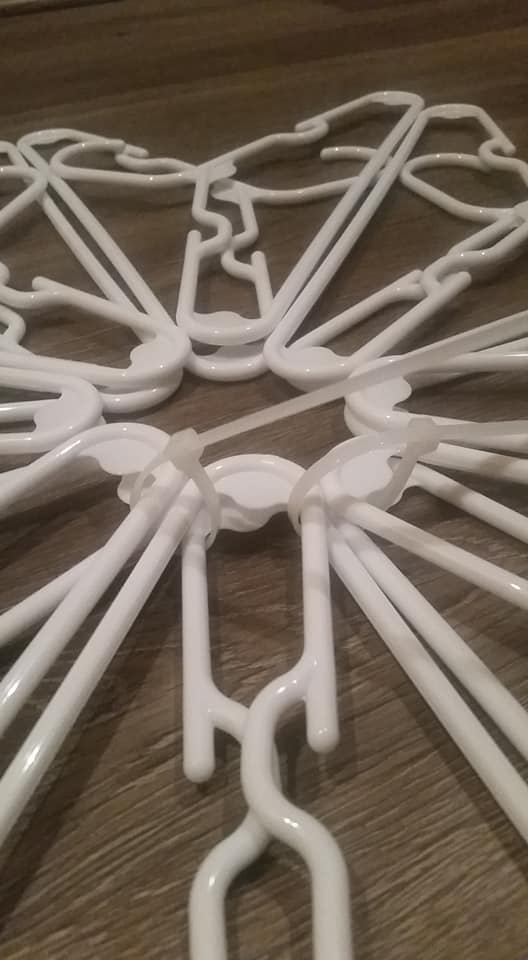
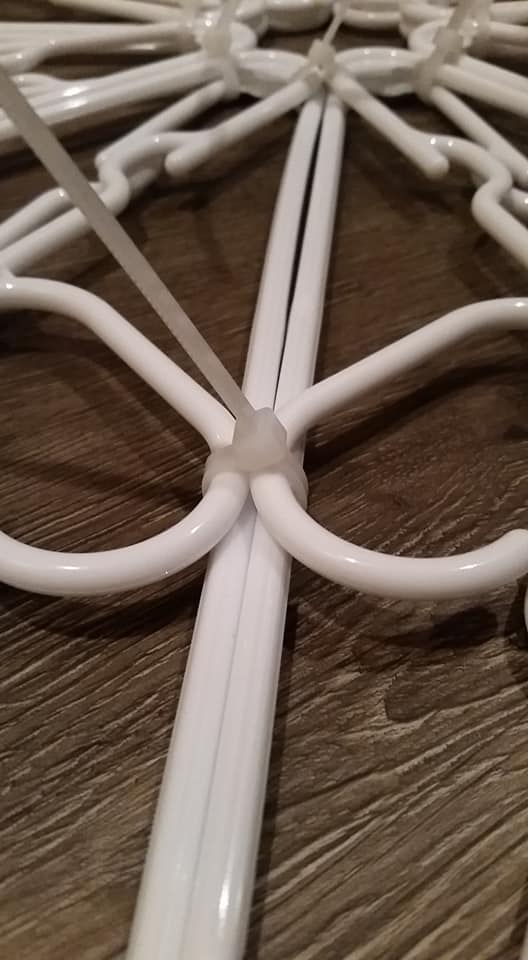
Step 9: Continue with inner circle
Step 10: Now that all 8 zip ties are loosely placed in the center, begin the outer circle
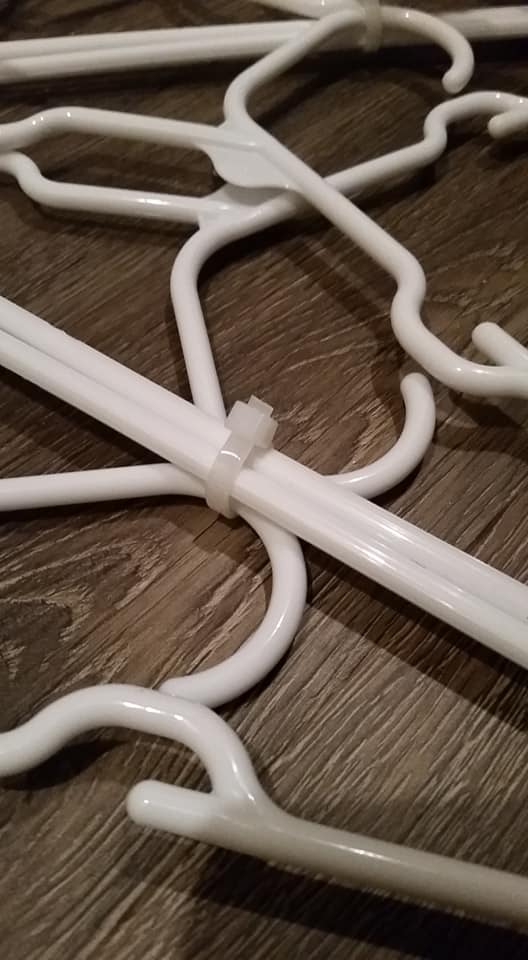
Step 10b: Find the spot where 2 hooks meet 2 bottoms and loosely place a zip tie.
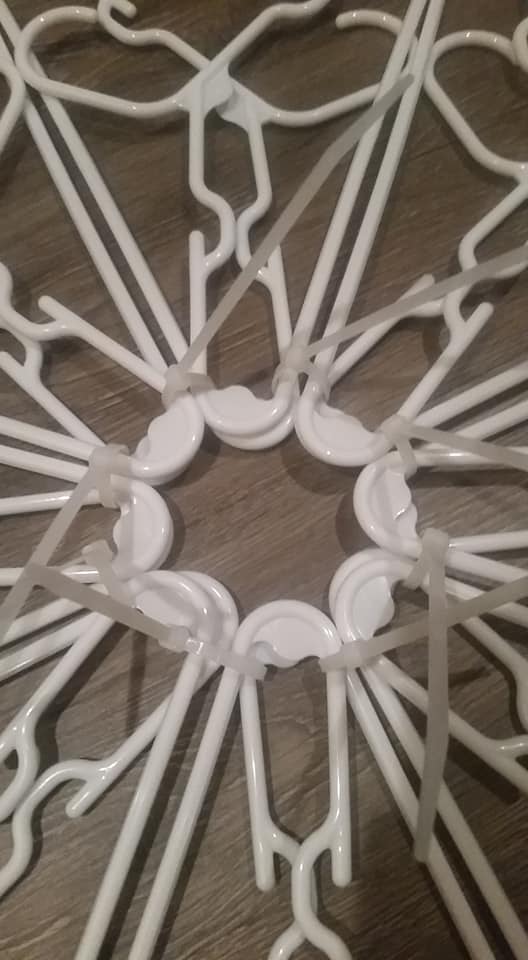
Step 11: Continue around outer circle until all 8 zip ties are placed, each holding 4 hangers together
Step 12: Begin slowly tightening the zipties in the center. Adjusting your snowflake as needed, try to keep the hangers in the same layer from overlapping. You want to keep your hangers as flat as possible so that your end product will lay nicely
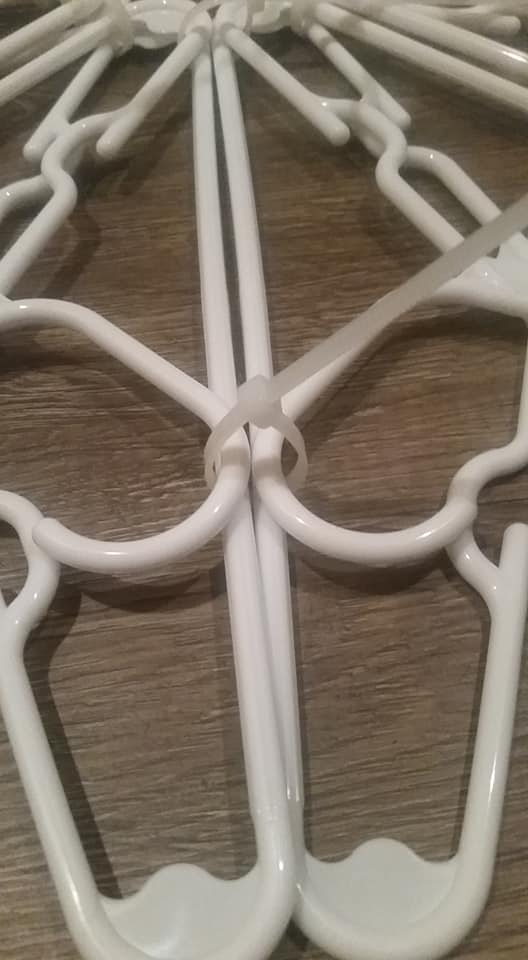
Step 13: Once you have finished tightening the inner zipties, begin tightening the outer ones. (Notice here what was meant about the hangers in the same layer not overlapping. They are side by side rather than over lapping each other)
Step 14: Once all 16 have been tightened, trim your zip ties
This amazing detailed tutorial was contributed by Amy L. Thank you so much for sharing your wonderful Hanger craft and tutorial with us.