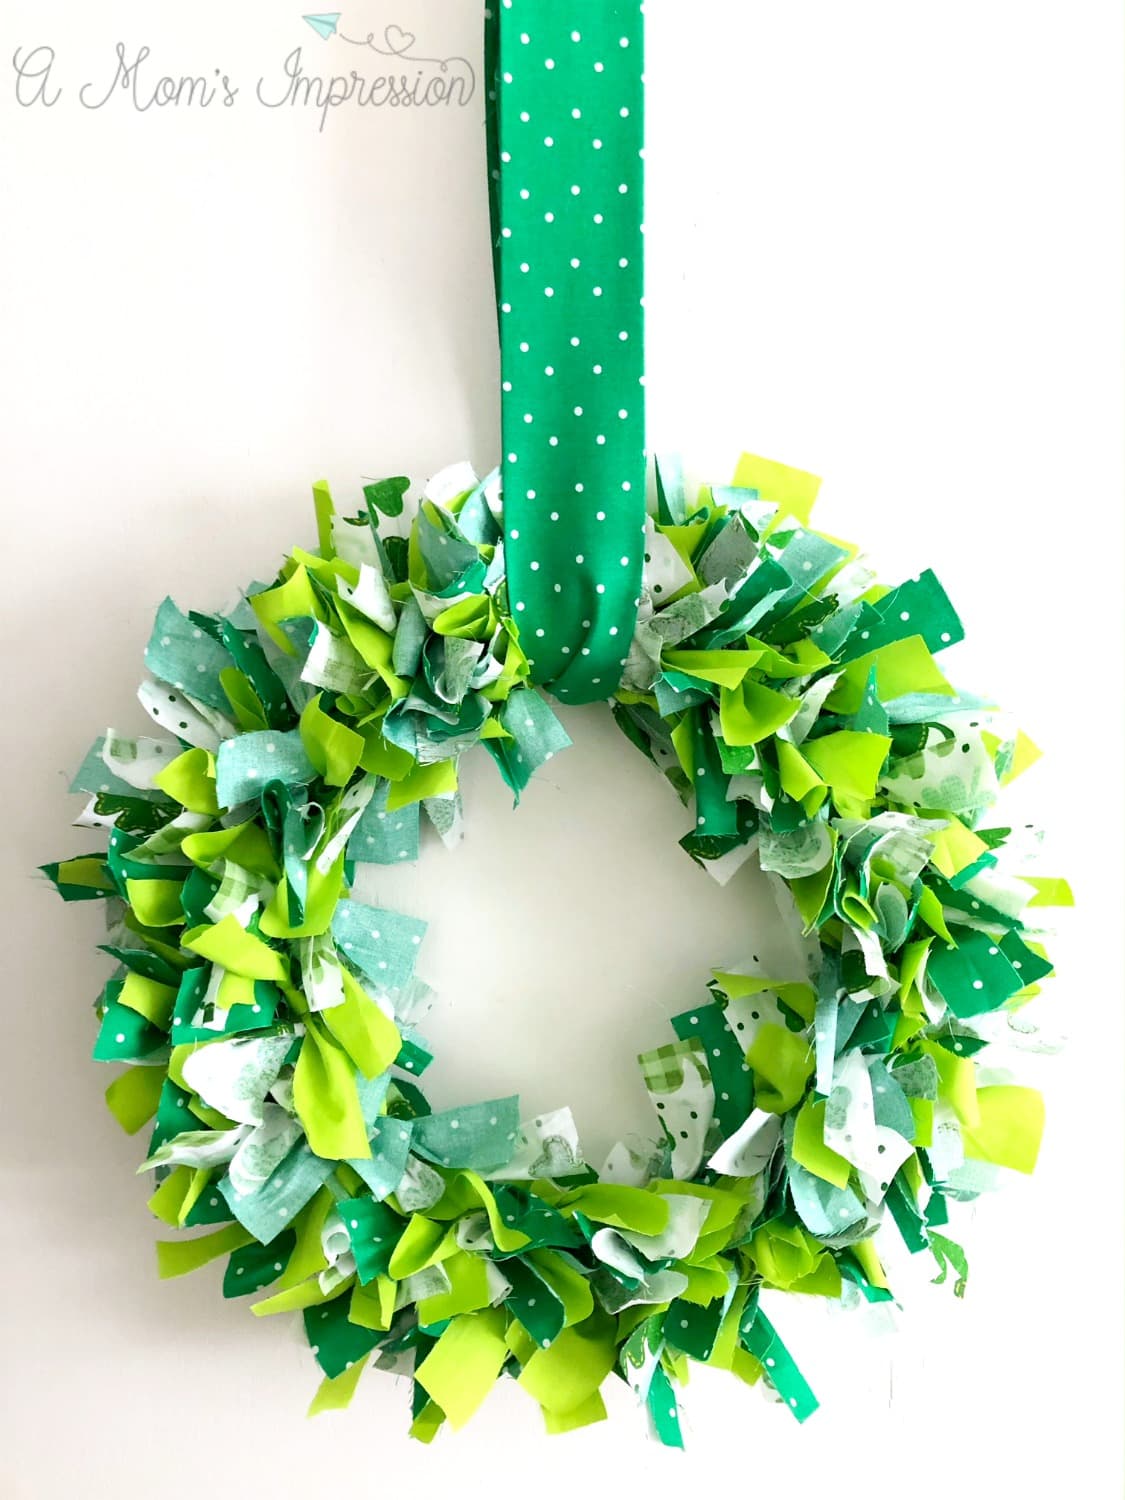
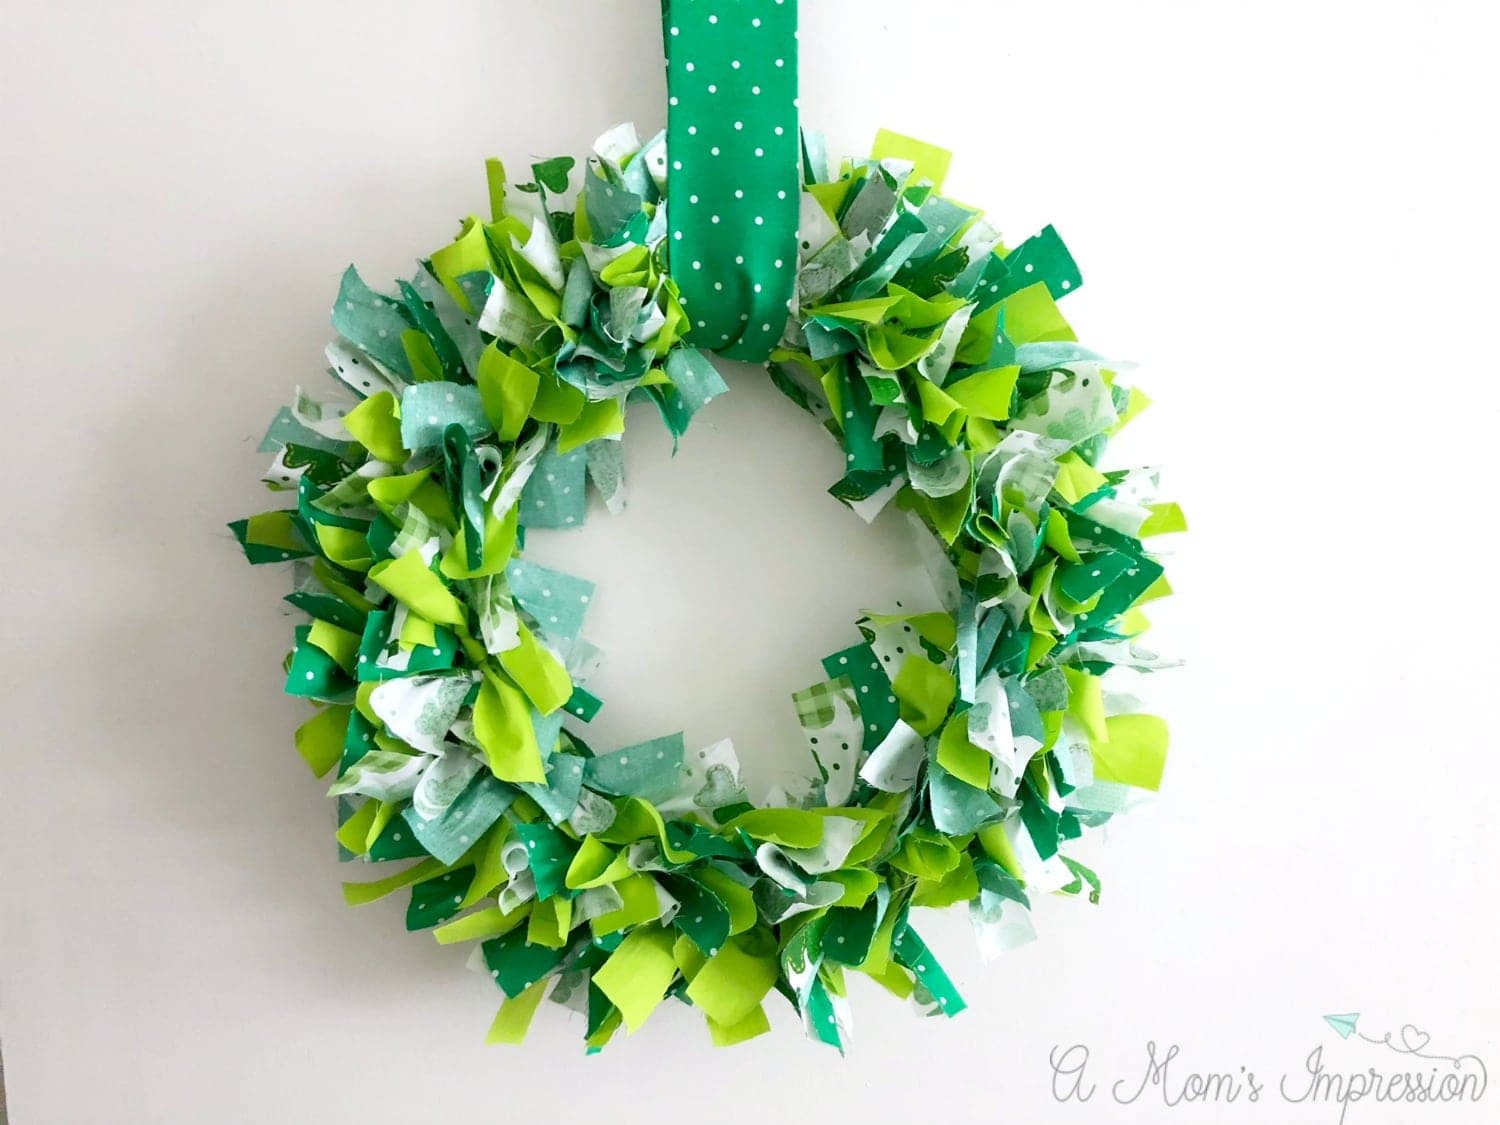
How to Make a Shamrock Wreath – DIY St. Patrick’s Day Decor Idea
This project was a bit time consuming, but it wasn’t hard at all. You can get your kids involved and make it a fun family project.
DIY Shamrock Wreath
Shamrock Wreath Supplies
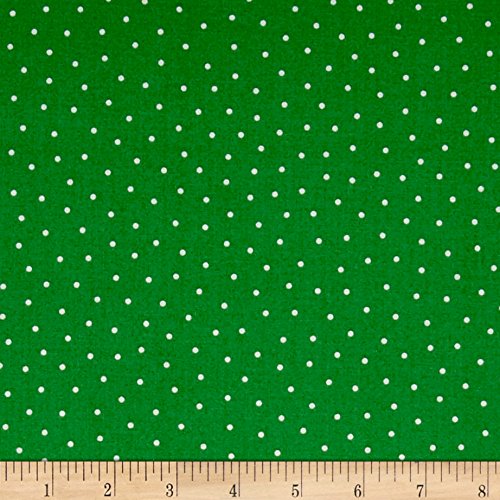
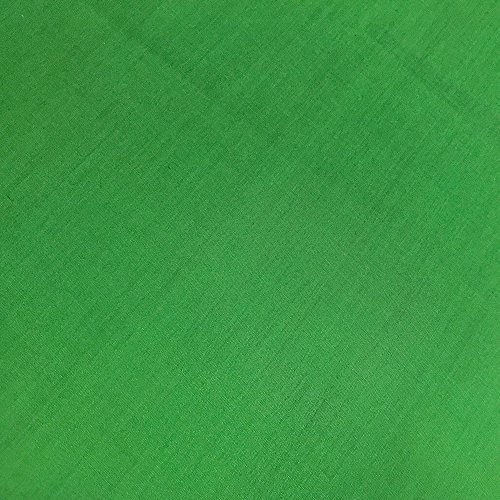
1-yard green polka dot fabric
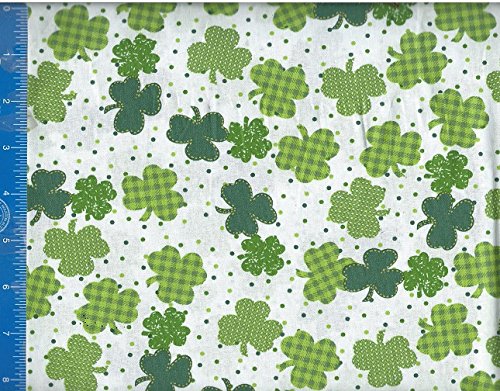
1-yard shamrock fabric
1-yard lime green fabric
1/4” yard green polka dot fabric
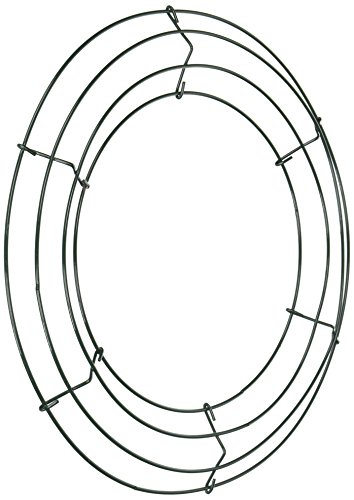
12” wire wreath frame
Scissors
Iron/ironing board
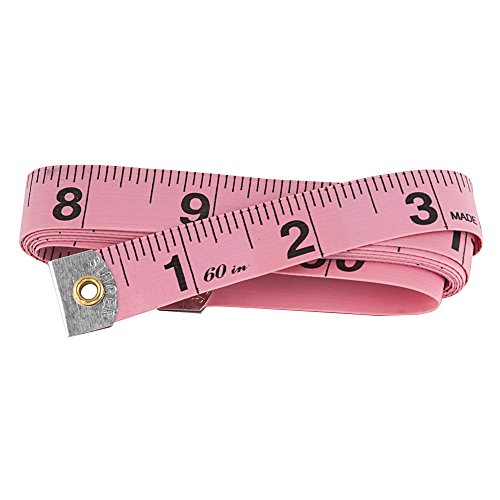
Measuring tape
How to Make A Shamrock Wreath For St. Patrick’s Day
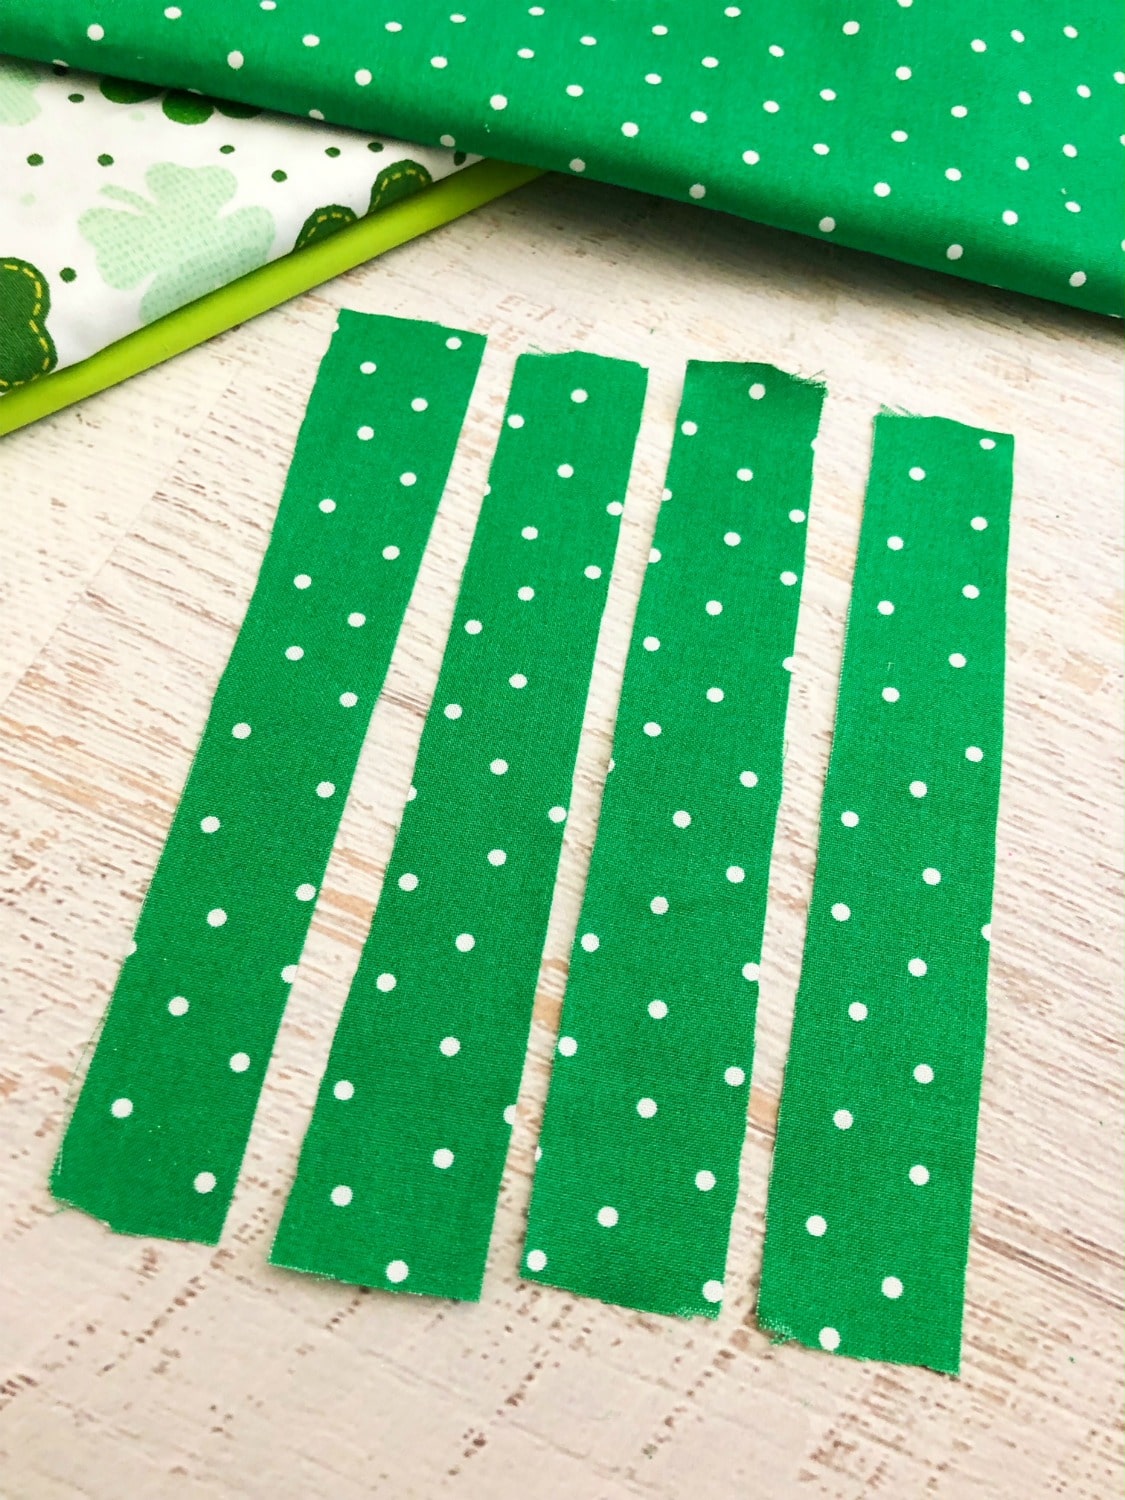
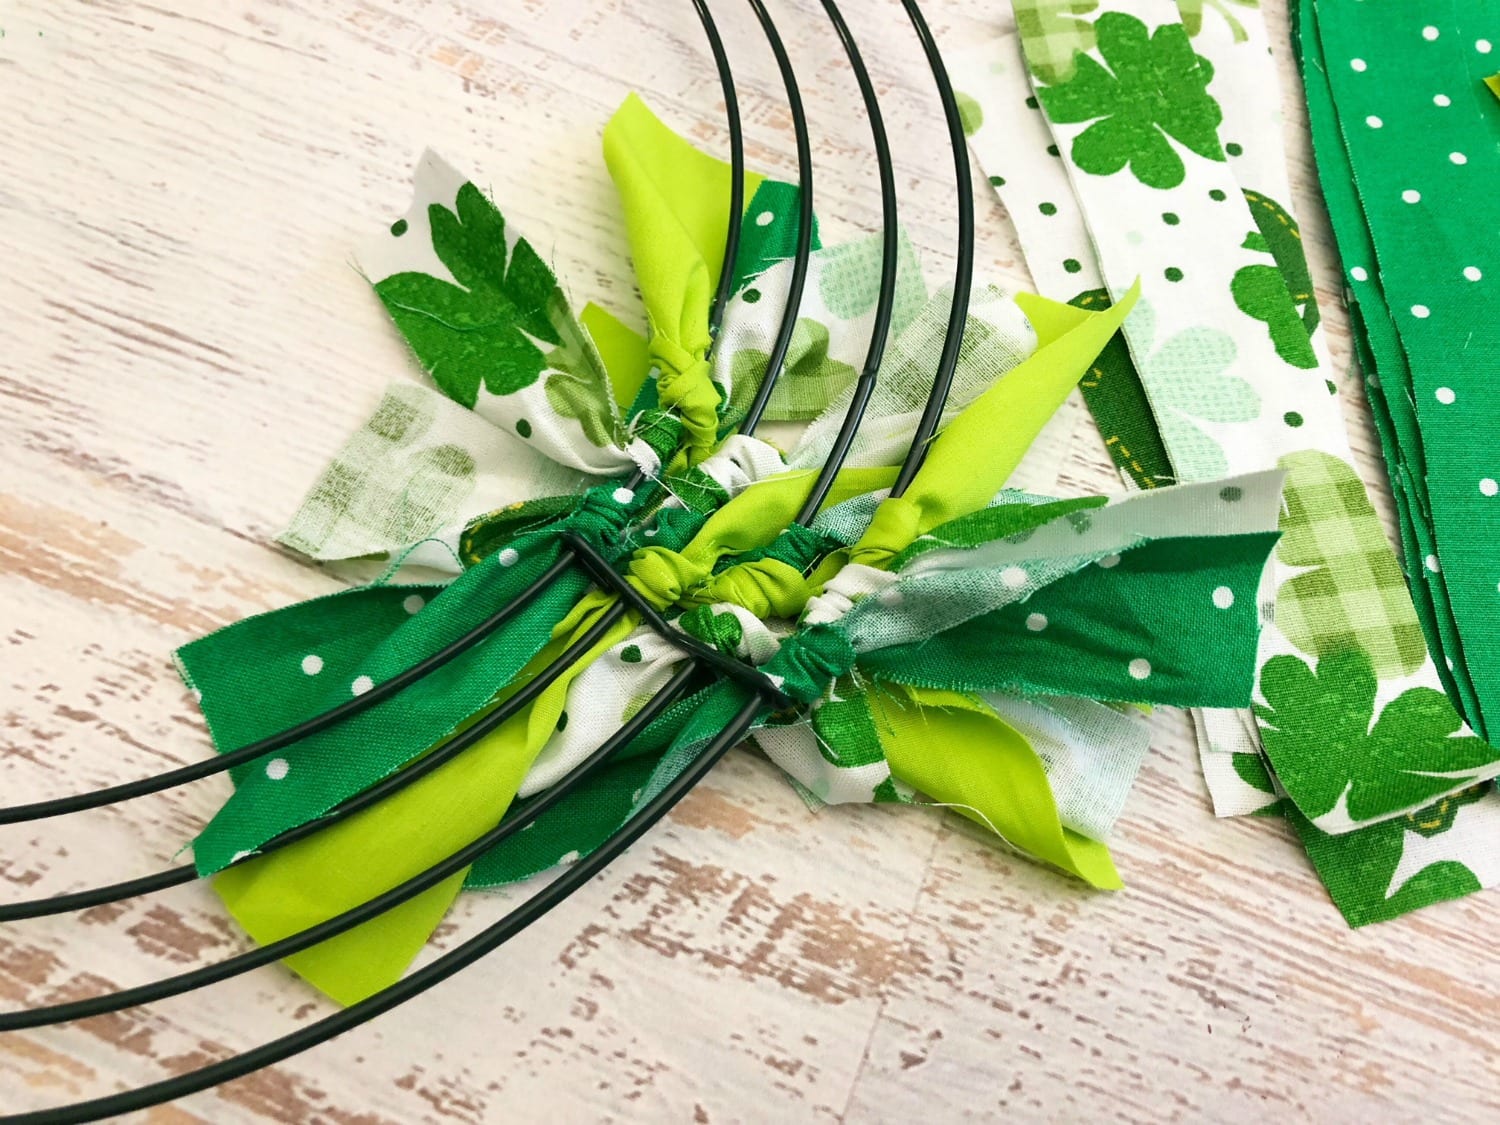
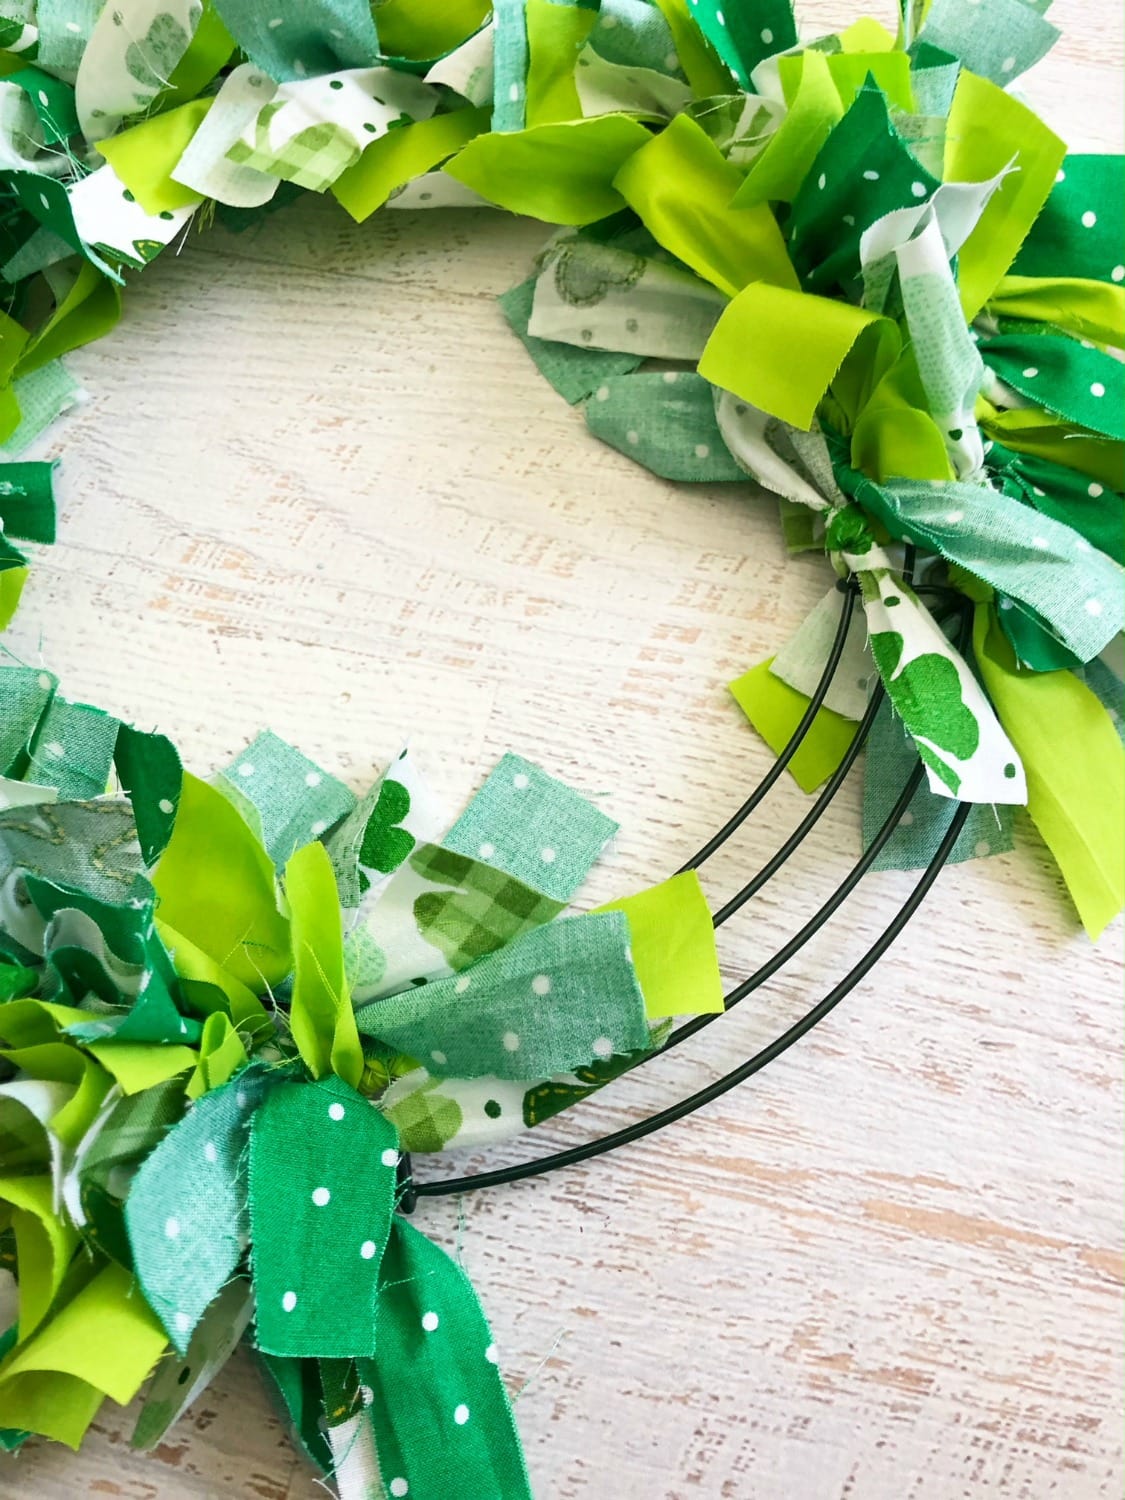
1. Measure and cut your 3 yards of fabric into 1.5” x 7” strips of fabric. 2. Tie on strips of fabric on your wire wreath in a pattern (green polka dot, shamrock, lime green) one at a time starting on the outer edge and working your way in. 3. Keep tiring your fabric strips on in a pattern once section at a time.
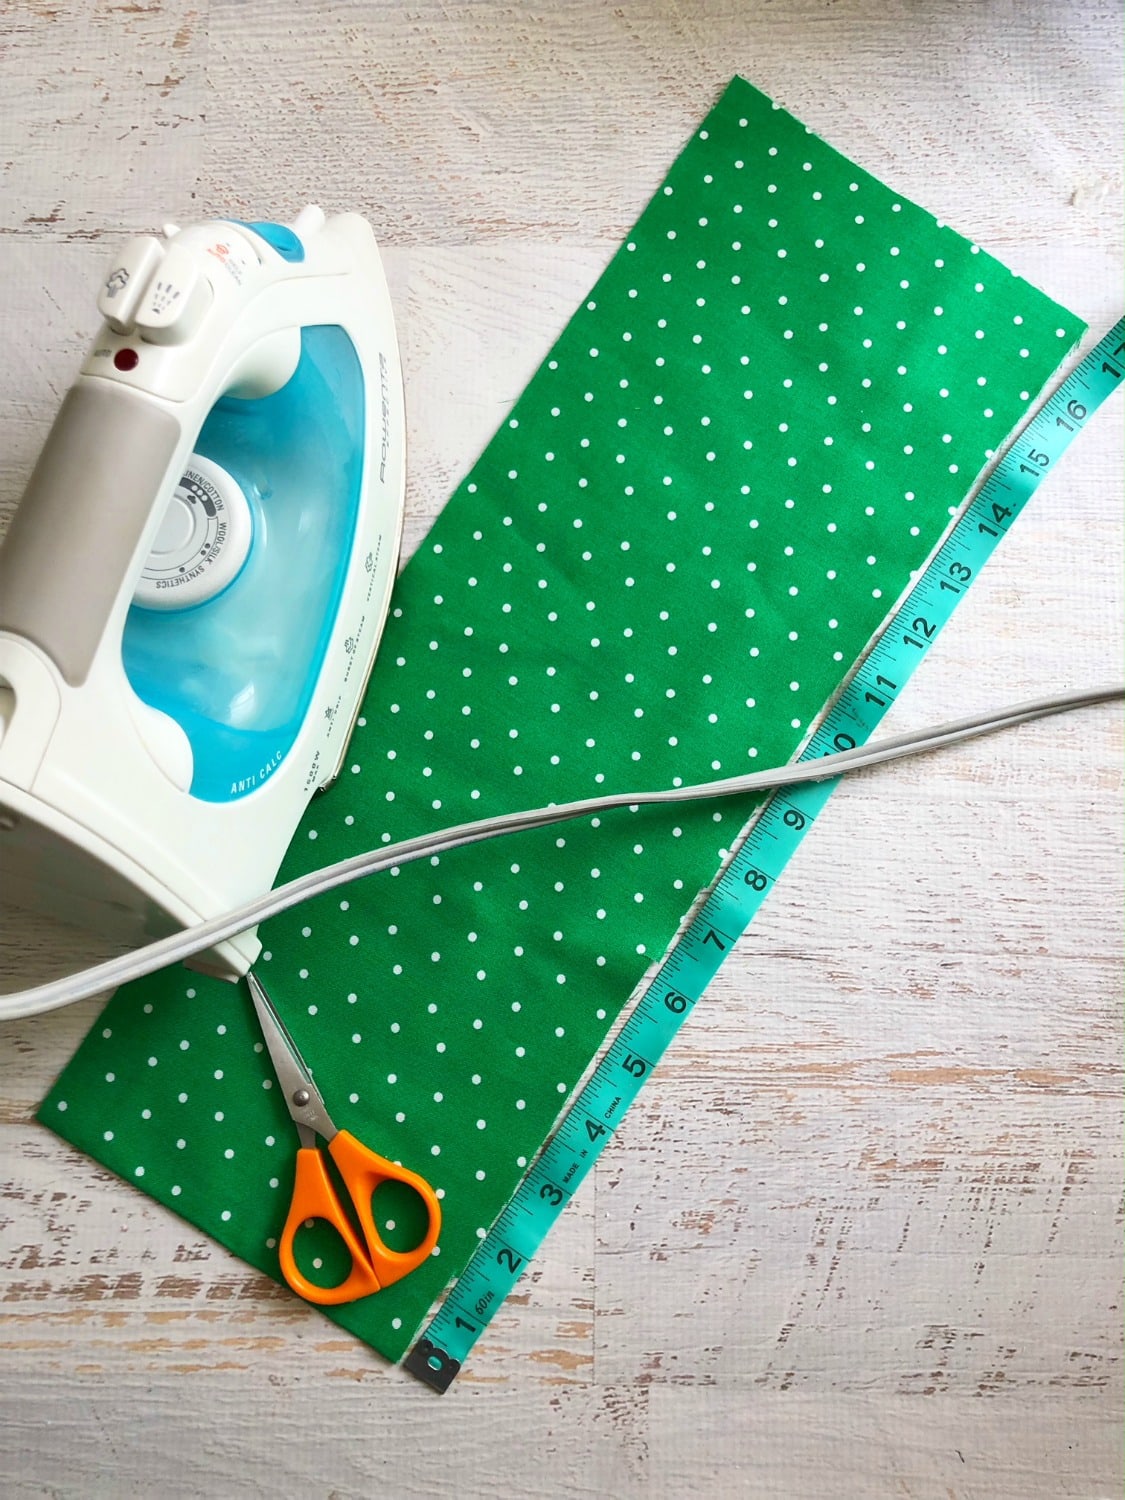
4. When your wreath is full cut a piece of fabric that is 34” x 7” from your 1/4” yard green polka dot fabric. 5. Fold the vertical sides in and iron in place making the fabric look like a strip of 3” wide ribbon. 6. Place your strip of fabric through the center of the wreath and tie the ends into a knot. Pull the knot behind the wreath and your wreath is ready to hang.
I really haven’t ever decorated for St. Patricks day before. I normally can’t wait and just skip right
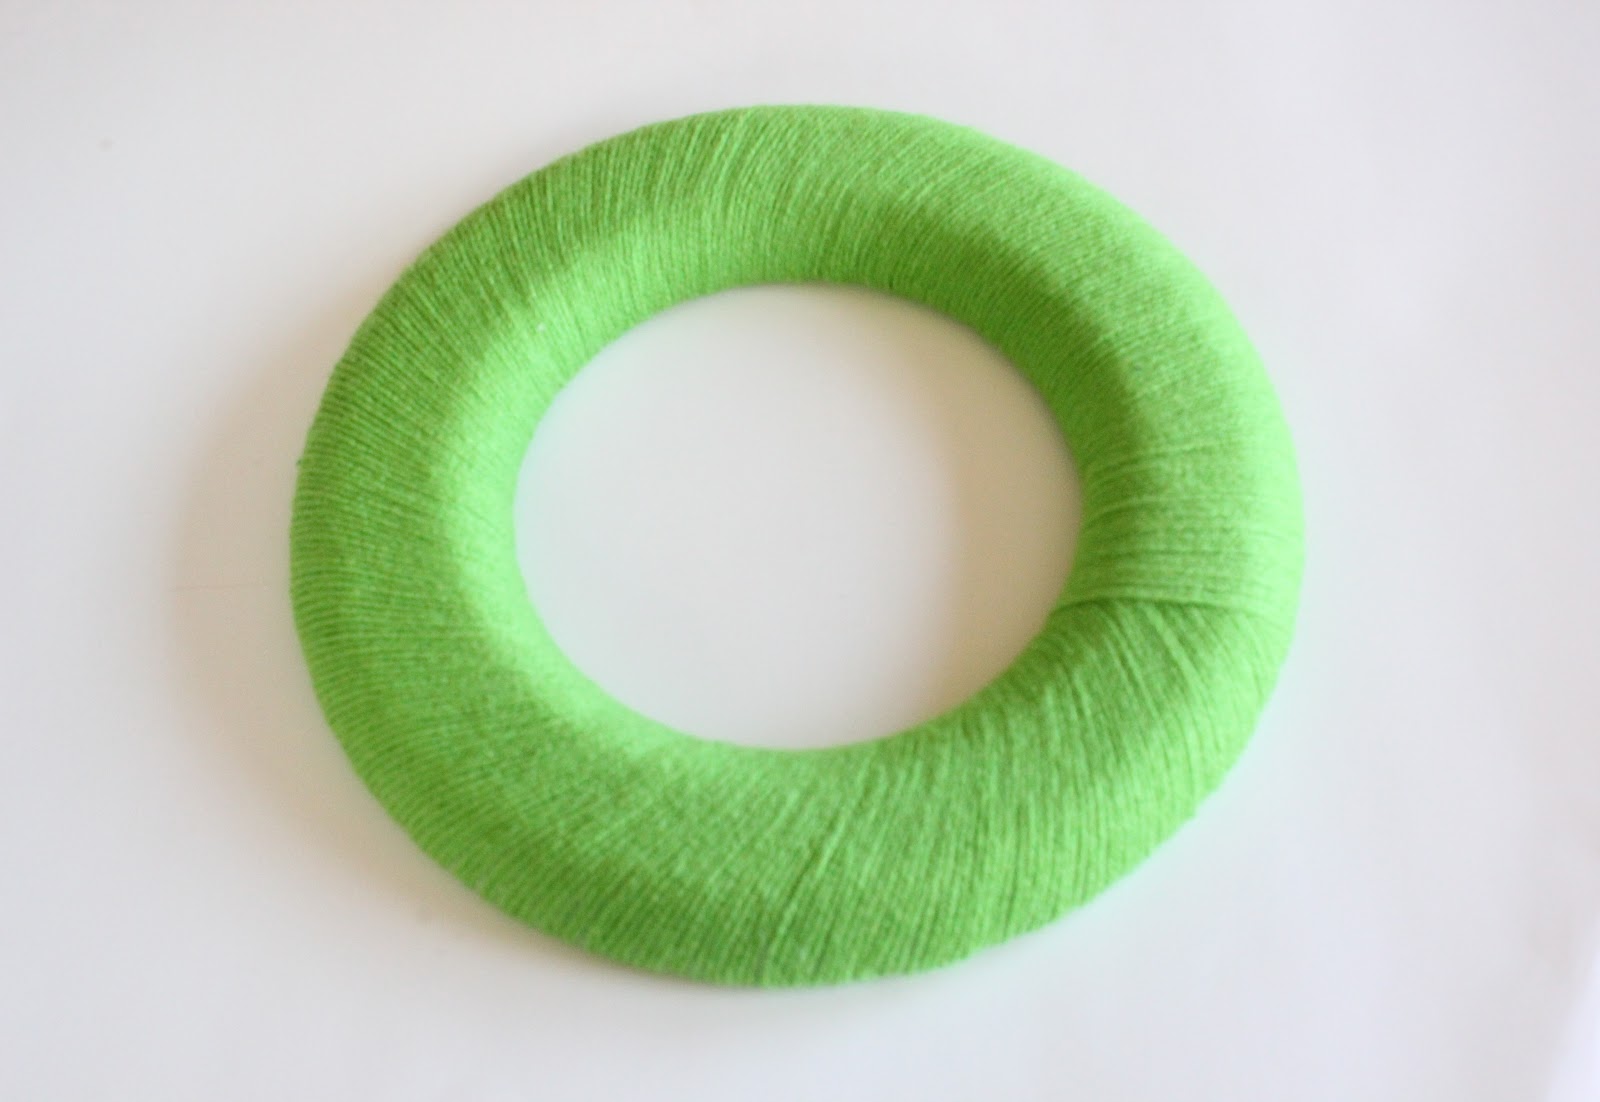
to Easter!This year I decided the holiday should get it’s fair chance so I decided to try out a yarn wreath and it turned out really great, and super easy. I wasn’t planning on making this a tutorial but people are already asking how to do it, so sorry for a gap in some pictures!
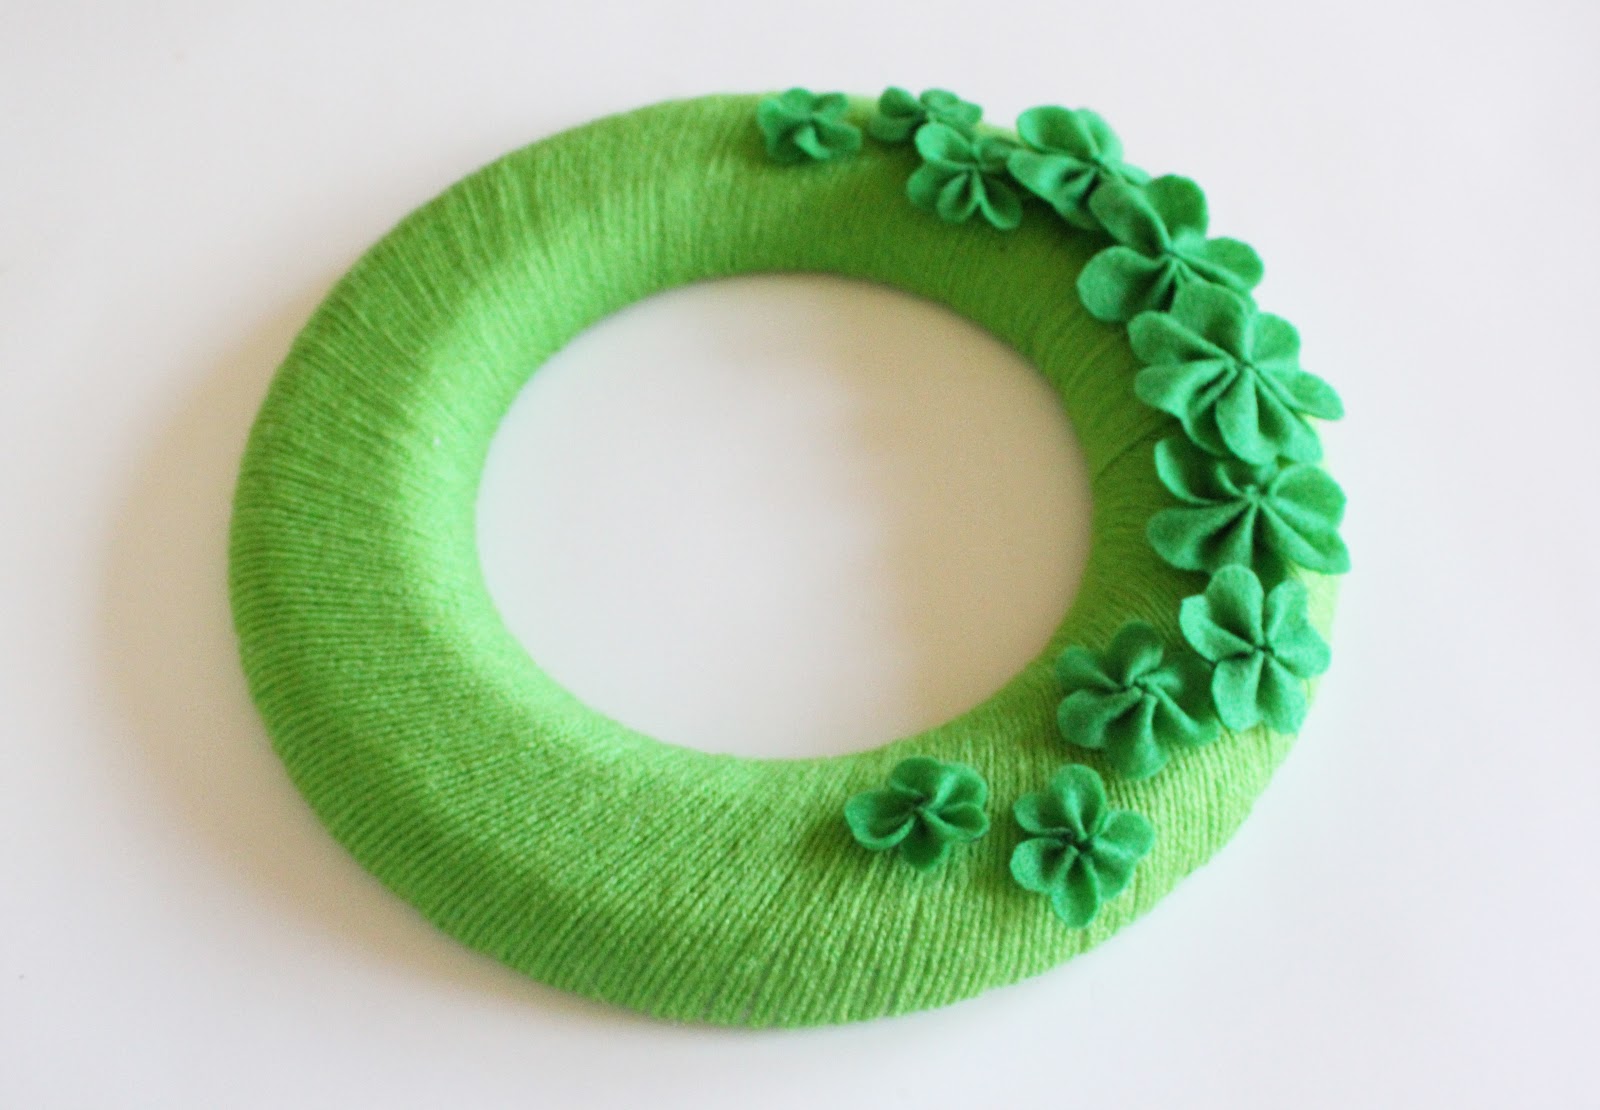
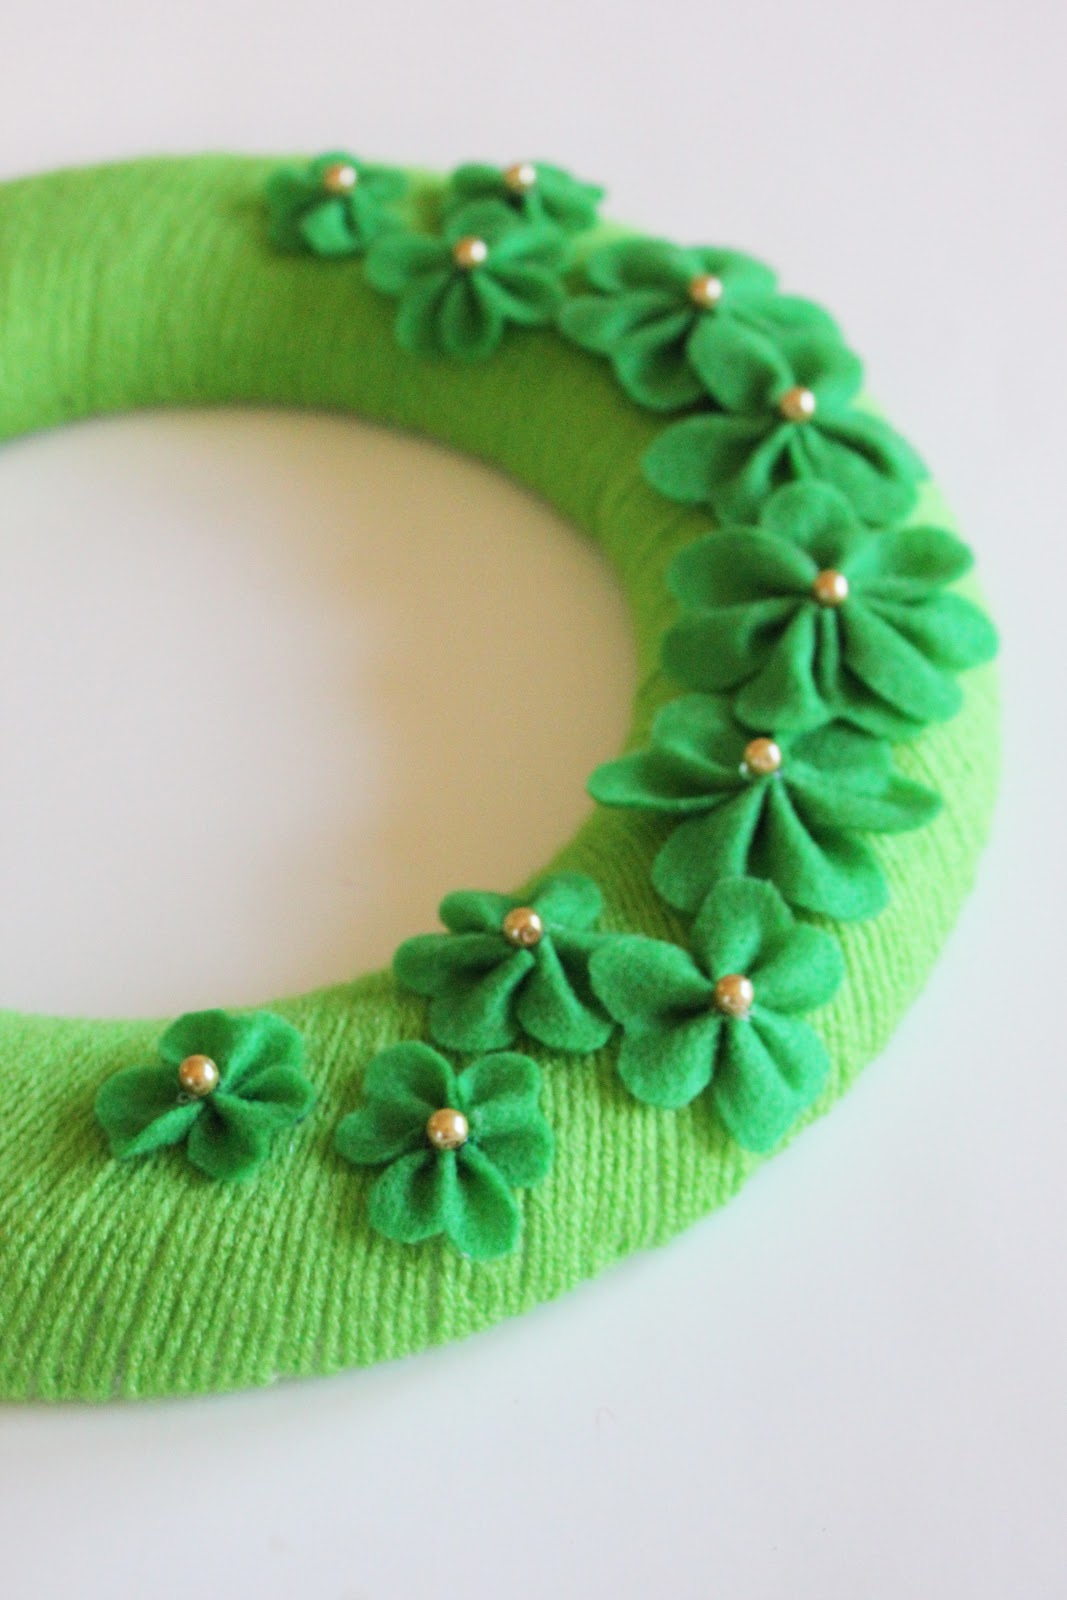
Gather your suplies: foam wreath, scissors, green yarn, marker, sheet of green felt, hot glue gun, ribbon (I used gold), gold beads, and clover template (below).
Step 1: To cover the wreath I cut yarn into long pieces instead of going right off the roll. I found this easier. Apply a drop of hotglue to somewhere on the back of the wreath and begin wrapping. The trick is to be consistent with how tight you pull the yarn, this will keep it looking smooth and even. Every few inches add a drop of glue on the back to hold in place. The yarn begings to tilt as you go round since the inside is smaller, so at the end I had to over lap. Not a problem thought because that will be covered up. Sry about the lack of pics!
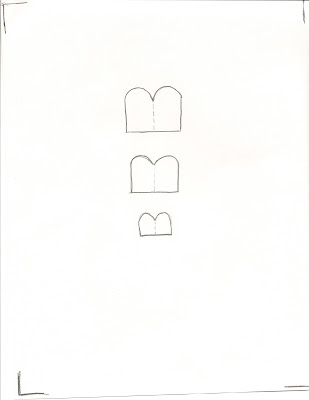
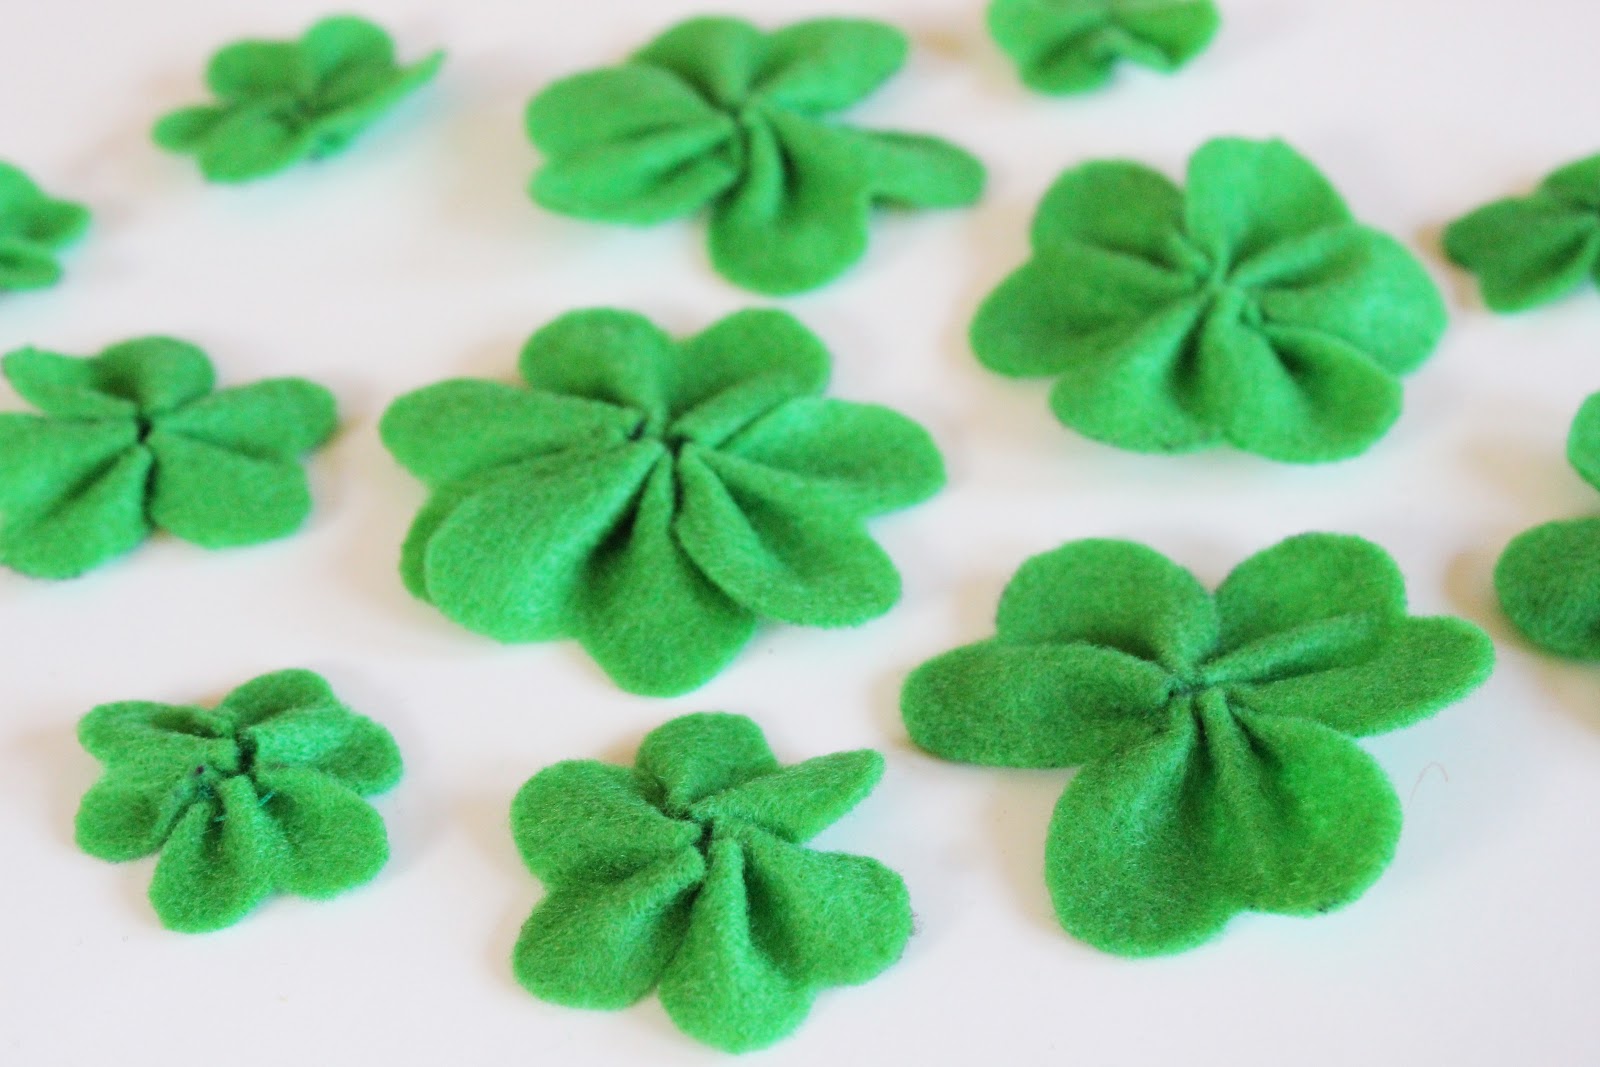
Step 2: Print and cut this template for the clover leafs. Or you could make your own. (click pic to print)
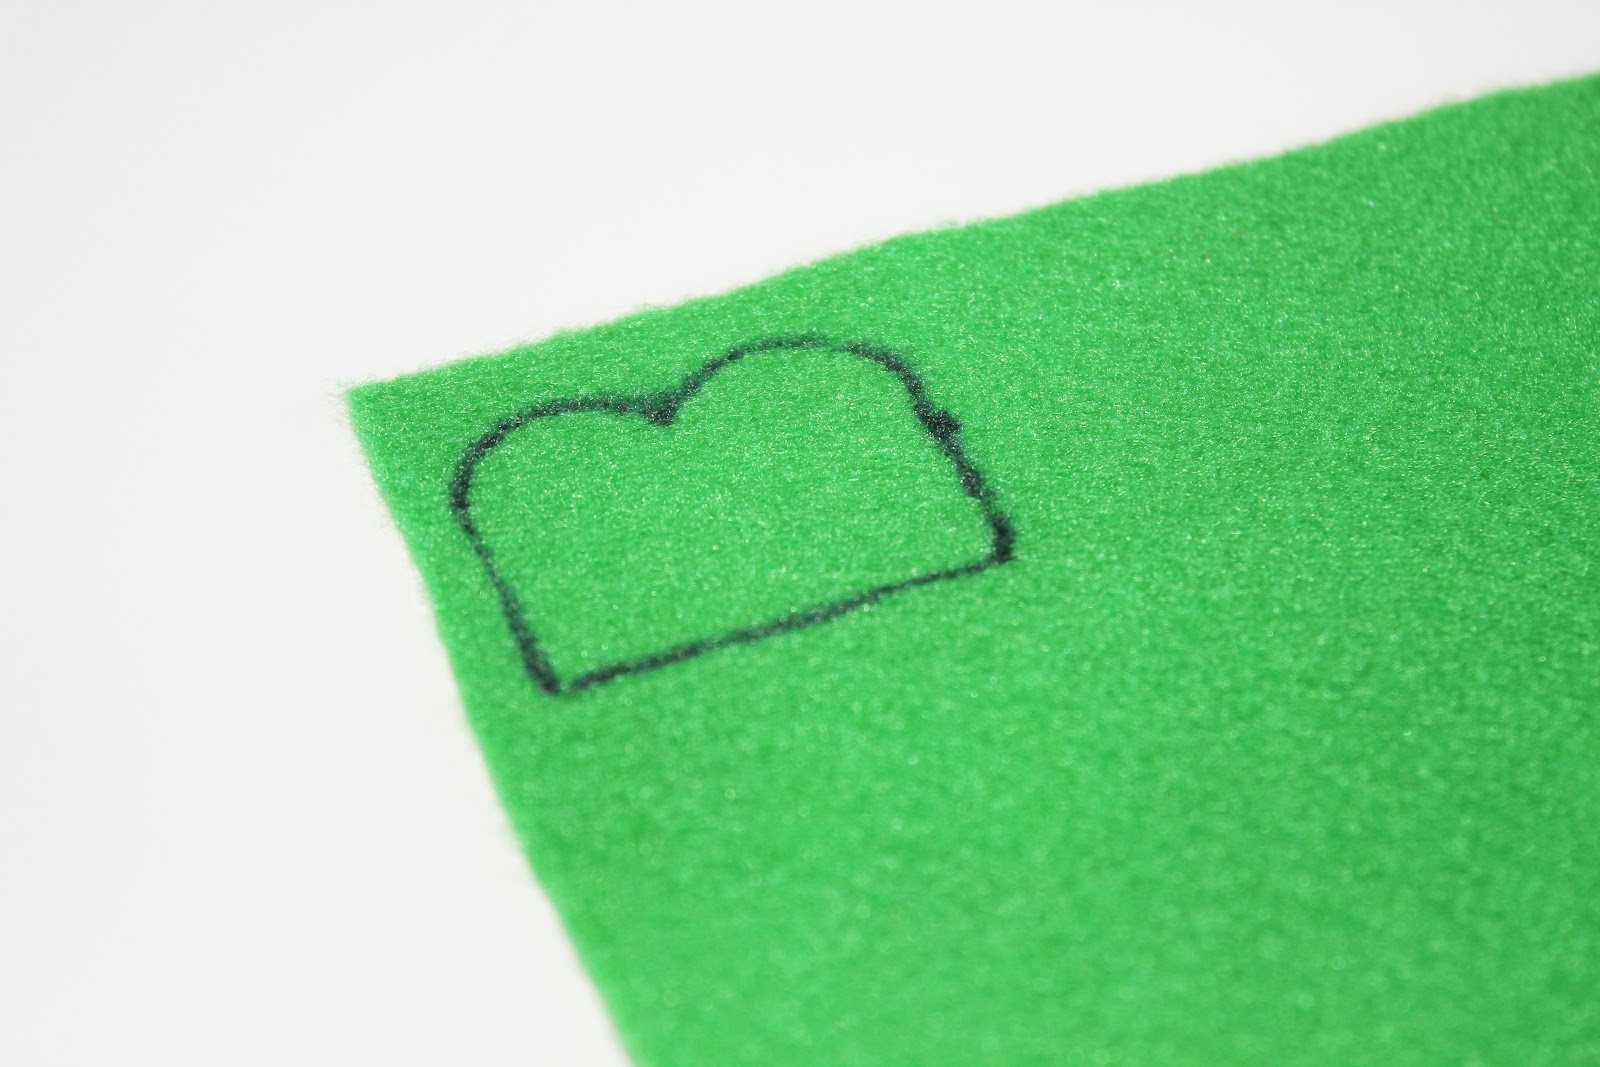
Step 3: Trace patterns onto the felt and cut. You will need eith 3 or 4 of one size for a clover. I mixed 3 and 4 leafe clovers.
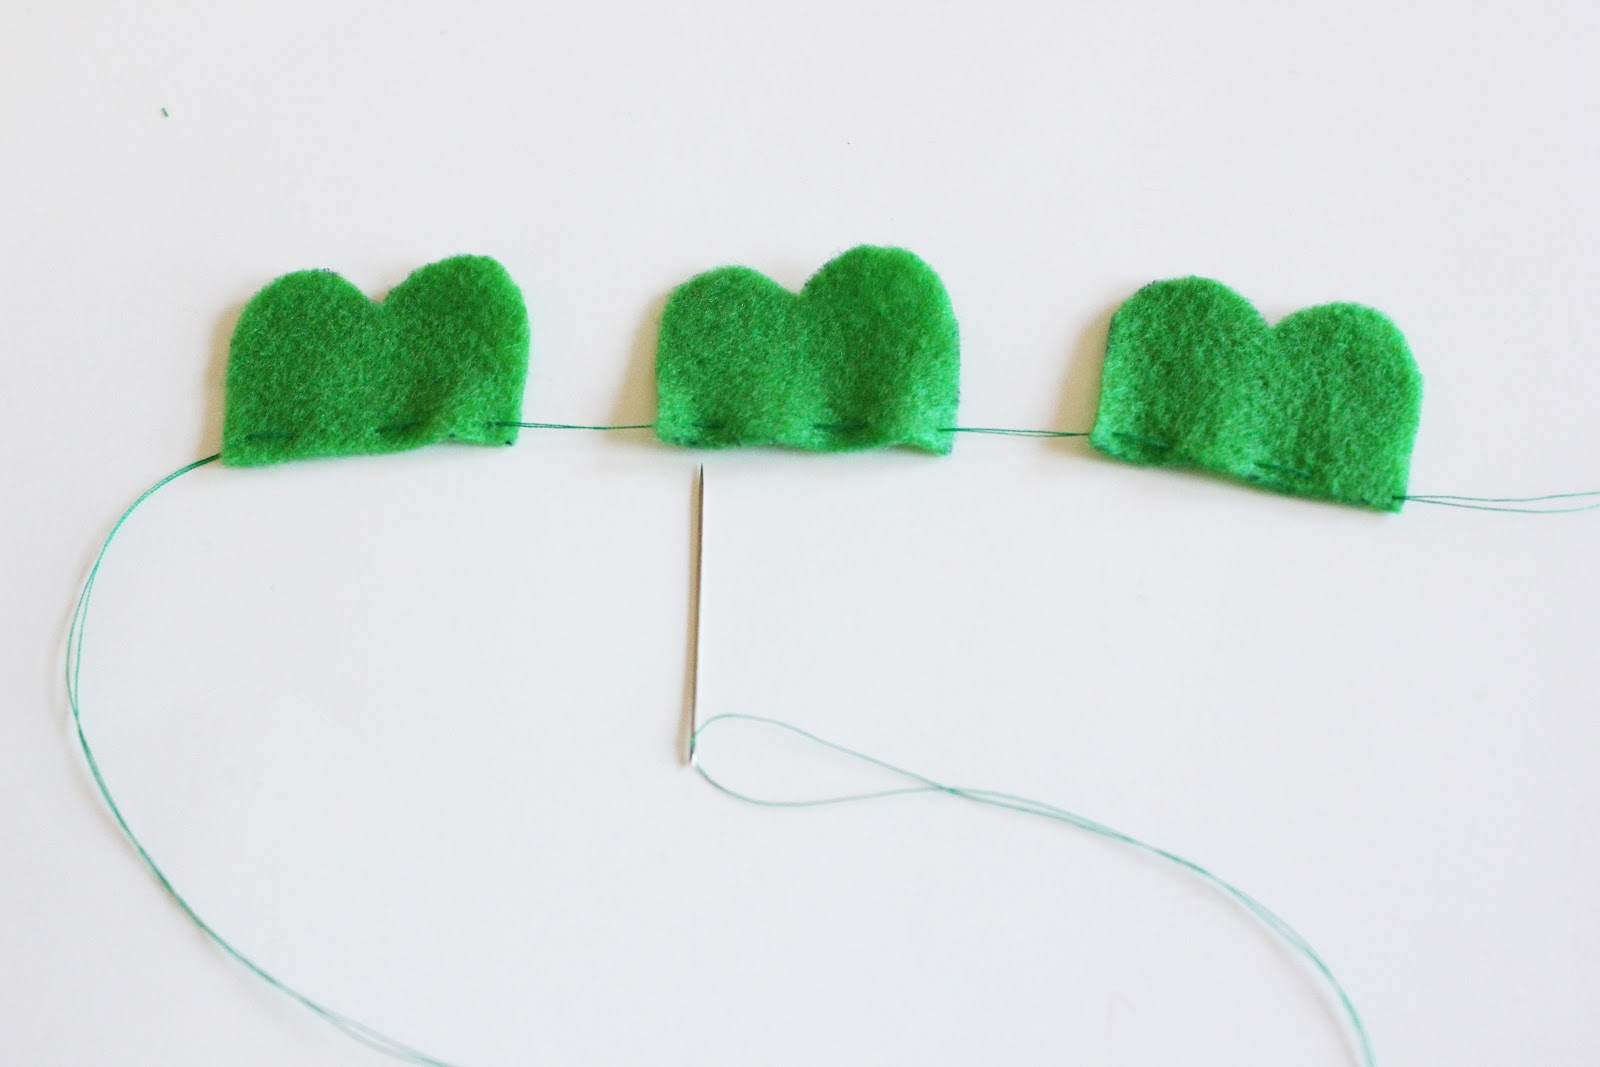
Step 4: Thread a needle and tie a knot. Sew under, over, under, over to each leaf.
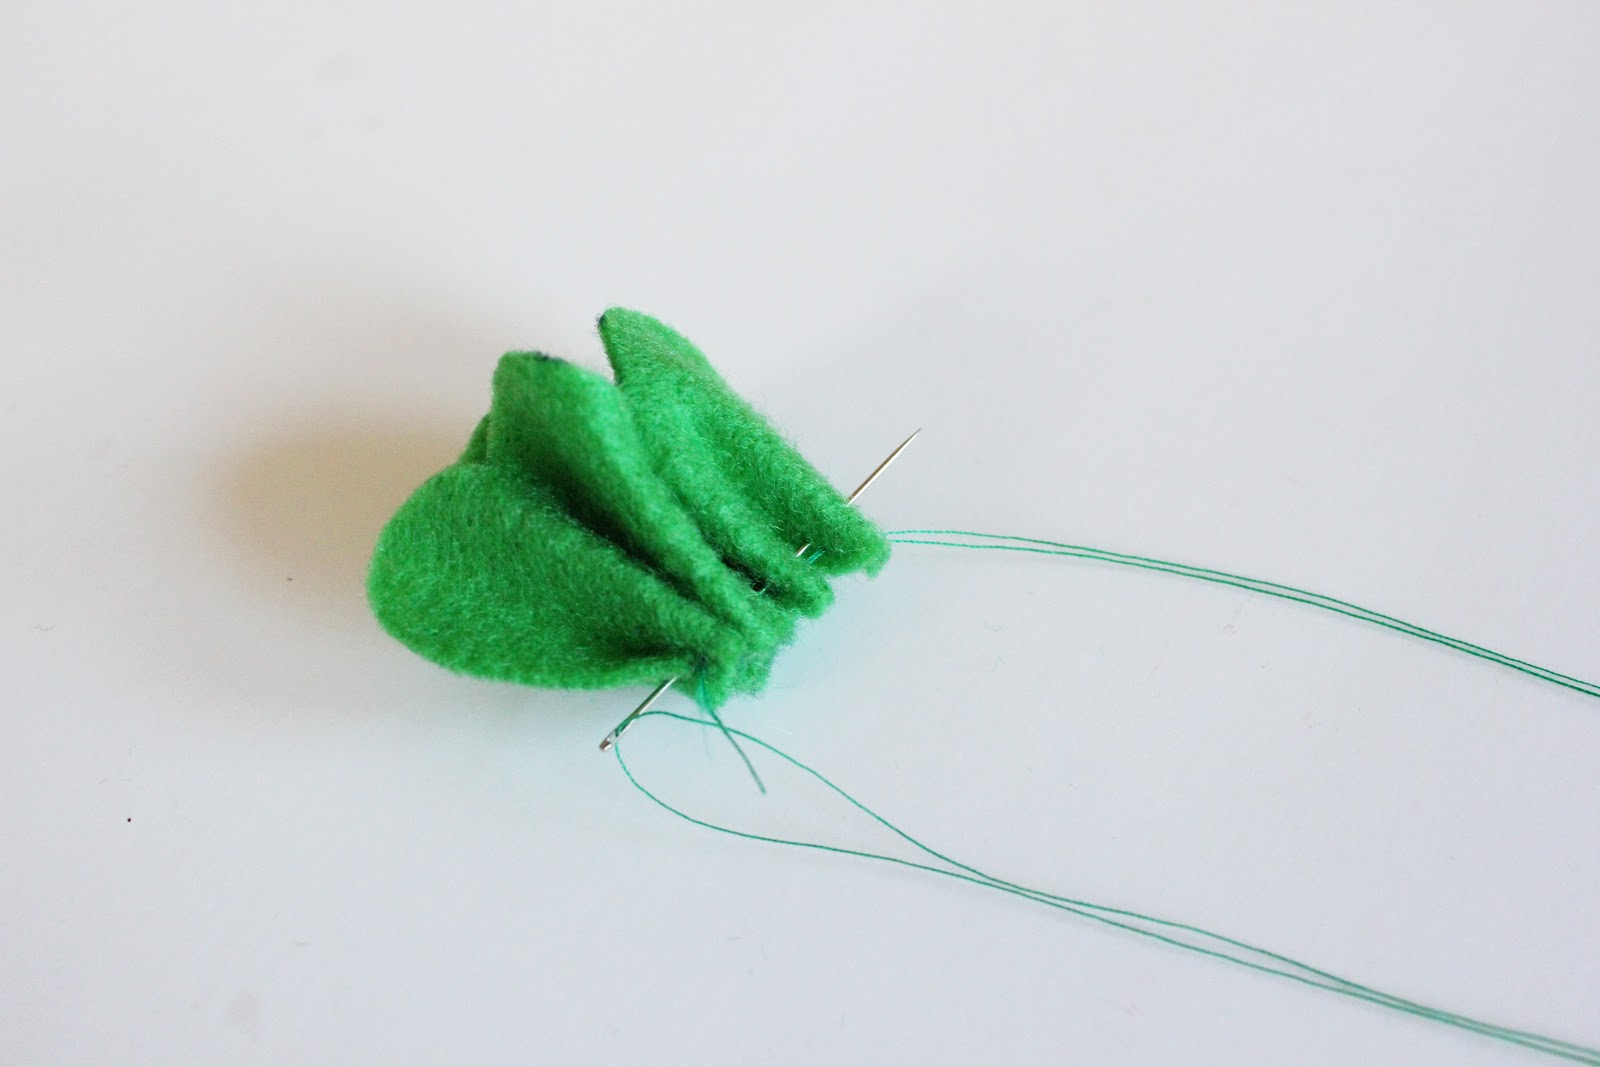
Step 5: Gently pull the thread till the clovers gather. Continue to gather until they fold into a nice straight line so you can slide the needle through the bottom.
Here’s what they should like! Wouldn’t these be cute on hair clips??
Step 6: Arrange you clovers how you would like, then gently life one side of each and put a drop of glue underneath.
Step 7: Add a little gold bling if you would like!
Step 8: Attach a ribbon loop on the back with hot glue, whatever length you would like!
All done!
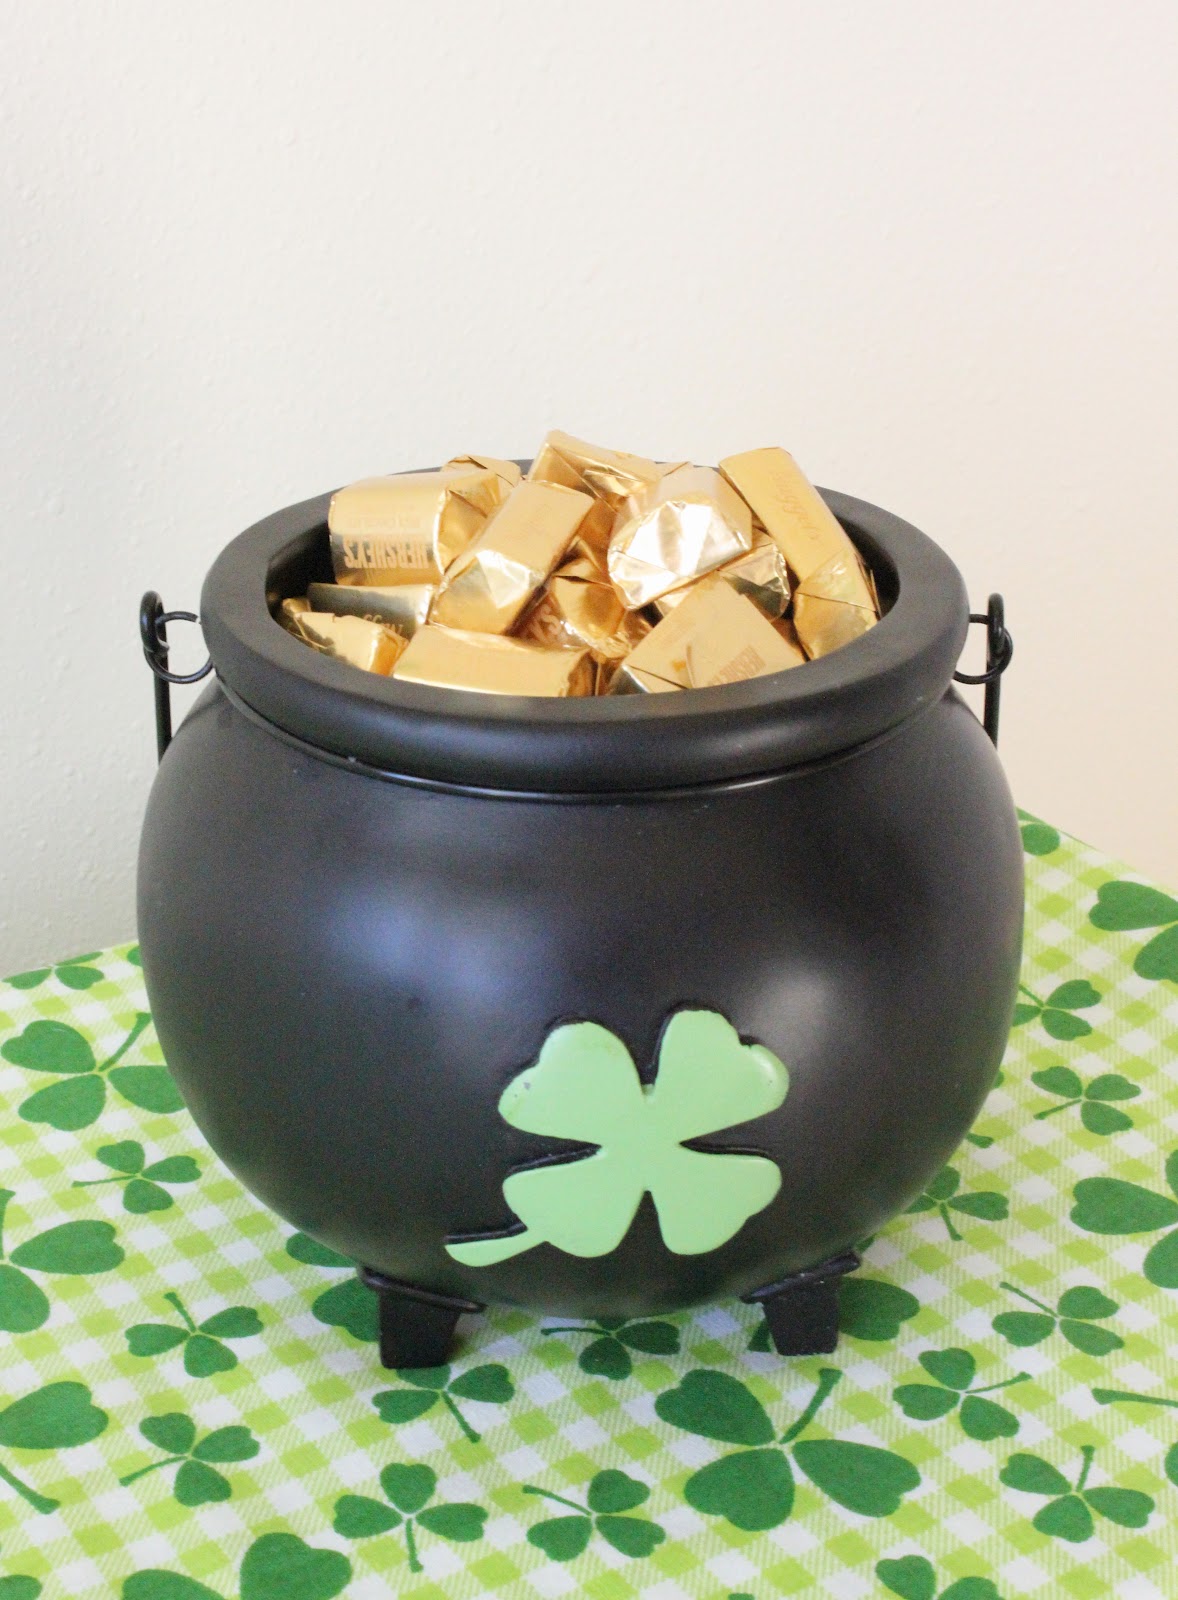
I can’t wait to try more yarn wreaths. This was SO easy, cute, and cheap! I displayed it in our entry way with this little ceramic pot filled with gold hershy bars. 🙂
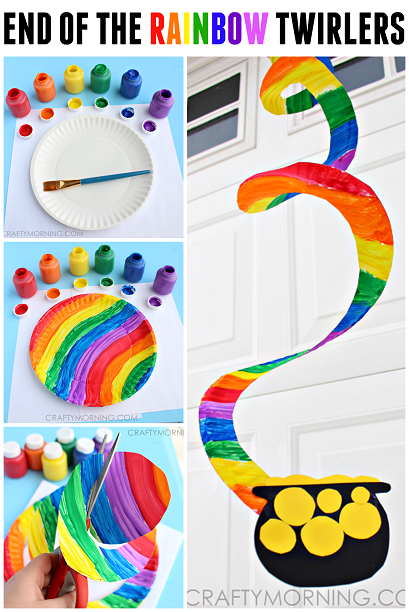
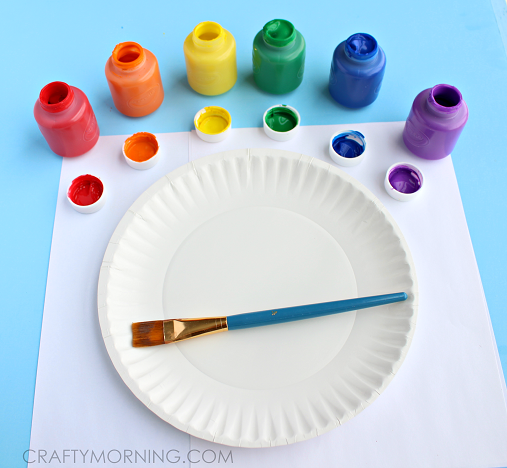
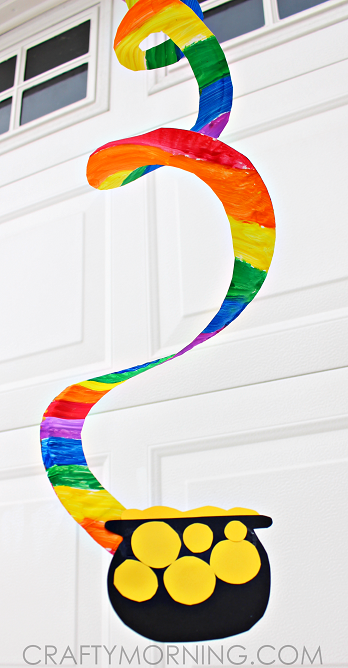
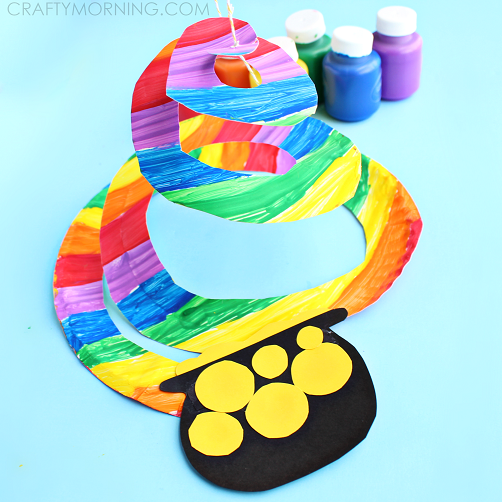
End of the Rainbow Paper Plate Twirler (Kids Craft)
Materials Needed:
Paper plate
Paint
Black and yellow paper
Scissors
Glue
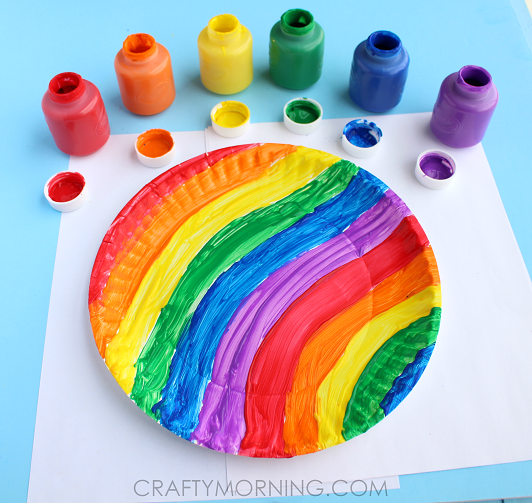
Start by having the kids paint rainbow stripes on the front of a paper plate.
Let dry and flip it over to paint the back as well. Blow dryers are great if you’re impatient!
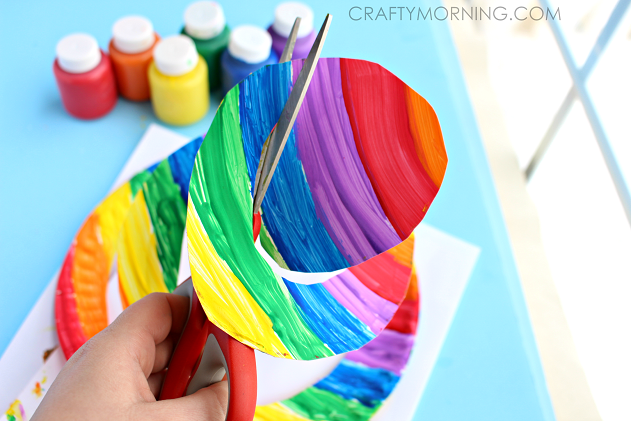
Grab a scissors and start at the outside of the plate to cut spirals. Cut out a black pot of gold and glue it to the end of the plate (we trimmed the spots that were pointy).
Glue on some yellow circles to make the gold…you can add some sparkles too! Poke a hole in the middle of the plate and add a string to hang it up!
Wash and dry the pear, or whatever you decide to cast. Since I’ll be filling the mold with concrete once it’s dry, I stuck a pen lid into the bottom of the pear. It helps keep the pear upright while the mold sets and will leave a hole that’s the right size for pouring in the concrete mix later.
See what I mean about the cute pear butt 😉 I stuck the pen lid into a bit of polystyrene before mixing up the mold. It’s a trick I learned when painting polystyrene balls 😉
Mixing the Two Ingredient Mold
Put your gloves on and throw some cornstarch into a container. Cut the tip off of the silicone tube and put it inside the caulking gun. Squeeze some silicone into the cornstarch. Roughly the same amount. Then add some more cornstarch on top of the silicone and stir using the plastic knife. It’s probably best to do this outside. Silicone has an incredibly strong vinegary smell. When it looks like it’s almost mixed, start kneading the mixture until it forms a stiff paste that resembles bread dough.
If the mixture is too tacky or sticky, add some more cornstarch. If it’s too dry and flaky, like in the piccy above, add more silicone. Once it’s ready, flatten it out a bit and wrap it around the shape you want to cast. About 7 to 10 mm thick is perfect. That’s about 1/4” to 3/8”. Make sure you squish it into all the nooks and crannies.
Sit back and wait for it to dry, probably about ½ hour depending on the silicone you used. Use a sharp knife to cut the mold and remove your form. The two ingredient mold is very pliable so you can just peel it off. If you’re molding a pear, please don’t eat it. Rather wash it off again and add it to the compost heap.
Use super glue and carefully glue the two halves back together again, and it’s ready for casting.
Casting the two ingredient mold
You can either use concrete or plaster of Paris. I didn’t have to add any kind of release agent, I simply mixed up some concrete and poured it inside the mold. Just make sure you shake it around a little to get rid of any air bubbles. Once the concrete sets, carefully cut along the seam lines and remove your form.
The two ingredient mold can be reused over and over again, just wash it off, and you’re good to go.
To finish the pear off, I used some copper paint to create that 5-star restaurant look and added a bent, rusty nail as a stalk. The leaf was cut from a piece of metal that’s been lying outside in the rain for a few months.
The easy two ingredient mold works really well and can be reused over and over again. And I do so love that combination of concrete, copper, and rust.
Just a word of warning. Once you make your first mold, everything looks moldable 😀 We’ve turned an old broken doll into a garden ornament and even created our own Egyptian cartouche using the two-ingredient mold.
And if you like the idea, don’t forget to save it to Pinterest so that you can find it again!
How to Turn Broken Wine Glasses Into Awesome Coconut Planters
What is it with wine glasses? They always seems to break off near the stem when they drop. Which happens quite often in our house. Yup, we like to party. Not the drugs, sex and rock and roll kind of parties, mind you. More like big bonfires, drumming circles and kumbaja till the early hours of the morning. So when our wine glasses break, what do we do? We turn them into fairy garden cloches or make these awesome coconut planters. It’s way more fun than just throwing them away 😀
They look stunning as a rustic center piece and can be made in a few hours. So grab those broken glasses and some coconuts and let’s get cracking shall we 😉
First things first. Cutting the coconuts and getting all the yumminess out to use later.
How To Cut and Clean A Coconut
We prefer to buy our coconuts fresh, since it works out cheaper and I love the taste of the meat when it hasn’t been desiccated yet. It’s not so coconutty 😀 Did you know that the dried meat inside is called Copra? Me neither, LOL. Anyways to cut and clean the coconut you’ll need a glass (to drain the milk), hacksaw and a knife. Remove all the hair on the outside of the coconut. Don’t throw it away. You can use the hair to make these adorable miniature bird’s nests. Look for three little indents at the bottom of the coconut. One of the indents will feel more squishy than the others.
Grab a sharp knife and dig that little squishy indent and the meat behind it out.
Flip the coconut onto the glass and drain the milk. Once it’s empty you can use a hacksaw to cut it in half.
Scoop the meat out with a knife and save those inside bits for later. You can hop on over to my friend Jas’s delicious cooking site to get some amazing coconut recipes BTW.
Turning the Broken Wine Glasses and Coconuts into Planters
Eye ball the thickness of the wine stem and grab a drill bit that’s a little bit thicker and make a hole in the bottom, center of the coconut half. You’ll only need to drill into one of the halves since the indents should be wide enough for the stem of the wine glass to fit into. Don’t forget to drill a few small drainage holes too 😉
Mix up some strong all purpose glueand attach the wine stem to the coconut half. We used Pratley Steel Quickset but any waterproof, non-toxic glue like E6000 should work.
To hide the glue we just used some of the coconut hair that we removed earlier.
Once the glue has dried you can start filling the planters.
We put succulents in ours. The spikey job in the picture above is a Gasteria Flow, I think. They’re often confused with Aloes, but they require less light and make ideal house plants. They get their name from the sac-like shape of their flowers, which are supposed to resemble a stomach, hence the name gasteria, 😀 Ours have never flowered so I’m not 100% sure. Pot the offsets in a small pot, using the same soil as the mother plant and put it a warm, bright spot. Add a little bit of perlite to the mix to help aerate the soil and help retain water. It also makes the soil much lighter.
The little trailing plant is a Crassula pellucida. One of my all time fav indigenous succulents. She’s super easy to grow. Just cut one of her trails off and stick it in the ground. Each little leaf produces roots and a new plant will form in no time.
So next time someone breaks a wine glass, don’t throw it away. Save the bits and turn them into coconut planters instead.
It’s surprisingly easy to transform a water bottle (or whatever plastic bottle you have on hand) into a DIY sprinkler. All you need in addition to your empty bottle is electric tape and a screwdriver, and you can create a fully functioning sprinkler in as little as five minutes.
Want to give your water bottle a second life and beautify your garden at the same time? Then turn your old plastic bottle into a bird feeder! Simply cut a hole into the side of your bottle and fill it with seed (as pictured here).
Want to give your water bottle a second life and beautify your garden at the same time? Then turn your old plastic bottle into a bird feeder! Simply cut a hole into the side of your bottle and fill it with seed (as pictured here).
Or, if you want to take things one step further, you can stick two spoons through your bottle and create little feeding posts, just like blogger Manuela Waliczek-Raczka demonstrates here.
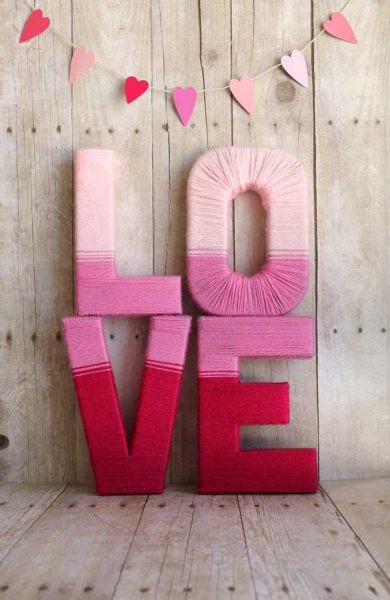
Valentines Day is the most romantic holiday of the year so it is no wonder there are so many craft projects out there to help celebrate the occasion!
Craft Ideas For Valentines Day
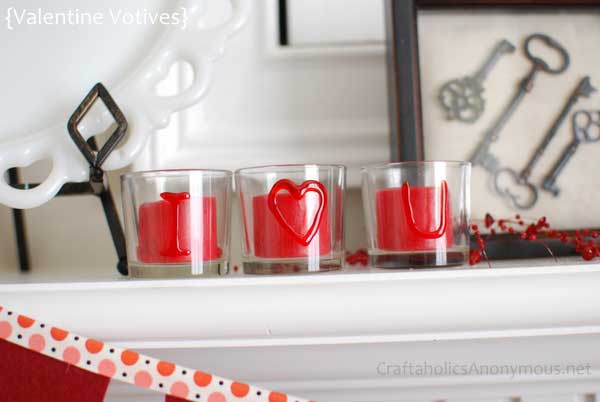
1. Write A Message On Glass With 3D Paint
Use 3D paint to write out a romantic message on glass. These candle holders are a good example. You can also write on picture frames, glass vases, or wine goblets.
2. Fill A Drink Carrier With Champagne And Treats
Simply fill a drink carrier with champagne bottles and flowers or treats. It would be great to decorate and recycle a six pack container for this and fill with mini bottles and other goodies.
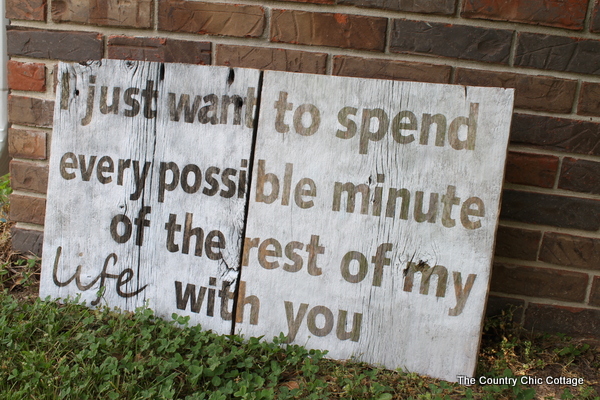
3. Make A Rustic Valentine Sign To Display
All it takes is some barnwood and paint to display a romantic sign for Valentines day or all year long.
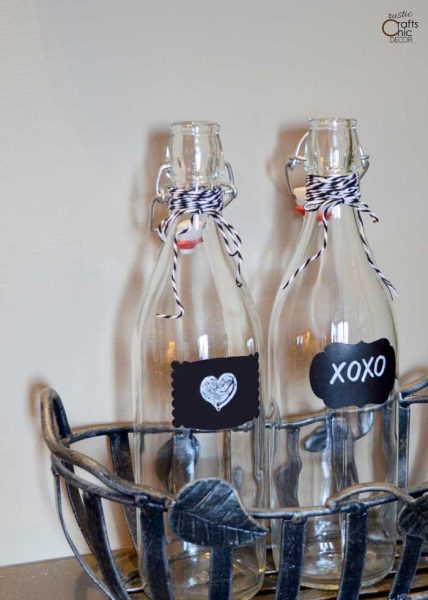
4. Decorate Glass Water Bottles For A Valentine Table
You can purchase these water bottles or recycle other beverage bottles to use to serve sparkling water. Then, simply decorate with chalkboard labels and twine.
5. Make A Valentine Topiary To Decorate Your Home
These topiaries are easy to make and perfect for Valentine’s day with the red, white and pink rosettes.
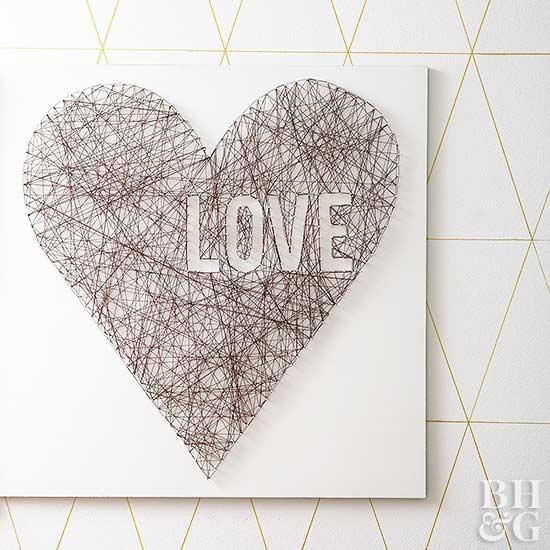
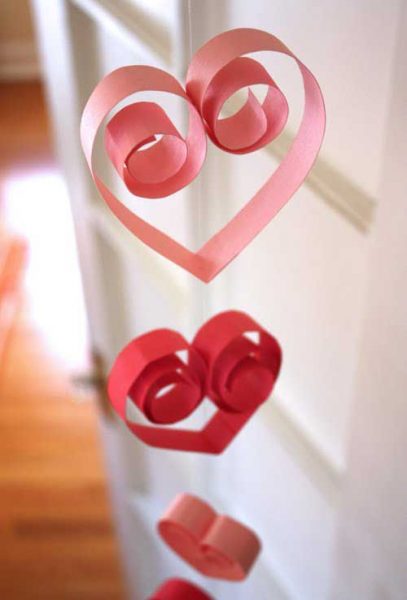
6. Create Some Valentine String Art
This art only looks complicated. The string heart is easy and fun to make.
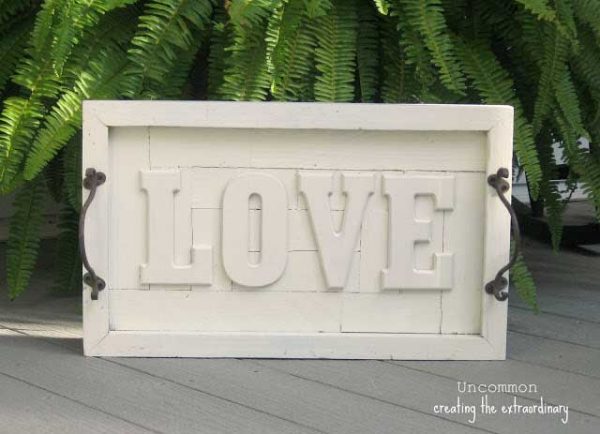
7. Serve Your Treats On A Tray Of Love
This Pottery Barn inspired love art can be used as a tray or for wall art.
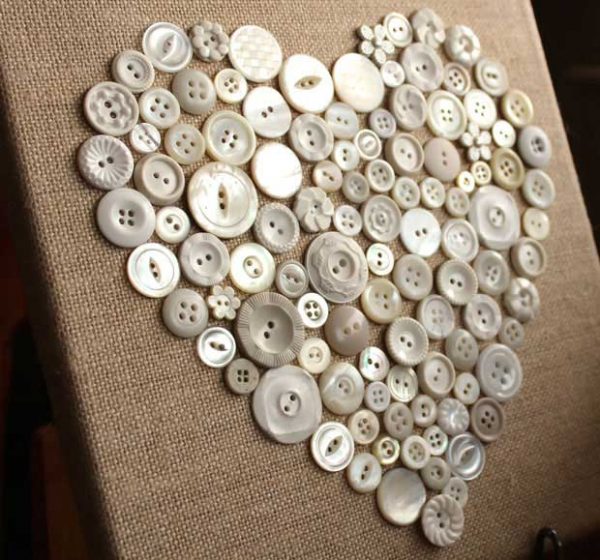
8. Make A Heart Out Of Buttons
Creamy buttons on a burlap base make such a rustic chic heart for Valentines Day.
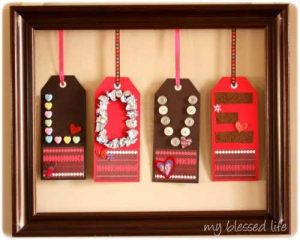
9. Make A Sign With Tag Letters And A Frame
Use tags to make letters and then hang them inside a frame. Spell out a Valentine message to fit inside.
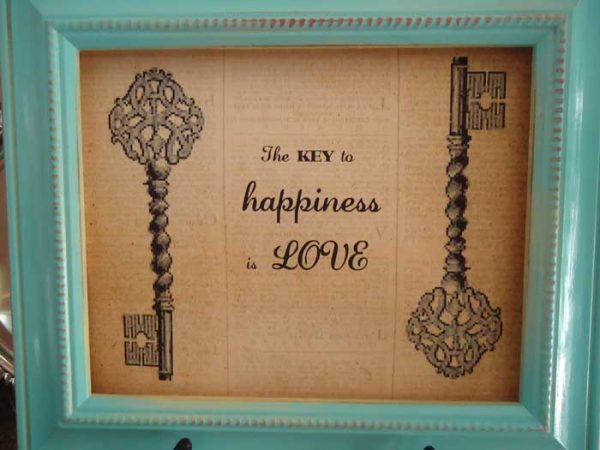
10. Create The Key To Happiness
Use graphics and frame the art for a festive valentine sign.
11. Make A Rustic Valentine Tree
Rustic, simple, festive and chic. This Valentine tree is the perfect craft for holiday decorating.
12. Create A French Inspired Pillow
Create something French inspired to get in the Valentine mood. This valentine pillow is perfectly romantic.
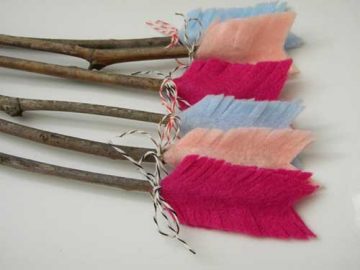
13. Craft Some Felt Hearts
Make a handful of felt hearts to strewn about or create a garland with.
14. Make A Rustic Heart Out Of Wood
Create a heart out of wood for a rustic way to celebrate the holiday.