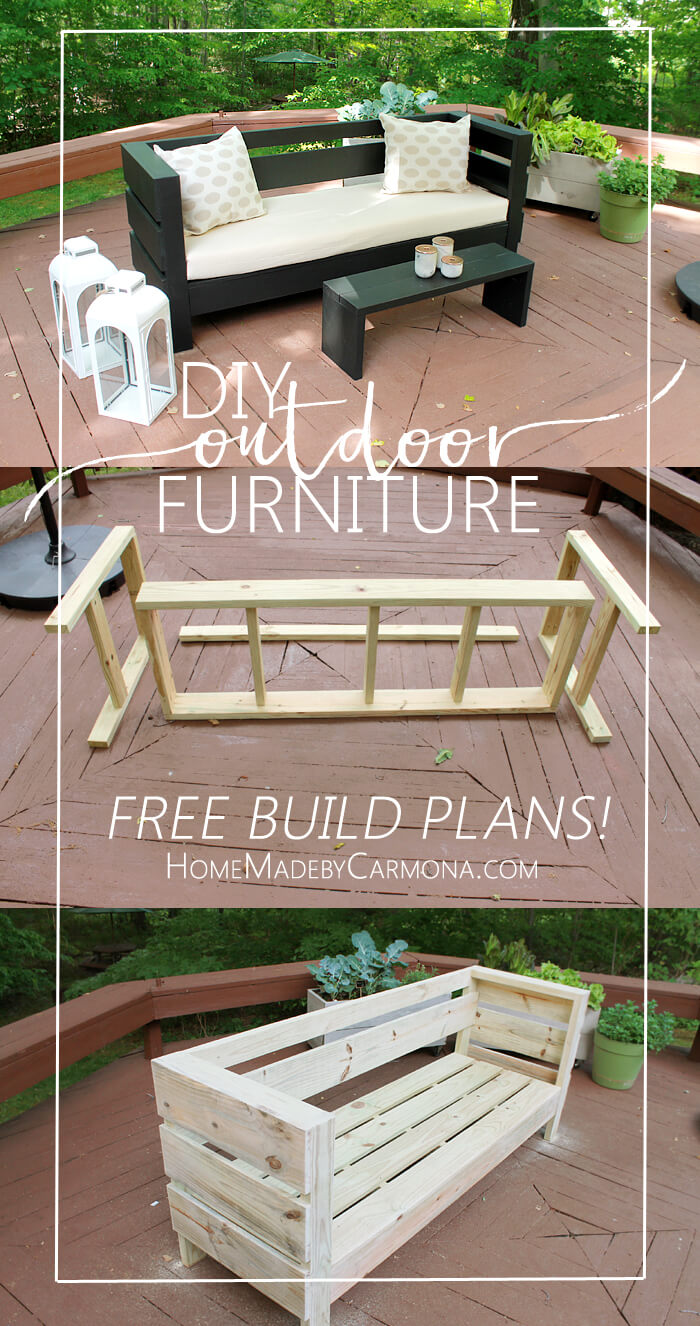
Select treated lumber so your sofa bench can stay in the outdoors year round. Pre-cut all your boards, or have them cut for you at the hardware store to save time. It is important to consider whether you have a saw that can handle 2″x 6″ and 2″ x 8″ boards…if not you will want to have them cut at the hardware store. The armrest and backrest is built solely from 2″x4″ wood, while the seat is framed out with 2″x6″ wood but I will reference the actual rather than nominal sizes moving forward.Save
2
Build Seat Frame
After making all your initial cuts, start by framing out your seat base. Using a Kreg Jig place pocket holes in either side of two 1 1/2″ x 6″ x 22.5″ seat frame pieces, and attach to inside of the 1 1/2″ x 6″ x 72″ seat frame pieces. Use a little wood glue when attaching all pieces moving forward, and a carpenter square to ensure all joining pieces are square.Save
3
Complete The Frame
Add pocket holes on either side of three of your 1 1/2″ x 4″ x 22.5″ boards. Attach them within the frame, spaced evenly apart. Attach each one flush with the top of the frame. This is your seat base where the slats will lay across later.Save
4
Assemble Armrest Frame
Place pocket holes at both ends of four 1 1/2″ x 4″ x 22.5″ boards. Screw one 22.5″ armrest boards between the two 1 1/2″ x 4″ x 32″ armrest boards, flush to the top. Mark 12″ from the bottom of either arm/leg piece, then attach the second 22.5″ board flipped on it’s side, with the top at that 12″ mark. Follow these steps again to create the second armrest.Save
5
Prepare To Assemble
Put pocket holes in either end of the 1 1/2″ x 4″ x 72″ backrest board. Then position the seat frame, armrest frames, and backrest to prepare for assembly. Place pieces so the sofa is oriented on it’s side for easier assembly.Save
6
Attach Armrest To Seat Frame
Attach the armrests to the seat frame while on it’s side. Screw directly through the armrest frame into the seat frame, and do the same from the seat frame side into the armrest. Stagger where you place your screws. Set your seat upright.Save
7
Attach Backrest
Once upright, attach the 72″ backrest piece (pocket holes facing back) flush between the two armrests.Save
8
Add Seat Slats
Evenly space the four 3/4″ x 6″ x 72″ wooden seat slats atop your seat frame, and nail down to the seating frame.Save
9
Optionally Add Decorative Slats
Optionally nail evenly spaced 3/4″ x 8″ x 25.5″ decorative slats to the outside armrest, and the single 3/4″ x 8″ x 79″ slat across the inside back. These are not necessary for support, but give a modern appeal to the bench. Sand the entire bench well, and stain!
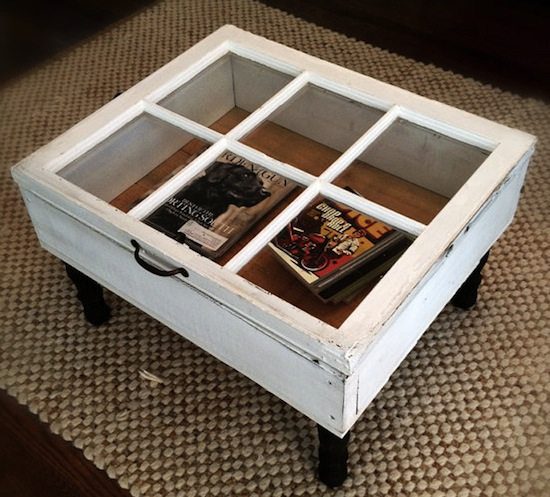
It should come as no surprise that with our passion for old items and repurposed treasures, we are also mad about collectables. Vintage trays, antique keys, He-man and the Masters of the Universe collection, if it’s from an era bygone we are into it. But with this kind of hobby comes a need for display cabinets, and the best kinds of display cabinets are multi-functional. Enter the window coffee table. This clever unit combines our love for collecting with our passion for upcycling, turning an old window into a display coffee table. Brilliant.
When you take a good look at this window coffee table you will see that the construction is actually quite simple. It is comprised of a salvaged window placed on top of a wooden frame with some unfinished wood as the backing. Add some table legs and you’ve got a complete window coffee table. It’s so simple and so gorgeous that we’ll bet you’re gonna start looking at old windows a bit differently. Here’s how to make your own.
How to make a window coffee table
To make your own window coffee table first measure your window. Now decide if you’d like your table to have a lip with the top of the table hanging slightly over the bottom. If so subtract an inch from the length and width from the measurement and build your window base to this specification. Otherwise cut your 2x4s to the exact measurements. These 2x4s will become the box that the window rests on. Cut a sheet of plywood to the same size as the 2×4 base. Screw the 2x4s together, attach the sheet of plywood to the bottom and flip this box over. With the plywood sheet on top, pre-drill holes in each corner and screw in the wooden coffee legs. For this project you can use salvaged coffee table legs or even buy ready made ones.
Now flip the table back onto it’s legs and attach the hinges to the window frame and top of the 2×4 frame.
Next prepare the window coffee table for paint by sanding down the window frame and wooden box. Prime the wood and let it dry. Next prep your window for paint by lining the window panes with tape to avoid getting paint on the glass. Choose your paint treatment and decide how much of a vintage look you’d like your coffee table to have. From crackle paint to high gloss it’s up to you.
Paint and then allow time for your window coffee table to dry. Complete the project by adding a handle to the window pane top. Place your collectibles inside and admire your handiwork. Ready for more upcycling ideas?
Old catalogues or magazines (they should be of the same size)
A record (or alternative table-top)
Paperclips
Coloured sticky/duct tape
All-purpose glue (or hot glue)
Firstly, take a magazine and open it to the 10th (or so) page. Roll it up to the left until the left edges of the pages touch the spine of the magazine.
Roll up the next 10 pages (you don’t have to count, just estimate it 🙂 ) until their edges touch each other. Then fix it with a paper clip as close as possible to the back of the magazine.
Repeat the second step until you’re at the second to last page. The last page shouldn’t be rolled up, yet.
Now you need the next magazine of the same size. Put the last page of the first magazine on top of the cover of the second one and roll them up as before, together with the first few pages of the magazines.
Repeat this until you think it is enough 🙂 (It depends on the thickness of the pages and how many pages your magazines have.) Don’t roll the last few pages, yet.
Now stand the whole thing up (hereby the paper clips are important, otherwise the pages might open again). Now you can roll in the last pages and fix them to the first pages of the first magazine using a paper clip.
Next you stick the sticky tape around the whole thing on top and again on the bottom.
Now you can remove the paper clips and make the second level as you did the first. It is important that the magazines of one level are of the same size, but all the levels don’t necessarily have to be even. However you prefer 🙂
Make as many levels as you want, depending on how high you want the table to be.
Now cut a piece of paper so that it matches the top of the table leg (in a circle) and stick one piece on top of each level. Glue the levels on top of each other and glue the record on top.
Done 🙂 I hope this was understandably phrased!
At our place the environmental-friendly table embellishes one corner of our living room together with my globe lamp 🙂
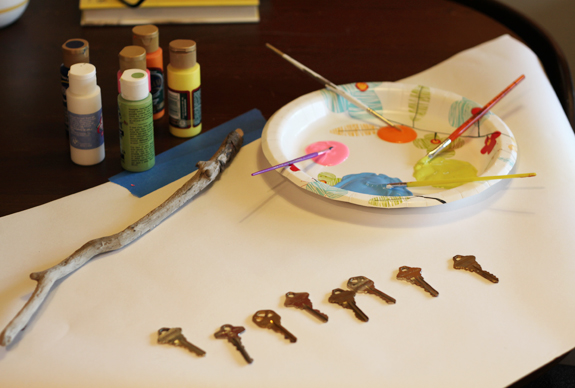
Optional: Paint your keys and stick. Choose a few coordinating colors and have your child paint the keys and stick. Our keys took two coats, let the first side dry before flipping and painting the other side.
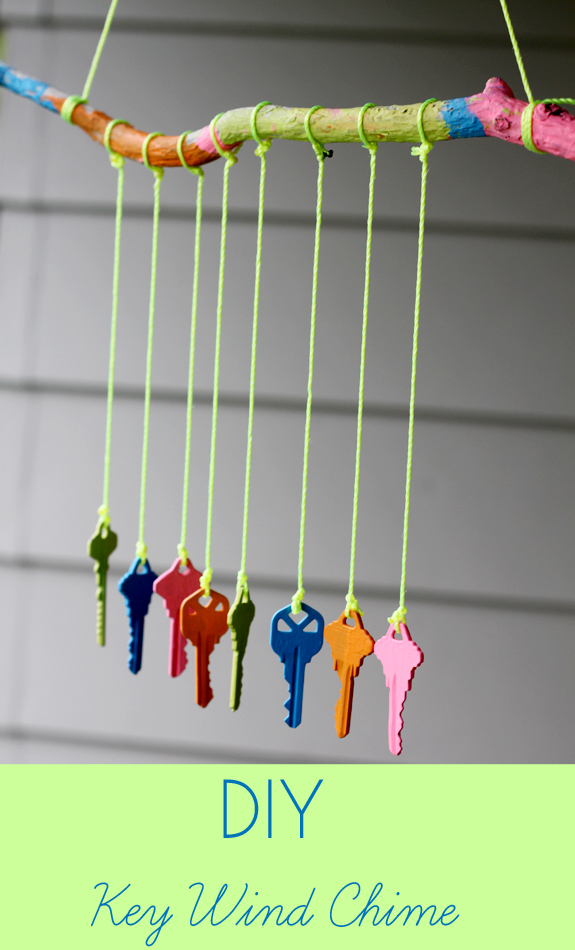
Tie a piece of string to either end of the stick so that you have a way to hang it.
Tie a piece of string to each key.
Tie the keys to the stick making sure that they are close enough to each other that they will chime when the wind blows them.
Gift, hang, enjoy!
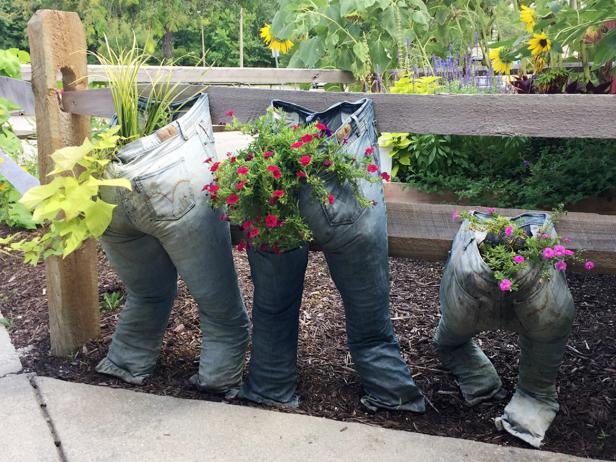
I hope this project inspires a little crafty recycling in your home. I’m sure you and your little ones will love turning trash into treasure. And whoever receives your thoughtful handy work is sure to be pleased as punch. I know they make me smile every time I enter my garden.
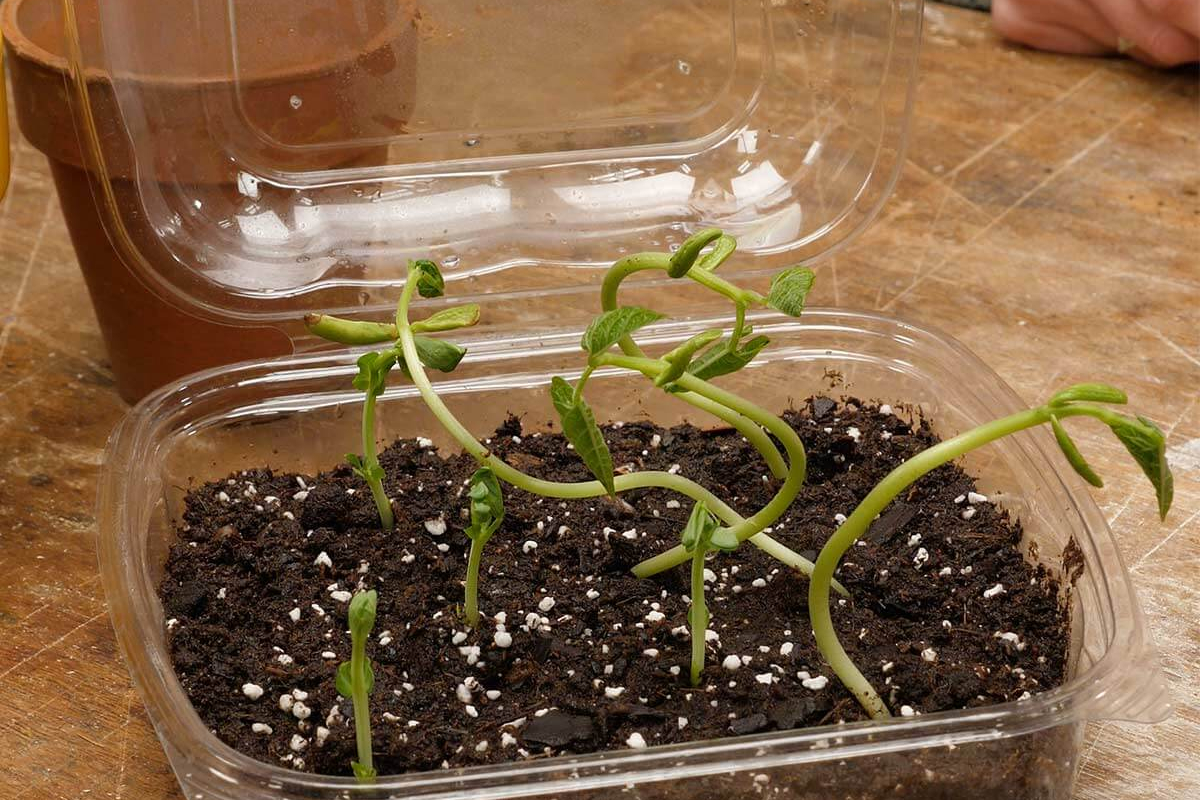
If you don’t have any soda bottles handy to create your own mini greenhouse, you can also use plastic to-go containers from restaurants. Plastic clamshell containers are the perfect place to get your seeds started.
Family Handyman
Wash your container thoroughly after you finish your food and fill the bottom with soil. Then place your seeds inside with enough space between them for each seed to grow. Close the container and set it near the window where it can soak in the sun. The plastic container keeps moisture locked inside while still allowing sun and warmth to reach your plant. Your seeds will sprout in no time!
Long strips of fabric – anything will work: I used knits, both cotton and acrylic. The pink neon was dirt cheap yardage in a bargain bin and the grey strips are Zpagetti yarn. You can use fabric scraps, old T-shirts or thrift sheets and tablecloths.
Cord – the neon orange is ‘Brickie’s Line’ from the hardware store ($5 for 100 metres) – or you can use more fabric or yarn like I did on the pink bowls. This is what you’ll need the most of. I used about 8 – 10 metres ( roughly 8.5 – 11 yards) for the grey bowl and it’s about 14cm (5.5 inches) wide x 8cm (3.5 inches) tall. The quantity in the photo below isn’t a true indication!
A large yarn needle with a big eye.
Scissors.
If you are cutting up fabric (T shirts, sheets, fabric yardage, etc) the thicker you cut it the chunkier and quicker your bowl will be. A good size for small bowls is roughly 3.5cm (1.5 inches) wide. The diagram below illustrates how to cut a piece of fabric into a continuous strip. When you’ve cut the fabric into stretch it in small sections at a time and the fabric will curl into a nice round tube of ‘yarn’.
The instructional photos are for the grey bowl with neon orange stitching, so I’ll refer to those colours from now on. Let’s begin…
Cut a length of orange cord as long as you can manage it without it getting tangled, and thread the needle with it. Mine was about 2 metres (just under 2 yards).
I used three pieces of grey fabric yarn together to get a good thickness. I cut it to roughly 1.4 metres (4.5 ft) long. If you are using one thickness of your yarn there is no need to cut it, it can remain on the ball/spool. The length of your yarn will depend on whether you want to change colours. It’s all fairly free form though – you can’t make mistakes!
Overlap the ends of the orange cord and the grey yarn. Wrap the cord around the yarn 4 or 5 times.
Fold the end of the grey yarn over to form a loop. Keep the hole in the center as small as you can – it should be just big enough to fit the needle through as it will get bigger as you stitch around the yarn. Wrap the cord around the base of the yarn loop, leaving a short tail sticking out, and tie a knot. (as in the left hand image below). Hold the yarn as shown with the short tail on top and the long piece of yarn on the bottom. Take the needle around to the back of the loop and pass it through the hole towards you (right hand image).
Don’t pull the cord tight – leave a loop at the top (as in the image below). Then pass the needle through the loop. Just like blanket stitch.
Repeat this stitch all the way around the loop. Needle into the hole from the back to the front. Leave a loop and insert the needle through it. Pull the stitch closed. The stitch needs to be firm but not tight. Keep your stitches close together and work your way around (as in the right hand image below).
Fold over the starting tail of the orange cord and the short tail of the grey yarn with the long grey yarn on top (left hand image below). Your next stitch will go through the top of your very first blanket stitch, instead of through the hole. Take the needle over to the back and bring it through the top of the first blanket stitch. Your next stitch will go through the top of the second blanket stitch. Scroll down to the next photo for a better look at where the needle passes through.
You’ve done a lot of stitches and will probably run out of cord soon. The photo below on the right shows how to add a new length of cord. Knot the two pieces together so the knot is on the outside of the coil.
Run the tails along the grey yarn and tuck them and the knot in as you continue to stitch (see image below left). As my coil grew I occasionally added an extra stitch when I thought they were getting too far apart. Remember not to pull the stitches too tight, or the base of the bowl won’t stay flat.
When you run out of yarn or want to change colours all you have to do is overlap the old and the new. As I was using three strands of yarn I cut each one a different length and inserted the new ones into the middle of them, so there wouldn’t be bulk all in one place.
As the fabric yarn tends to curl up I opened each piece up and inserted the new one into it. Then just continue on stitching.
When you’re happy with the size of the base you can start building up the sides. Make your stitches a little firmer while holding the yarn above the previous coil, instead of next to it. Continue like this until you have reached the desired height.
Finishing off. If you’re using more than one strand of yarn cut them at staggered lengths to lessen the bulk. Continue stitching around until you have just one strand left. Leave a tail of about 10 cm (4 inches) so you have enough to work with.
Weave the tail into one of the vertical stitches in the row below (on the inside of the bowl). Then weave in through a few more stitches in that row and cut the yarn off so the tail isn’t sticking out (image on the left below). To finish off the cord do one more stitch to complete the top edge of the bowl then tie a small knot and weave the cord down into the centre of the bowl. Cut the cord and tuck the end in.
And you’re done! I find this very addictive and I’ve made quite a few bowls and baskets of varying sizes now. It’s really quite easy once you get started. And it’s a great way to upcycle fabric.
If you’d like to link to this tutorial that would be lovely – I’m always happy and grateful for that and I’m all about sharing. But first please take a look at the FAQ page about using my content. Thanks!


