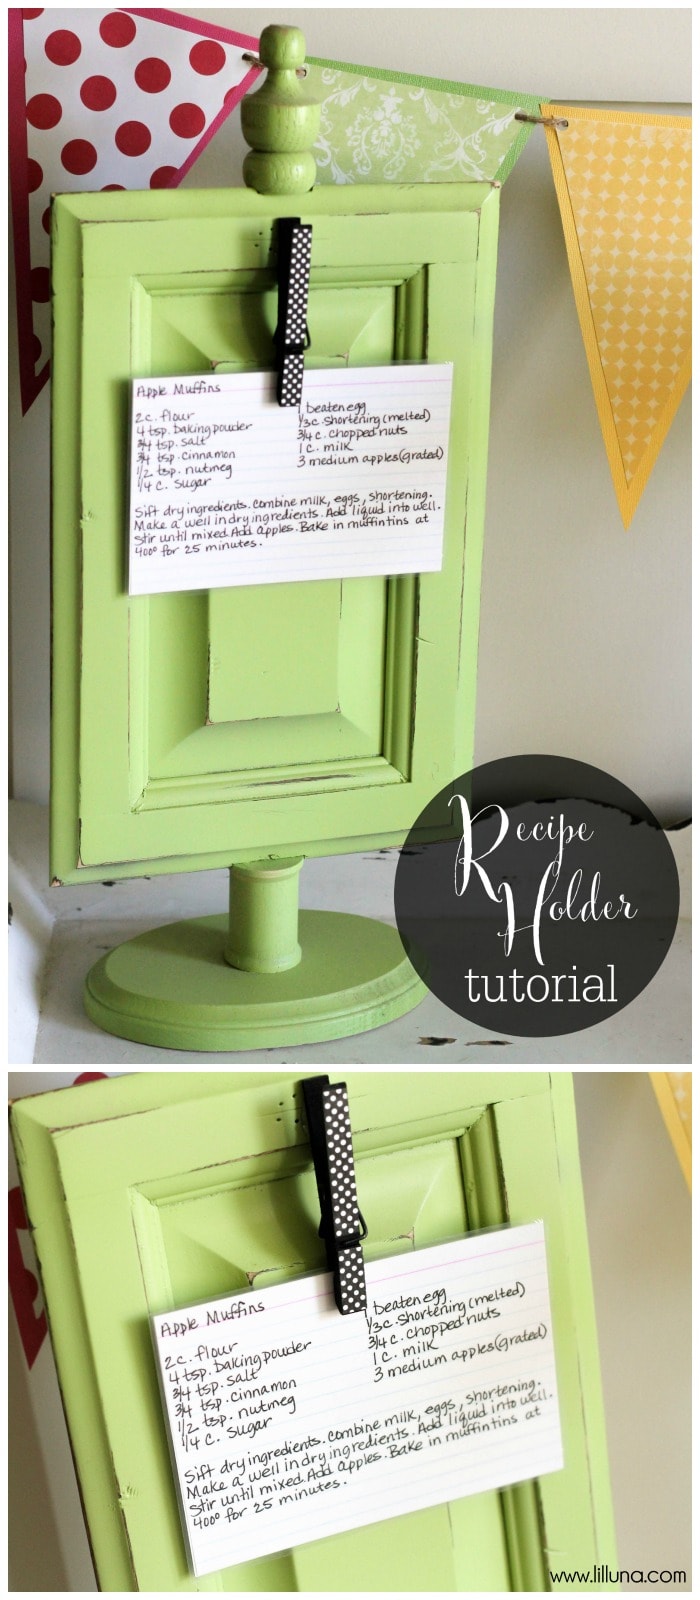
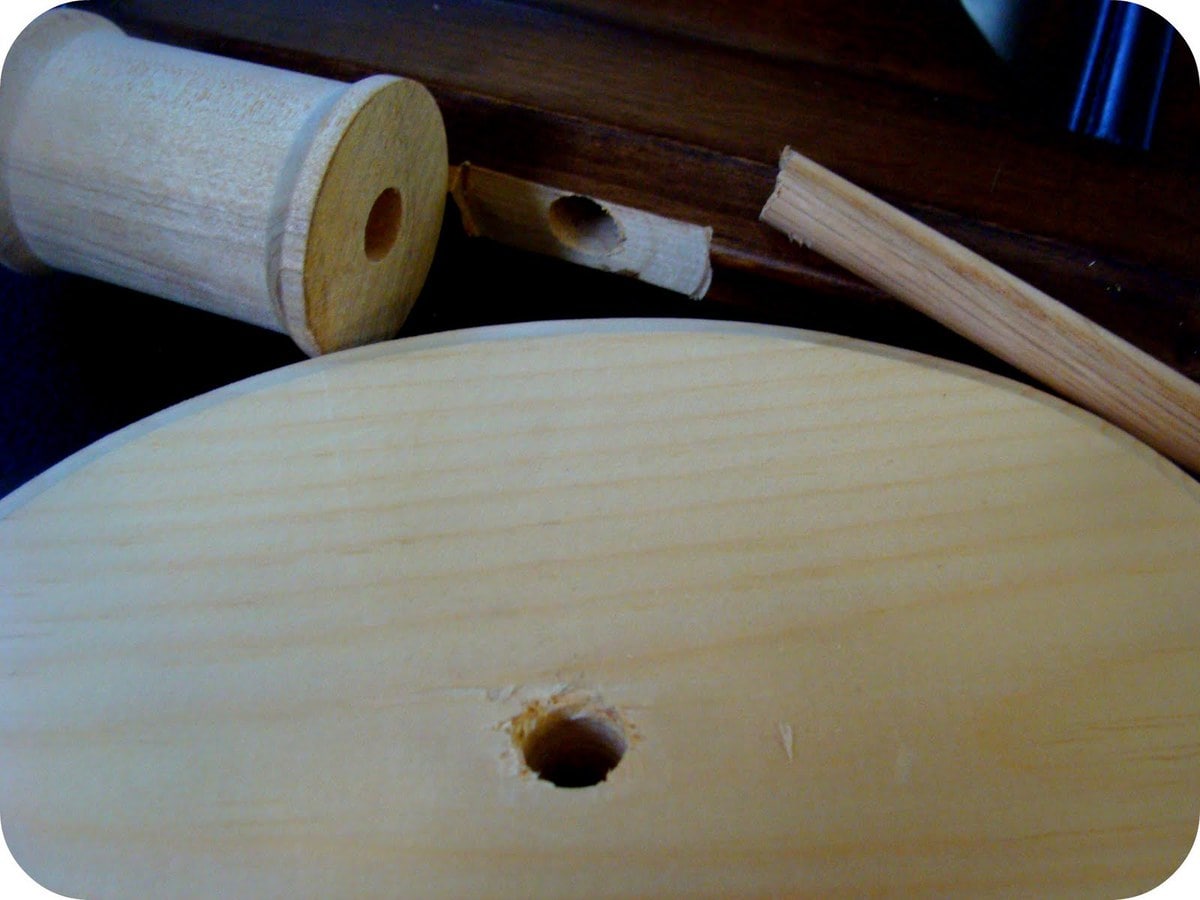
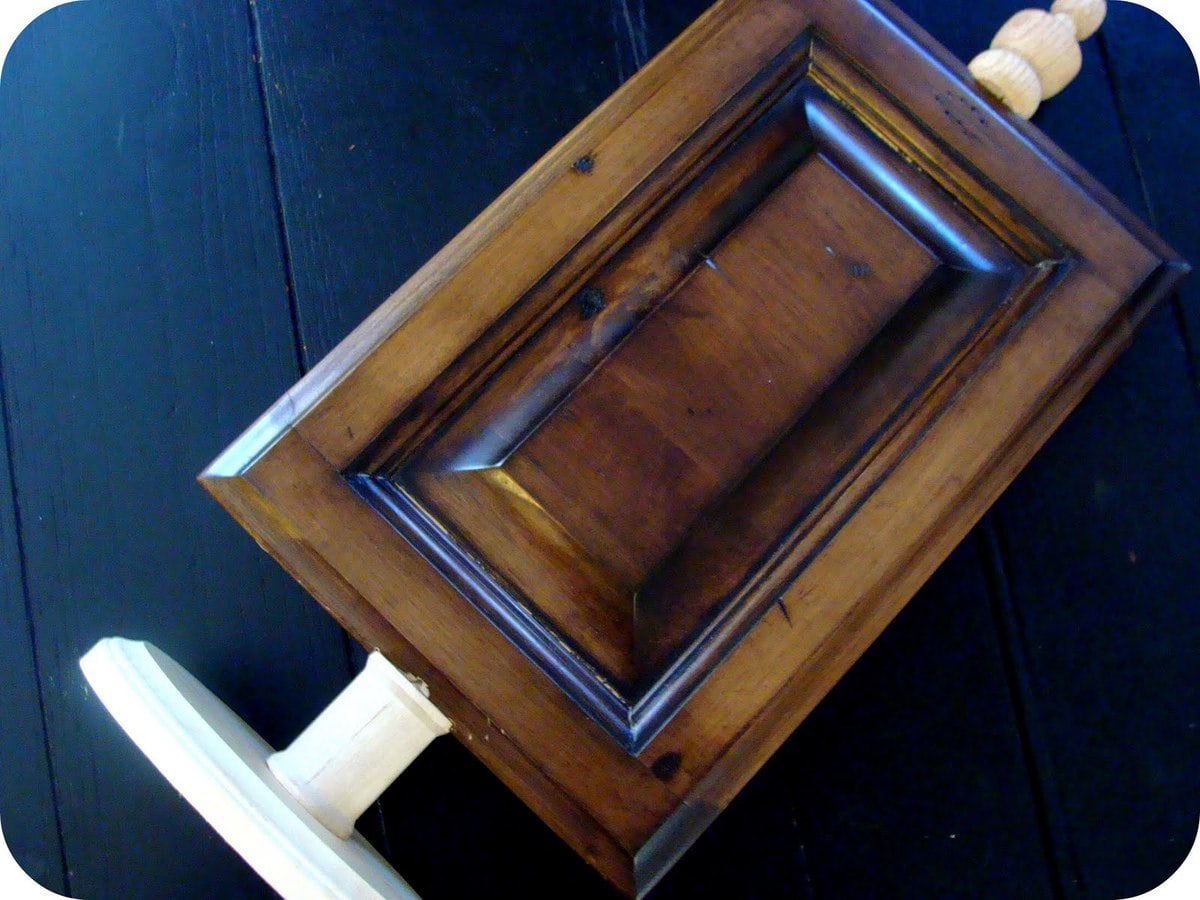
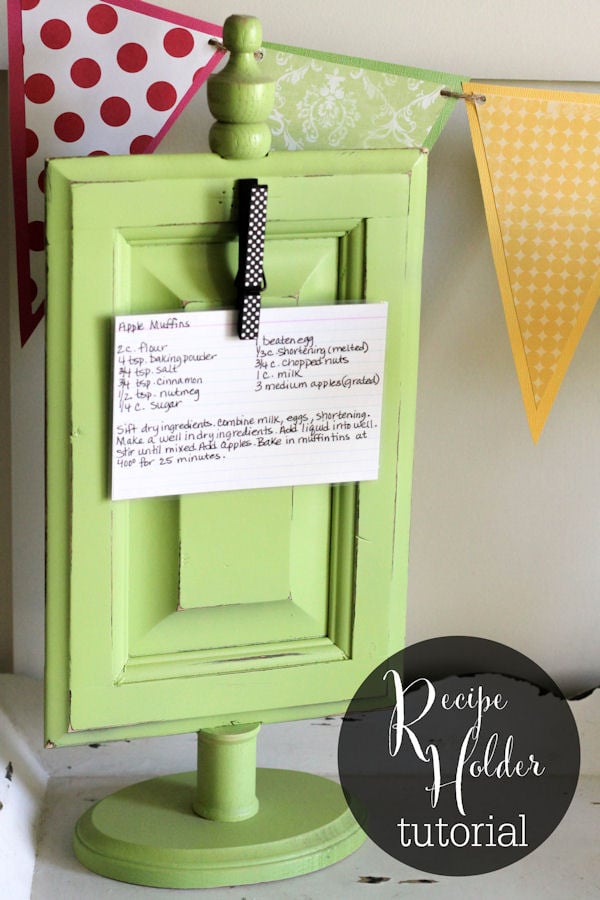
– Main wood piece {I used a cabinet door front} – Finial {top wood piece} – Spool – Oval Wood Piece for base – Drill – Wood Glue – Spray Paint – Sand Paper {to distress} – Clothes pin
MY LATEST VIDEOS
DIRECTIONS:
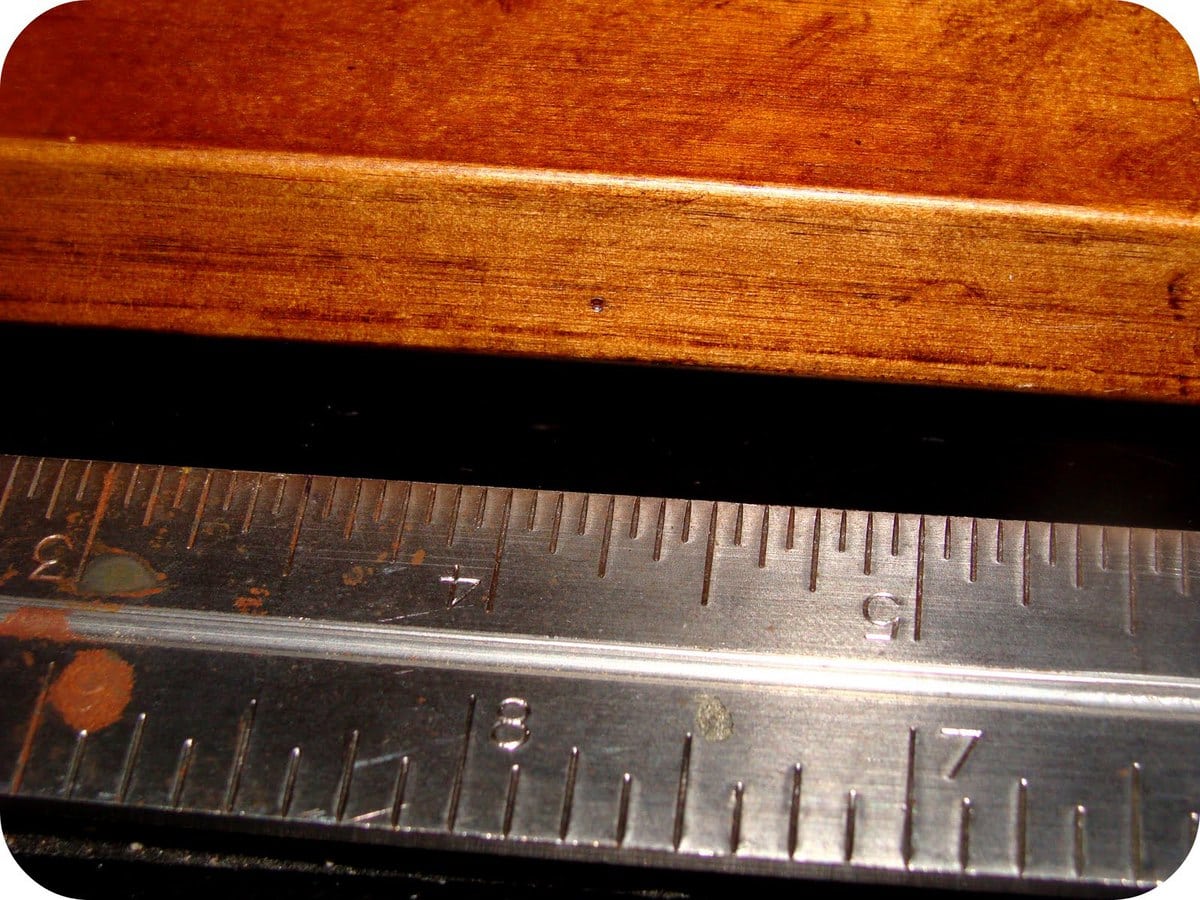
1. Mark the center of your main wood piece on the top and the bottom based off of the width of the board and the thickness of the board.
2. Drill a hole slightly larger than the screw on the finial. *If you want to make the holder sturdier and with smoother transitions, you can flatten the connecting parts on the frame using a forstner bit.
3. Drill a 3/8 in. hole in the bottom of the main wood piece/frame.
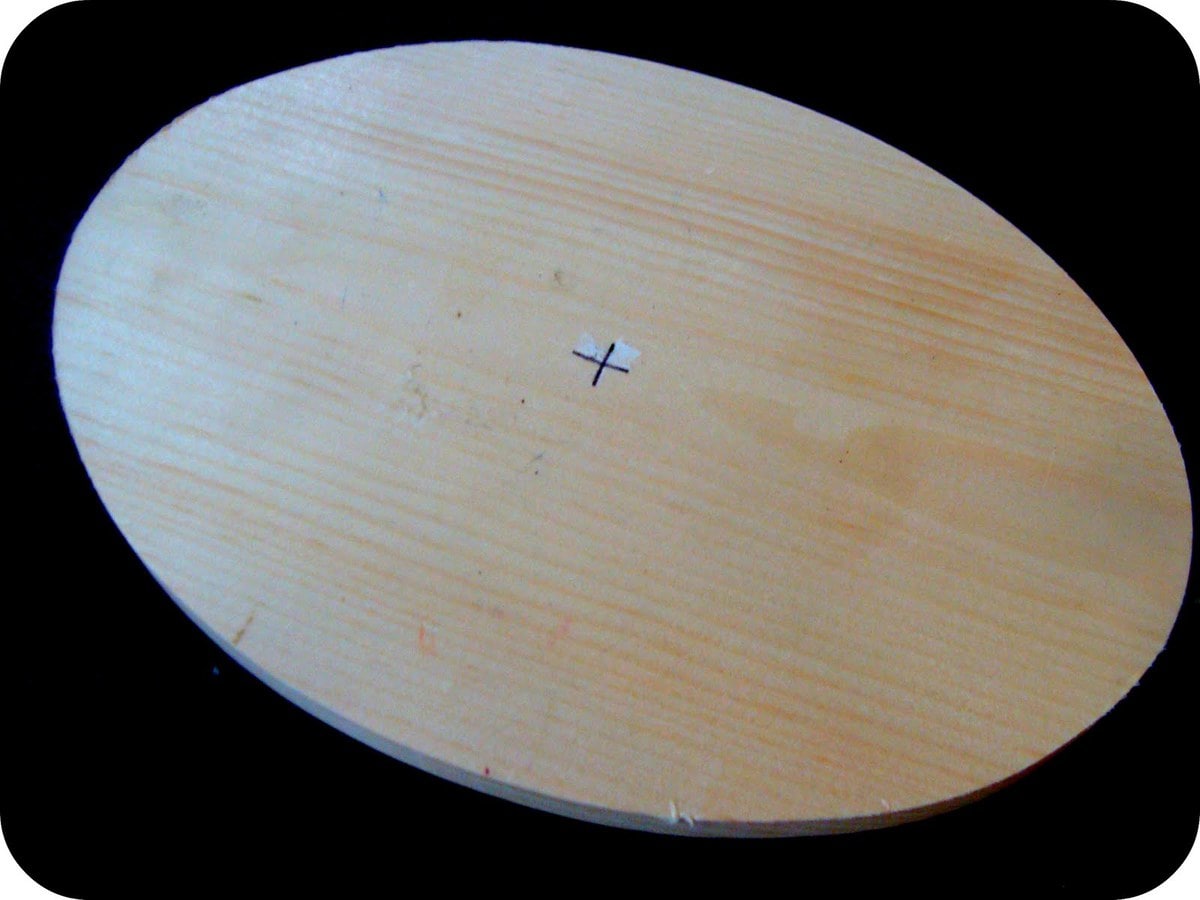
4. Drill a 3/8 in. hole through the center of the base and cut a 3/8 in. dowel to the needed length.
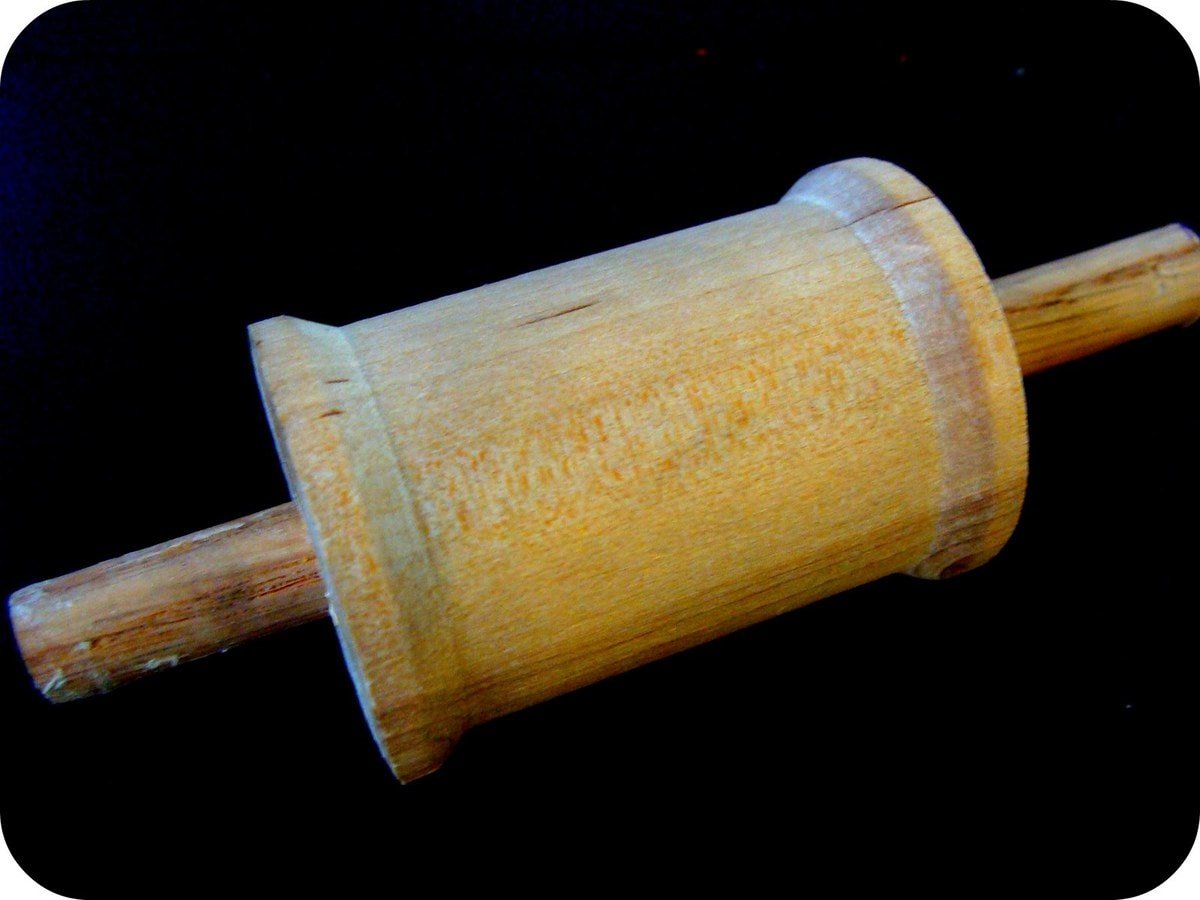
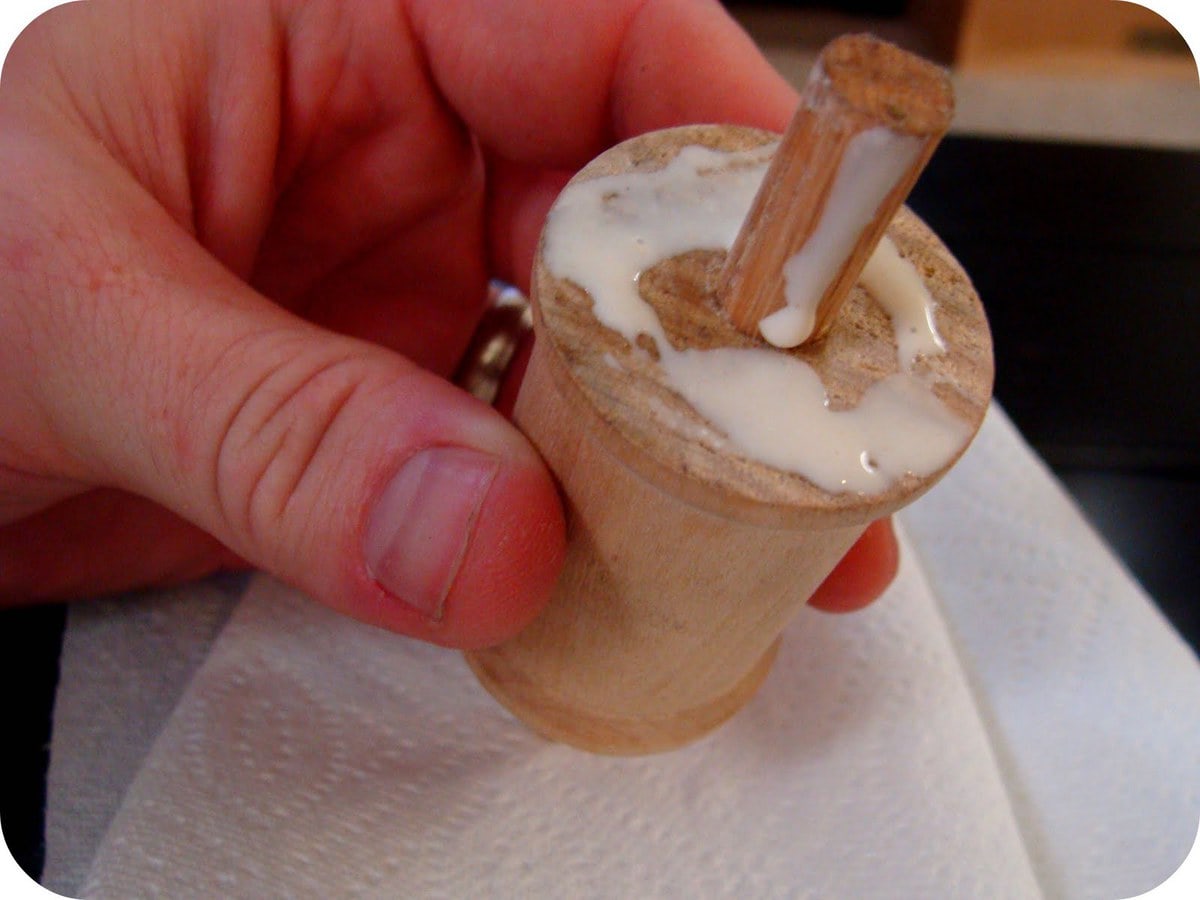
5. Apply glue to the spool and base and in the hole of the spool and base. Push the dowel through and let dry.
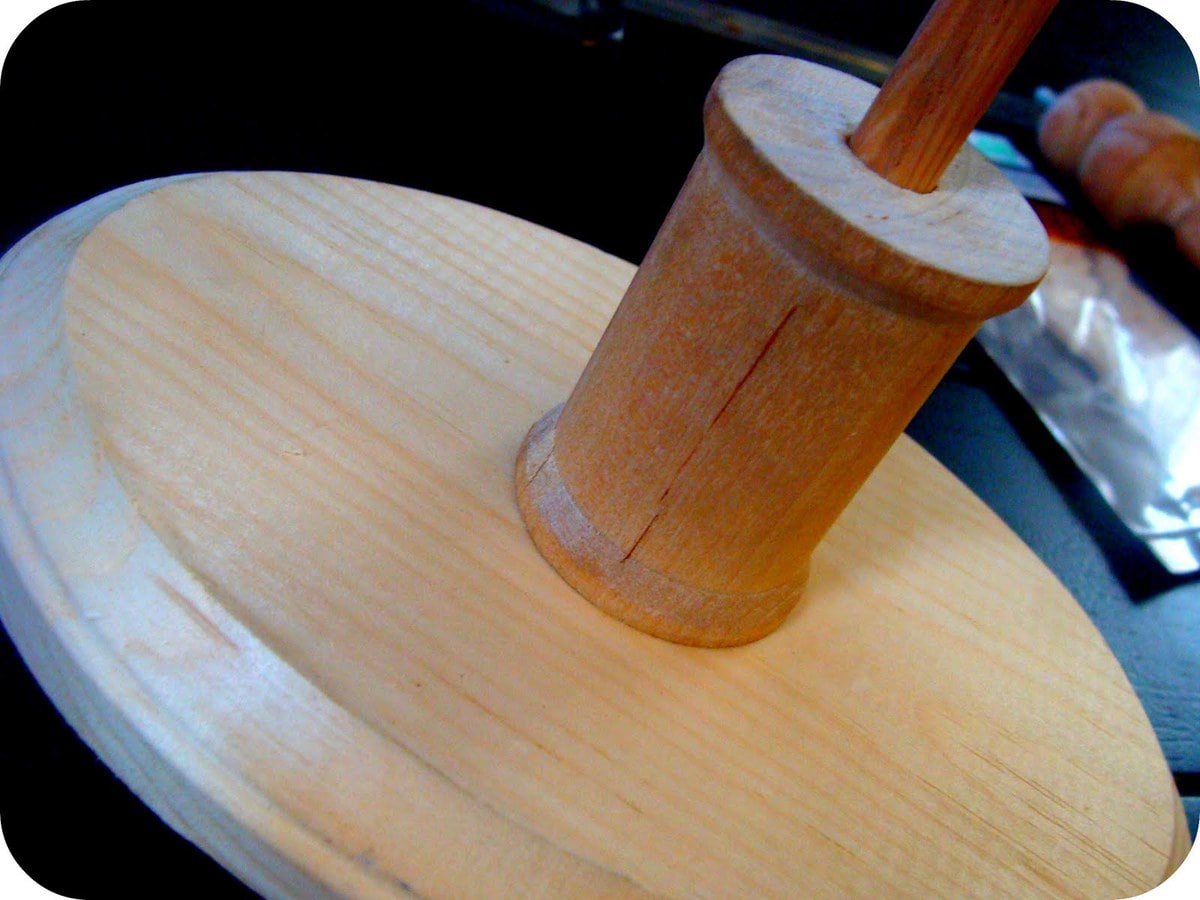
6. Apply glue to the hole in the bottom of the frame and push the remainder of the dowel through. Also screw in the finial on top.
7. Spray paint and let dry. Polyurethane for a nice finish.
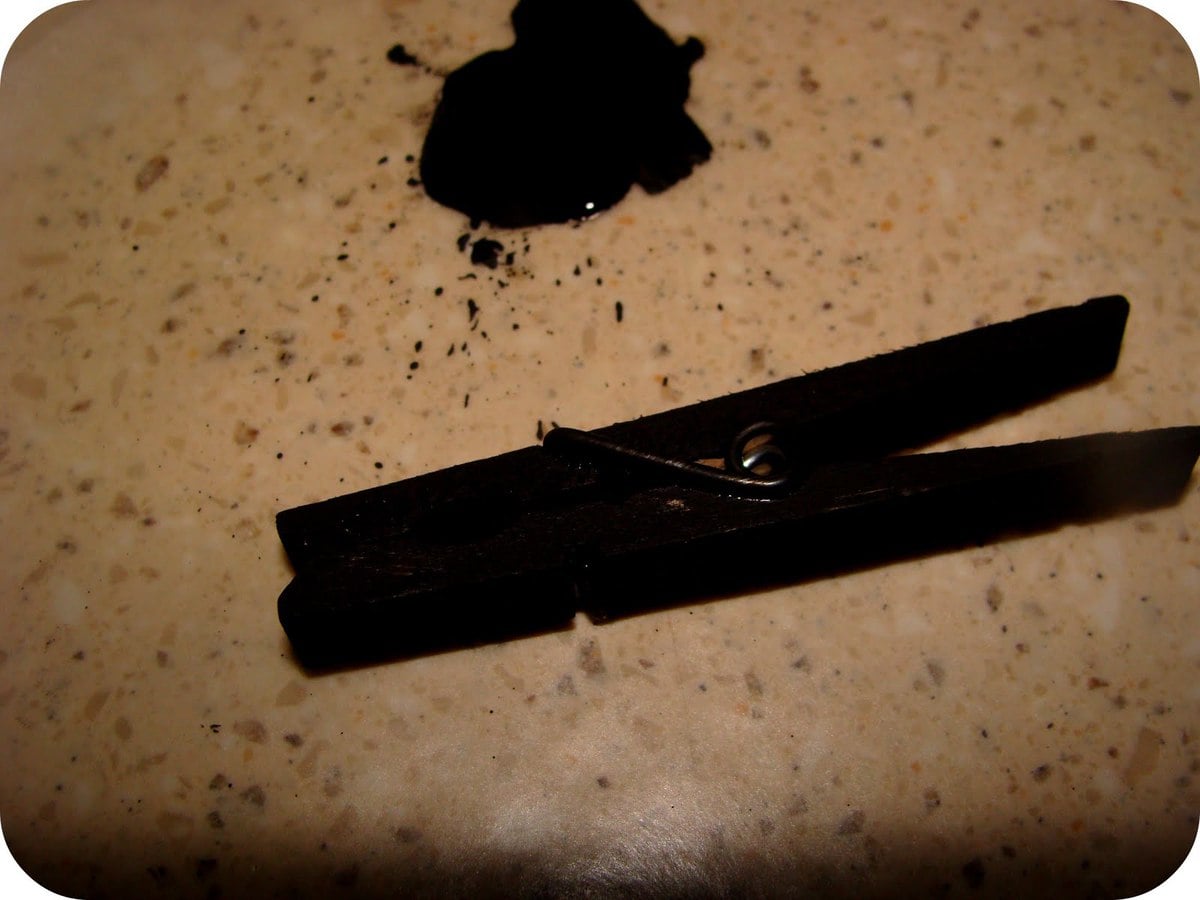
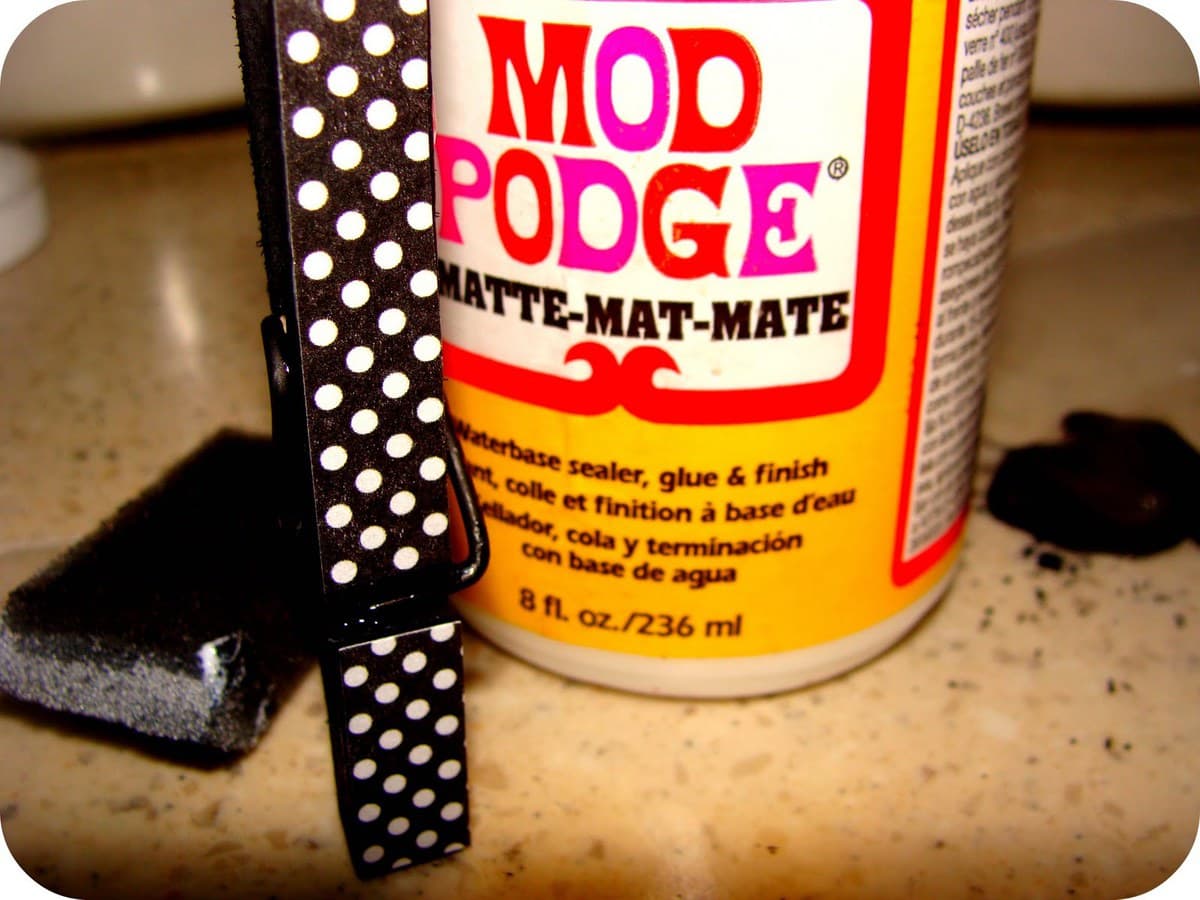
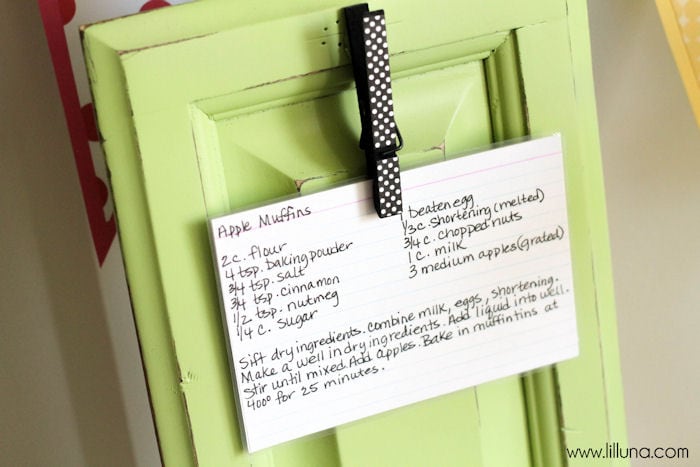
8. Paint clothes pin and let dry. Mod Podge scrapbook paper on if desire. Hot glue to board.
Now you can use this baby to hang recipes, pictures or anything else you want.
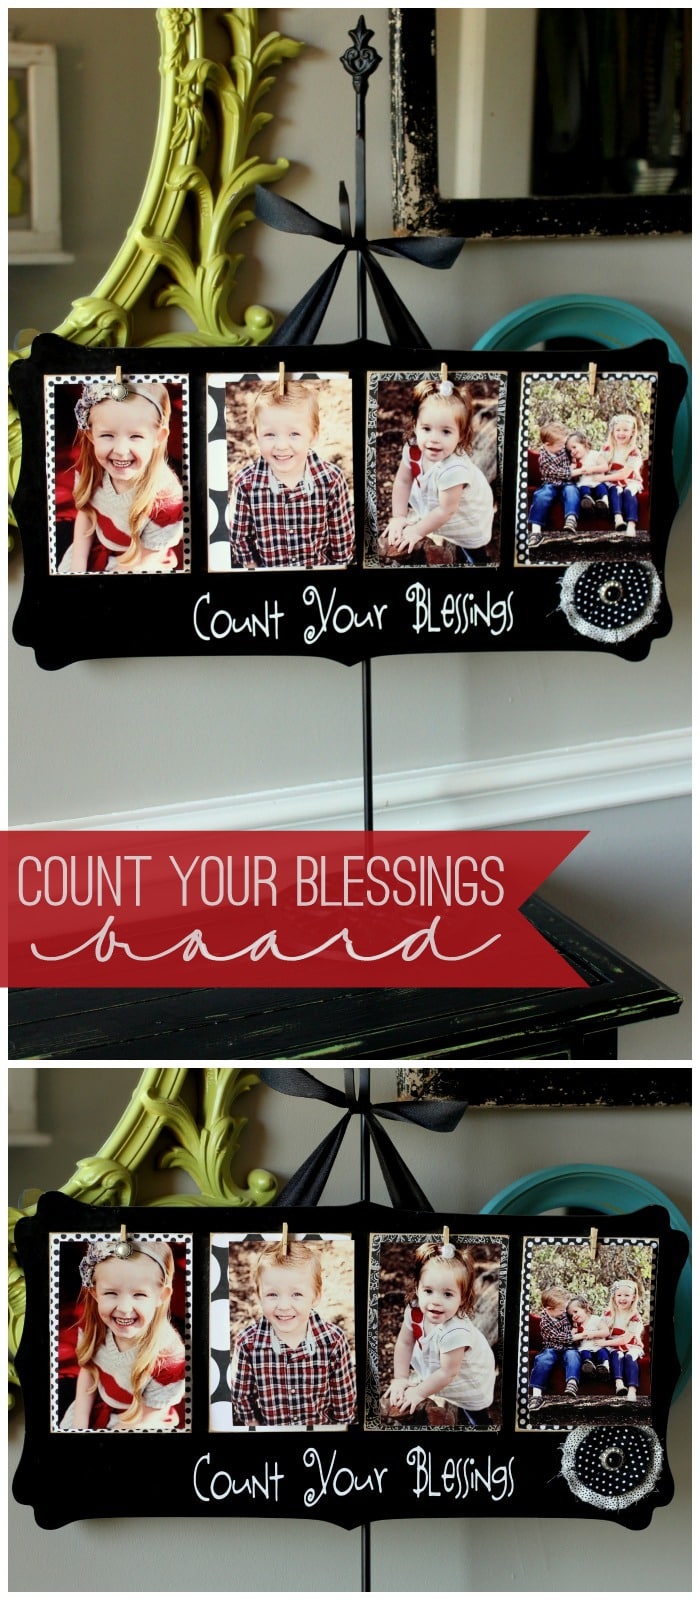
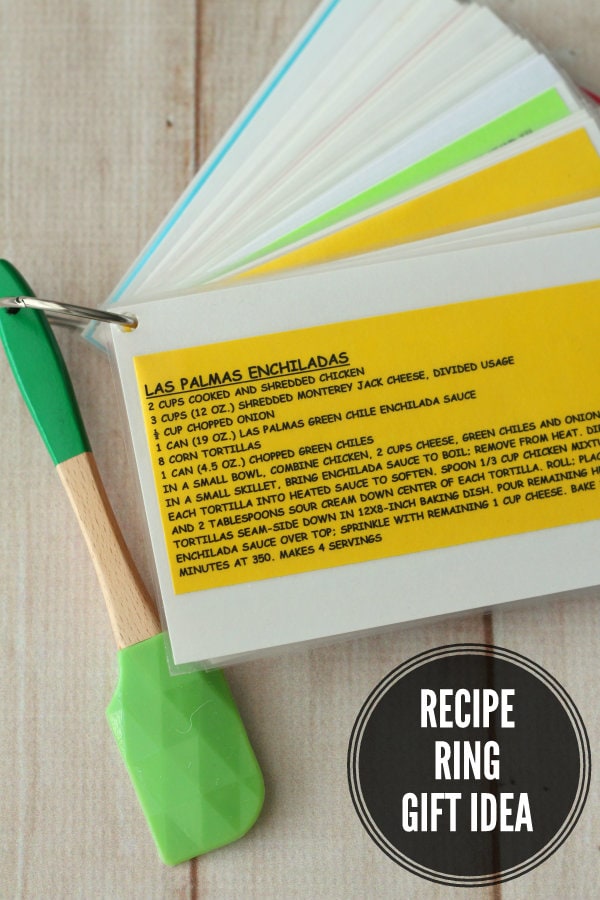
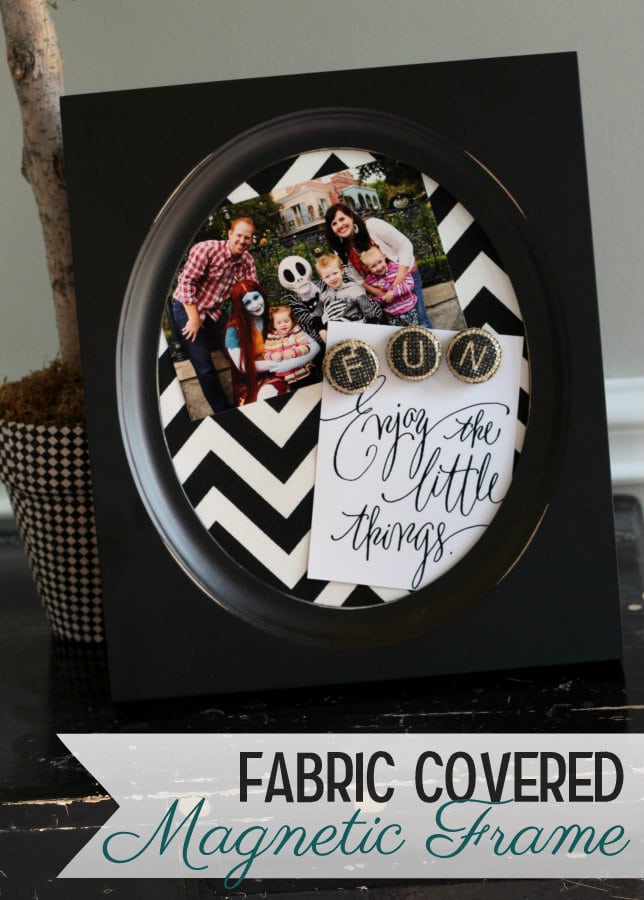
For more simple and great gift ideas, be sure to check out:
How to Turn Broken Wine Glasses Into Awesome Coconut Planters
What is it with wine glasses? They always seems to break off near the stem when they drop. Which happens quite often in our house. Yup, we like to party. Not the drugs, sex and rock and roll kind of parties, mind you. More like big bonfires, drumming circles and kumbaja till the early hours of the morning. So when our wine glasses break, what do we do? We turn them into fairy garden cloches or make these awesome coconut planters. It’s way more fun than just throwing them away 😀
They look stunning as a rustic center piece and can be made in a few hours. So grab those broken glasses and some coconuts and let’s get cracking shall we 😉
First things first. Cutting the coconuts and getting all the yumminess out to use later.
How To Cut and Clean A Coconut
We prefer to buy our coconuts fresh, since it works out cheaper and I love the taste of the meat when it hasn’t been desiccated yet. It’s not so coconutty 😀 Did you know that the dried meat inside is called Copra? Me neither, LOL. Anyways to cut and clean the coconut you’ll need a glass (to drain the milk), hacksaw and a knife. Remove all the hair on the outside of the coconut. Don’t throw it away. You can use the hair to make these adorable miniature bird’s nests. Look for three little indents at the bottom of the coconut. One of the indents will feel more squishy than the others.
Grab a sharp knife and dig that little squishy indent and the meat behind it out.
Flip the coconut onto the glass and drain the milk. Once it’s empty you can use a hacksaw to cut it in half.
Scoop the meat out with a knife and save those inside bits for later. You can hop on over to my friend Jas’s delicious cooking site to get some amazing coconut recipes BTW.
Turning the Broken Wine Glasses and Coconuts into Planters
Eye ball the thickness of the wine stem and grab a drill bit that’s a little bit thicker and make a hole in the bottom, center of the coconut half. You’ll only need to drill into one of the halves since the indents should be wide enough for the stem of the wine glass to fit into. Don’t forget to drill a few small drainage holes too 😉
Mix up some strong all purpose glueand attach the wine stem to the coconut half. We used Pratley Steel Quickset but any waterproof, non-toxic glue like E6000 should work.
To hide the glue we just used some of the coconut hair that we removed earlier.
Once the glue has dried you can start filling the planters.
We put succulents in ours. The spikey job in the picture above is a Gasteria Flow, I think. They’re often confused with Aloes, but they require less light and make ideal house plants. They get their name from the sac-like shape of their flowers, which are supposed to resemble a stomach, hence the name gasteria, 😀 Ours have never flowered so I’m not 100% sure. Pot the offsets in a small pot, using the same soil as the mother plant and put it a warm, bright spot. Add a little bit of perlite to the mix to help aerate the soil and help retain water. It also makes the soil much lighter.
The little trailing plant is a Crassula pellucida. One of my all time fav indigenous succulents. She’s super easy to grow. Just cut one of her trails off and stick it in the ground. Each little leaf produces roots and a new plant will form in no time.
So next time someone breaks a wine glass, don’t throw it away. Save the bits and turn them into coconut planters instead.
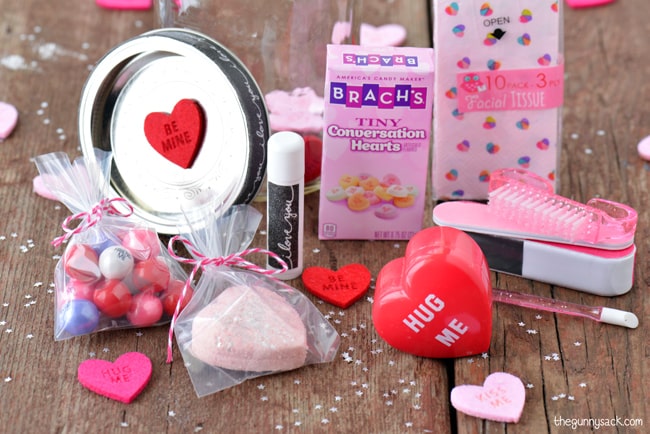
Valentines Day is the most romantic holiday of the year so it is no wonder there are so many craft projects out there to help celebrate the occasion!
Craft Ideas For Valentines Day
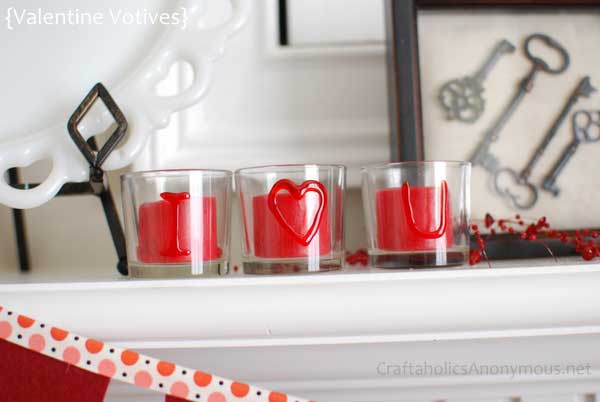
1. Write A Message On Glass With 3D Paint
Use 3D paint to write out a romantic message on glass. These candle holders are a good example. You can also write on picture frames, glass vases, or wine goblets.
2. Fill A Drink Carrier With Champagne And Treats
Simply fill a drink carrier with champagne bottles and flowers or treats. It would be great to decorate and recycle a six pack container for this and fill with mini bottles and other goodies.
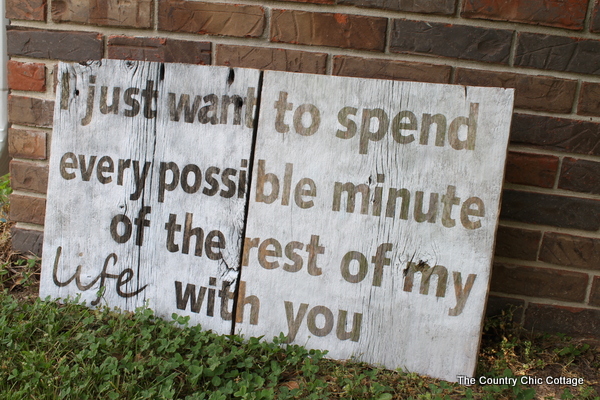
3. Make A Rustic Valentine Sign To Display
All it takes is some barnwood and paint to display a romantic sign for Valentines day or all year long.
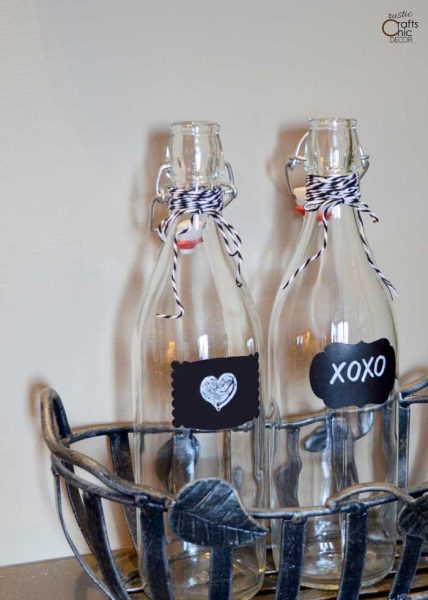
4. Decorate Glass Water Bottles For A Valentine Table
You can purchase these water bottles or recycle other beverage bottles to use to serve sparkling water. Then, simply decorate with chalkboard labels and twine.
5. Make A Valentine Topiary To Decorate Your Home
These topiaries are easy to make and perfect for Valentine’s day with the red, white and pink rosettes.
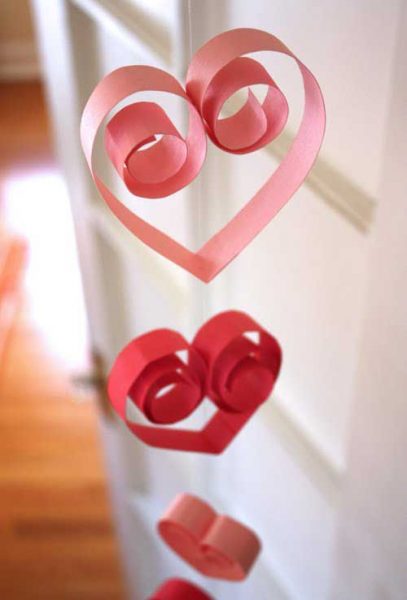
6. Create Some Valentine String Art
This art only looks complicated. The string heart is easy and fun to make.
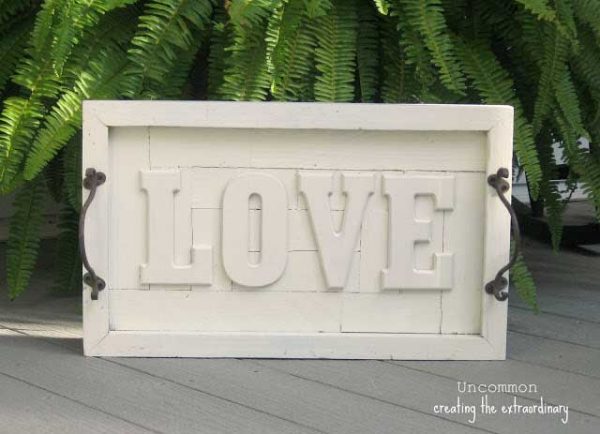
7. Serve Your Treats On A Tray Of Love
This Pottery Barn inspired love art can be used as a tray or for wall art.
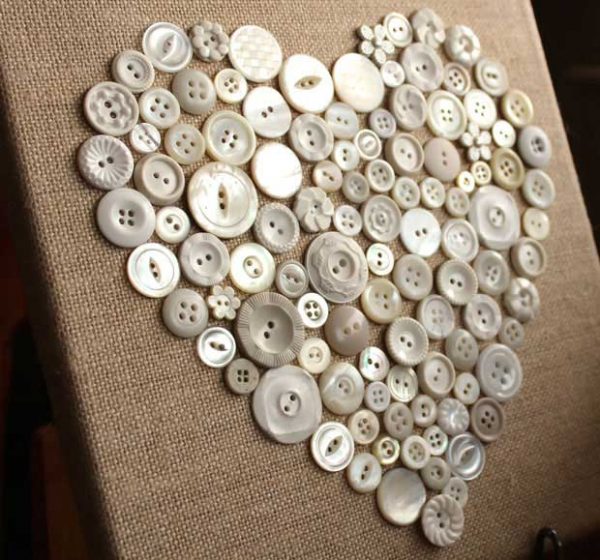
8. Make A Heart Out Of Buttons
Creamy buttons on a burlap base make such a rustic chic heart for Valentines Day.
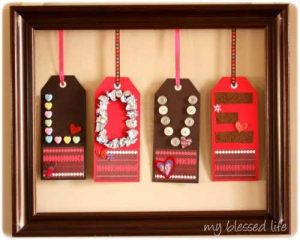
9. Make A Sign With Tag Letters And A Frame
Use tags to make letters and then hang them inside a frame. Spell out a Valentine message to fit inside.
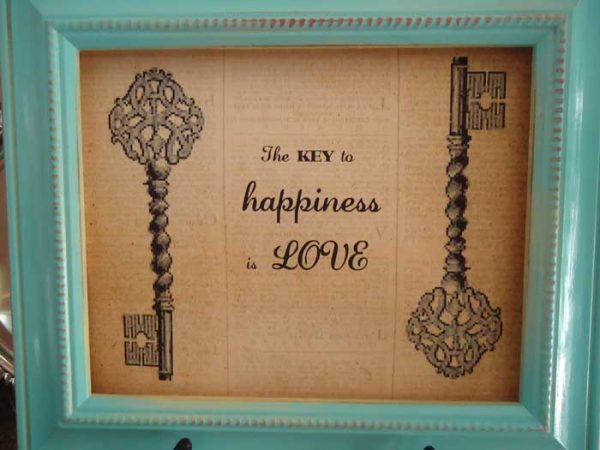
10. Create The Key To Happiness
Use graphics and frame the art for a festive valentine sign.
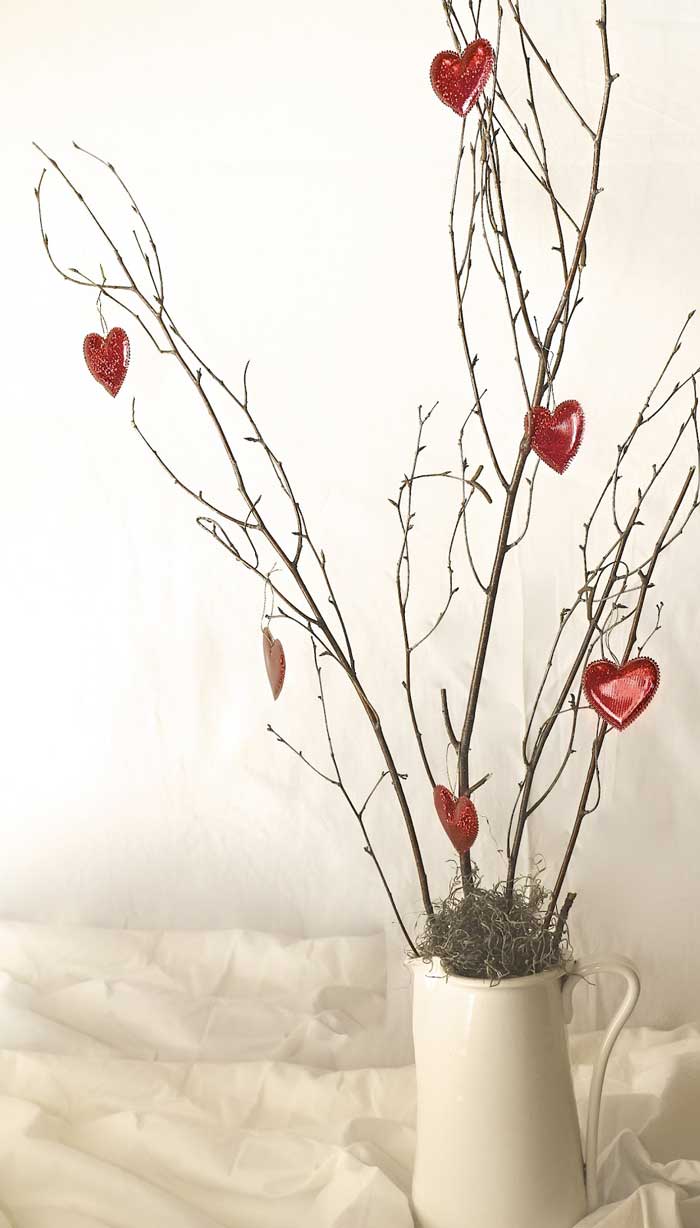
11. Make A Rustic Valentine Tree
Rustic, simple, festive and chic. This Valentine tree is the perfect craft for holiday decorating.
12. Create A French Inspired Pillow
Create something French inspired to get in the Valentine mood. This valentine pillow is perfectly romantic.
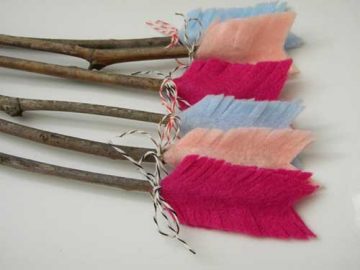
13. Craft Some Felt Hearts
Make a handful of felt hearts to strewn about or create a garland with.
14. Make A Rustic Heart Out Of Wood
Create a heart out of wood for a rustic way to celebrate the holiday.
Pour the fractionated coconut oil into a bowl, add the sweet almond oil and mix.
Grind enough freeze dried strawberries until you have about ½ cup of powder.
In a separate bowl, Whisk and then sift together the granulated sugar and powdered strawberries.
Gently stir half of the sugar mixture into the coconut oil mixture. Then, stir in the second half of the mixture.
Optional: mix in strawberry extract for added scent.
Note: If using in the shower or bathtub, be careful because bath products containing oil can make it slippery.
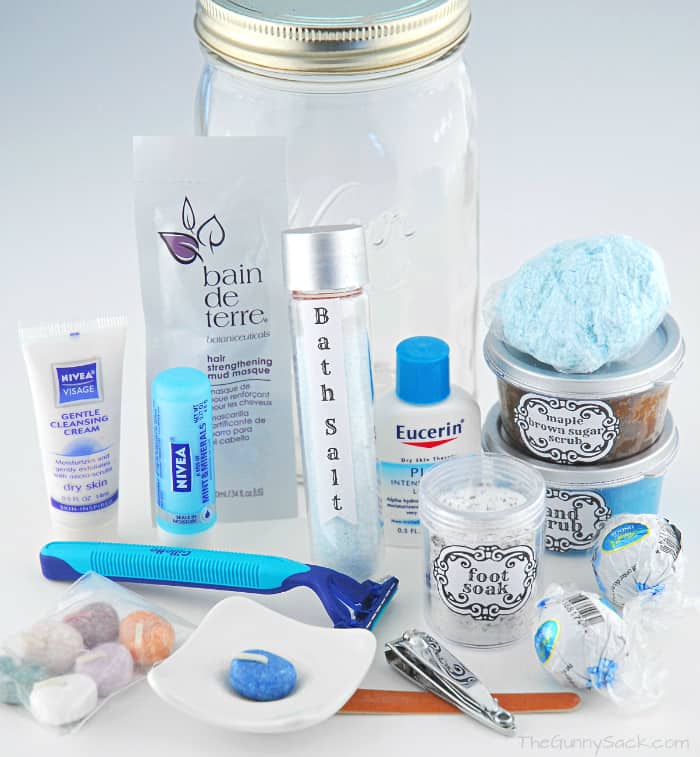
Pamper Yourself After all your hard work cleaning for your holiday parties, it’s time to treat yourself to a relaxing bath to unwind. Add ½ cup of ARM & HAMMER™ Baking Soda to your bath for a refreshing soak. Your skin will feel silky smooth.
Give Yourself a Natural Glow: Facial Scrub and Body Exfoliant For smooth, radiant skin, give yourself a gentle facial and body scrub with ARM & HAMMER™ Baking Soda. Make a paste of 3 parts ARM & HAMMER™ Baking Soda to 1 part water. Consider enhancing the treatment by including 1 part ground oatmeal. Rub in a gentle circular motion to exfoliate skin and remove dead skin cells. (Be careful to avoid eye area.) Rinse clean with warm water. Leaves skin feeling nourished and refreshed. Gentle enough for daily use!
Relax Your Tired Feet: Exfoliating PedicureBlend 2 tablespoons of ARM & HAMMER™ Baking Soda in a basin of warm water. After a nice soak, make a scrub using 3 parts ARM & HAMMER™ Baking Soda and 1 part water. Follow with an application of a rich moisturizer and a warm towel foot wrap. Let sit for 5-10 minutes. Feet will feel smooth and clean.
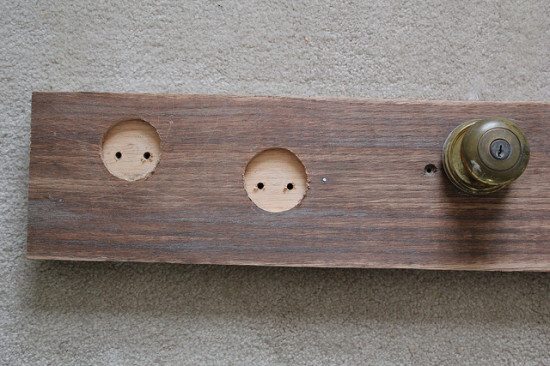
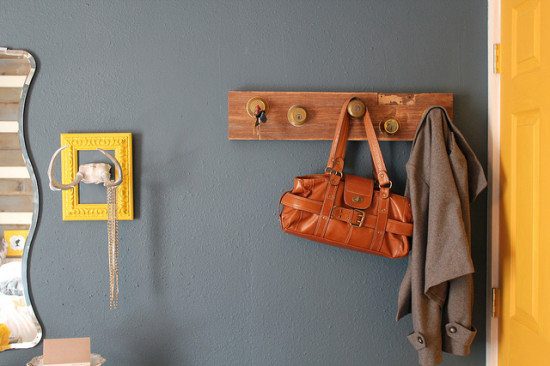
The first thing you will need to make your new key rack is a piece of wood. This is a great opportunity to repurpose bits and bobs saved from previous projects. Next you’ll need some deadbolt locks and doorknobs. If you don’t have any old ones laying about there is a great chance your local thrift shop or Habitat for Humanity Restore will.
Leave your piece of wood as is or give it a stylish stain. Then lay your locks and doorknobs out and mark where you want them to be. In order for your knobs to sit flush you will need to make a groove in the wood with a router. A router is a woodworking tool used to hollow out a piece of wood.
Once you’ve finished with your router, drill holes for attaching the door knobs and locks. At this stage your upcycled key rack will look like this:
Then, simply attach the knobs/locks and you’re done. If you don’t have the original keys from the locks then just get blank keys to add to your key ring. You can now hang up your finished doorknob key rack and give your keys a place of their own.