Exercises

How to live longer: The simple exercise shown to extend your lifespan

Research suggests increasing walking pace may boost longevity

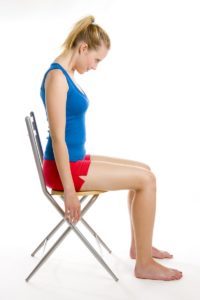
How to live longer: Research suggests increasing walking pace may boost longevity (Image: Getty Images)

HOW TO live longer: A long and fulfilling life is largely contingent on the choices people make along the way. How regularly someone exercises is a useful barometer of how healthy they are, but the best type of exercise is a contested subject. A new study reveals a surprising finding.

Ample evidence shows that regular exercise is a surefire way to boost longevity, because it lowers the risk of developing a wide range of deadly conditions.

Cardiovascular disease is one of the greatest threats to longevity, for example, but it can largely be prevented by maintaining high fitness levels and following a healthy diet.

While numerous studies demonstrate the health benefits of exercise in general or focus on specific groups of exercise, there is a growing field of research that is shedding a light on the specific forms of exercise that will extend longevity.

One of those studies, published in the British Journal of Sports Medicine, makes the case for speeding up your walking pace.

The study found that walking at an average pace was found to be associated with a 20 percent risk reduction for all-cause mortality compared with walking at a slow pace, while walking at a brisk or fast pace was associated with a risk reduction of 24 percent.

A similar result was found for risk of cardiovascular disease mortality, with a reduction of 24 percent walking at an average pace and 21 percent walking at a brisk or fast pace, compared to walking at a slow pace.

Interestingly, the health benefits were most pronounced in older age groups, with average paced walkers aged 60 years or over experiencing a 46 percent reduction in risk of death from cardiovascular causes, and fast paced walkers a 53 percent reduction.

A fast pace is generally five to seven kilometres per hour, but it really depends on a walker’s fitness levels; an alternative indicator is to walk at a pace that makes you slightly out of breath or sweaty when sustained,” said lead author Professor Emmanuel Stamatakis from the University of Sydney’s Charles Perkins Centre and School of Public Health.

The researchers sought to establish the link between walking pace and all-cause, cardiovascular disease and cancer mortality.

To gather the findings, the researchers pooled together and analysed mortality records with the results of 11 population-based surveys in England and Scotland between 1994 and 2008 – in which participants self-reported their walking pace – the research team then adjusted for factors such as total amount and intensity of all physical activity taken, age, sex and body mass index.

“Walking pace is associated with all-cause mortality risk, but its specific role – independent from the total physical activity a person undertakes – has received little attention until now,” Professor Stamatakis said.

https://www.express.co.uk/life-style/health/1201045/how-to-live-longer-exercise-walking-pace-diet-fruits-legumes-vegetables/amp

Anti Aging Exercises

7 Ultimate Anti-Aging Exercises…

https://www.prevention.com/fitness/fitness-tips/a20457262/7-ultimate-anti-aging-exercises/

The best tricks to stop the clock By Amy Rushlow Aug 12, 2013

image

It’s no secret that working out keeps you younger—both in terms of the energy you have and your physical ability to keep doing the things you love. “Fitness is a youth serum,” says physical therapist and fitness expert Maureen Hagan. “Fitness affects how youthful you look, the way you move, and your ability to do whatever you want, whenever.”

Hagan has been training clients for more than 20 years with a focus on active aging, and is also a regularly published research reviewer on the same topic. This past weekend at the IDEA World Fitness Convention, Hagan presented the healthy aging secrets she’s learned from both practice and clinical research. Don’t worry, we’re not about to overhaul your favorite workout. No matter how old you are or what you like to do for exercise, you can use Hagan’s secrets to move better, protect yourself from injury, and feel younger.

1. Squat right

“People say to me, ‘Oh I can’t squat, it hurts my knees,’” and then they go and pick up their bag of groceries from the floor,” Hagan says. The point: You squat all the time, so it’s essential that you learn to do it properly. For women, that means turning your toes out slightly. This simple fix allows your femur to line up properly in the hip joint, causing your knees to track over your ankles instead of caving in. The result: a stronger knee joint and less chance of knee pain. (Men have a different hip structure, so they should squat with toes forward.) Also, “women really do need to step their feet slightly wider than their hips,” Hagan adds. “Without the wider stance than hip-width, that knee tracking and movement at the hip cannot happen.”

2. Hack your genetics

Ever hear that you can’t change your genes? That’s only partially true. While you can’t change your genetic makeup, you can change how certain genes are expressed—that is, how much they do whatever they do. And strength training is one of the best ways to do that. Only 26 weeks of resistance training reverses the aging process at the genetic level, research shows. “You can actually train your tissues to behave the way they did when you were younger,” Hagan says. Furthermore, resistance training preserves muscle mass that we typically lose as we age—5 pounds per decade, on average. (We also gain an average of 10 pounds of fat per decade. “That’s certainly not fair! It should at least be even!” Hagan says. Agreed!) Advertisement – Continue Reading Below

3. Play on the brain gym

Exercise is a physical crossword puzzle, Hagan likes to say. The more activity you can do that also engages your brain, the better. These can involve reaction training (such as playing tennis or racquetball), memorizing choreography (like you would in step class or Zumba), and changing direction (common in step, kickboxing, and dance classes). 

4. Do more cardio than you think you need

While U.S. guidelines call for 150 minutes of cardio per week, Hagan’s examination of research found that 240 minutes per week is optimal for heart health. Aerobic activity improves mitochondrial function (the work of energy-producing organelles in cells), which typically decreases with age. Four hours of cardio a week sound like too much? “If you don’t have much time, interval training is one of the most efficient ways to exercise at high enough levels to improve aerobic fitness,” Hagan says. Click here for tips on how to add intervals to your workout.

5. Make your two brains talk to each other

Include some moves where you cross your legs and arms over the midline of your body. Why? The connection between the right and left hemispheres of your brain deteriorates as you age, which causes “brain farts” (technical name: brain delays) as the hemispheres have trouble communicating with one another, Hagan explains. Crossing limbs forces the two sides of your brain to talk to one another, strengthening the connection between hemispheres. (How cool is that?)

6. Embrace high-impact activity

A lot of older people are afraid to jump because it’ll hurt the knees or hips. “But that’s bogus, because you need to jump in everyday life, and you need impact to build bone density,” Hagan says. That doesn’t mean you need to take up Insanity (the DVD series known for crazy-intense jumping moves). A “forceful step” like you’re squishing a bug is enough impact to make a difference. Think of forceful stepping any time you lunge, squat, or march.

7. Get the BAM

The average American walks only 2,000 steps per day, but experts recommend 10,000. “7,500 steps a day is what we Canadians call the BAM, or bare you-know-what minimum, for health,”

Yoga Poses From Your Chair~

13 Chair Yoga Poses To Do While Sitting At Your Desk

The ancient practice of yoga has certainly evolved in 21st century to meet our long work days, seated behind a desk. Sitting for long periods places strain on the spine, mid and upper back, shortens the chest and hips, and can leave your neck, shoulders and lower back in pain. It may be hard to fit in a yoga class during a busy work day, but that doesn’t mean you have to sit motionless for hours on end. Try these 13 moves right at your desk to improve your posture and relieve stress.

Sit and stand chair pose

Begin by sitting with your knees bent at 90 degrees and your feet flat on the ground. Press your heels down, but do not move your feet closer to the chair. Now, without using your arms, lift your body into a standing position. From the standing position, slowly sit straight back down, refrain from leaning forward and from shifting the hips to one side or the other. Repeat five to ten times.

Sitting scale pose

This is a more advanced pose that requires a desk chair wide enough to accommodate the width of the body and placement of arms on each side of the seat. Sit at the edge of your chair, and press your hands down on either side of your hips. Now, using the strength in your arms, raise your legs and butt up off the seat. Engage the abdominal muscles and keep the tops of your shoulders down. Hold for five breaths. Lower your body and repeat two more times.

High altar pose

Inhale deeply and lift your arms. Clasp your hands and invert your palms. Now Lean to your left and hold for five to eight breaths. Repeat on your right side.

Seated crescent moon pose

Desk yoga can help reverse the negative effects of sitting all day.

Lift your arms overhead and stretch your fingers wide. Lean to the right, and take two to three deep breaths. Repeat on the left side for another two to three deep breaths.

Seated body twist

Turn to your left and place your left hand on the back of the chair to deepen the twist. Hold for five to eight breaths. Then repeat the twist on your right side.

Seated cow face

Desk yoga can increase flexibility and reduce muscle tension.

Bring your left arm behind your back and your right arm behind your head. Now clasp your fingers if you can. If you can’t clasp your fingers, then work towards moving them closer each day. Hold for five to eight breaths and switch sides.

Sitting ankle to knee

Place your left foot on your right knee, allowing your left knee to drop open. Keep your back straight and lean forward into a deep stretch. Hold for five to eight breaths and then switch sides.

Seated wrist and finger stretches

Complete these stretches every two hours to avoid carpal tunnel syndrome.

  1. Place the hands one on your desk, palms facing up and fingers towards you, putting gentle pressure to counter stretch the wrist and the forearm. You can also stretch each arm out and bend the wrist inward then outward, counter stretching with your other hand. Hold each side five to ten breaths.
  2. Extend the arms to the sides or overhead and draw ten circles inward and outward through the wrists. Next, quickly spread the fingers and close the fists. Repeat this ten times to shake off any excess tension.

Seated pigeon pose

While seated in your chair, with both feet flat on the floor, cross your right leg over the left at a 90-degree angle, keeping the foot flexed to not place pressure on the knee. Maintain equal weight distribution between the sitting bones while staying in an upright seated position. You should feel a gentle to moderate stretch on the outermost part of the right thigh. Hold for ten breaths before switching sides.

Standing yoga push-ups

Place your hands about shoulder width distance on the edge of a sturdy desk. Now step your feet back so that your torso is diagonal to the floor. Keep your feet firmly placed and inhale as you bend the elbows to a 90-degree angle. Keep the elbows hugged in towards the ribs. Exhale and press your chest back up to the starting position. Repeat 12 times.

Standing upward dog pose

Follow the above standing desk pushups with this upward dog pose. Remain in the same position as you did for the standing yoga push up. With your arms straight, lower your hips toward the desk, refraining from sinking in the lower back by using the strength in your legs. Stretch your chest between your shoulders and gently tilt your chin upwards while sliding the shoulder blades down the back. Hold for ten breaths.

Standing plank pose

Use your desk to support this spine-lengthening and hamstring-stretching pose. Place your hands shoulder-width apart or wider at the desk edge. Step your feet back until your feet are directly under your hips. Hold ten breaths to allow this pose to help you undo all the negative effects of sitting.

Standing forward bend

Stand next to your desk, with feet firmly on the ground. Bend over in half with soft knees and let gravity take over. Hold for at least 20 seconds and sway gently from side to side if it feels good. Allowing your arms and head to hang forward, let your neck and shoulders decompress. Plus, reversing the blood flow will give you extra energy to complete your work day.

Sitting at a desk all day doesn’t have to turn you into Quasimodo. A few feel-good yoga poses and stretches will do wonders for your energy level, tension, posture and confidence!

— Katherine Markohttps://www.thealternativedaily.com/desk-yoga-poses-to-do-at-the-office

How Much Exercise~ Information

HOW MUCH EXERCISE DO YOU NEED TO DO?

To stay healthy, adults aged 19 to 64 should try to be active daily and should do:

  • at least 150 minutes of moderate aerobic activity such as cycling or brisk walking every week and
  • strength exercises on 2 or more days a week that work all the major muscles (legs, hips, back, abdomen, chest, shoulders and arms)

Or:

  • 75 minutes of vigorous aerobic activity such as running or a game of singles tennis every week and
  • strength exercises on 2 or more days a week that work all the major muscles (legs, hips, back, abdomen, chest, shoulders and arms)

Or:

  • a mix of moderate and vigorous aerobic activity every week – for example, 2 x 30-minute runs plus 30 minutes of brisk walking equates to 150 minutes of moderate aerobic activity and
  • strength exercises on 2 or more days a week that work all the major muscles (legs, hips, back, abdomen, chest, shoulders and arms)

A good rule is that 1 minute of vigorous activity provides the same health benefits as 2 minutes of moderate activity.

One way to do your recommended 150 minutes of weekly physical activity is to do 30 minutes on 5 days every week.

All adults should also break up long periods of sitting with light activity.

Source: NHS 

Back Fat~ Exercises

Back Exercises You Can Totally Do At Home

at home back exercises for back fat

Most people head into a workout focusing on the areas we consider the most noticeable—butt, stomach, legs, etc. But here’s a secret: Strong upper-body muscles (and back muscles, specifically) are not only key for an overall defined look, but they’re your best defense against pain, injury, and poor posture for years to come.

Try these eight back exercises at home or at the gym to sculpt a strong, sexy back, and shoulders all at once and reduce the appearance of back fat.

How it works: Three or four days a week, do 1 set of each of these back exercises, with little or no rest in between moves. After the last exercise, rest 1 to 2 minutes and repeat the full circuit 2 more times (3 times total).
You’ll need: A pair of light-weight dumbbells and a pair of medium-weight dumbbells

T Raises

t-raise at home exercise for back fat

This at-home back exercise proves that you don’t need huge weights to make some huge strength gains.

  • Grab a pair of light-weight dumbbells and stand with feet hip-width apart.
  • Take a slight bend in knees as you shift hips back and lower torso until it’s parallel to the floor.
  • Bring weights together and turn palms to face forward.
  • Keeping arms straight, lift weights up to shoulder height then lower back down. (Make sure to keep core and glutes engaged the entire time.)

Do 15 reps.

Single-Arm Dumbbell Rows

single-arm dumbbell rows exercise for back fat

Aim to keep shoulder blades down and together and core engaged through this entire exercise.

  • Holding a medium-weight dumbbell in one hand, stand with feet hip-width apart, bend knees, and shift hips back, lowering torso until nearly parallel with the ground. Place right hand on a wall in front of you for balance.
  • Draw the weight up toward chest by bending left elbow straight up toward the ceiling. 

Do 10 reps per side.

Delt Raise

rear delt raise exercise at home for back fat

This at-home back exercise is all about control. To get the most out of the move, focus on eliminating momentum and utilizing your back rather than arm muscles.

  • Holding a pair of light-weight dumbbells, stand with feet hip-width apart, knees slightly bent.
  • Shift hips back as you lower torso until nearly parallel with the ground.
  • Turn palms to face each other, bend elbows, and lift weights up to shoulder height.
  • Gently lower back down, keeping core and glutes engaged during the entire movement.

Do 10 reps.

Plank with Lateral Arm Raise

plank with lateral arm raise at-home back exercise for back fat

Moving your limbs away from your core makes this back exercise an abs workout and balance challenge, too.

  • Start in a straight-arm plank with hands below and in line with shoulders, feet slightly wider than hip-width apart.
  • Keeping hips as still as possible, lift one arm up to shoulder height.
  • Return to center, then lift the other arm to shoulder height. (Draw belly button up and in and keep your body centered.)

Do 10 reps per side.

Push-Up Hold

push-up hold best at home back exercises for back fat

Rather than cranking out hundreds of reps, incorporate more isometric back exercises in your at-home workout to help build muscle.

  • Start in pushup position with hands slightly wider than shoulder width, feet hip-width apart. Your body should form a straight line from heels to head.
  • Bend elbows and lower body until hovering a few inches above the ground. Hold for 1 deep breath, and then press half-way up and hold for 1 deep breath.
  • Lower back down to your lowest point, holding for 1 deep breath.
  • Return to your half-way point for one more hold.

Do 5 reps.

Back and Booty Blasters

locus lift at home back exercise for back fat

While this move focuses on your glutes, hamstrings, and inner thighs, it’s also a great at-home back exercise too. (P.S. the muscles along the entire back of your body are called the posterior chain.)

  • Lay flat on your stomach. Lift your chest up, arching your back and interlacing your hands behind your back.
  • Lift your hands and legs up, touching your heels together.
  • Slowly move your legs apart and bring them back together.

Do 20 reps.

Twister

chair pose back fat exercise at home

Time for a round of twister—but in the form of an at-home back exercise. This chair pose will stretch and strengthen your back while the rotations will hit your obliques.

  • Squat into chair position with hands in prayer pose in front of chest.
  • Twist your torso to the right while remaining in chair pose, and place the left elbow on the outside of the right knee. The other elbow should be pointing to the ceiling. 
  • Hold for three breaths, then return to center. Repeat on the other side.

Do 4 reps.

Pilates Press

Pilates press back fat exercise at home

You’ll seriously sculpt your chest, too, while doing this back exercise—as long as you don’t let your hips drop when you lower to the ground.

  • Start in push-up position and bend one leg behind you so the bottom of the foot is facing toward the ceiling.
  • Lower your body to the ground by bending your elbows, keeping your back straight.
  • Push yourself back up.

Do 10 reps per side.

Exercise~

This Single Move Targets Your Butt, Legs, AND Core

a close up of a person: The single leg deadlift is a classic strength move that works all the muscles in your legs, along with your core. Plus it challenges your stability and balance. Here's how to master the move.

© Kathryn Wirsing The single leg deadlift is a classic strength move that works all the muscles in your legs, along with your core. Plus it challenges your stability and balance. Here’s how to master the move. Reasons to get flustered at how surprisingly difficult a task turns out to be: Helping your kid with basic algebra; playing that peg board game at Cracker Barrel; and attempting a basic single-leg deadlift without weights.

After all, all you’re doing is hinging at the hips-minus the added resistance from a dumbbell, no less. But the balance and stability required in this basic move will eat up your glutes, your nervous system, and your ego. So obviously, you have to try it ASAP.

How To Do A Single-Leg Deadlift

How to: Stand with both feet under hips. Shift your weight to the right leg, which should be nice and straight with a soft bend in the knee. Begin to drive your left foot back like you’re stamping the bottom of your foot on the wall behind you, keeping your leg straight. Simultaneously, slowly start hinging at the waist, tipping your torso forward until it’s almost parallel to the floor. Keep your arms straight, at shoulder height, and perpendicular to the floor at all times. At the bottom of the position, your body should be in a straight line from the top of your head to the bottom of your left foot. Then, begin pulling your left leg forward while keeping it straight, and lift your torso up until you’re standing again. That’s one rep. Repeat all reps on one side, then switch legs.

Reps/sets for best results: Single-leg deadlifts are super versatile depending on your goal and skill level. If you’re just starting out, begin with three sets of 10 reps, no weight, with 90 seconds of rest in between.

Once you start to feel comfortable with the balance component, you can work toward goals: If your goal is muscular endurance, hit three sets of 15 to 20 reps with just 60 seconds rest in between. If you’re aiming for strength, add some weights (dumbbells or barbell) and shoot for three sets of five to six reps, with three minutes of rest in between. If you’re looking to increase muscle size, add weight, and do three sets of 8 to 12 reps with 90 to 120 seconds rest in between.

Form tips: Be sure to keep your body in a straight line at the bottom of the move. “When your body is parallel to the floor and leg is extended behind you, the hip has a tendency to roll up toward the ceiling-you want to prevent it from rotating at all,” says Matt Pippin, CSCS, strength and mobility coach at Pippin Performance in San Diego. Try this cue: Imagine you have a glass of water (or wine!) resting on your low back when you hit the bottom of the move-don’t let it spill.

Even with no equipment, this move is a burner, Pippin says. But as you progress, you can add dumbbells or kettlebells to each hand.

Benefits Of Single-Leg Deadlifts

Single-leg deadlifts work all the major muscles it’s two-legged namesake does: the hamstrings, gluteus maximus, gluteus medius, ankles, and the core. But while it challenges the same muscles, if you use lighter weights (or none at all), it puts way less stress on the spine, says Pippin.

Plus, one leg adds a balance and stability challenge, so there’s an increase in the glute demand (read: better booty builder). And that higher demand is the real selling point of this burner: “If you want to be able to do things like run, walk, and jump, you need a strong posterior chain-aka, all the muscles of the back side of the body,” Pippin explains.

Get Fit

Make Single-Leg Deadlifts Part Of Your Workout

Work this move into your routine two to three times per week (on the higher end for building strength, the lower for overall wellness).

The balance and stability will work your nervous system, so it’s good to get after it at the beginning of your routine when you’re still fresh, Pippin says. However, as long as you’re not adding any weight, you can definitely incorporate this move as a finisher to “empty the gas tank,” or as part of a HIIT routine to keep your heart rate elevated.

This move pairs well with any other single-leg-dominant exercise, like lunges, single-leg hip thrusts, or lateral lunges. For a total-body day, try single-leg deadlifts with unilateral upper body exercises (i.e., single-arm press, single-arm rows).

And remember, this move is not as easy as it appears. One way to make it easier: Stand near a wall, chair, or something close to help with balance. “You can get comfortable with the movement pattern first,” Pippin says, “Then remove the object and master the balancing component.” Whatever variety you choose, get ready to feel the booty burn.


    5 Simple Exercises For You

    Exercise 1: Chair Squat

    chair squat

    A study found in the European Journal of Preventative Cardiology found that the ability to get off the floor without using your hands was a key indicator of whether participants were more likely to die prematurely. With this exercise, you’ll develop that ability while building strength in your legs and working on your balance—and if you stumble, you’ll land safely back in the chair.

    How to do it: Stand in front of a stable chair with your feet about hip-width apart. Imagine that you’re holding a bag of groceries, and there’s a door ajar behind your butt. Bump your butt backwards as if to open that door—this initiates a hip hinge, keeping your weight in your heels and your back flat. Keep pushing your hips back to sit down in a controlled manner without using your hands. Now, sitting up straight in the chair and keeping your weight in your heels, forcefully stand back up.

    To make sure it’s a powerful move, try to stand up quickly. Even if you can’t, try to muster all your strength in the first moment of the standing movement, so you’re using your strength from the start. And to keep it powerful, don’t do all of your repetitions quickly. Once you sit back down, compose yourself, reset and push up forcefully again. Repeat this for five sets of five repetitions each day, resting a full minute between sets.

    Exercise 2: Glute Bridge

    glute bridges

    The glutes are one of the biggest muscles in the body, but because we sit so much, many people suffer from what has been called “gluteal amnesia,” where the butt doesn’t do the work it’s supposed to. Being able to fire the glutes can help keep your lower back in place, reducing your risk of pain. And despite the booty focus of many female workouts, women actually have, on average, less gluteal and hip muscle mass than men, according to International Orthapedics. A simple glute bridge, though, can help you “remember” how to use your glutes, develop more muscle and because it’s safe to do forcefully on the ground, make that butt muscle powerful.

    How to do it: Lie face-up on a mat with your knees bent and feet flat on the floor. Place your arms at your sides, palms up. Keeping your feet flat on the floor, squeeze your glutes to raise your hips forcefully off the floor until your body forms a straight line from your knees to your shoulders. As you’re lifting, keep your knees and thighs parallel—don’t let them pull together. This will engage your hip musculature. Pause for a second at the top of the exercise, and then slowly return to the start position. As you’re raising up, don’t let your heels come off the floor.

    To make sure it’s powerful, take a beat between repetitions, just as with the chair squat. Concentrate on pushing the hips up rapidly, and control the descent down. Perform three sets of five to eight repetitions of this exercise each day.

    https://leaf.nutrisystem.com/power-exercises/

    Exercise 3: Elevated Pushup

    push ups

    If you can’t do a bunch of pushups without struggling, elevating your hands can help make the movement easier and allow you to perform the exercise while recruiting force in a powerful manner. It can also help you keep your form in check, which can reduce your risk of shoulder injury and give the benefits you’re really looking for.

    How to do it: Place your hands shoulder-width on the arm of a sofa or the second step of a staircase. In this position, assume a straight body line from head to heels. Bend your elbows to lower your body until your chest reaches your hands, maintaining the rigid body line throughout the movement. Press forcefully back to start, maintaining the body line. Try for five reps to start, working up to five sets of five reps. Once that’s too easy, try the exercise with your hands lower—maybe on the first step of the staircase.

    Exercise 4: Medicine Ball Chest Pass

    medicine ball throw

    The next two exercises require some equipment, but if you can get a medicine ball, it’s really fun: Throwing the medicine ball won’t just build power, but will make you feel powerful. It can be great for stress relief, too! If you can, try to find a soft-sided medicine ball that doesn’t bounce—instead, it will hit the wall and fall to the ground. This is easier to handle than trying to dodge or catch the ball as it returns to you. As with the other exercises, don’t let this medicine ball work become cardio—it falls under the power exercises category, so each repetition should be powerful! Take a second between reps to compose yourself, get reset, and throw the ball with power.

    How to do it: Stand with knees slightly bent facing a wall three to four feet away, holding a medicine ball at the chest with both hands. Press both arms forcefully forward to push the ball away from you at the wall. Retrieve the ball, reset, and repeat. This exercise can also be done while seated. Perform five to eight throws.

    Exercise 5: Medicine Ball Slam

    power exercises

    As with the chest pass, take a moment to rest between power exercises so you’re composed and ready to throw the ball with maximum power!

    How to do it: Stand in the same position as you did for the chest pass, holding the ball in front of your chest. Raise your arms up over your head, and then forcefully slam the ball down in front of your feet. Retrieve the ball, reset, and slam it again. Perform one set of eight reps.


      Tighten Your Arms~Exercises

      5 exercises to tighten and tone your arms for summer

      Add this 10-minute upper body routine to your regular workout to tone flabby arms for summer.

      Adding exercises that focus on the biceps, triceps and shoulders will help sculpt your arms for tank top season.John Duarte / Getty Images/Tetra images RF

      May 30, 2019, 12:29 PM ETBy Stephanie Mansour

      We all have those trouble zones we’re self-conscious about and want to tone up. Perhaps it’s your midsection or your glutes. For many, upper arms top the list, and this is the time of year this insecurity is brought to light.

      The good news is that by adding the right exercises to your workout routine you can start strengthening the muscles in your arms rather quickly. One of my clients added a 5-minute arm routine to her typical workout routine and noticed a change after just three sessions. Within a week she already felt more confident in her sleeveless tops and dresses.

      If tightening and toning the arms is on your list of summer goals, try adding these exercises to your fitness regimen three times a week. I recommend performing them with 3-5 pound dumbbells. Remember that some exercises may be easier than others, so it’s okay to alternate between weights based on what feels right for your body.

      My favorite way to put these exercises together is to perform one set of 10 repetitions of each, and then repeat the whole circuit three times. In the end, you’ll complete 30 repetitions total of each exercise.

      Bicep Curls

      The bicep curl is the quintessential arm exercise. It tones and strengthens the front of the arms, which many people associate with the ability to “flex a muscle.”

      To perform this exercise, grab your dumbbells and start with your arms by your sides. Hug your elbows in towards the side of your body, and then curl the weights up towards your shoulders. Be careful not to let your arms swing. (If you need to swing your arms and use momentum to get the weight up, you are likely using too heavy of a weight.) Repeat this 10 times, and complete 3 sets total throughout your workout.

      Tricep Kickbacks

      The triceps are what people are referring to when they say that their arms are flabby. This is the part of the arm that jiggles when you wave. (During one of my workout segments for the “Today Show,” Kathie Lee called them bat wings!) In order to tighten this area and reduce “jiggle” it’s necessary to strengthen the backs of the arms. The most basic dumbbell exercise to accomplish this is a tricep kickback. Holding weights in both hands, lean forward with a flat back. Hug your elbows in towards your sides and pull them up towards the ceiling. Keeping your elbows still, kick the weight towards the back of the room by moving the lower half of your arm back and up towards the ceiling. Hold for a second, feeling the back of your arm tighten, and then release back to the starting position. Repeat this 10 times, and complete 3 sets total throughout your workout.

      Hug a Tree

      This exercise works the biceps from a different angle, while also working the sides of the chest (and that pesky area by the armpits) and sculpting the shoulders. Hold the weights at shoulder height, parallel to the floor. Relax the shoulders down, and then hug the arms towards the front of your body as if you’re hugging a tree. Keep the elbows level with your shoulders — don’t let them dip down — and be conscious of the shoulders starting to raise up towards your ears, which means the weight is too heavy or you’re too fatigued. Repeat this 10 times, and complete 3 sets total throughout your workout.

      Serve the Platter

      This move is a three-in-one, working the biceps, shoulder and chest. Start with your arms at your side, bending your elbows at 90 degrees. Reach the arms forward, straightening them as if you’re serving a platter, then reach them out to the sides in a “T” position, back to center, and then pull them back in towards you. Keep the palms facing up the entire time. Repeat this 10 times, and complete 3 sets total throughout your workout.

      V’s

      The ultimate toner for the front of the shoulder is the V exercise. For this exercise, hold your dumbbells down at your hips. Then reach the weights forward and up on an angle, drawing a V, and then release them back down towards your hips. Keep the arms straight throughout the entire exercise. Repeat this 10 times, and complete 3 sets total throughout your workout.