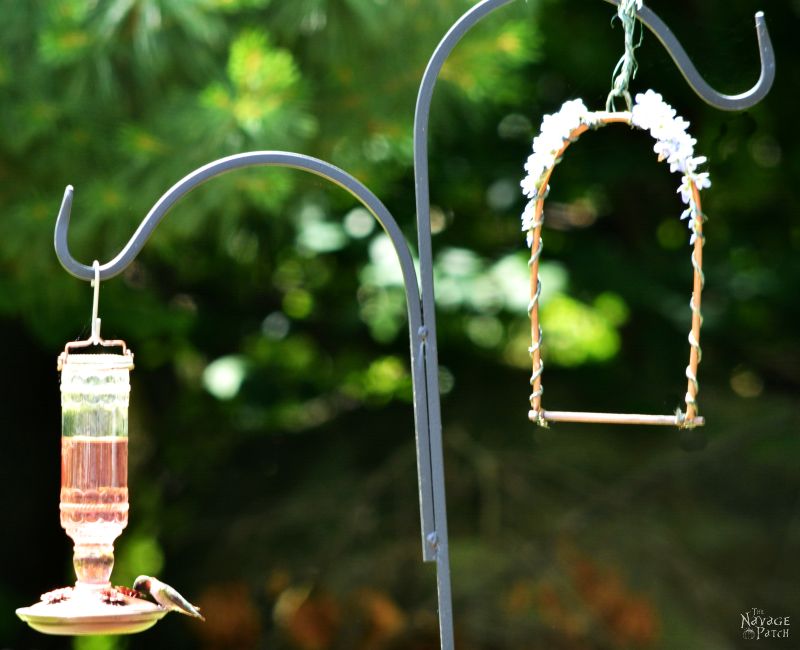
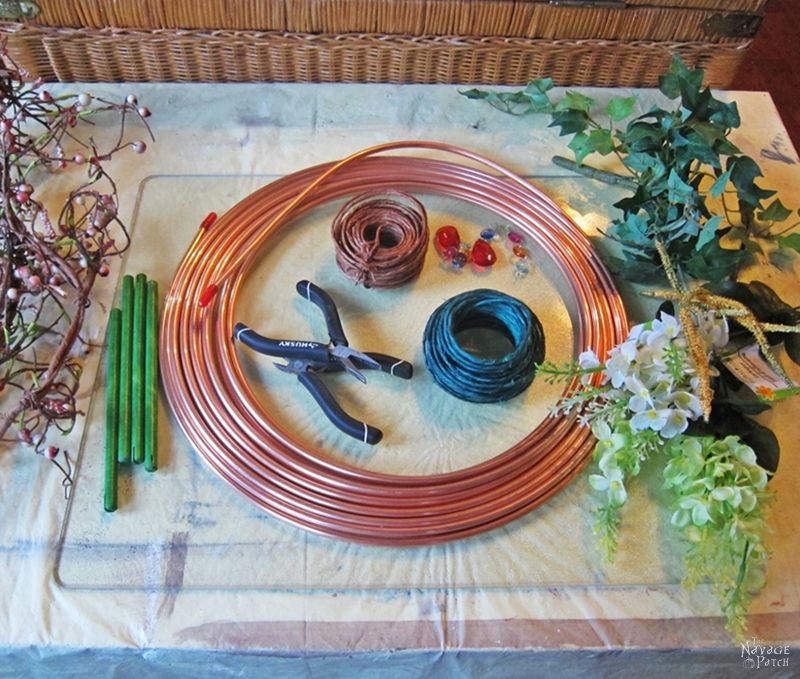
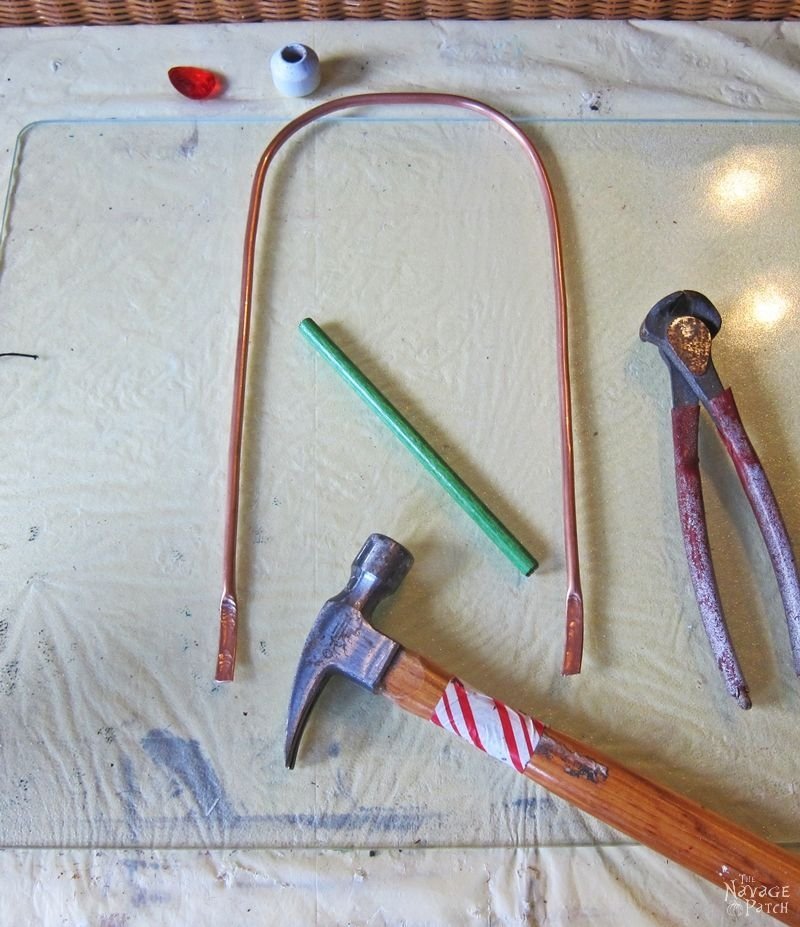
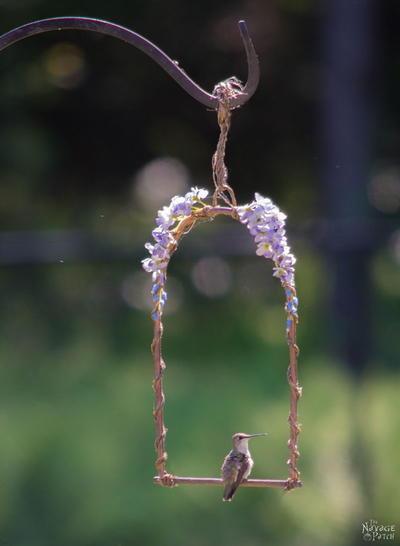
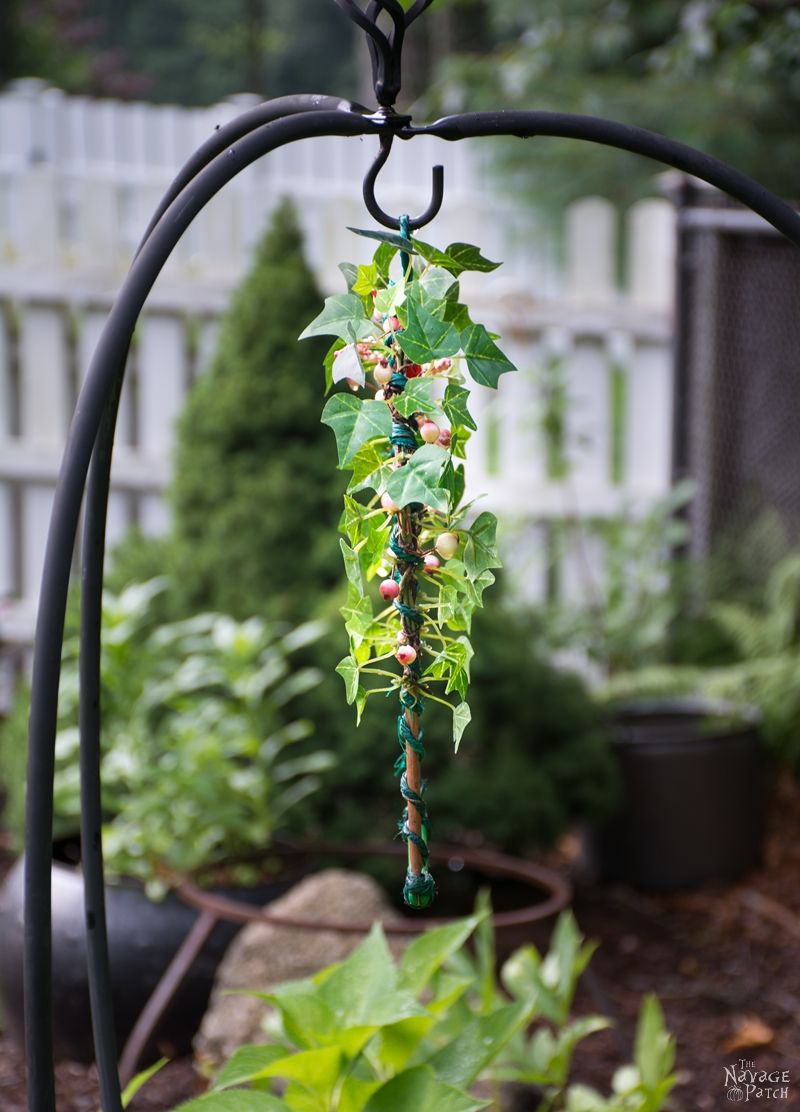
To make a hummingbird perch, all I used was a short dowel (which I found among our son’s old toys), some floral wire, copper pipe (thick and sturdy wire could substitute) and some old faux flowers. I also used a red prism/faux gem, because the red color attracts hummingbirds.
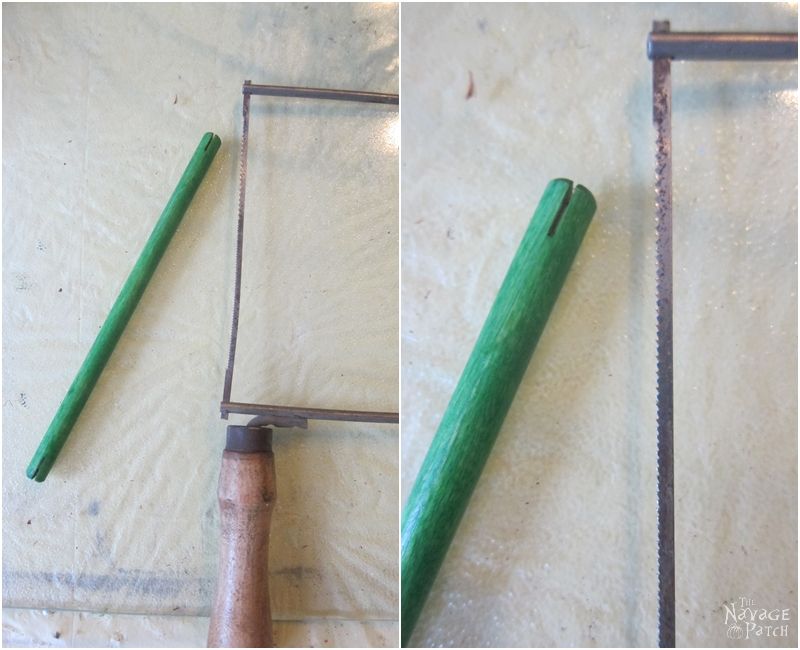
First, I prepared my dowel pieces. I cut the dowels into 7 inch lengths, then I cut a notch at the both ends of the dowel.
Now, you might be thinking cutting a notch like that is not easy. I am not going to argue with that, but instead I will give you a workaround. Therefore, if you don’t want to bother with the notches, then just have your 7 inch dowel and move on to the next step.
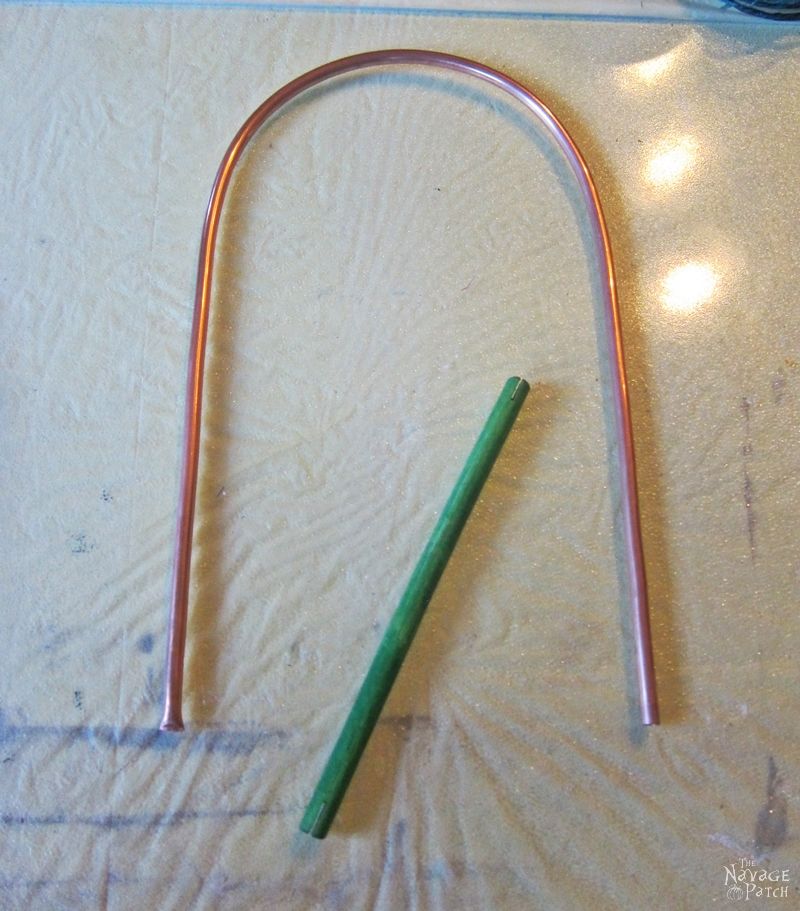
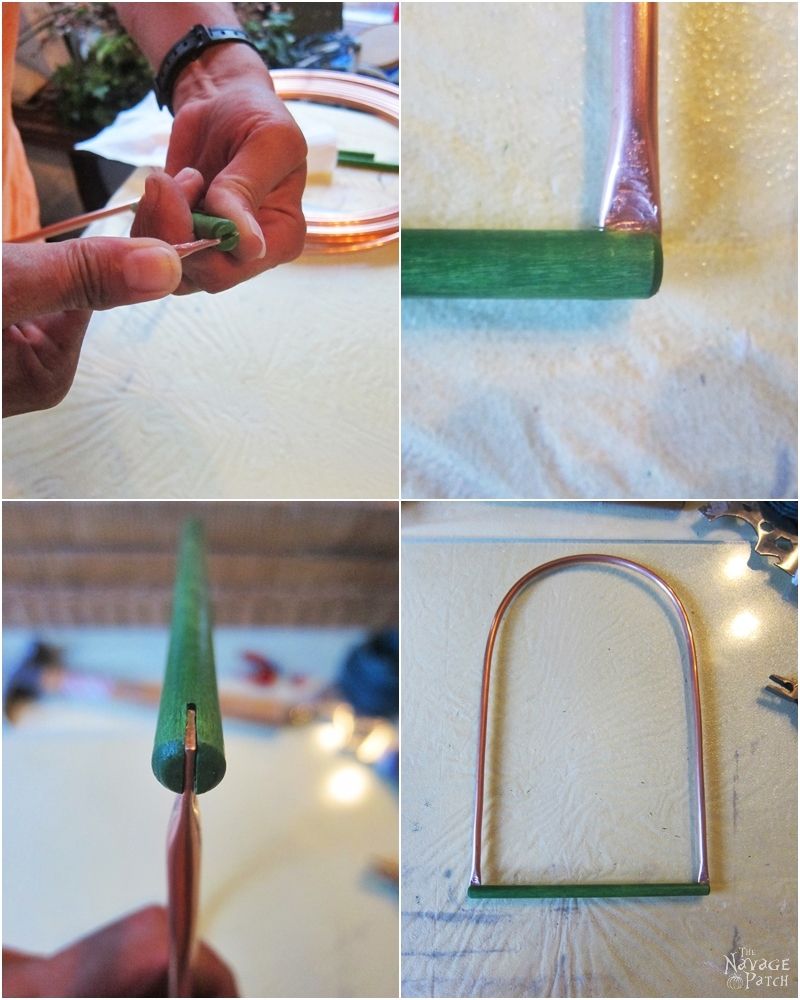
Next, I cut a 24 inch length of copper pipe and bent it to make an arch shape.
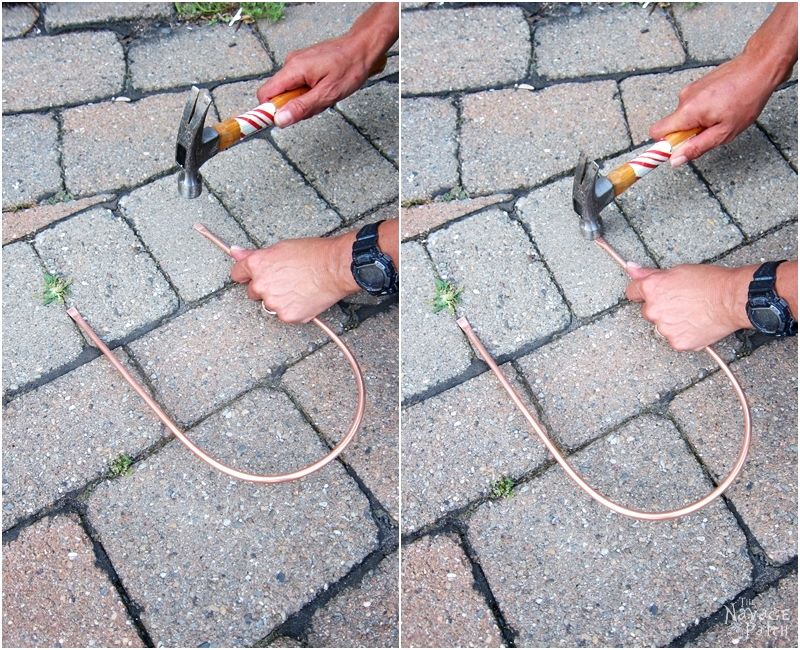
Then, I took my hammer and the copper arch outside to a stone (or concrete) surface, and hammered the ends of the arch to flatten them. For the dowel with the notches, I flattened only a little part of the ends…
…but for the dowel with no notches, I flattened a longer part of the copper arch, as shown in picture below.
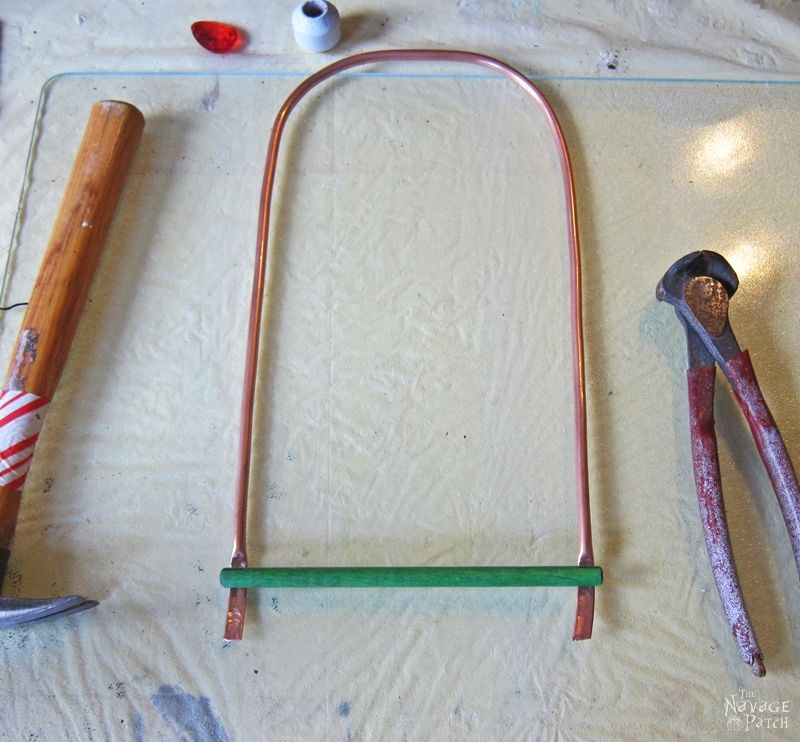
With the notch version, I inserted the flattened copper ends into those notches.
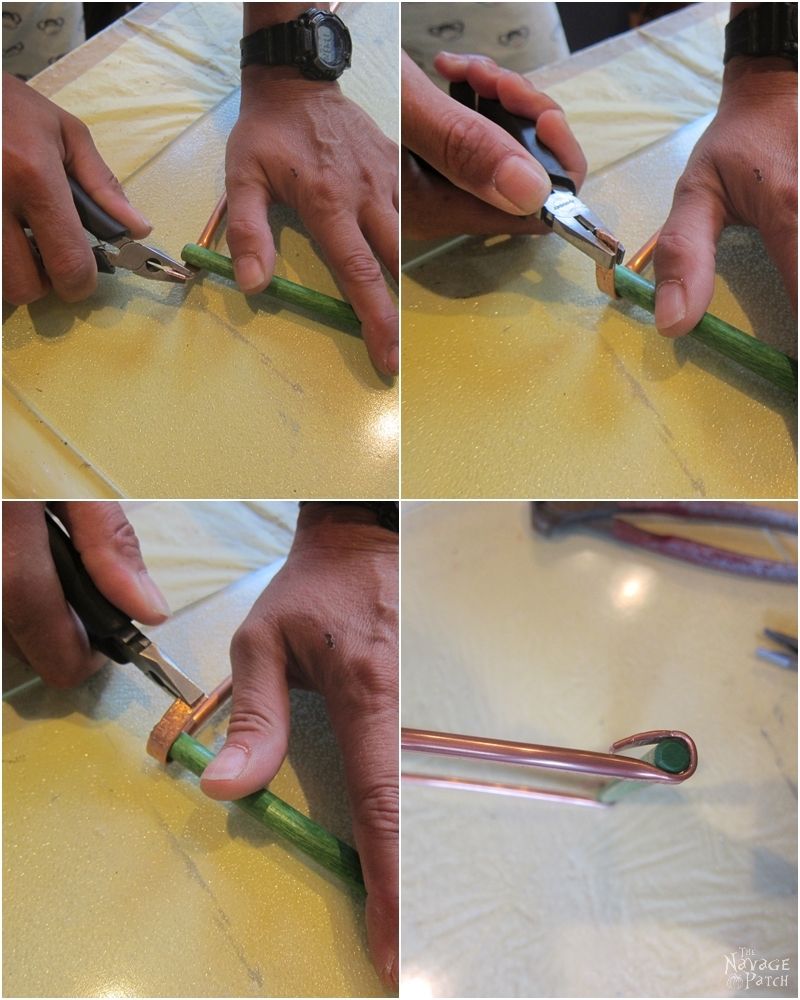
With the notchless version, I placed the dowel on the flattened part and…
…started to wrap the flattened ends around the dowel.
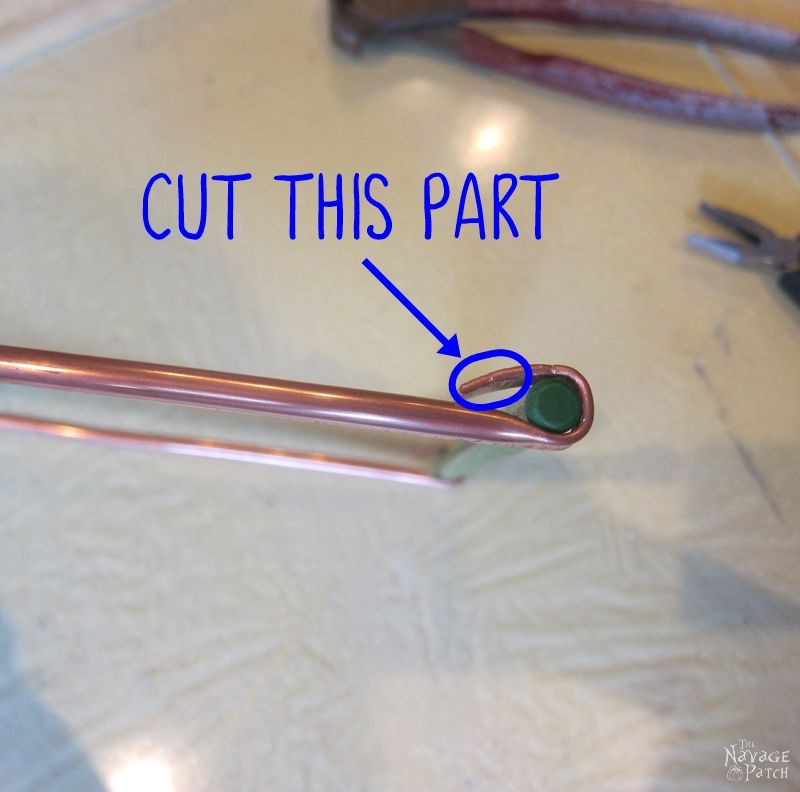
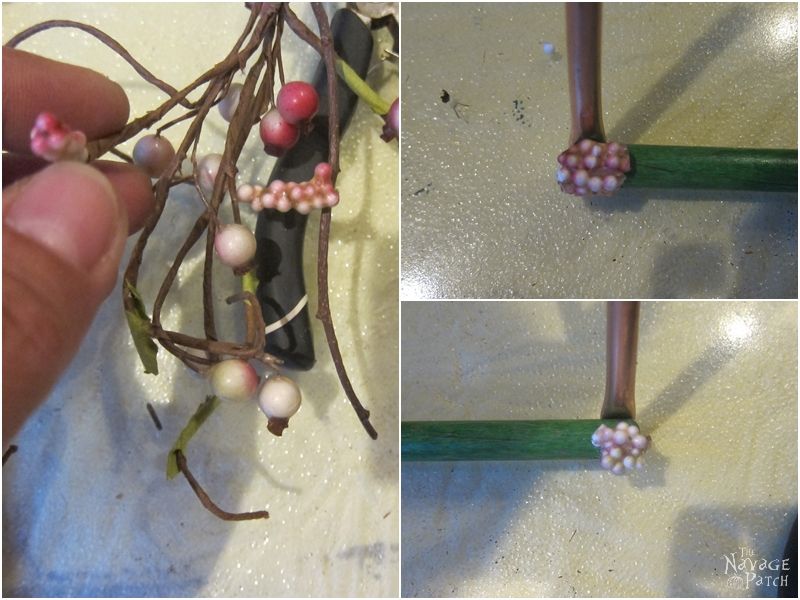
Then, I cut the excess part and…
…hot glued some faux berries on the cut part. This was so the cut copper would be covered and wouldn’t hurt anyone when touched.
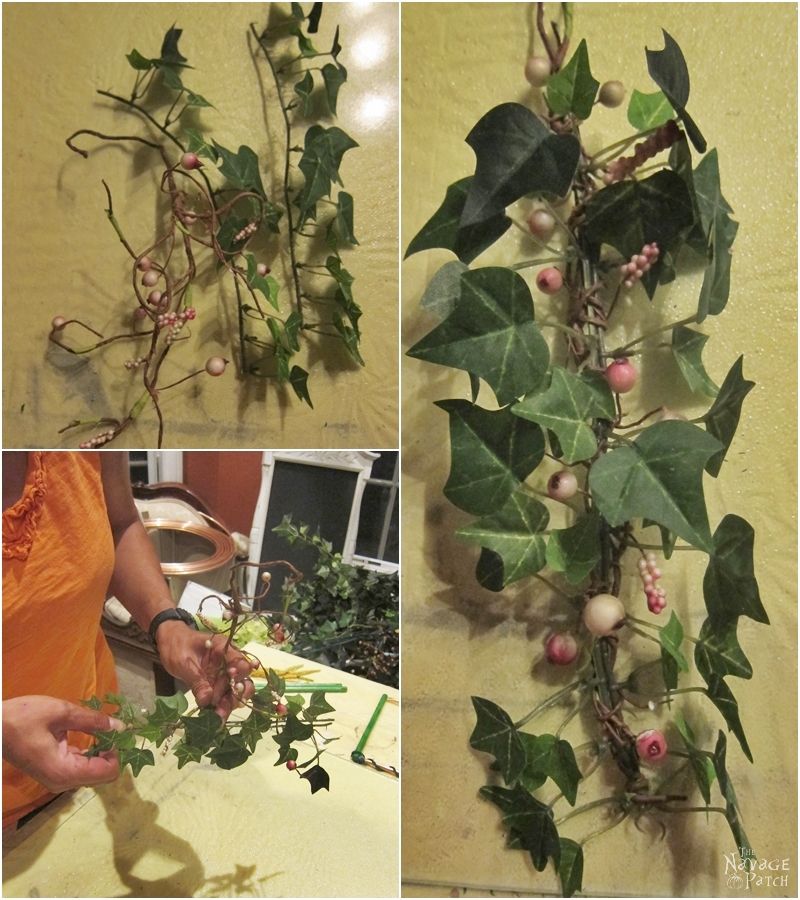
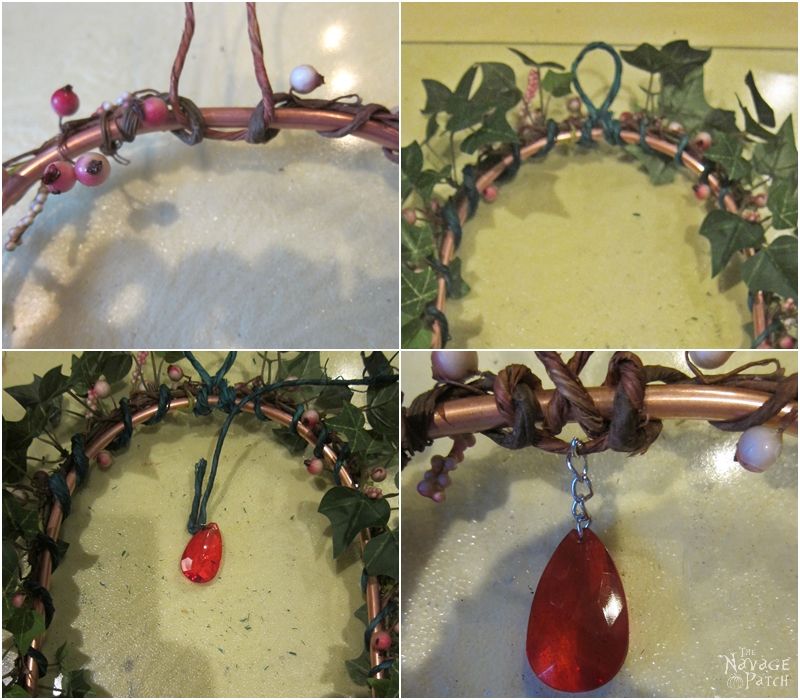
Now that both perch versions were complete, it was time to pretty them up a little bit. For that, I put together a small arrangement of floral picks I had on hand.
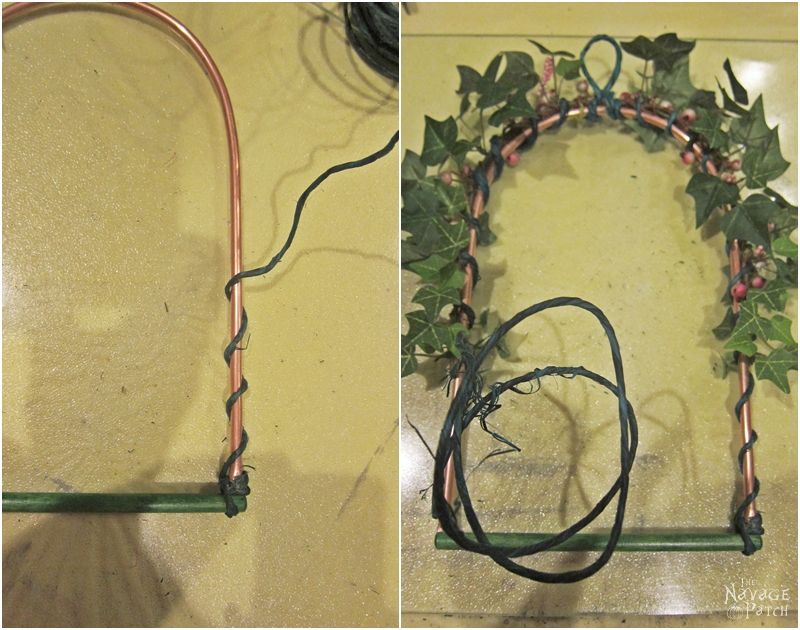
Then, using a floral wire, I attached it along the copper arch.
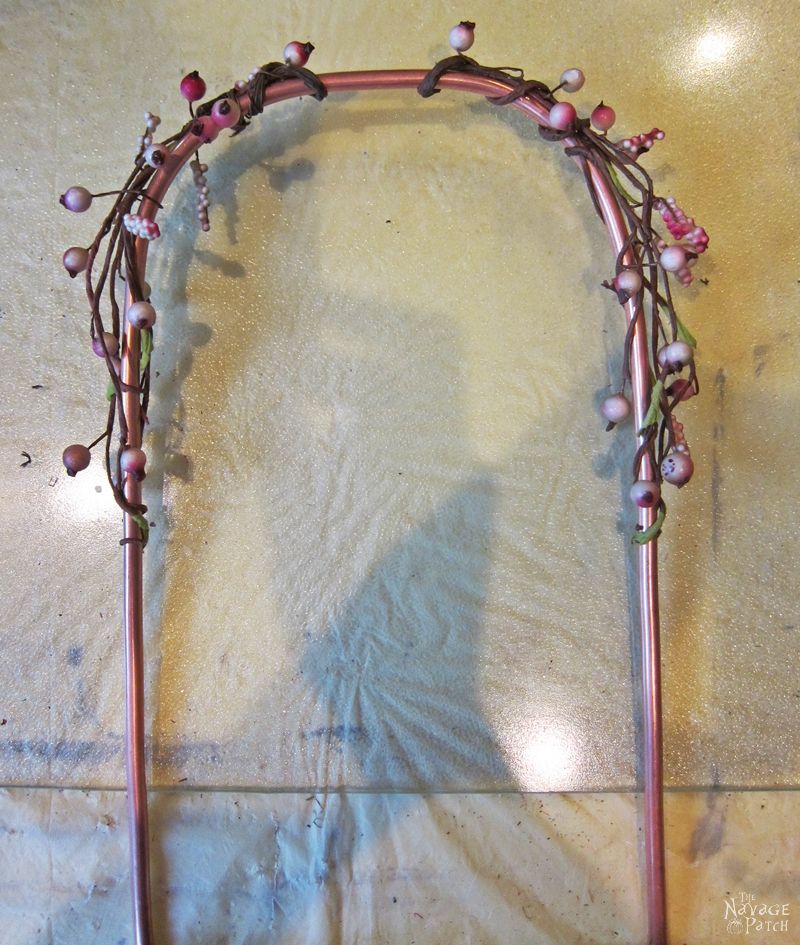
This is the one with notch.
This is the notchless one.
Next, using floral wire, I created hanging loops on the copper arch. As the final touch, I added a red teardrop prism on top.
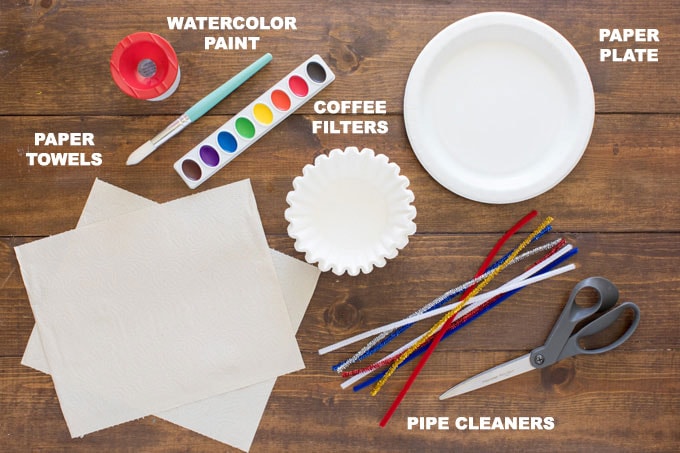
Old catalogues or magazines (they should be of the same size)
A record (or alternative table-top)
Paperclips
Coloured sticky/duct tape
All-purpose glue (or hot glue)
Firstly, take a magazine and open it to the 10th (or so) page. Roll it up to the left until the left edges of the pages touch the spine of the magazine.
Roll up the next 10 pages (you don’t have to count, just estimate it 🙂 ) until their edges touch each other. Then fix it with a paper clip as close as possible to the back of the magazine.
Repeat the second step until you’re at the second to last page. The last page shouldn’t be rolled up, yet.
Now you need the next magazine of the same size. Put the last page of the first magazine on top of the cover of the second one and roll them up as before, together with the first few pages of the magazines.
Repeat this until you think it is enough 🙂 (It depends on the thickness of the pages and how many pages your magazines have.) Don’t roll the last few pages, yet.
Now stand the whole thing up (hereby the paper clips are important, otherwise the pages might open again). Now you can roll in the last pages and fix them to the first pages of the first magazine using a paper clip.
Next you stick the sticky tape around the whole thing on top and again on the bottom.
Now you can remove the paper clips and make the second level as you did the first. It is important that the magazines of one level are of the same size, but all the levels don’t necessarily have to be even. However you prefer 🙂
Make as many levels as you want, depending on how high you want the table to be.
Now cut a piece of paper so that it matches the top of the table leg (in a circle) and stick one piece on top of each level. Glue the levels on top of each other and glue the record on top.
Done 🙂 I hope this was understandably phrased!
At our place the environmental-friendly table embellishes one corner of our living room together with my globe lamp 🙂
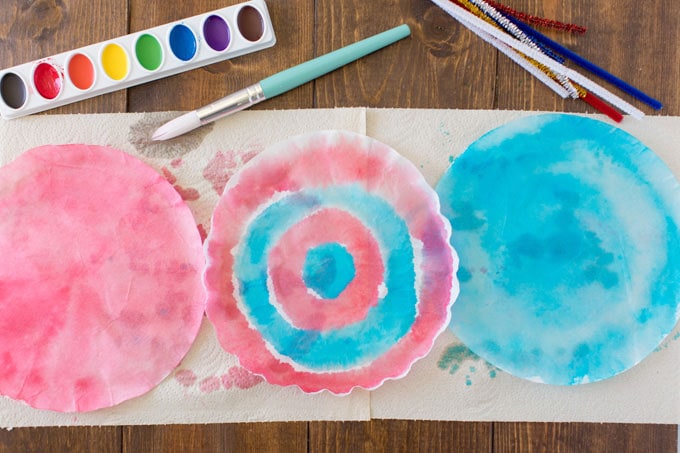
Watercolor paint makes these super easy, but you could substitute food coloring if that’s what you have on hand.
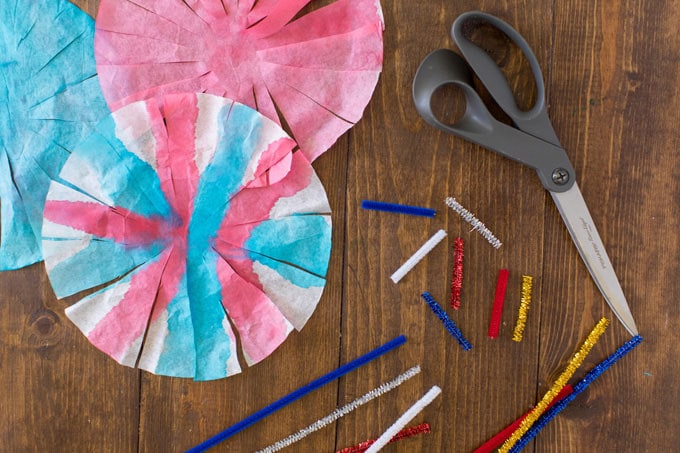
You can use any color pipe cleaners you have on hand. We suggest patriotic colors like red, white, blue, silver, or gold.
have younger kids wear smocks or an oversized t-shirt, just in case!
Report this ad
HOW TO MAKE COFFEE FILTER FLOWERS
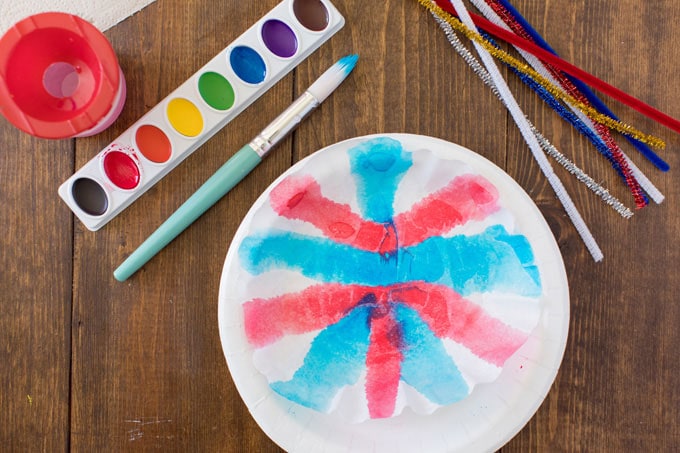
Place one of the coffee filters onto the paper plate and flatten out.
Paint the coffee filter with water color paint. Paint some solid red, some solid blue and others a combination of blue and red, leaving some areas unpainted.
Report this ad
Move the coffee filter to the towel and lay flat to dry. Repeat with the second coffee filter.
Leaving the center of the filter in tact, cut the coffee filter in strips, working you way around the circle.
Report this ad
Cut a 1.5″ piece off of one end of a pipe cleaner and set aside.
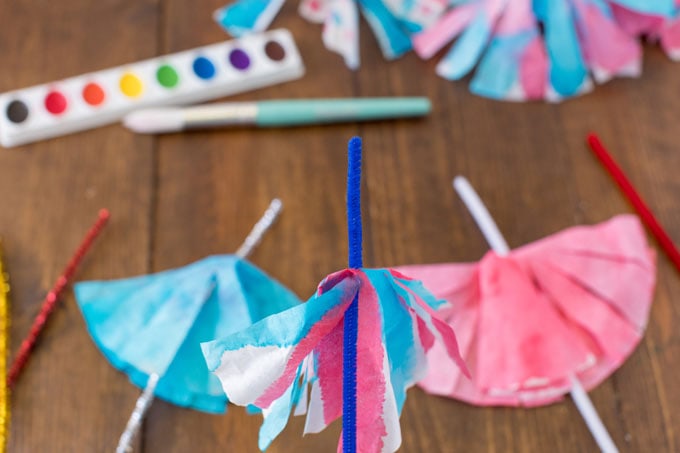
Take the longer piece of the pipe cleaner and poke it through the center of the coffee filter. There should be about 2″ of pipe cleaner poked through.
Turn the entire thing upside down and grasp the filter with your fingers.
Report this ad
Gather it around the pipe cleaner and secure it by wrapping the extra piece of stem that you cut off in an earlier step. Twist it around the part you are holding and turn the flower back upright.
Report this ad
Manipulate with your finger until strips are spread out and it looks the way you want it to.
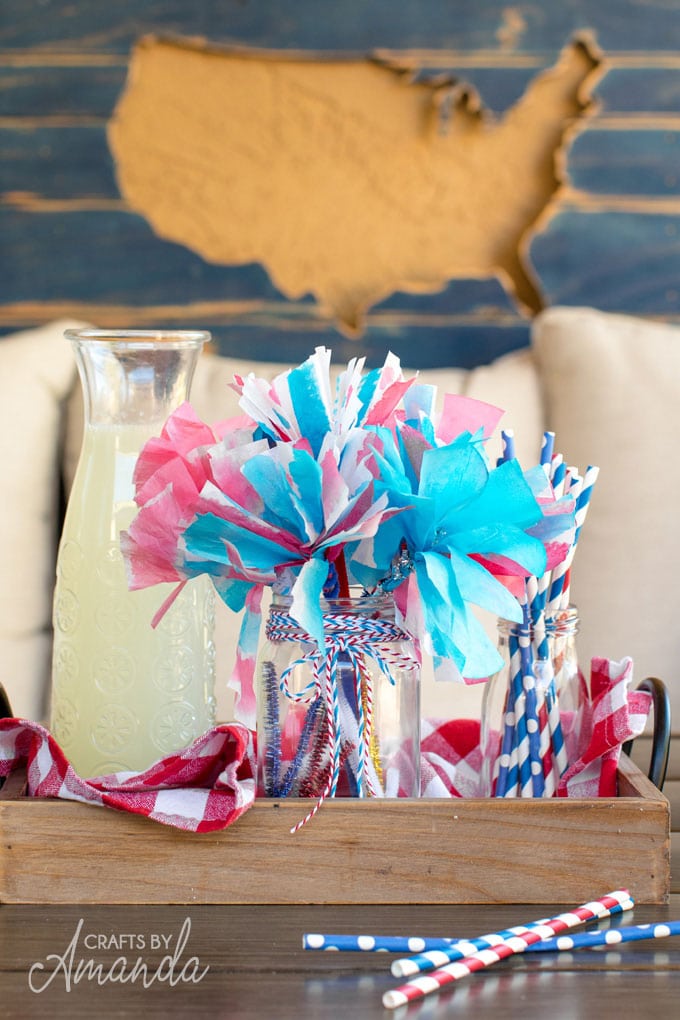
This fun 4th of July craft is great for kids of all age levels. Make some today!
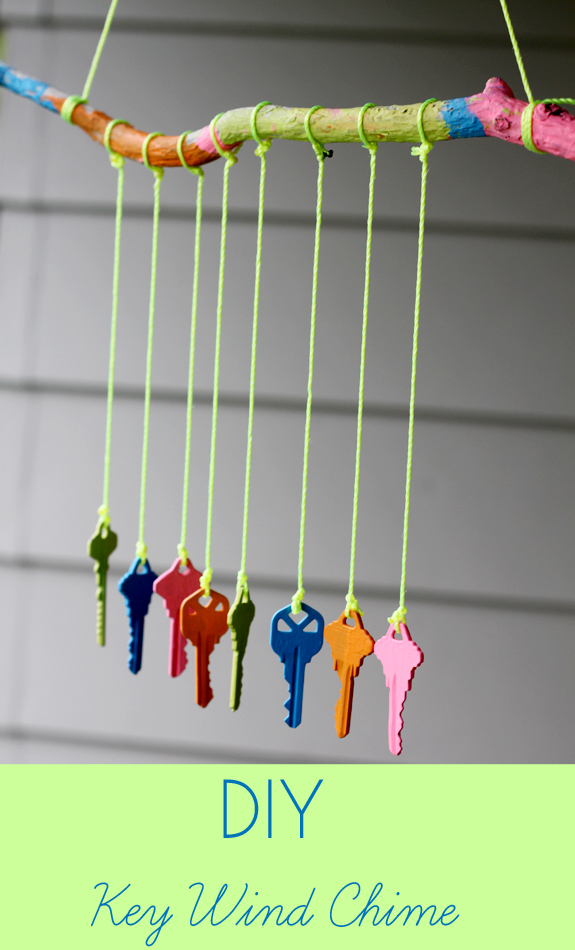
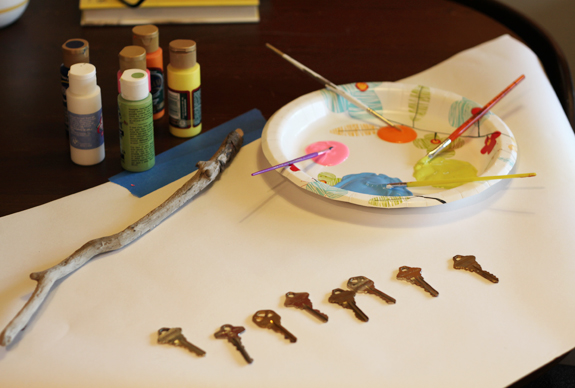
Optional: Paint your keys and stick. Choose a few coordinating colors and have your child paint the keys and stick. Our keys took two coats, let the first side dry before flipping and painting the other side.
Tie a piece of string to either end of the stick so that you have a way to hang it.
Tie a piece of string to each key.
Tie the keys to the stick making sure that they are close enough to each other that they will chime when the wind blows them.
Gift, hang, enjoy!
I hope this project inspires a little crafty recycling in your home. I’m sure you and your little ones will love turning trash into treasure. And whoever receives your thoughtful handy work is sure to be pleased as punch. I know they make me smile every time I enter my garden.
Instead of tossing your post-pruning piles, take the greenscaping approach and recycle yard waste at home. These three simple steps will give you the lush, healthy yard of your dreams in a sustainable, chemical-free way.
Grasscycle for Faster Mowing and a Greener Lawn
Grasscycling means leaving clippings on your lawn after mowing. This is one of the simplest ways to recycle yard waste because it eliminates an unnecessary step — bagging and removing the clippings. You may need to mow more often to maintain the desired length, but without the bagging, it will take less time — 38 percent less, according to the EPA.
When trimmed to the correct size, the clippings fall beneath the grass and decompose quickly to add nutrients back into your soil. The EPA, says those extra nutrients can reduce the need for store-bought nitrogen fertilizer by “25 to 50 percent,” saving you time and money. The University of Minnesota recommends the clippings be no longer than an inch because longer pieces may smother the grass.
Recycle Yard Waste with DIY Mulch
Grass, leaves and wood scraps can be used as organic, free mulch around your flower beds and gardens. Weeds struggle to pop up through mulch, and the organic materials help regulate temperature and moisture while enriching your soil.
You’ll find ample natural mulch in the fall season. Shred autumn leaves with your lawn mower before bagging them with your grass clippings, then spread a thin layer at the base of your plants.
If you have lots of wood scraps from trimming or removing a tree, make your own wood chips. Instead of purchasing and hauling mulch bags from a home improvement store, rent a wood chipper or shredder. Wood mulch lasts longer than grass and leaves, and it provides a more traditional appearance to your landscaping.
Recycle Yard Waste and Food Scraps with Composting
Composting is a common part of the zero-waste lifestyle, but it can sound intimidating. Don’t worry; it’s much easier than you think. You can even start a small, indoor compost bin just for kitchen scraps. If you want to recycle kitchen and yard waste items, building a large backyard compost bin or barrel tumbler is the way to go. You can also find ready-made composting containers and accessories online.
The EPA’s biggest and most basic backyard composting tip is to get your ratio right. Your three ingredients are greens, browns, and water. Grass clippings, flowers, leaves, coffee grounds, and fruit and vegetable scraps are all examples of greens. Twigs, dead leaves, cardboard, and sawdust are all examples of browns. Although there is some routine maintenance, including watering and turning the pile, composting is an easy way to recycle yard waste and bolster the health of your yard.
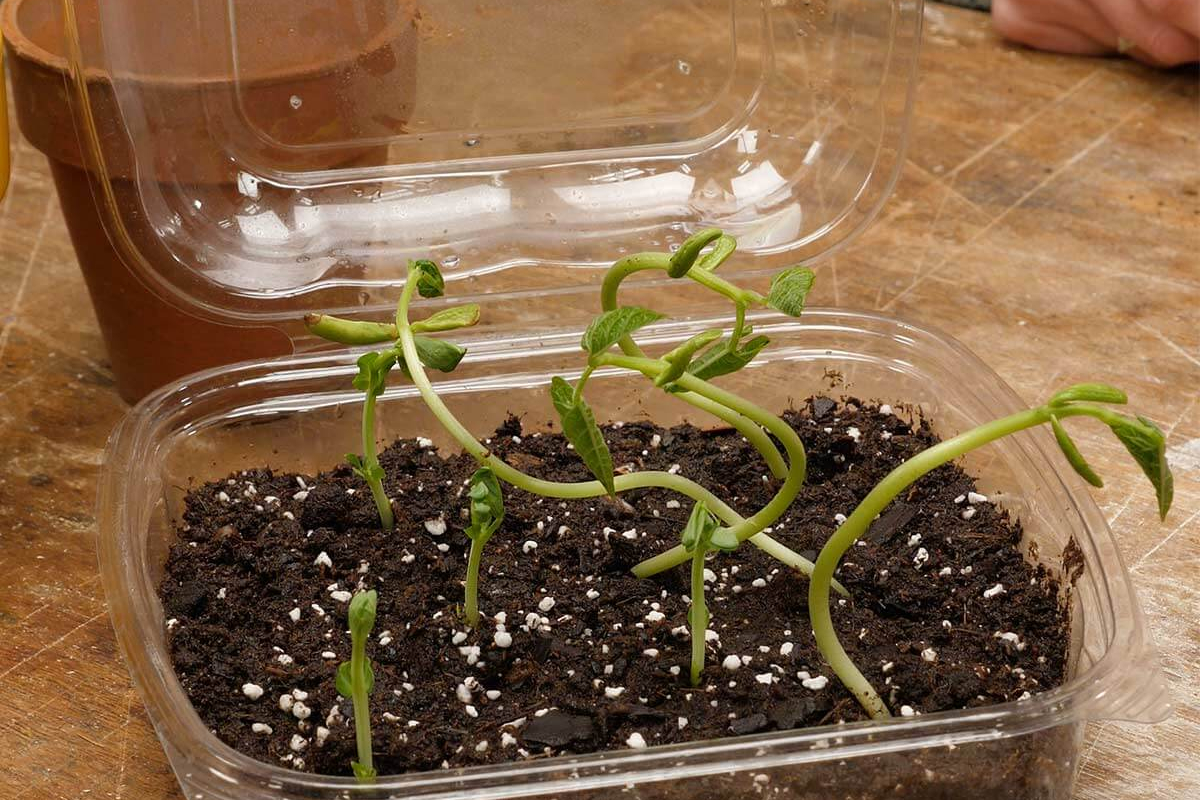
If you don’t have any soda bottles handy to create your own mini greenhouse, you can also use plastic to-go containers from restaurants. Plastic clamshell containers are the perfect place to get your seeds started.
Family Handyman
Wash your container thoroughly after you finish your food and fill the bottom with soil. Then place your seeds inside with enough space between them for each seed to grow. Close the container and set it near the window where it can soak in the sun. The plastic container keeps moisture locked inside while still allowing sun and warmth to reach your plant. Your seeds will sprout in no time!
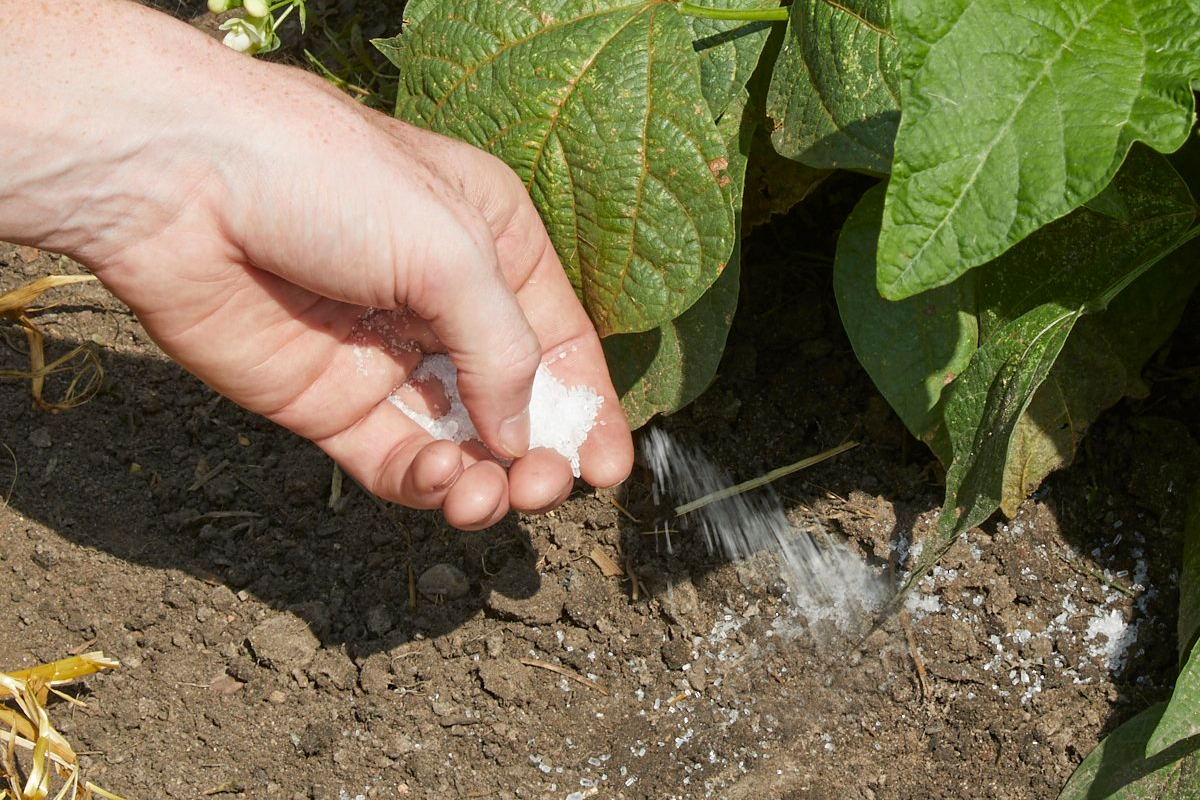
While fertilizer is an essential part of keeping your plants healthy, you might not know that Epsom salt acts as an incredibly effective fertilizer for your shrubs. Epsom salt contains magnesium, which allows your seeds to germinate and helps your plants absorb vital nutrients they need to stay alive. It’s cheap, easy-to-use, and it will keep your plants healthy and your garden filled with greenery.
Family Handyman
Use roughly two teaspoons of Epsom salt mixed with one gallon of water per month. Pour the mixture onto the base of your plants, then sit back and watch them grow!


 © Flying Colours Ltd/Getty Images