Card stock in sky blue, two shades of pink, medium blue, yellow, purple, and white
Paper trimmer
Hot glue gun
17″ x 1″ dia. cardboard cylinder from a roll of wrapping paper
Thick jute rope
Scissors
DIRECTIONS:
First, start by trimming all 264 pieces into 1 1/2″ x 5 1/2″ strips. Broken down by colour, it goes:
1. Sky blue: 129
2. Hot pink: 30
3. Light pink: 24
4. Medium blue: 21
5. Yellow: 17
6. Purple: 7
7. White: 36
Here’s where I made my first mistake: I MEANT to have the yellow and medium blue papers reversed in the sequence to follow a rainbow pattern more closely. If you wish to go that way, you’ll need to switch the quantities around.
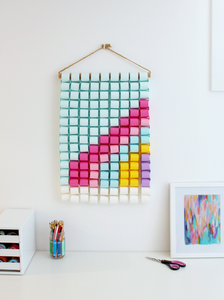
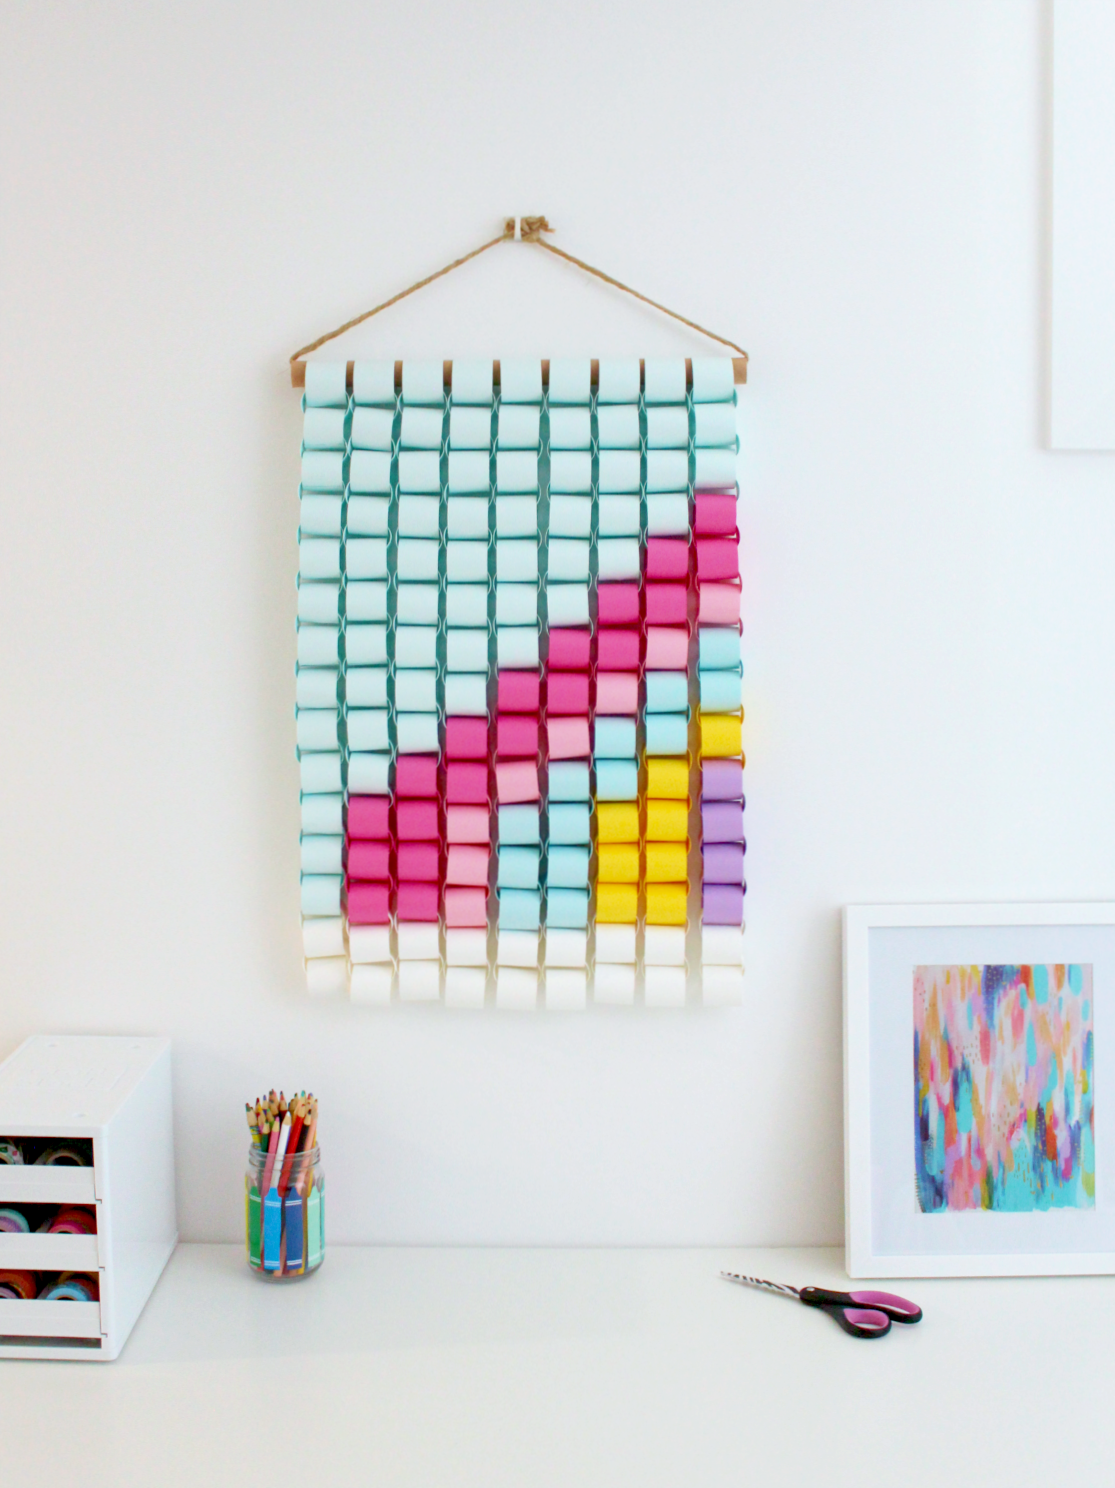
Plug in the glue gun, and follow the patterning as you see it below to make your wall hanging. There are 29 rows and 9 columns. Use the hot glue gun to adhere the strips together. You just need a little bit of glue along the edge. Also, if you’re using a dual temperature glue gun, make sure it’s on a low temperature setting. I made my rainbow from right to left as I was figuring out the pattern, but you don’t have to!
1 1 1 1 1 1 1 1 1
1 1 1 1 1 1 1 1 1
1 1 1 1 1 1 1 1 1
1 1 1 1 1 1 1 1 1
1 1 1 1 1 1 1 1 1
1 1 1 1 1 1 1 1 1
1 1 1 1 1 1 1 1 2
1 1 1 1 1 1 1 1 2
1 1 1 1 1 1 1 2 2
1 1 1 1 1 1 1 2 3
1 1 1 1 1 1 2 2 3
1 1 1 1 1 1 2 3 3
1 1 1 1 1 2 2 3 4
1 1 1 1 1 2 3 3 4
1 1 1 1 2 3 3 4 4
1 1 1 1 2 3 3 4 5
1 1 1 2 2 3 4 4 5
1 1 1 2 3 3 4 5 5
1 1 2 2 3 4 4 5 6
1 1 2 3 3 4 5 5 6
1 2 2 3 4 4 5 5 6
1 2 2 3 4 4 5 5 6
1 2 2 3 4 4 5 5 6
1 2 2 3 4 4 5 5 6
1 2 2 3 4 4 5 5 6
7 7 7 7 7 7 7 7 7
7 7 7 7 7 7 7 7 7
7 7 7 7 7 7 7 7 7
7 7 7 7 7 7 7 7 7
My original idea was to have the wall hanging stop at row 19, and if you can imagine that the pattern I started with would have made more sense. BUT, I didn’t like how short it looked, so I kept on adding paper of the same colour down the columns, and then finished it with four rows of white paper to make up the “clouds”.
Once all nine chains are assembled, slide the top ends thru the cardboard cylinder of an old or nearly finished wrapping paper roll. Note: the measurements in this post are to specifically fit a roll that is 17″ long and 1″ in diameter. Anything shorter or thicker will pose a problem.
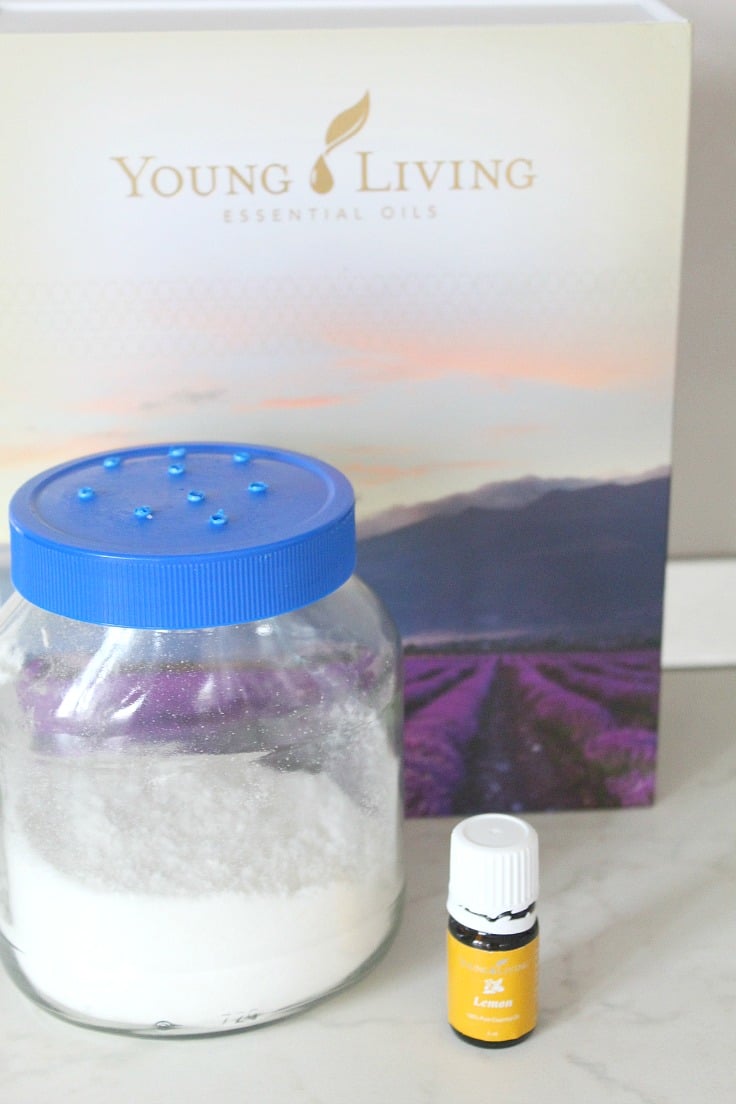
Borax, Baking soda, Salt and lemon essential oils from Young Living. Borax and baking soda will kill the adult fleas, the salt will dry up the eggs and the essential oils will make your house smell absolutely divine! Plus if you use lemon or lavender scents, these are natural flea repellents so any possible unwanted visitors that you may have missed will stay away from your house.
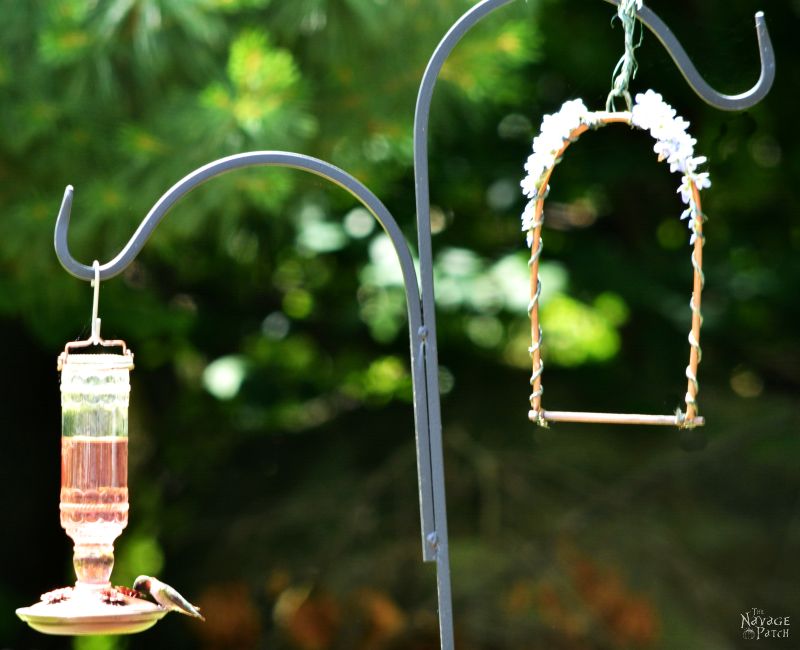
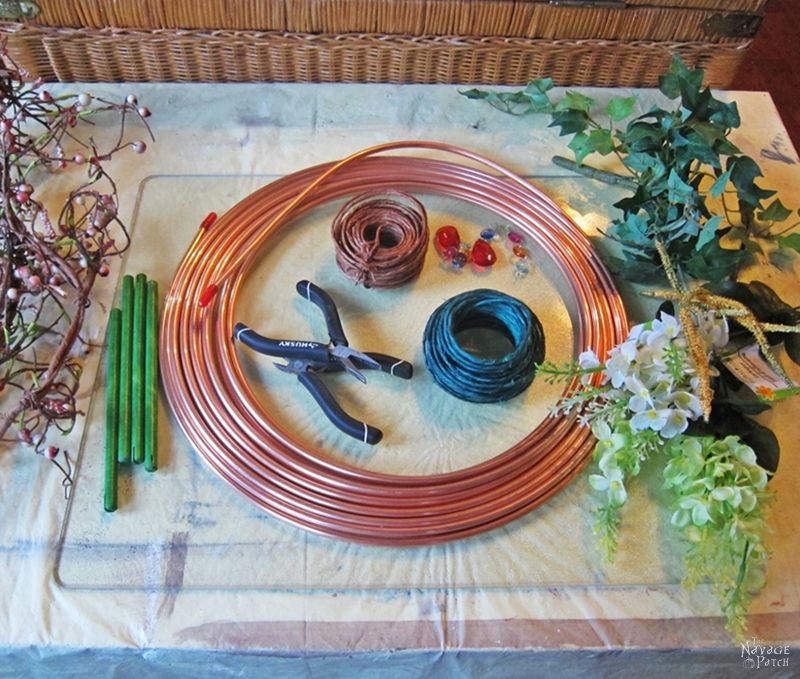
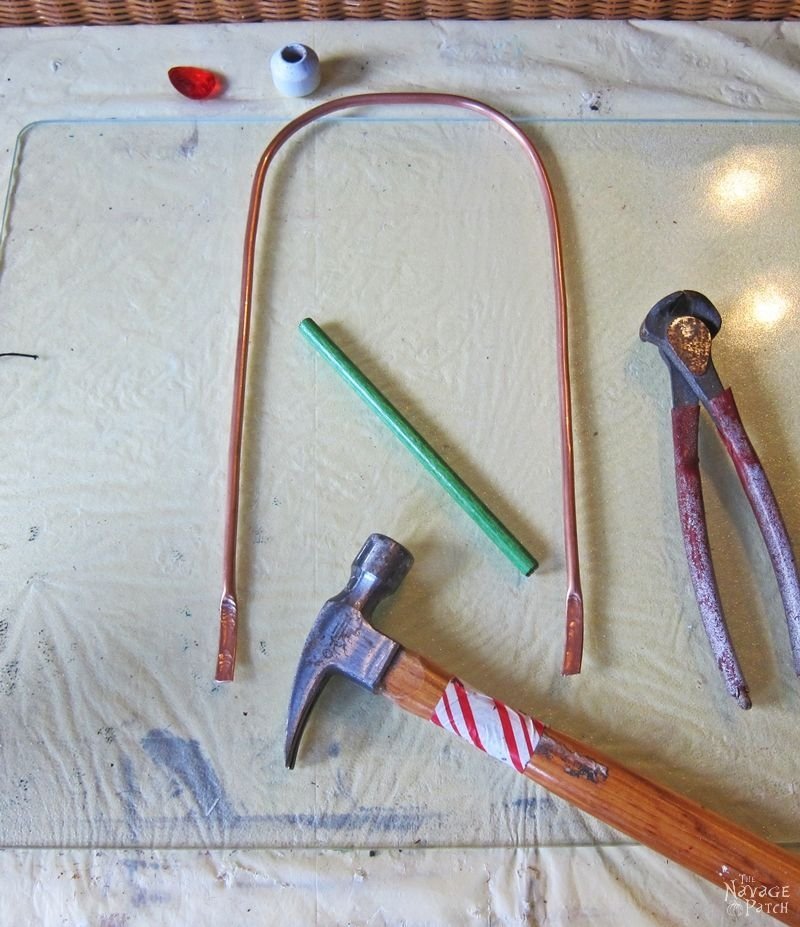
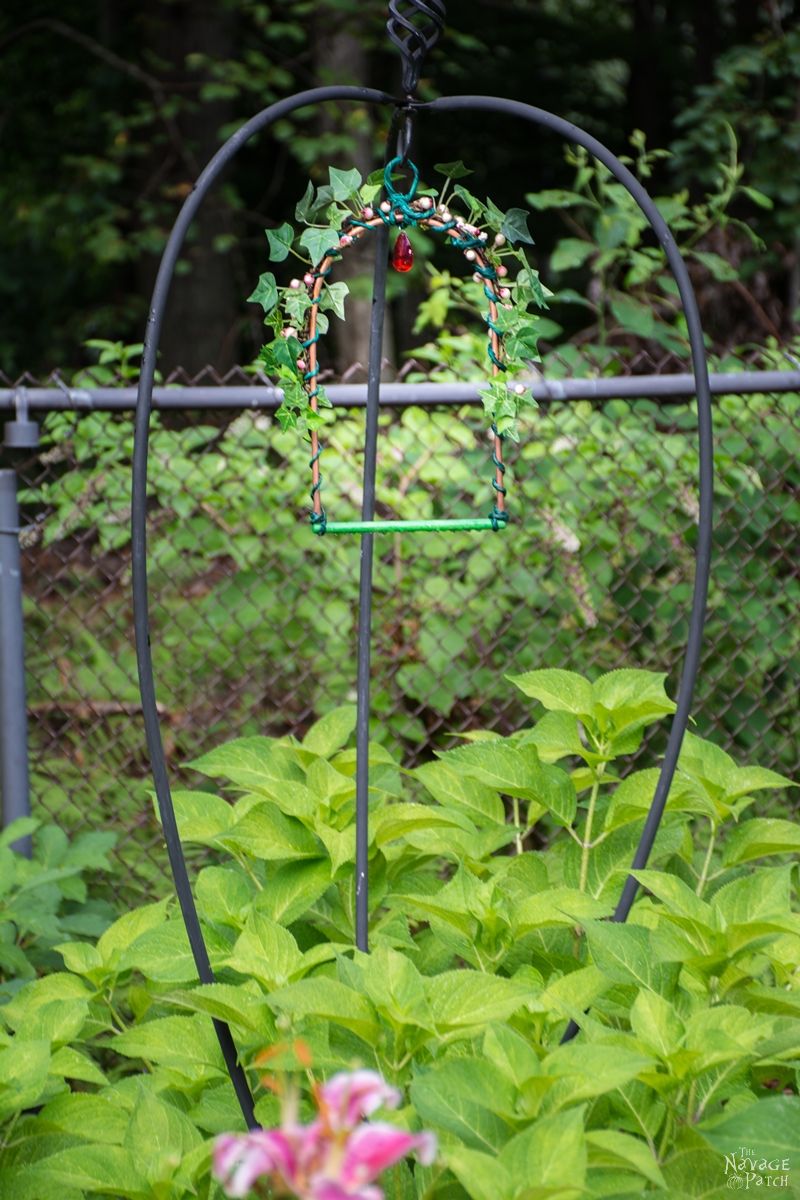
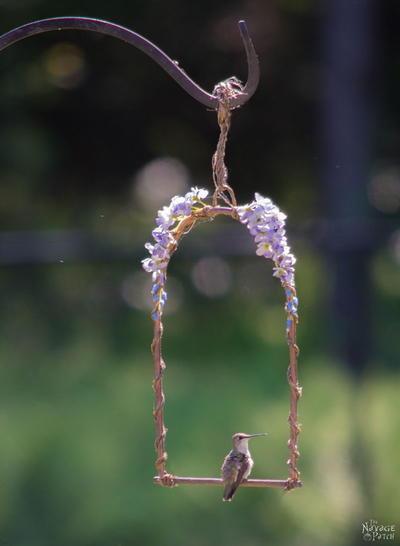
To make a hummingbird perch, all I used was a short dowel (which I found among our son’s old toys), some floral wire, copper pipe (thick and sturdy wire could substitute) and some old faux flowers. I also used a red prism/faux gem, because the red color attracts hummingbirds.
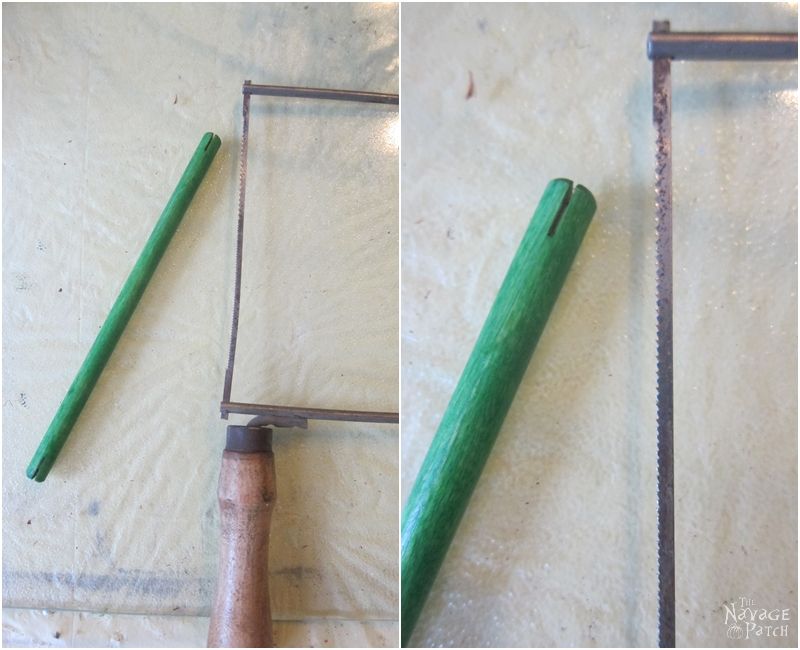
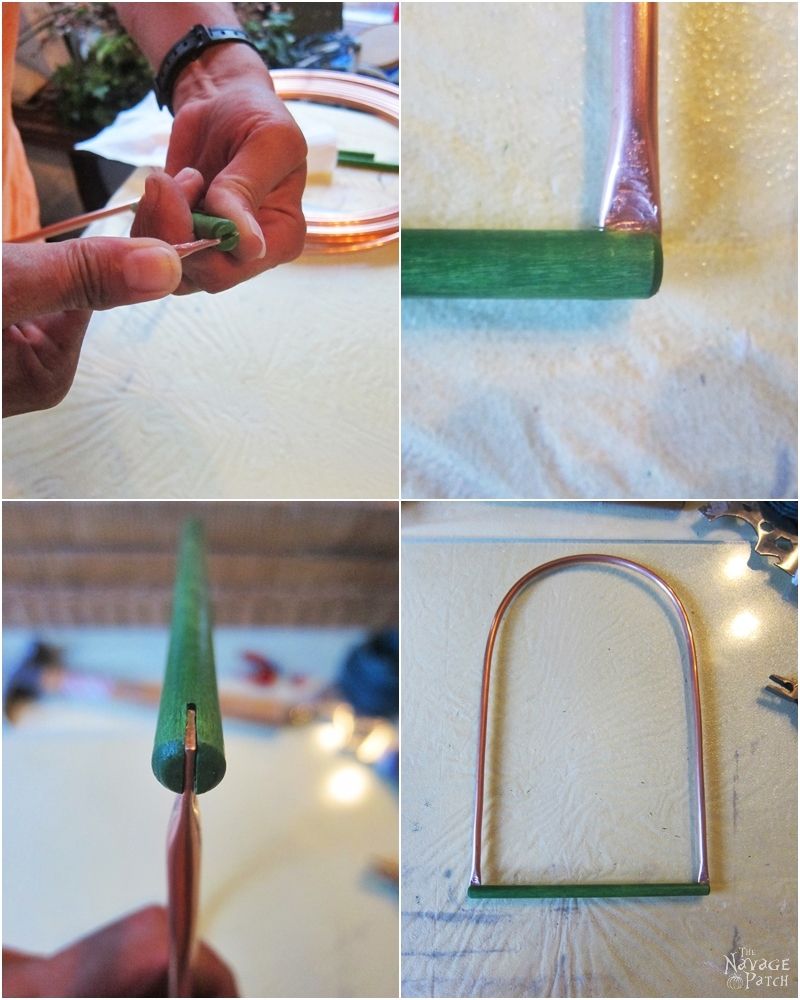
First, I prepared my dowel pieces. I cut the dowels into 7 inch lengths, then I cut a notch at the both ends of the dowel.
Now, you might be thinking cutting a notch like that is not easy. I am not going to argue with that, but instead I will give you a workaround. Therefore, if you don’t want to bother with the notches, then just have your 7 inch dowel and move on to the next step.
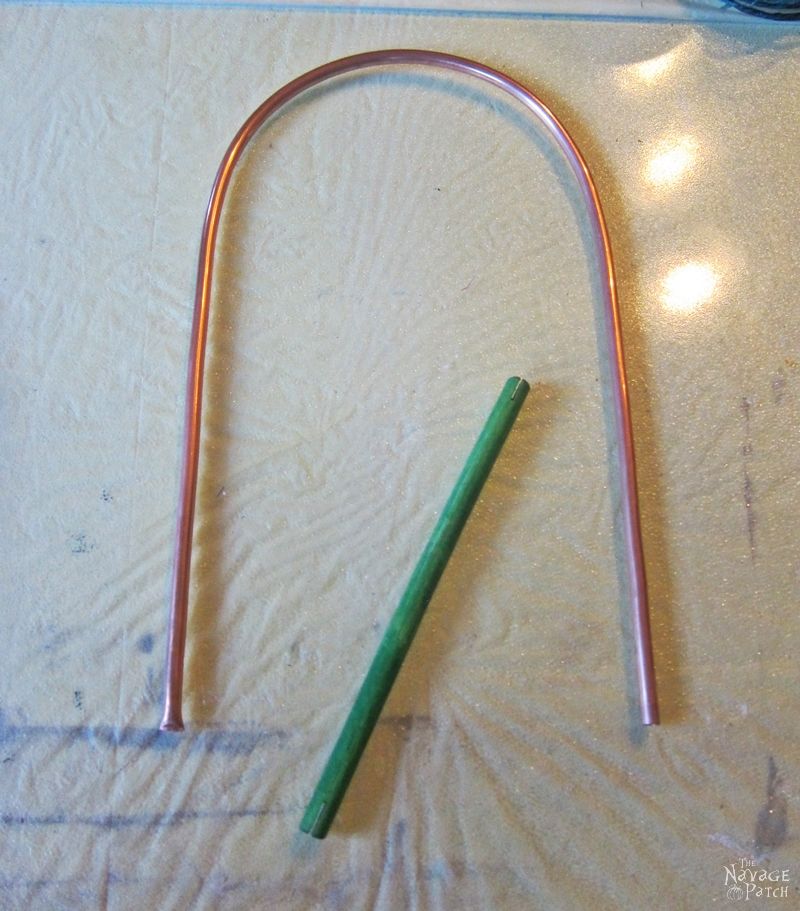
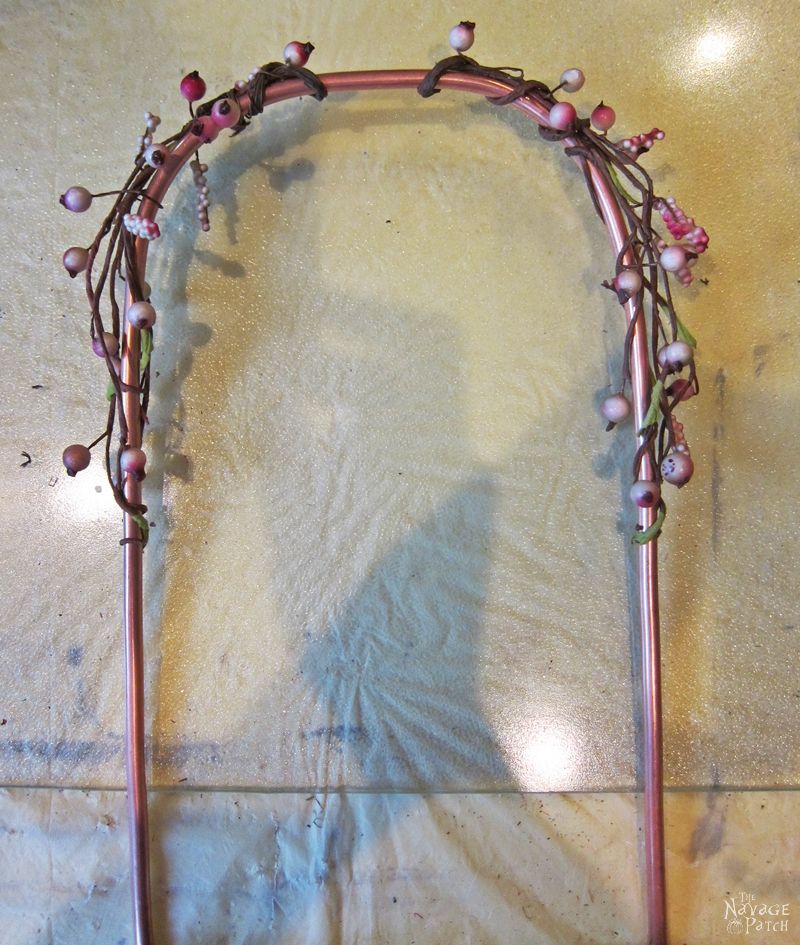
Next, I cut a 24 inch length of copper pipe and bent it to make an arch shape.
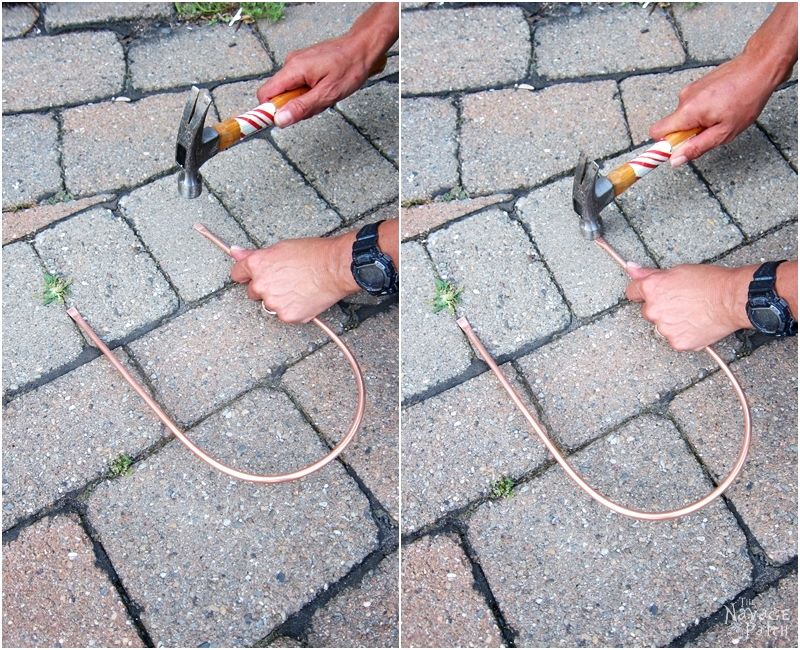
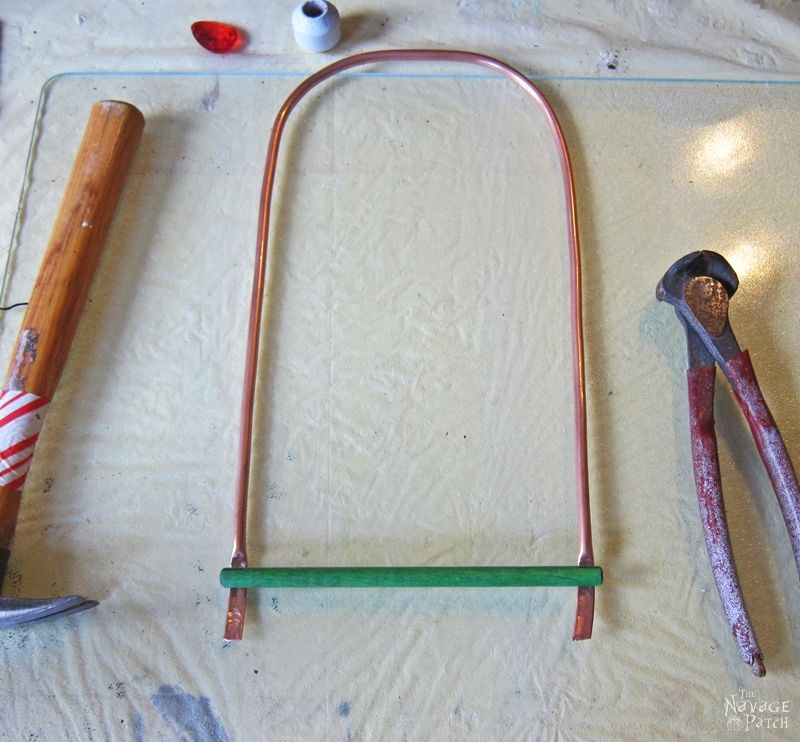
Then, I took my hammer and the copper arch outside to a stone (or concrete) surface, and hammered the ends of the arch to flatten them. For the dowel with the notches, I flattened only a little part of the ends…
…but for the dowel with no notches, I flattened a longer part of the copper arch, as shown in picture below.
With the notch version, I inserted the flattened copper ends into those notches.
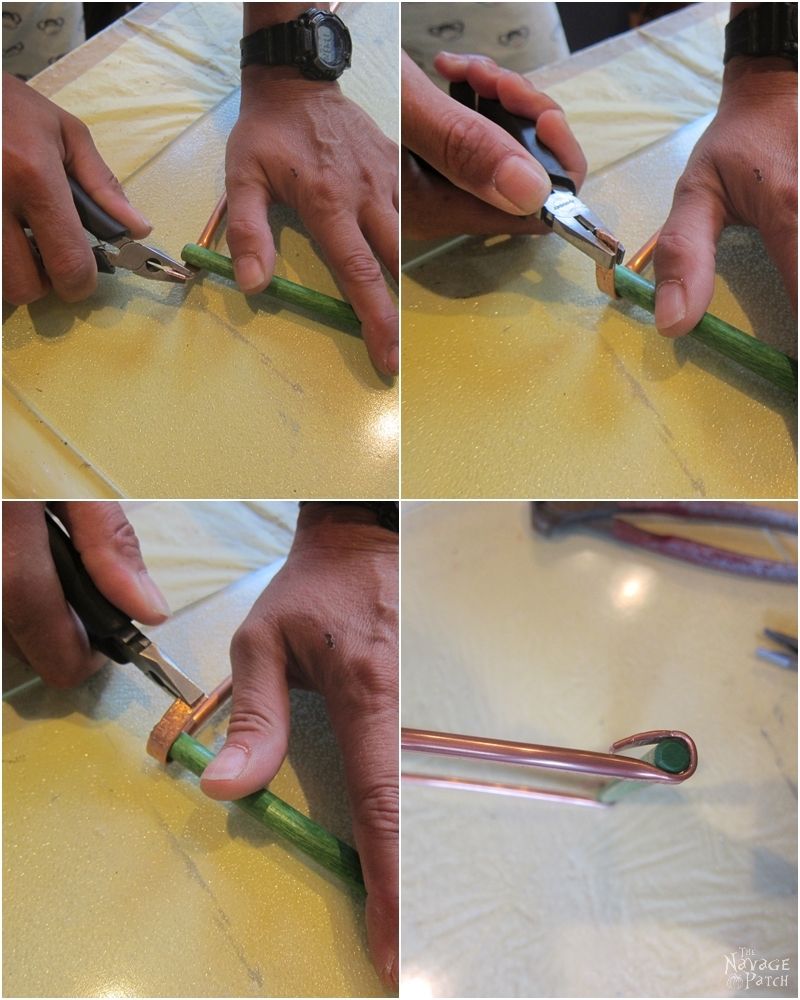
With the notchless version, I placed the dowel on the flattened part and…
…started to wrap the flattened ends around the dowel.
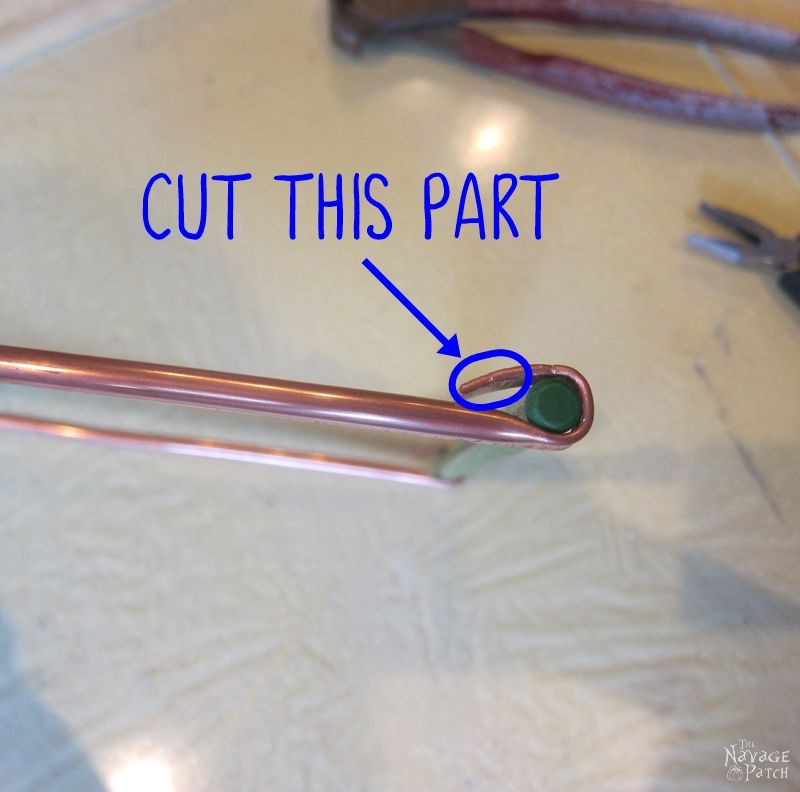
Then, I cut the excess part and…
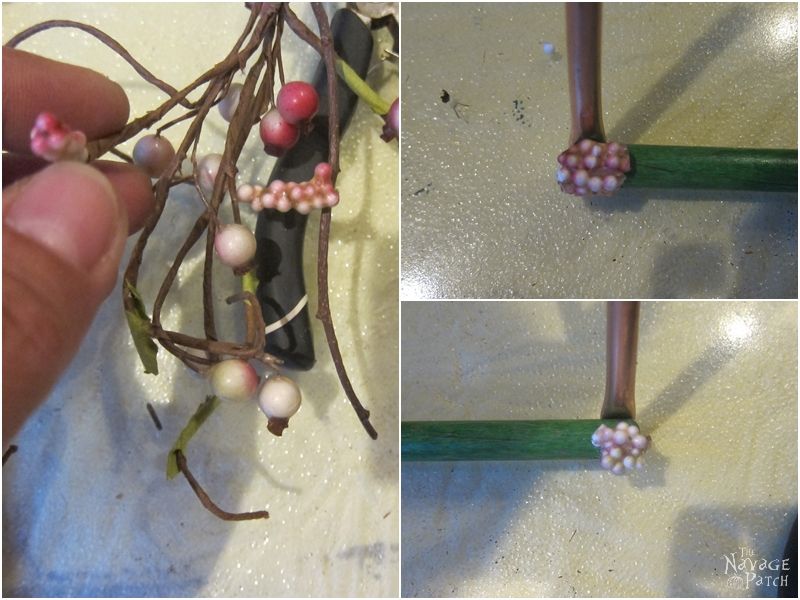
…hot glued some faux berries on the cut part. This was so the cut copper would be covered and wouldn’t hurt anyone when touched.
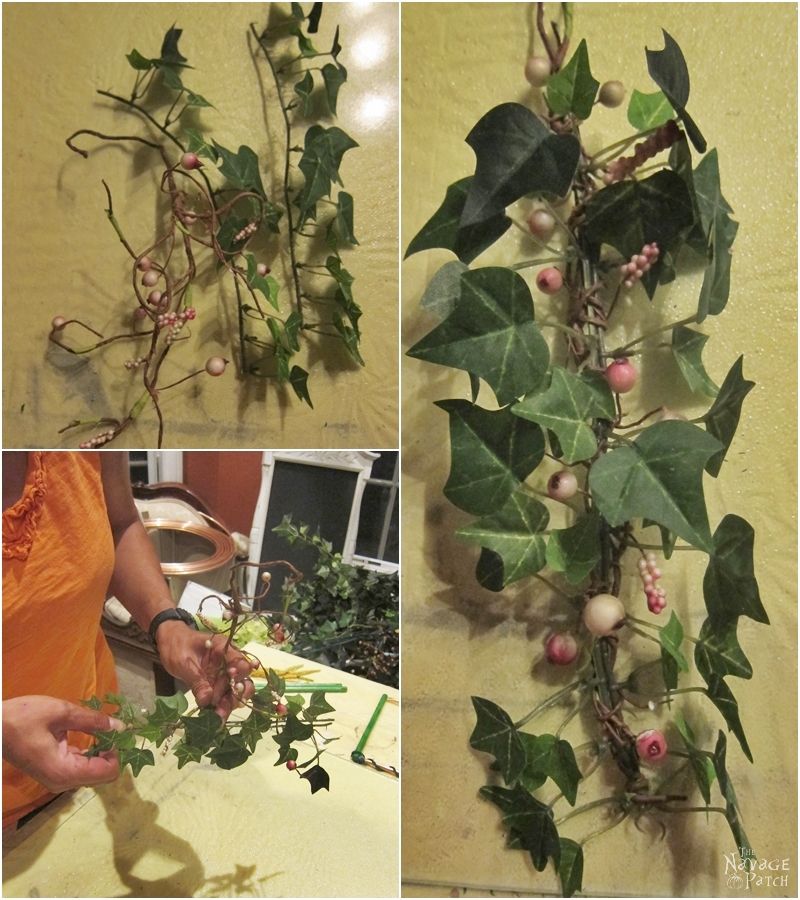
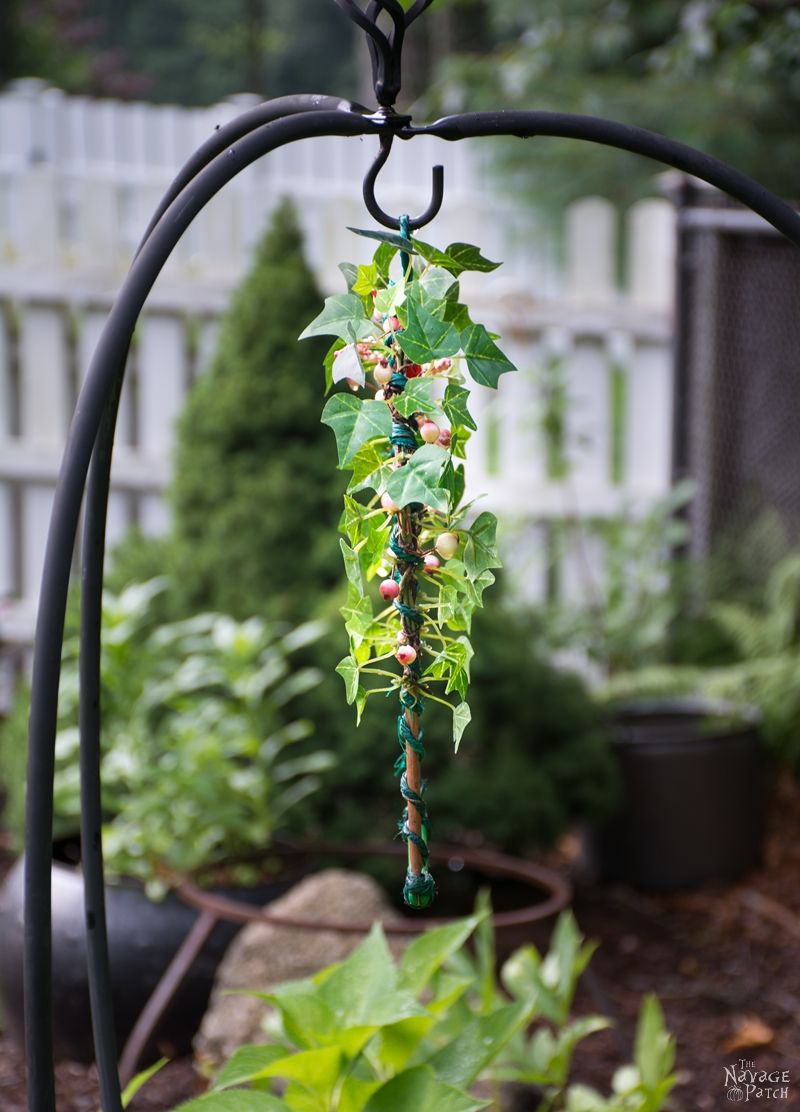
Now that both perch versions were complete, it was time to pretty them up a little bit. For that, I put together a small arrangement of floral picks I had on hand.
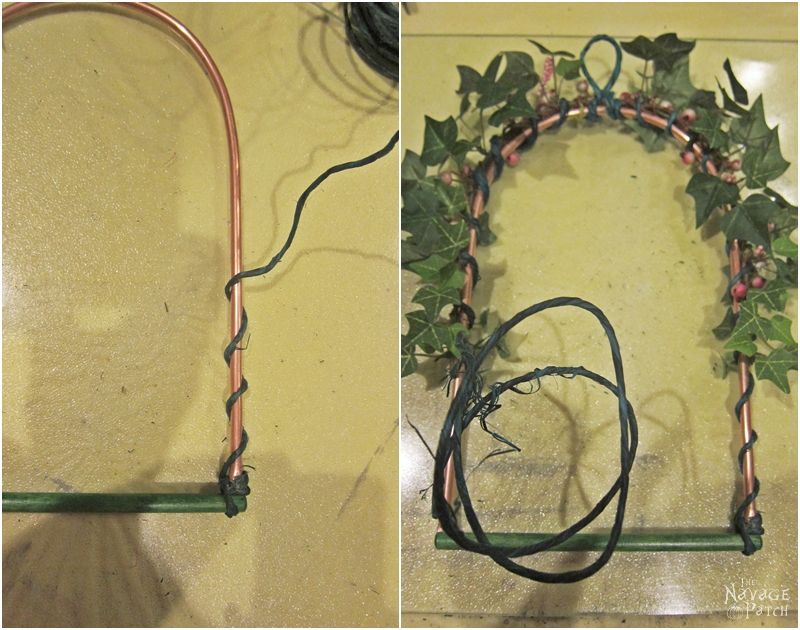
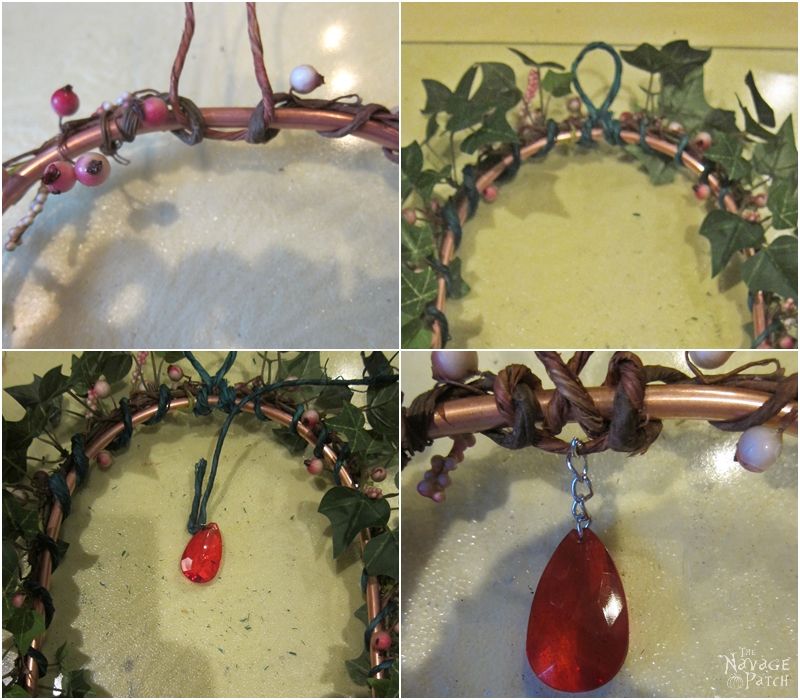
Then, using a floral wire, I attached it along the copper arch.
This is the one with notch.
This is the notchless one.
Next, using floral wire, I created hanging loops on the copper arch. As the final touch, I added a red teardrop prism on top.
Old catalogues or magazines (they should be of the same size)
A record (or alternative table-top)
Paperclips
Coloured sticky/duct tape
All-purpose glue (or hot glue)
Firstly, take a magazine and open it to the 10th (or so) page. Roll it up to the left until the left edges of the pages touch the spine of the magazine.
Roll up the next 10 pages (you don’t have to count, just estimate it 🙂 ) until their edges touch each other. Then fix it with a paper clip as close as possible to the back of the magazine.
Repeat the second step until you’re at the second to last page. The last page shouldn’t be rolled up, yet.
Now you need the next magazine of the same size. Put the last page of the first magazine on top of the cover of the second one and roll them up as before, together with the first few pages of the magazines.
Repeat this until you think it is enough 🙂 (It depends on the thickness of the pages and how many pages your magazines have.) Don’t roll the last few pages, yet.
Now stand the whole thing up (hereby the paper clips are important, otherwise the pages might open again). Now you can roll in the last pages and fix them to the first pages of the first magazine using a paper clip.
Next you stick the sticky tape around the whole thing on top and again on the bottom.
Now you can remove the paper clips and make the second level as you did the first. It is important that the magazines of one level are of the same size, but all the levels don’t necessarily have to be even. However you prefer 🙂
Make as many levels as you want, depending on how high you want the table to be.
Now cut a piece of paper so that it matches the top of the table leg (in a circle) and stick one piece on top of each level. Glue the levels on top of each other and glue the record on top.
Done 🙂 I hope this was understandably phrased!
At our place the environmental-friendly table embellishes one corner of our living room together with my globe lamp 🙂
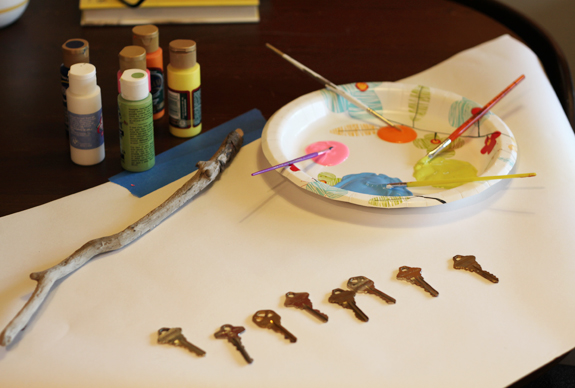
Optional: Paint your keys and stick. Choose a few coordinating colors and have your child paint the keys and stick. Our keys took two coats, let the first side dry before flipping and painting the other side.
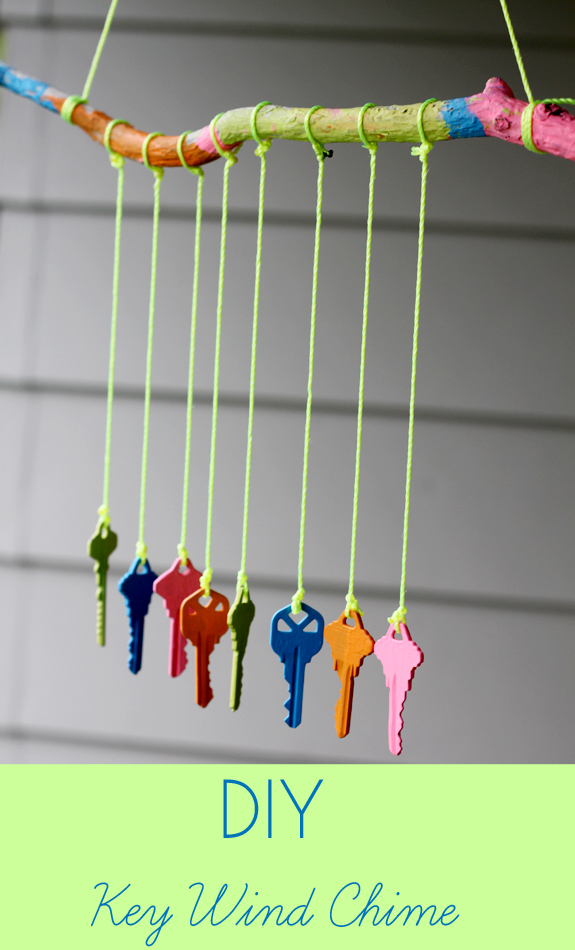
Tie a piece of string to either end of the stick so that you have a way to hang it.
Tie a piece of string to each key.
Tie the keys to the stick making sure that they are close enough to each other that they will chime when the wind blows them.
Gift, hang, enjoy!
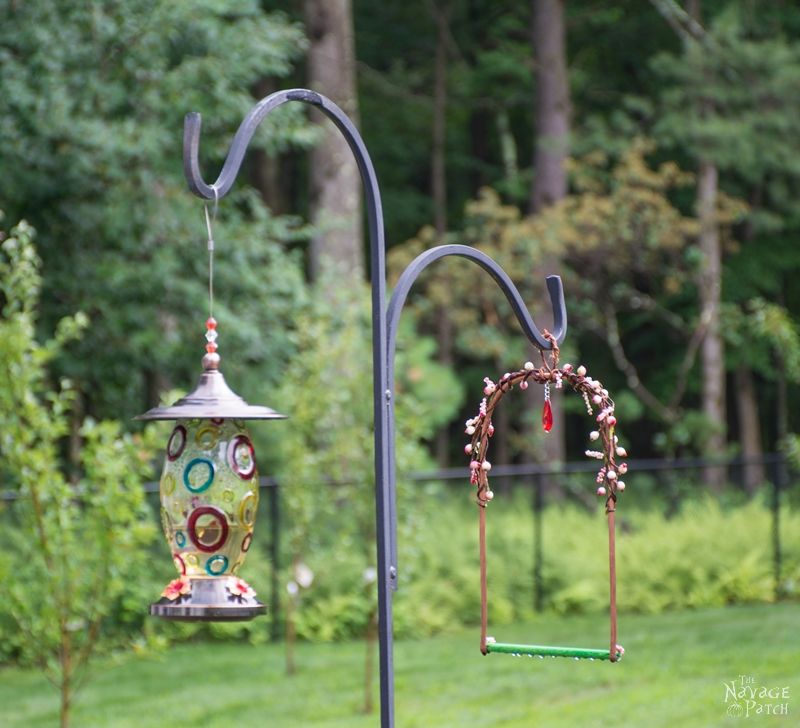
I hope this project inspires a little crafty recycling in your home. I’m sure you and your little ones will love turning trash into treasure. And whoever receives your thoughtful handy work is sure to be pleased as punch. I know they make me smile every time I enter my garden.
Long strips of fabric – anything will work: I used knits, both cotton and acrylic. The pink neon was dirt cheap yardage in a bargain bin and the grey strips are Zpagetti yarn. You can use fabric scraps, old T-shirts or thrift sheets and tablecloths.
Cord – the neon orange is ‘Brickie’s Line’ from the hardware store ($5 for 100 metres) – or you can use more fabric or yarn like I did on the pink bowls. This is what you’ll need the most of. I used about 8 – 10 metres ( roughly 8.5 – 11 yards) for the grey bowl and it’s about 14cm (5.5 inches) wide x 8cm (3.5 inches) tall. The quantity in the photo below isn’t a true indication!
A large yarn needle with a big eye.
Scissors.
If you are cutting up fabric (T shirts, sheets, fabric yardage, etc) the thicker you cut it the chunkier and quicker your bowl will be. A good size for small bowls is roughly 3.5cm (1.5 inches) wide. The diagram below illustrates how to cut a piece of fabric into a continuous strip. When you’ve cut the fabric into stretch it in small sections at a time and the fabric will curl into a nice round tube of ‘yarn’.
The instructional photos are for the grey bowl with neon orange stitching, so I’ll refer to those colours from now on. Let’s begin…
Cut a length of orange cord as long as you can manage it without it getting tangled, and thread the needle with it. Mine was about 2 metres (just under 2 yards).
I used three pieces of grey fabric yarn together to get a good thickness. I cut it to roughly 1.4 metres (4.5 ft) long. If you are using one thickness of your yarn there is no need to cut it, it can remain on the ball/spool. The length of your yarn will depend on whether you want to change colours. It’s all fairly free form though – you can’t make mistakes!
Overlap the ends of the orange cord and the grey yarn. Wrap the cord around the yarn 4 or 5 times.
Fold the end of the grey yarn over to form a loop. Keep the hole in the center as small as you can – it should be just big enough to fit the needle through as it will get bigger as you stitch around the yarn. Wrap the cord around the base of the yarn loop, leaving a short tail sticking out, and tie a knot. (as in the left hand image below). Hold the yarn as shown with the short tail on top and the long piece of yarn on the bottom. Take the needle around to the back of the loop and pass it through the hole towards you (right hand image).
Don’t pull the cord tight – leave a loop at the top (as in the image below). Then pass the needle through the loop. Just like blanket stitch.
Repeat this stitch all the way around the loop. Needle into the hole from the back to the front. Leave a loop and insert the needle through it. Pull the stitch closed. The stitch needs to be firm but not tight. Keep your stitches close together and work your way around (as in the right hand image below).
Fold over the starting tail of the orange cord and the short tail of the grey yarn with the long grey yarn on top (left hand image below). Your next stitch will go through the top of your very first blanket stitch, instead of through the hole. Take the needle over to the back and bring it through the top of the first blanket stitch. Your next stitch will go through the top of the second blanket stitch. Scroll down to the next photo for a better look at where the needle passes through.
You’ve done a lot of stitches and will probably run out of cord soon. The photo below on the right shows how to add a new length of cord. Knot the two pieces together so the knot is on the outside of the coil.
Run the tails along the grey yarn and tuck them and the knot in as you continue to stitch (see image below left). As my coil grew I occasionally added an extra stitch when I thought they were getting too far apart. Remember not to pull the stitches too tight, or the base of the bowl won’t stay flat.
When you run out of yarn or want to change colours all you have to do is overlap the old and the new. As I was using three strands of yarn I cut each one a different length and inserted the new ones into the middle of them, so there wouldn’t be bulk all in one place.
As the fabric yarn tends to curl up I opened each piece up and inserted the new one into it. Then just continue on stitching.
When you’re happy with the size of the base you can start building up the sides. Make your stitches a little firmer while holding the yarn above the previous coil, instead of next to it. Continue like this until you have reached the desired height.
Finishing off. If you’re using more than one strand of yarn cut them at staggered lengths to lessen the bulk. Continue stitching around until you have just one strand left. Leave a tail of about 10 cm (4 inches) so you have enough to work with.
Weave the tail into one of the vertical stitches in the row below (on the inside of the bowl). Then weave in through a few more stitches in that row and cut the yarn off so the tail isn’t sticking out (image on the left below). To finish off the cord do one more stitch to complete the top edge of the bowl then tie a small knot and weave the cord down into the centre of the bowl. Cut the cord and tuck the end in.
And you’re done! I find this very addictive and I’ve made quite a few bowls and baskets of varying sizes now. It’s really quite easy once you get started. And it’s a great way to upcycle fabric.
If you’d like to link to this tutorial that would be lovely – I’m always happy and grateful for that and I’m all about sharing. But first please take a look at the FAQ page about using my content. Thanks!